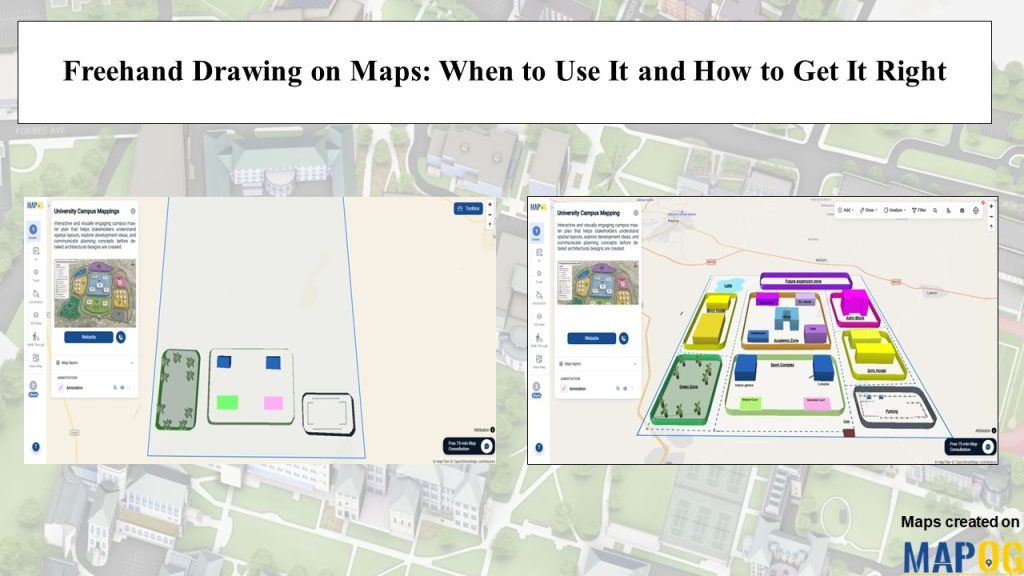
Campus planning is a complex process that involves visualizing roads, buildings, open spaces, academic blocks, residential areas, and future expansion zones. Traditionally, planners rely on CAD drawings, architectural layouts, and static site plans to communicate their ideas. At early planning stages, stakeholders often need a faster and more flexible way to explore concepts before investing time in detailed designs. This is where freehand drawing tools can make a significant difference.
With MAPOG’s Freehand Drawing Tools, planners can sketch campus boundaries, create functional zones, and place proposed buildings directly on an interactive map. Instead of working with complicated software, users can quickly transform a blank map into a visual campus master plan that is easy to understand and share. In this article, we’ll demonstrate how to use drawing freehand tools correctly.
How Using Freehand Tools Could Make Things Easier
Imagine a university planning committee evaluating different campus layouts. What they do need is a way to visualize ideas and communicate them effectively with decision-makers.
Using freehand drawing tools, planners can:
- Define the campus boundary.
- Sketch roads and pathways.
- Allocate space for academic and residential areas.
- Visualize sports facilities and green spaces.
- Place conceptual buildings.
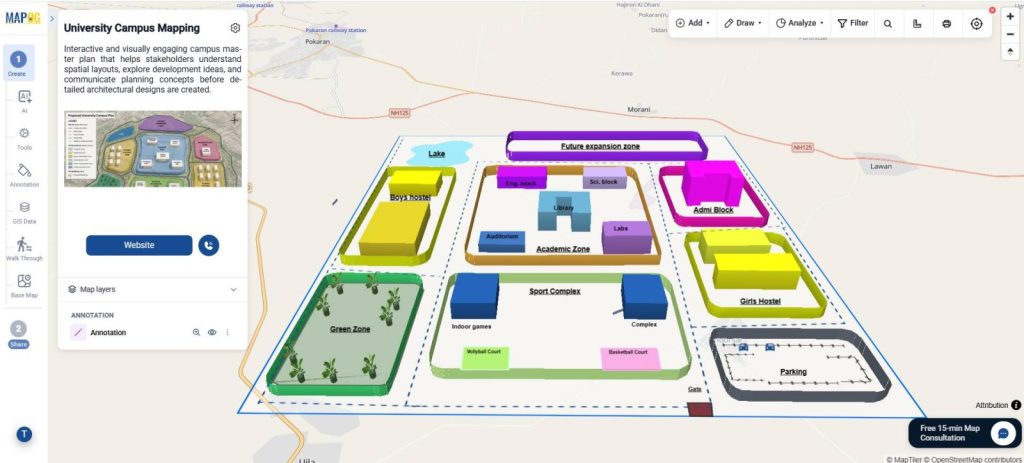
By combining 2D sketches with 3D visualizations, everyone involved gains a clearer understanding of how the future campus may look.
Step-by-Step Process
Step 1: Create a New Map
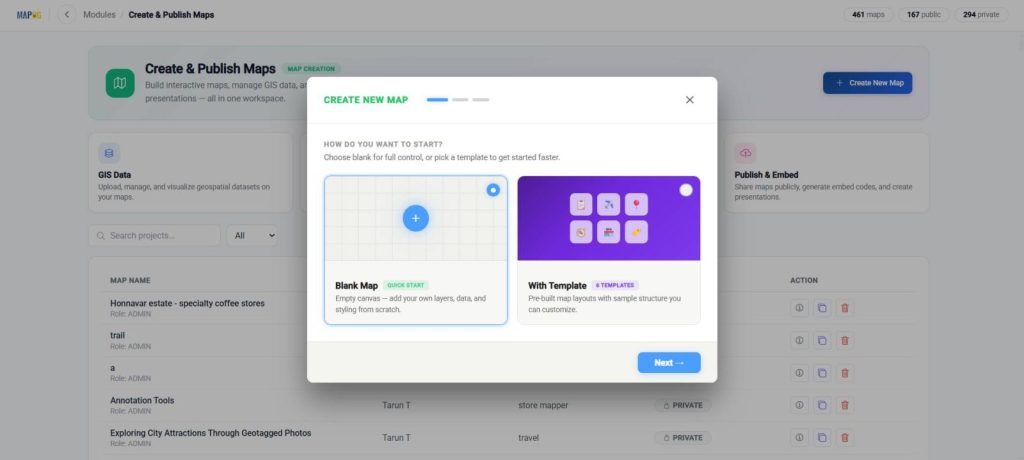
To begin, open MAPOG and go to the Create & Publish section. Then click Create New Map and choose Blank Map.
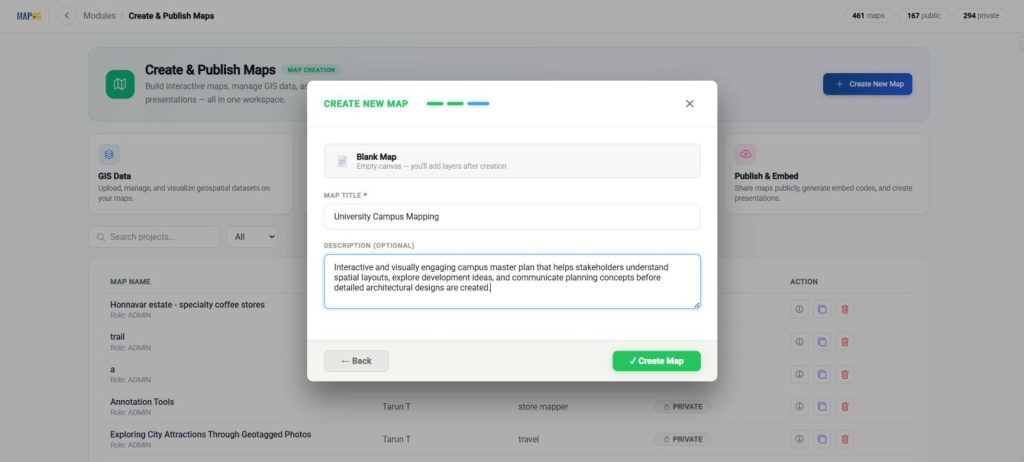
Afterwards, enter a title and description for your project. Once everything is configured, click Create Map.
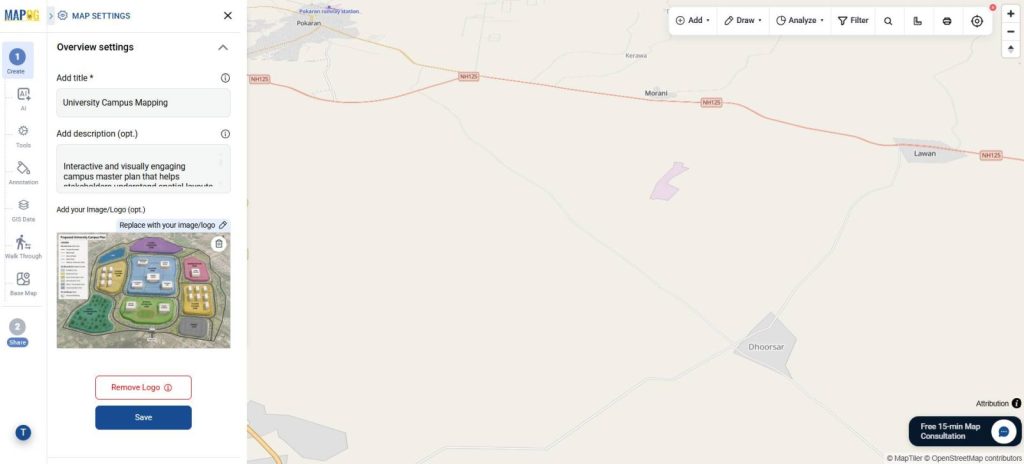
To make your project visually appealing, open Map Settings and upload a logo.
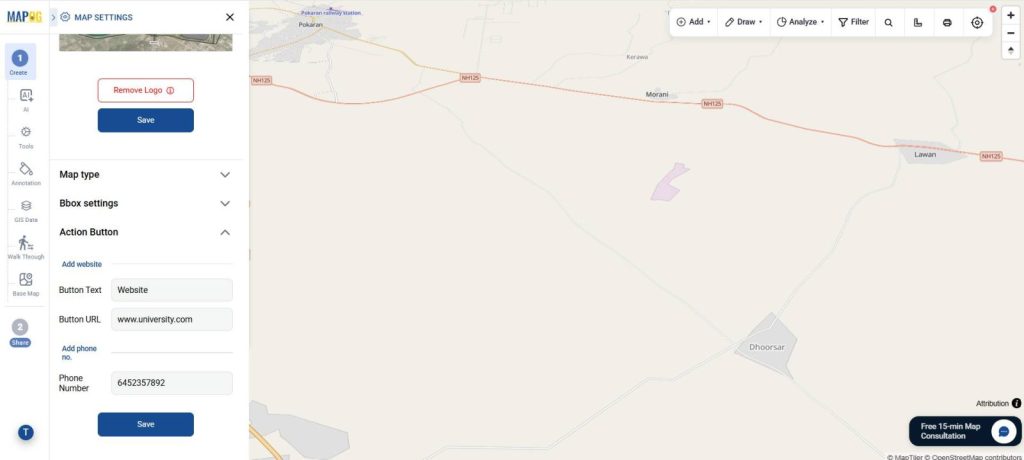
You can also configure action buttons to include your website, or contact information, allowing visitors to explore additional content related to your work.
Step 2: Draw the Campus Boundary
The next step is to add destinations to your map. Navigate to the Annotation section and use the search bar to locate destinations by place name or exact coordinates.
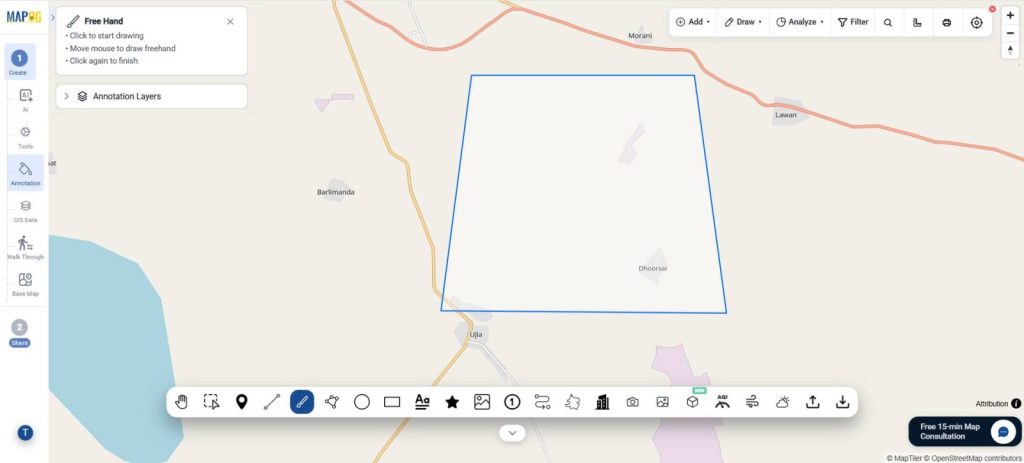
Once the map centres on a location, Choose the Freehand Pen Tool from the Annotation Toolbar, and sketch the Campus boundary. Pen Tool acts as the foundation for the entire project by defining the physical layout of the campus.
Step 3: Create Functional Zones with 3D Boundaries
Once the campus framework is established, use the 3D Boundary Tool to define different land-use zones, choose freehand, this lets you draw areas of any dimension such as:
- Sports and Recreation Zone
- Green Spaces
- Academic Zone
- And other
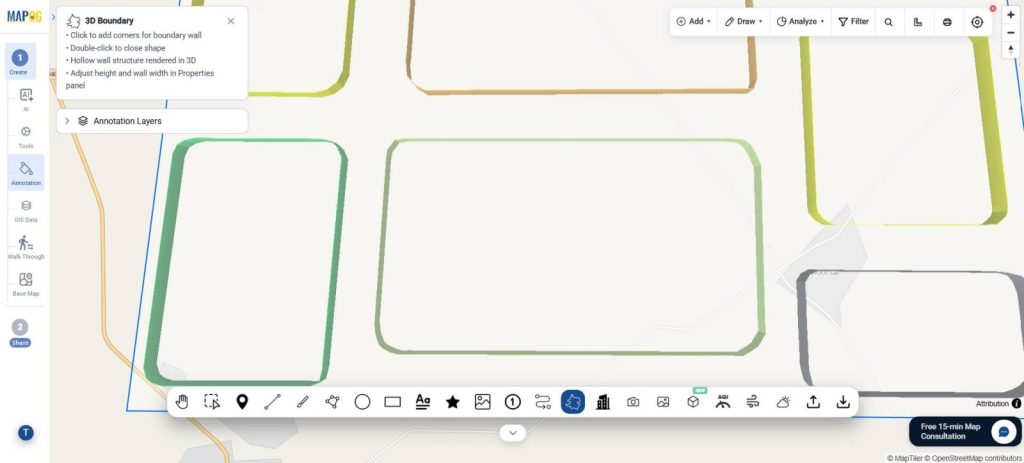
Unlike standard polygons, these boundaries appear as elevated 3D zones, making them easier to identify and distinguish.
Additionally, can customize Colors, Heights, Opacity, and Border styles. This creates a visually appealing campus layout that immediately communicates the purpose of each area.
Step 4: Add Proposed Buildings
Next, select the 3D Building Tool. Draw simple building footprints within each zone.
Examples include:
- Central Library
- Engineering Building
- Science Block
The tool automatically converts sketches into 3D building models.
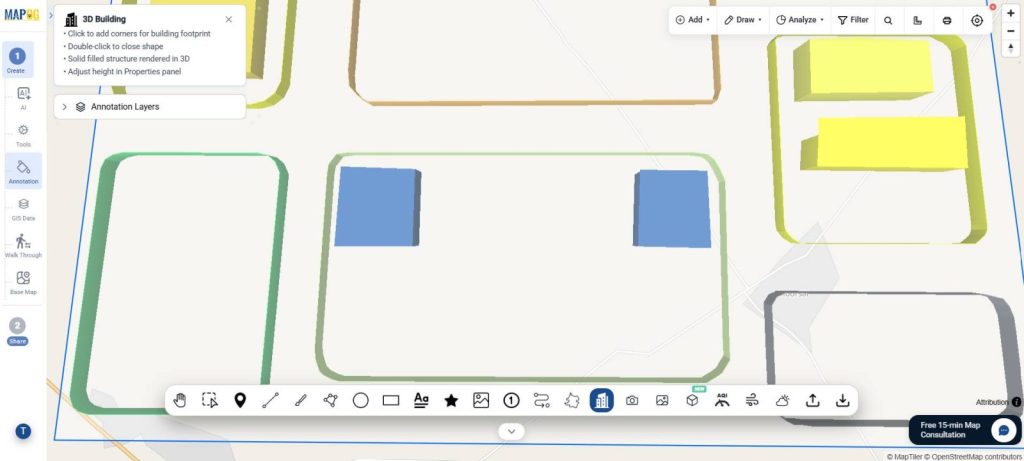
Furthermore, you can adjust building height and colours to represent different building types and importance levels.
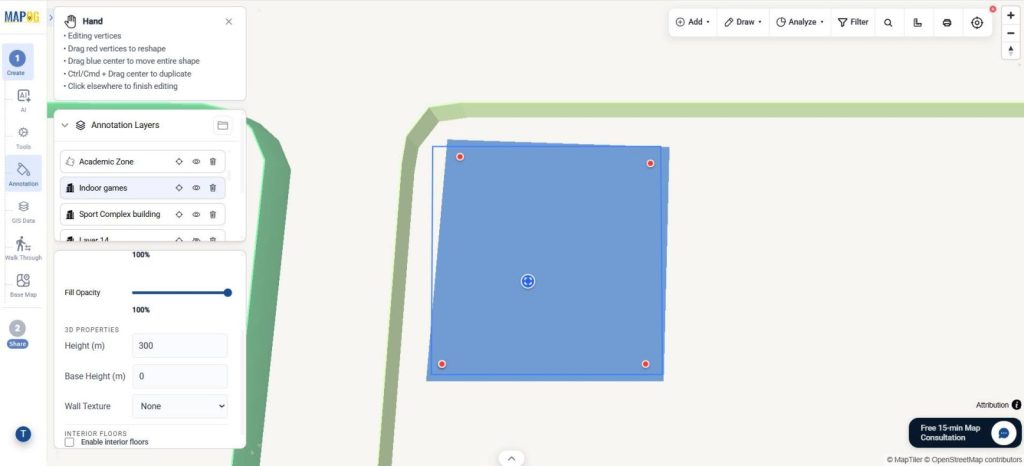
This allows viewers to understand how various structures fit within the overall campus plan.
Step 5: Add Labels and Descriptions
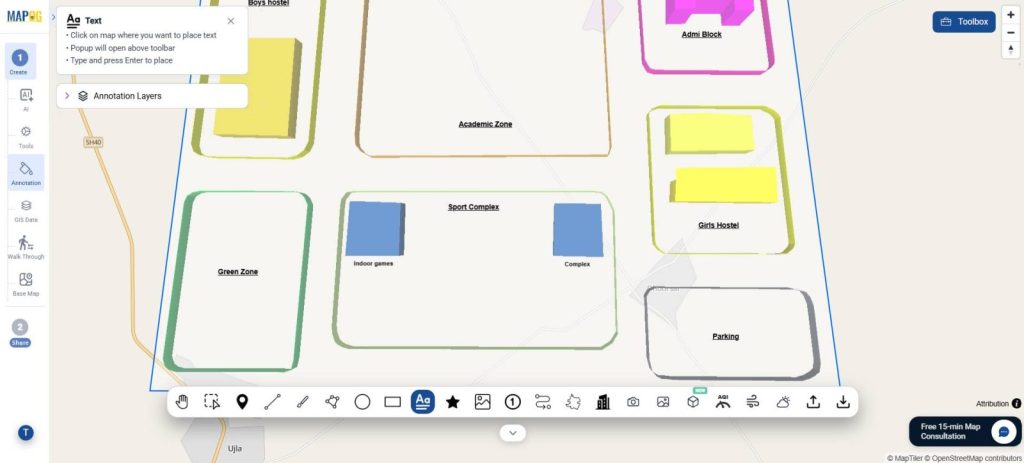
To make the map easier to understand, you can then use the Text Tool to label zones and buildings, you can change font style and size to make it more attractive.
You can also add polygons to draw certain other areas and make your map more engaging.
Step 6: Enhance the Campus with 3D Models
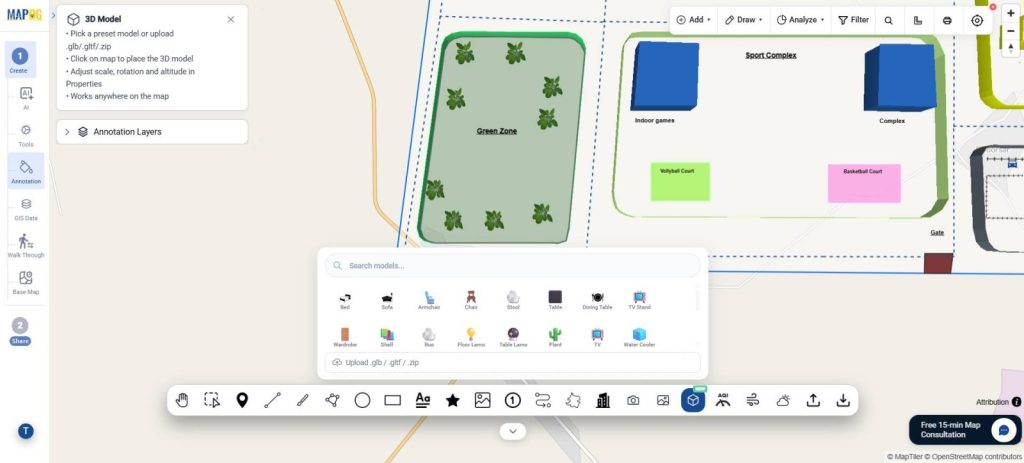
To create a more realistic environment, use the 3D Model Tool. From here you can add elements such as Trees, Benches, Vehicles etc.
These additions help stakeholders better visualize how the campus may appear after development. The result is a more engaging and immersive presentation.
Step 7: Preview and Share the Project
Lastly, once your map is complete, navigate to Preview & Share. From here you can make your map Public or also keep it Private.
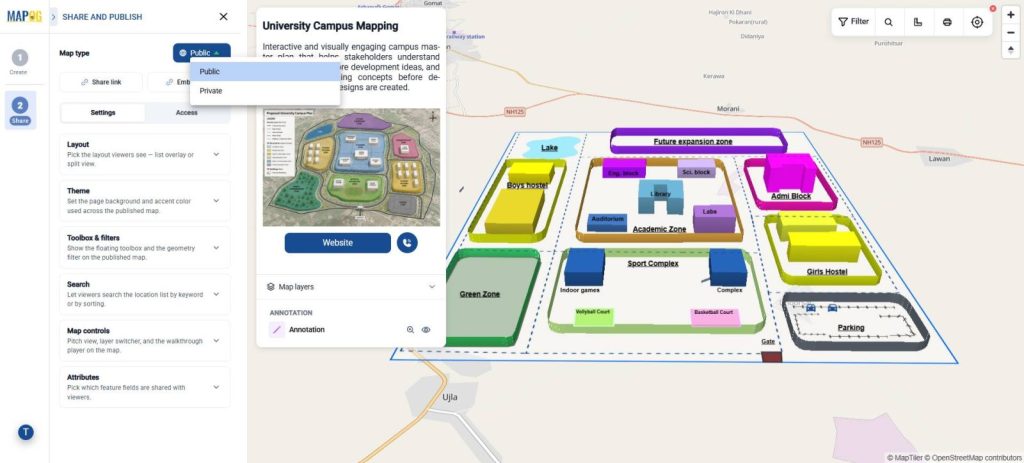
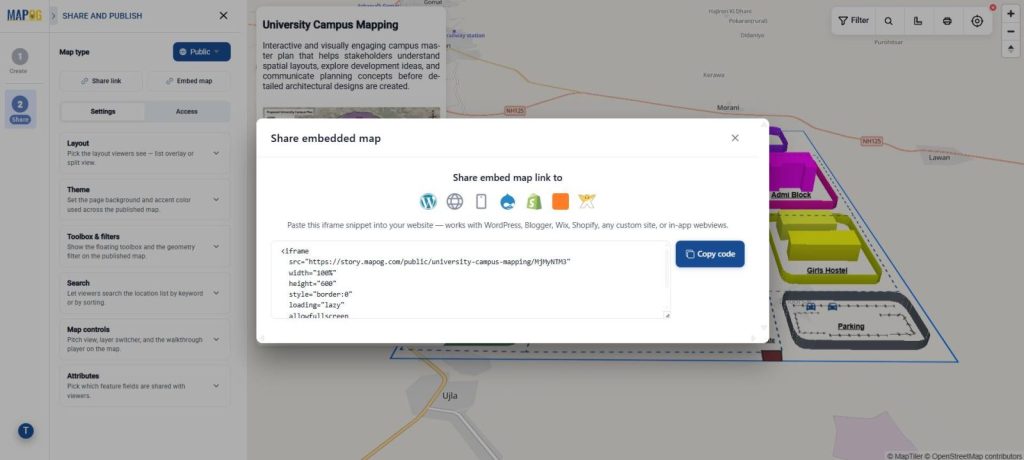
Share links and embed links are also available, allowing maps to be added directly to websites or presentations.
You can also share the map with team members, using add a new member option.
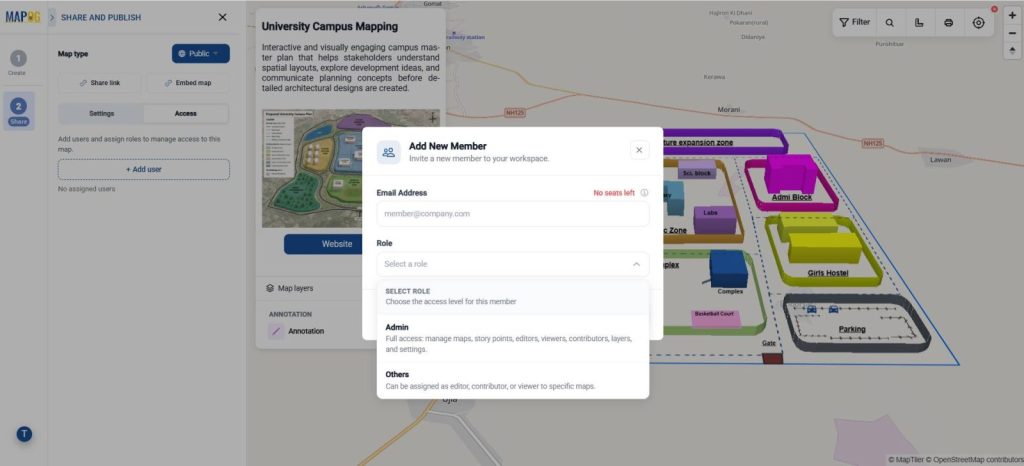
This makes it easy to gather feedback from planners, architects, administrators, and investors.
Significance of Freehand Tools
Freehand tools play an important role in simplifying the planning process by bridging the gap between initial ideas and implementation. They also allow planners to quickly sketch concepts without creating detailed CAD drawings, making early-stage development faster. Interactive maps improve communication by helping stakeholders easily understand proposed layouts, while 3D boundaries and buildings provide better spatial visualization than traditional flat maps. These tools also offer flexibility, allowing plans to be modified instantly as requirements evolve. Additionally, they encourage collaboration by enabling multiple stakeholders to review and discuss ideas on a shared platform.
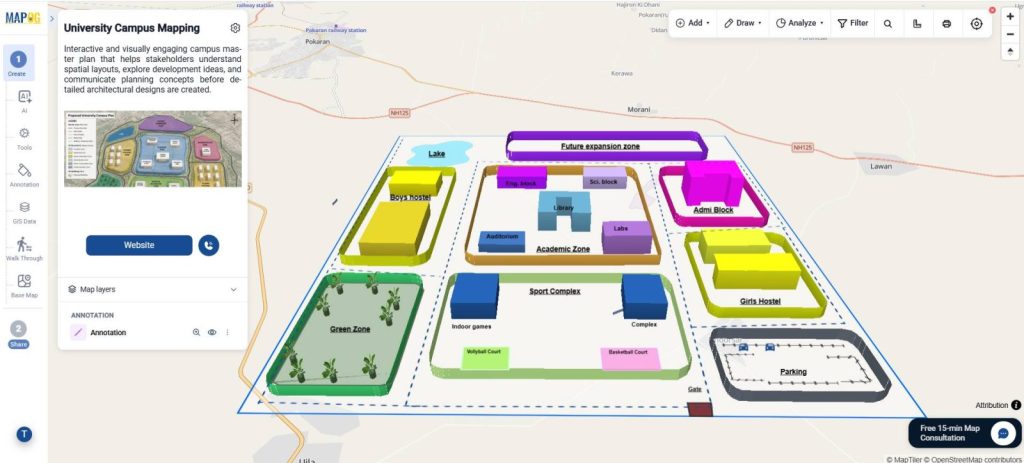
Conclusion
Freehand drawing tools are more than simple annotation features. They also provide a practical way to transform planning concepts into interactive visual experiences. Using MAPOG’s Freehand Tools, planners can quickly develop and communicate campus master plans without relying on complex design software.
Whether you’re planning a university campus, educational institution, research facility, or training center, freehand tools offer a faster and more intuitive approach to early-stage planning.