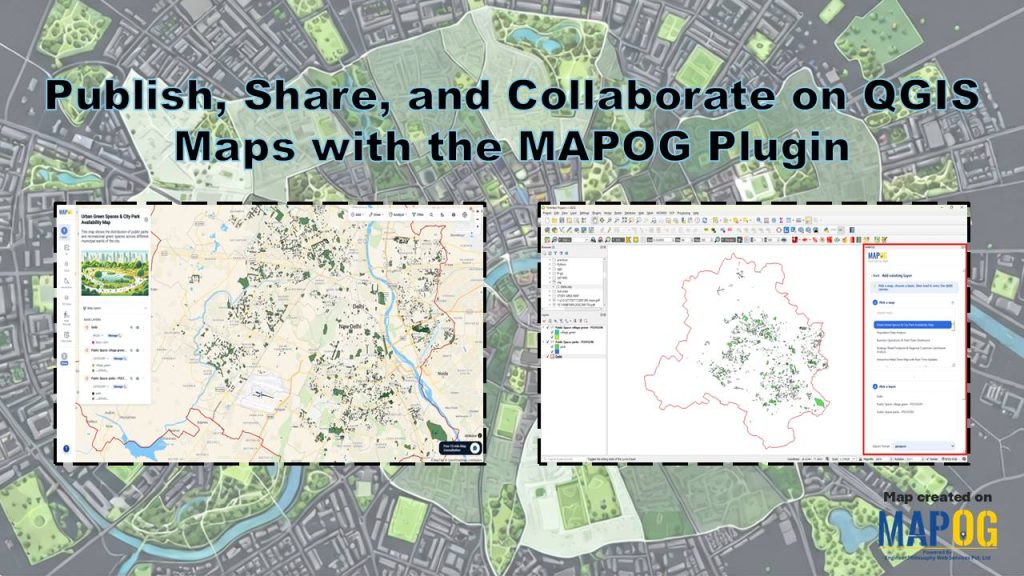
Urban planners rely on current spatial data to improve parks and green infrastructure. Publish, Share, and Collaborate on QGIS Maps with the MAPOG Plugin simplifies this workflow inside QGIS. You can create maps faster and keep teams aligned. Moreover, the plugin supports adding layers to maps, exporting layers to QGIS, and sharing public maps without interrupting your mapping process.
Key Concept: Publish, Share, and Collaborate on QGIS Maps
Publish, Share, and Collaborate on QGIS Maps with Plugin enables planners to manage datasets efficiently within QGIS. It allows teams to share updates instantly, maintain version control, and ensure data consistency. Moreover, users can integrate multiple layers, analyze accessibility, and coordinate planning efforts without delays.
Step-by-Step Workflow: Publish, Share, and Collaborate on QGIS Maps
1. Create a New Map
Begin by navigating to MAPOG and opening the Create and Publish Map module.
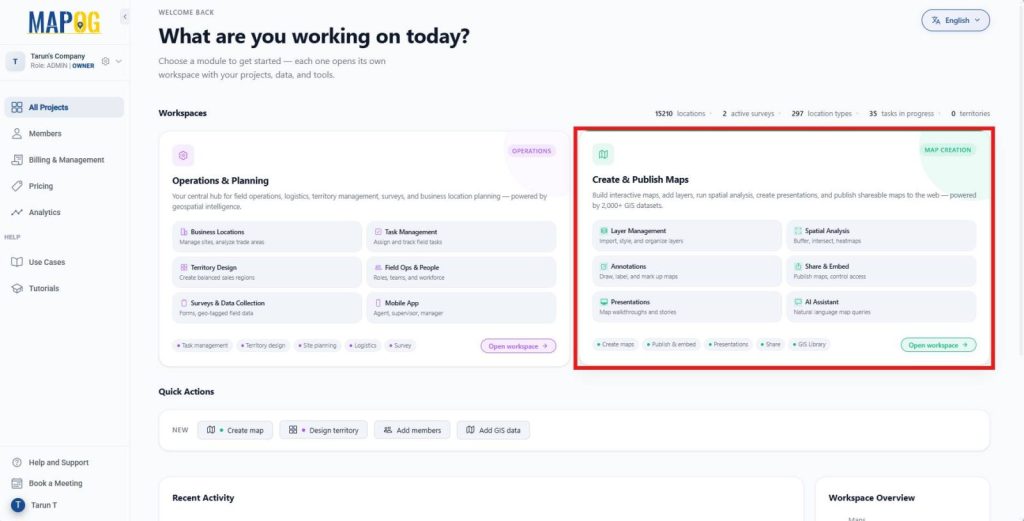
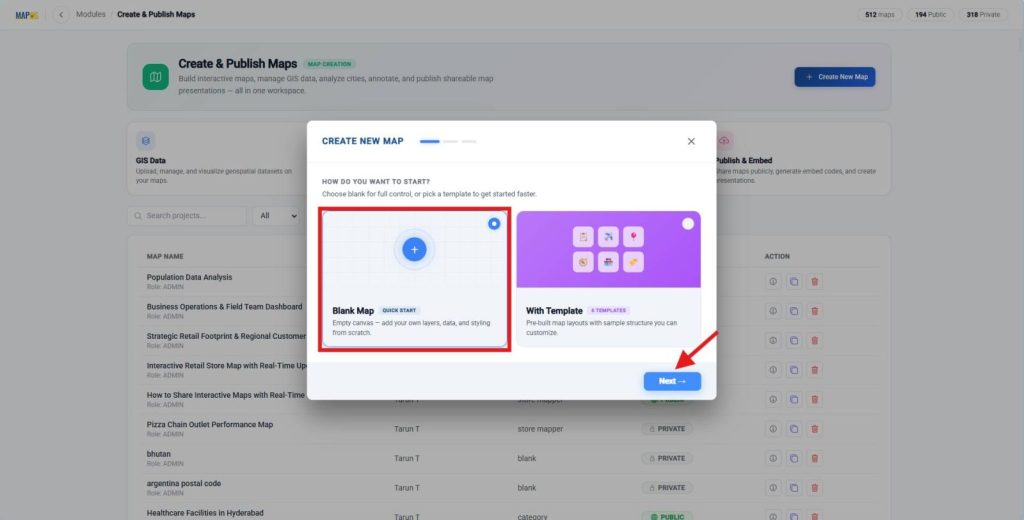
Next, click Create New Map, choose Blank Map, and select Next to start a new mapping project.
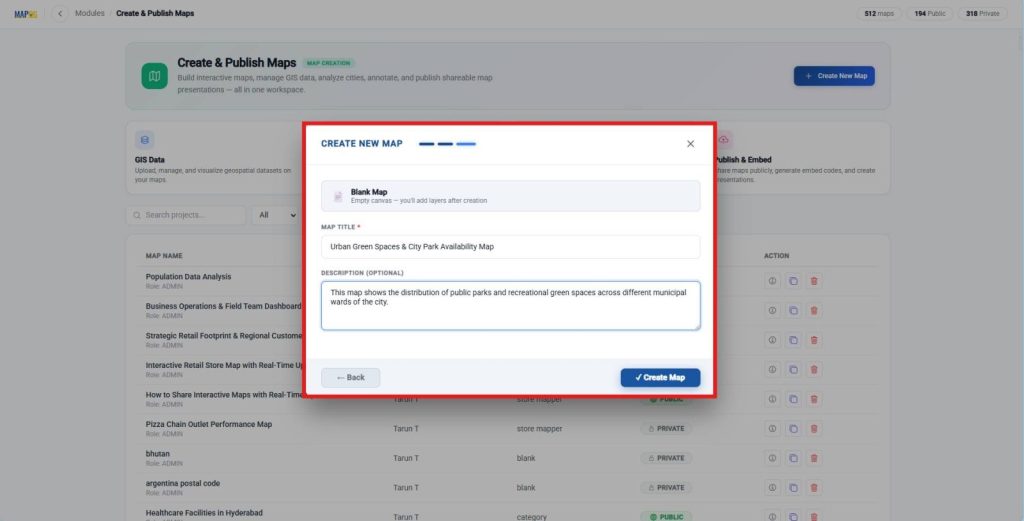
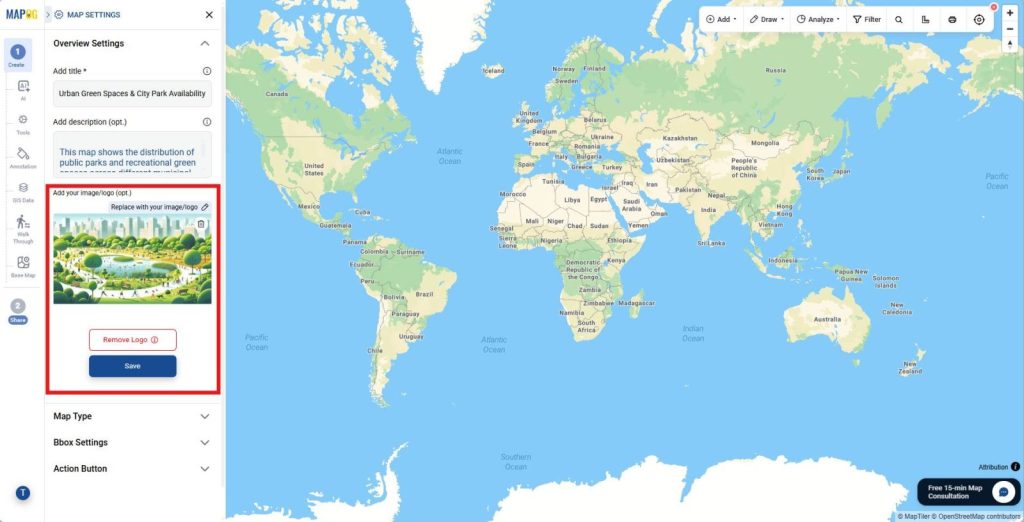
Enter a map title and a meaningful description so collaborators can easily identify the project later.
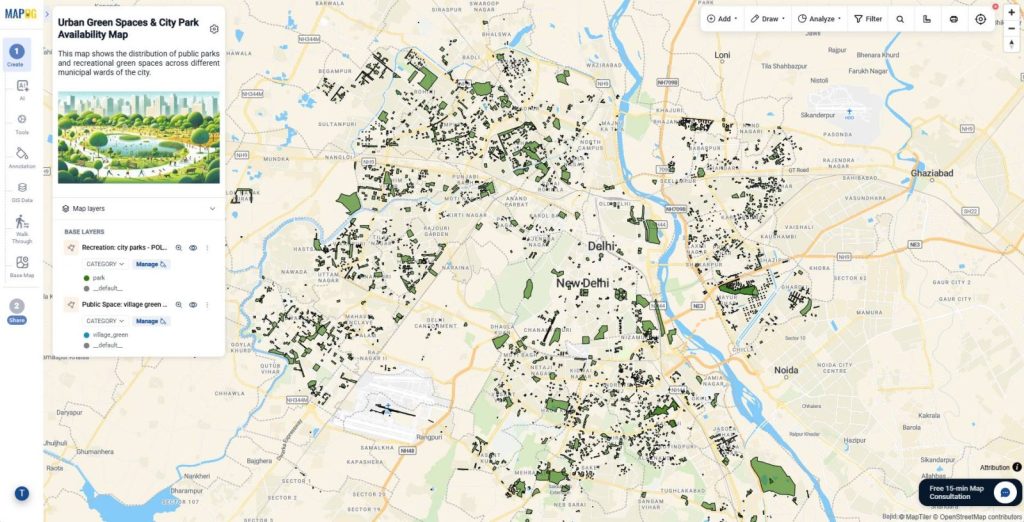
Afterward, create the map and open Map Settings. Finally, upload a map logo or cover image to improve the map’s appearance and make it easier to recognize.
2. Add GIS Data Layers
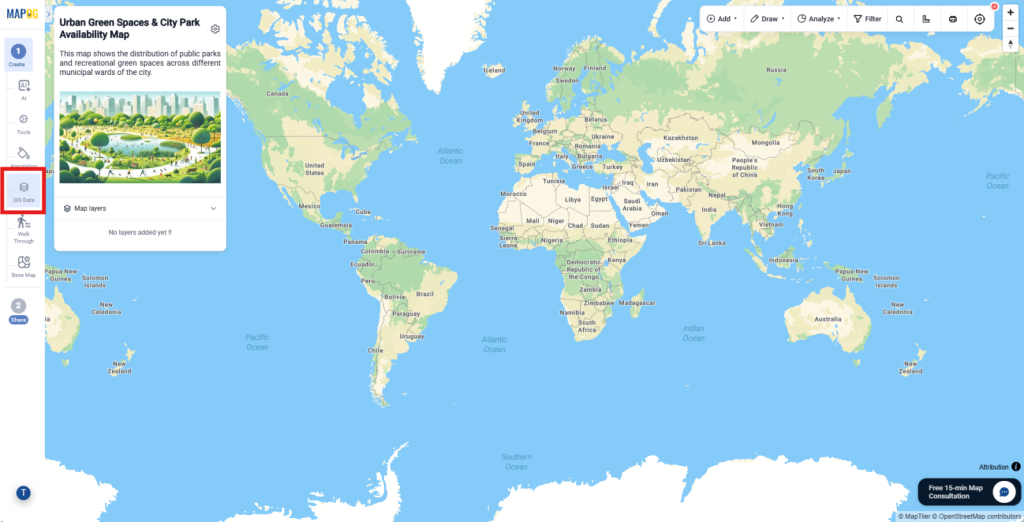
Then, Open the GIS Data section to build the map with relevant spatial information.
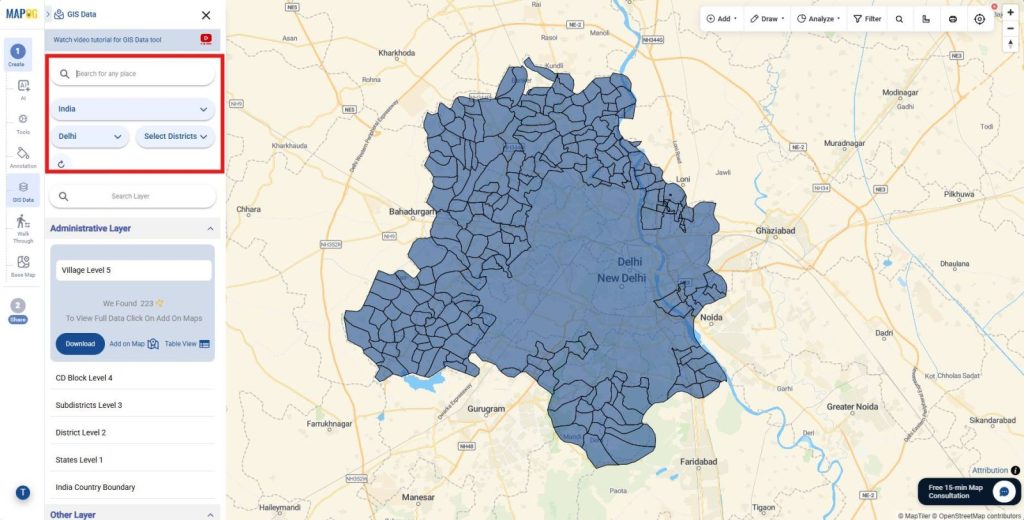
Next, search for your area of interest.
then search for the required GIS layers and import each layer individually so you can verify that the correct datasets appear on the map.
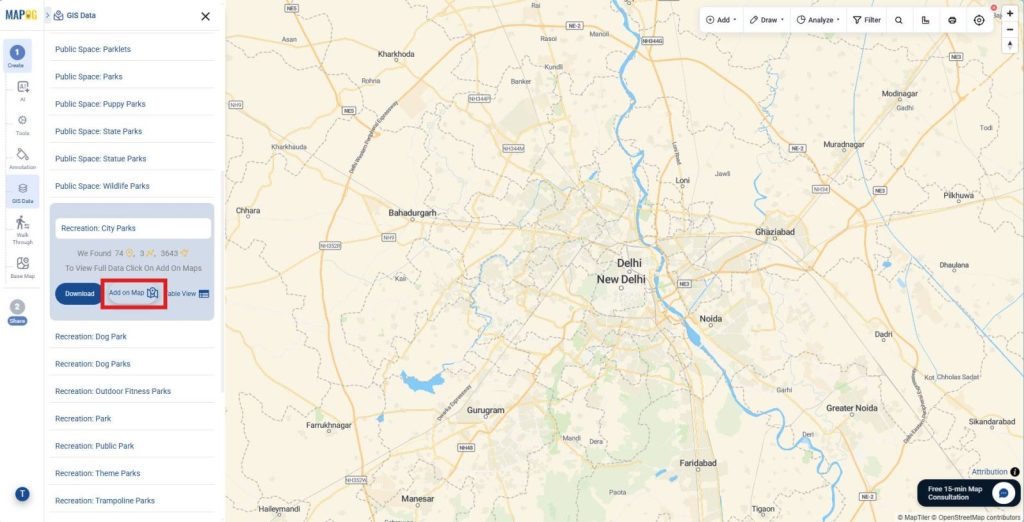
Organizing the layers at this stage creates a solid foundation before working in QGIS.
3. Install and Sign in to the MAPOG Plugin
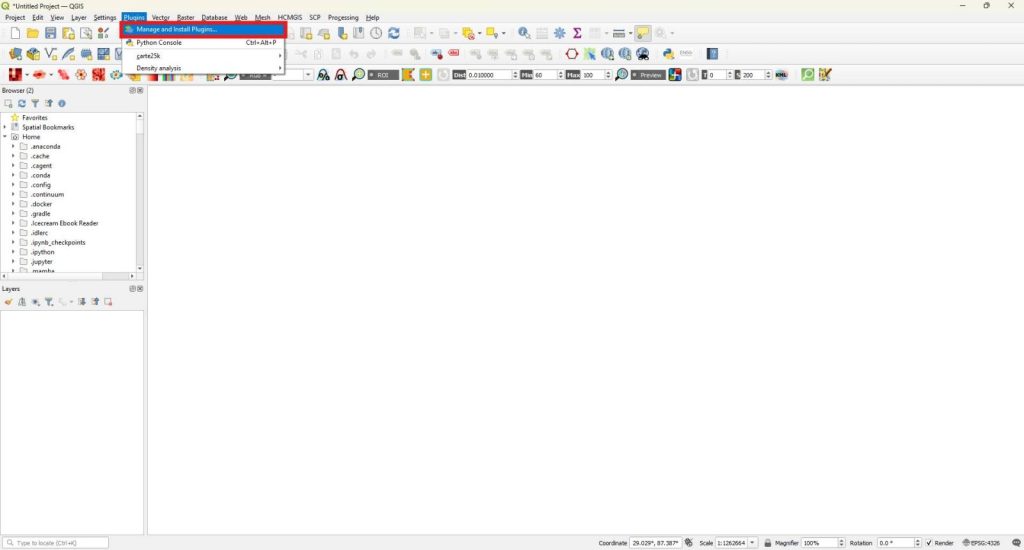
Now, launch QGIS and create a new project to begin desktop editing. Next, open Plugins then go to Manage and Install Plugins.
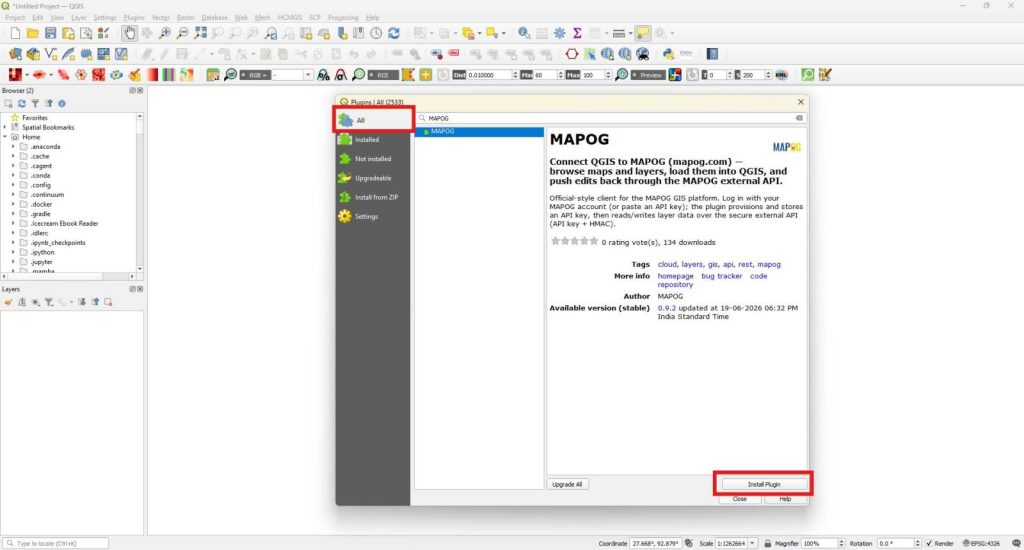
Then, switch to the All Plugins tab, search for the MAPOG plugin, and install it.
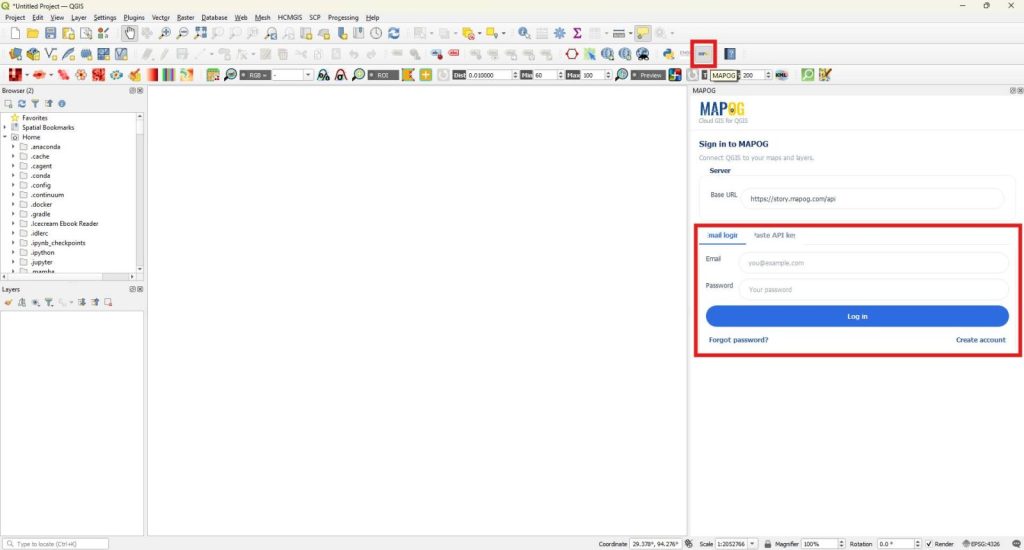
After installation, open the plugin and sign in with your account credentials. Signing in connects QGIS with your online maps and enables data synchronization.
4. Load Existing Layers from MAPOG into QGIS
Open the MAPOG to QGIS section and select Add Existing Layer to import online data into your desktop project.
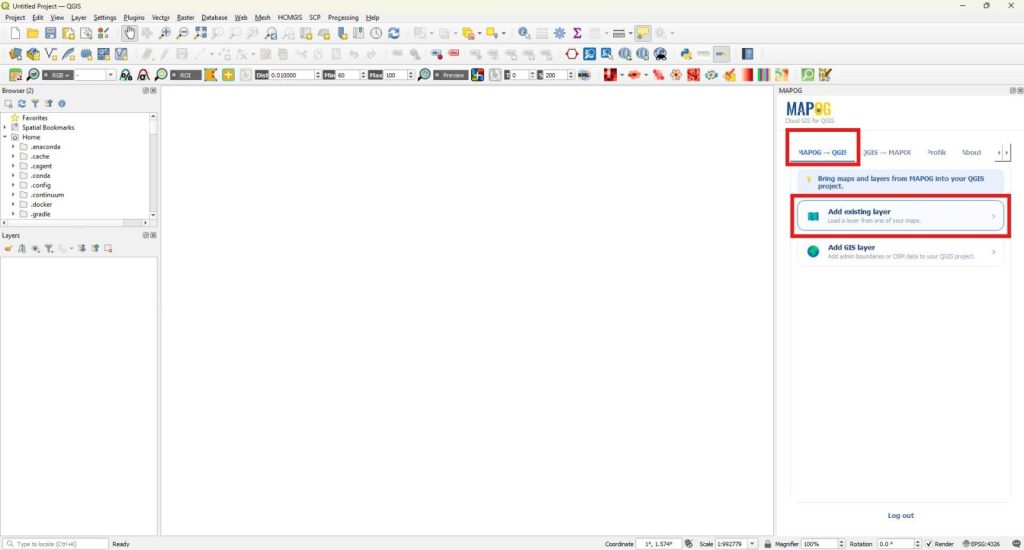
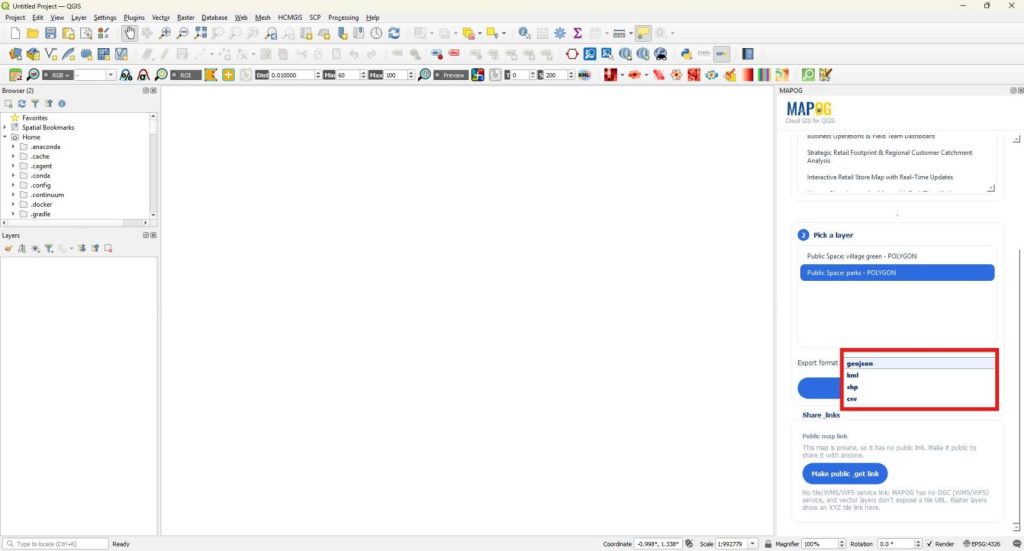
Search for and select the required map, choose the layer you want to work with, and select an appropriate format such as GeoJSON, KML, SHP, or CSV.
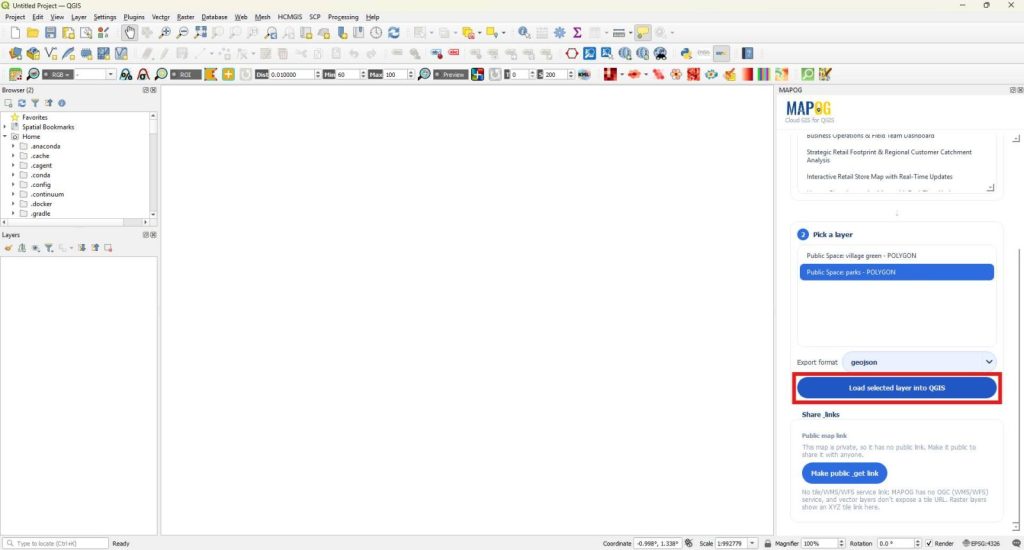
Finally, click Load Selected Layer into QGIS to begin editing or analyzing the data locally.
5. Upload QGIS Layers to MAPOG
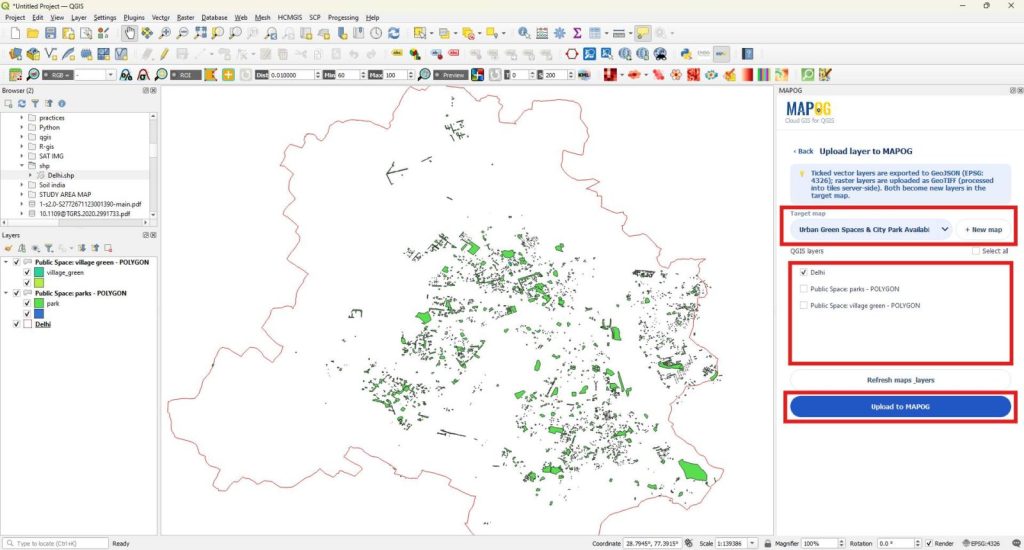
When your edits are complete, open the QGIS to MAPOG section and click Upload Layer to MAPOG.
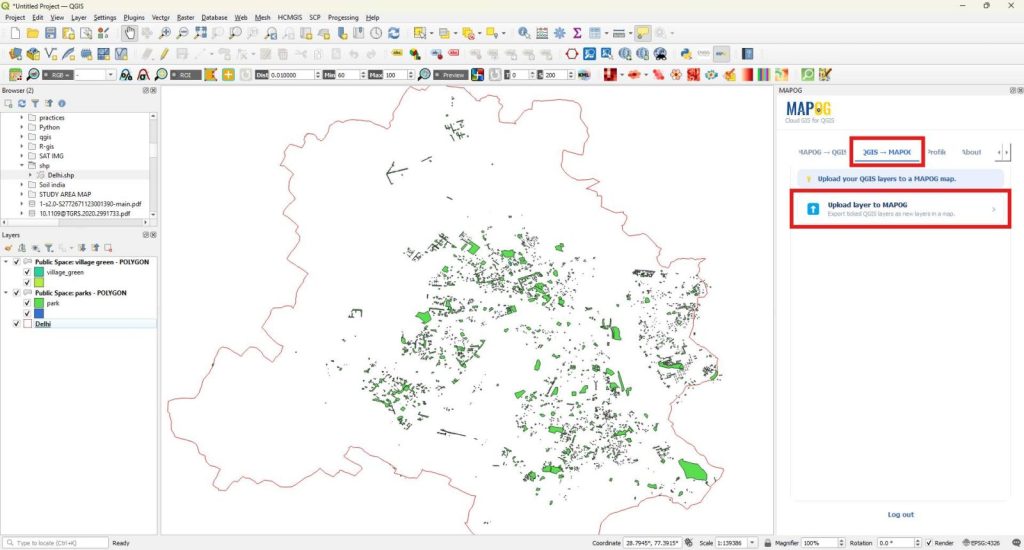
Next, select an existing online map or create a new one directly from QGIS. Then, choose the required QGIS layer and click Upload to MAPOG. As a result, the latest version of your edits becomes available to every project member for collaboration.
6. Share and Manage Map Access
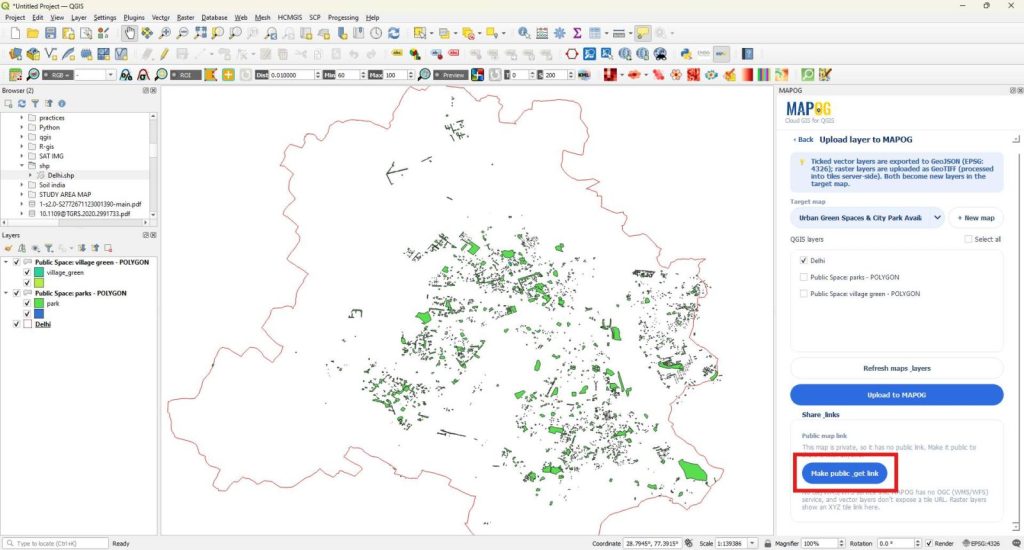
Finally, open the Share Links section to manage how others access your map. First, click Make Public to generate a shareable map that colleagues or stakeholders can view immediately.
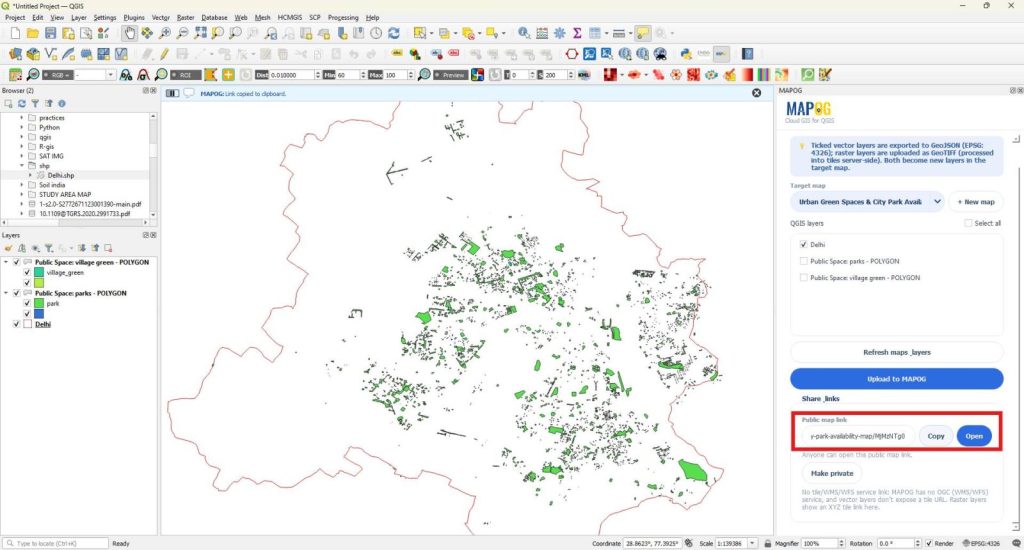
Next, copy the public link or open the map directly from QGIS to verify the published version.
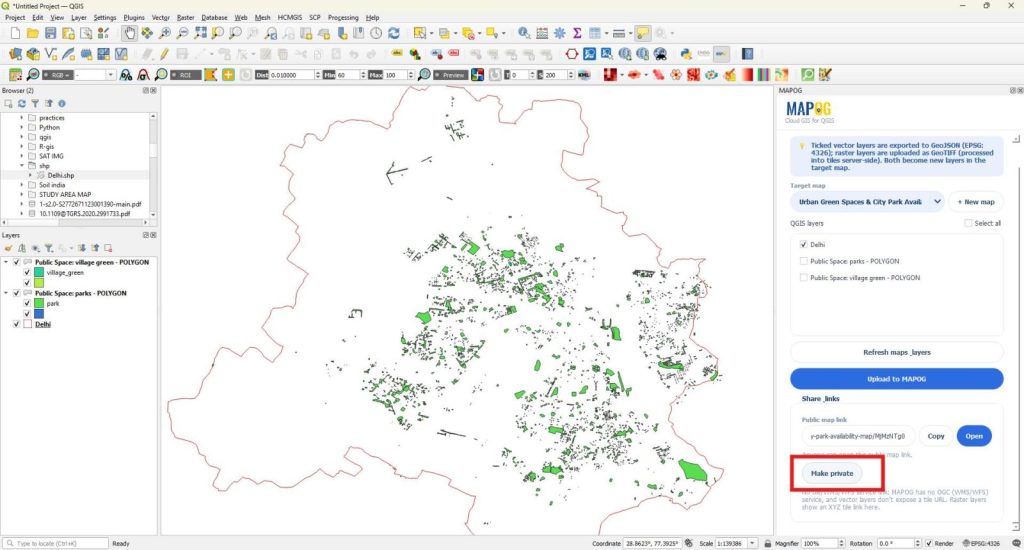
However, if access requirements change, click Make Private to restrict visibility without leaving the plugin.
Industries and Domains Benefitting
Urban planning departments use these maps to improve public access to parks. Municipal governments support evidence-based development decisions. Landscape architects evaluate green infrastructure opportunities. Additionally, researchers analyze park distribution and accessibility trends using consistent spatial datasets.
Conclusion
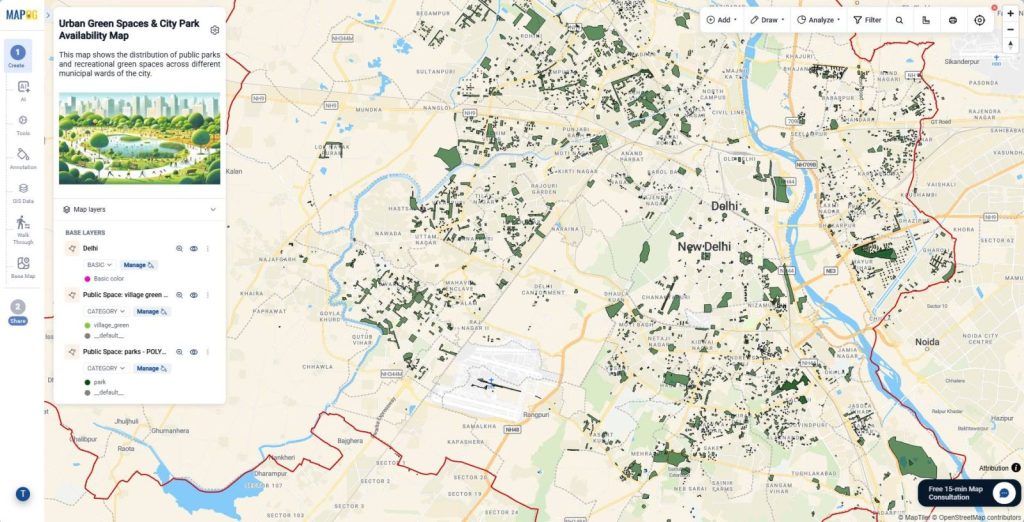
Urban Green Spaces & City Park Availability maps support smarter planning and healthier communities. Publish, Share, and Collaborate on QGIS Maps with the MAPOG Plugin streamlines collaboration from start to finish. You can continue adding layers to maps, exporting layers to QGIS, and sharing public maps to maintain accurate and up-to-date planning data.