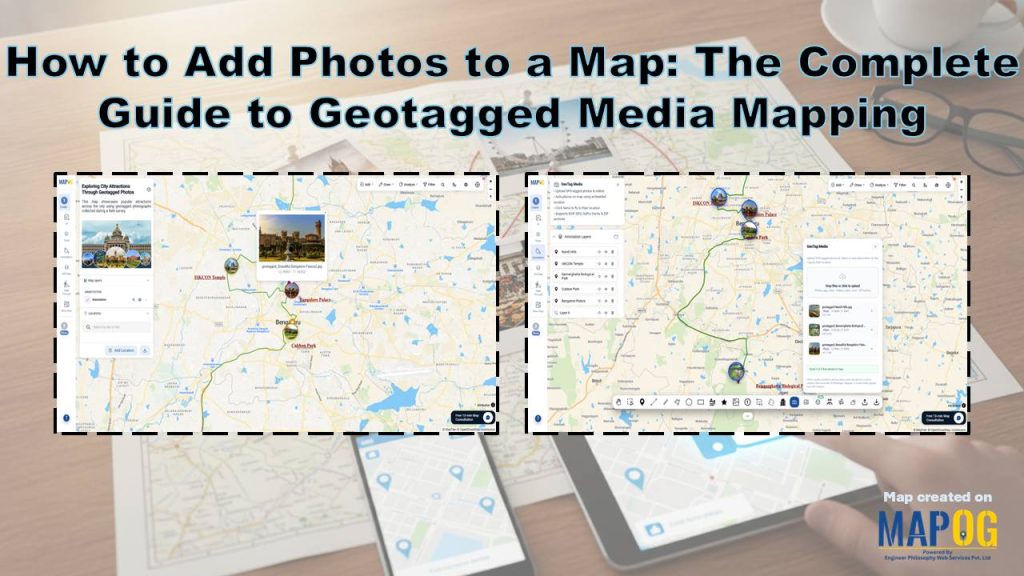
Maps become more engaging when they include visual context. Today, users can Add Photos to a Map and instantly show real-world locations with images. MAPOG makes this process simple with its geo-tagged image upload capability and Annotation tools. Users can upload images with embedded GPS coordinates, and the platform automatically places them on the map. As a result, teams save time and create richer mapping experiences.
Key Concept of Geotagged Media Mapping
Geotagged images contain GPS coordinates in their metadata. When users upload these images, the system reads the coordinates and places the photos automatically on the map. Users can then add labels and highlights using Annotation.
Steps- by- Step Workflow to Add Photos to a Map
1. Create Your map
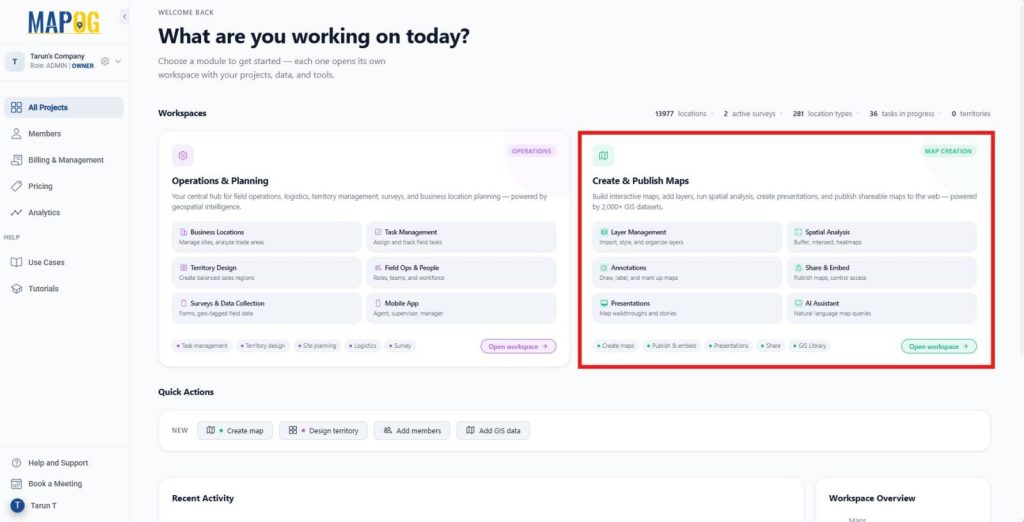
First, go to MAPOG. Then, open the Create & Publish Maps module from the dashboard. This workspace helps you create, customize, and publish interactive maps.
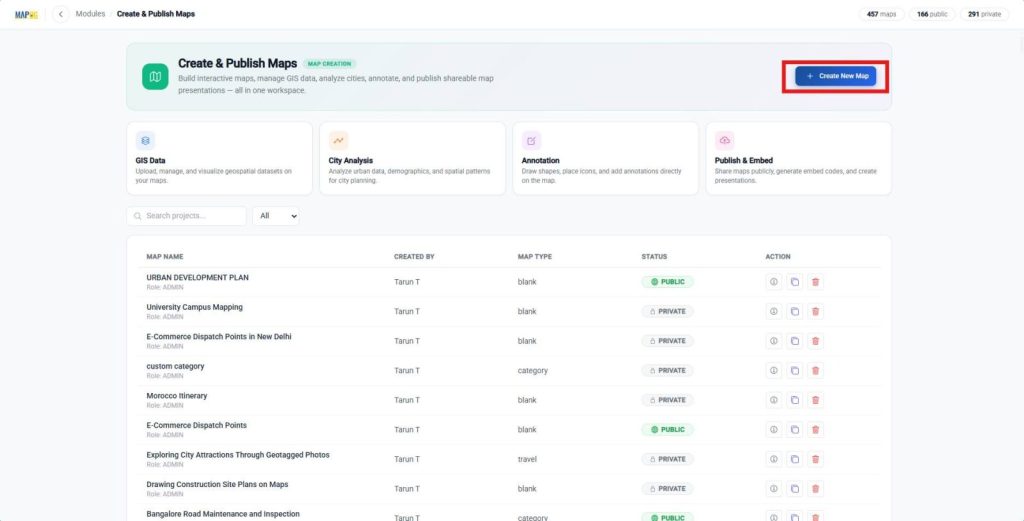
Next, click Create New Map to initiate the map creation.
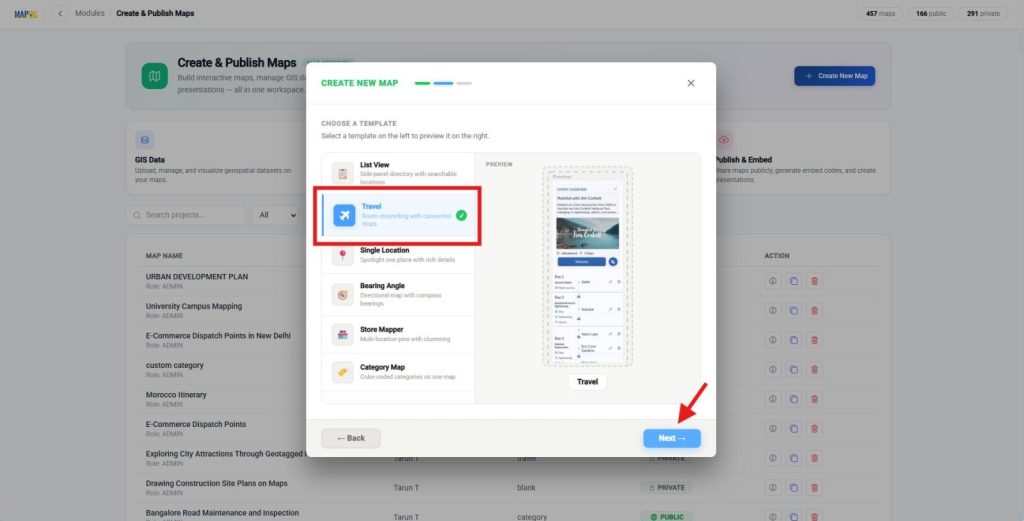
After that, select With Template and click Next.
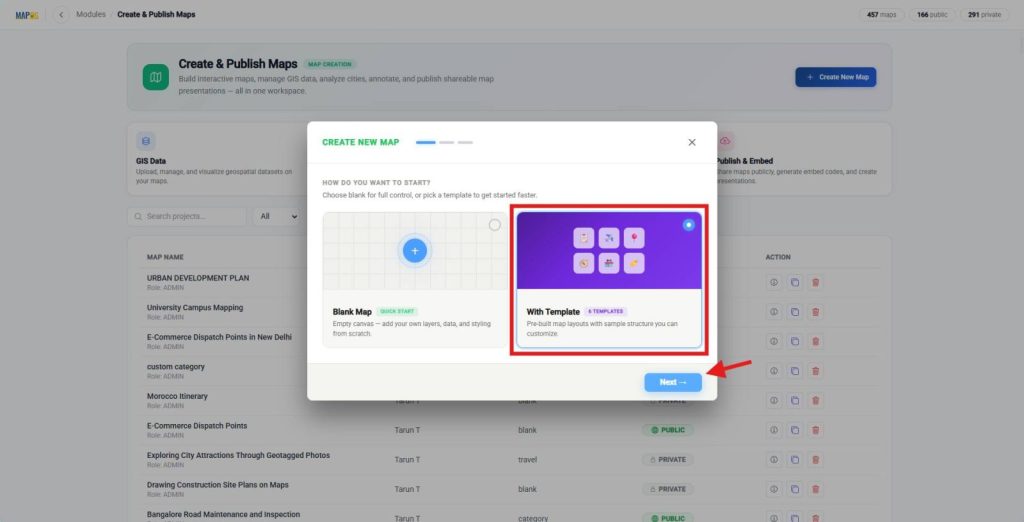
Then, choose the Travel template from the list. Finally, click Next to continue.
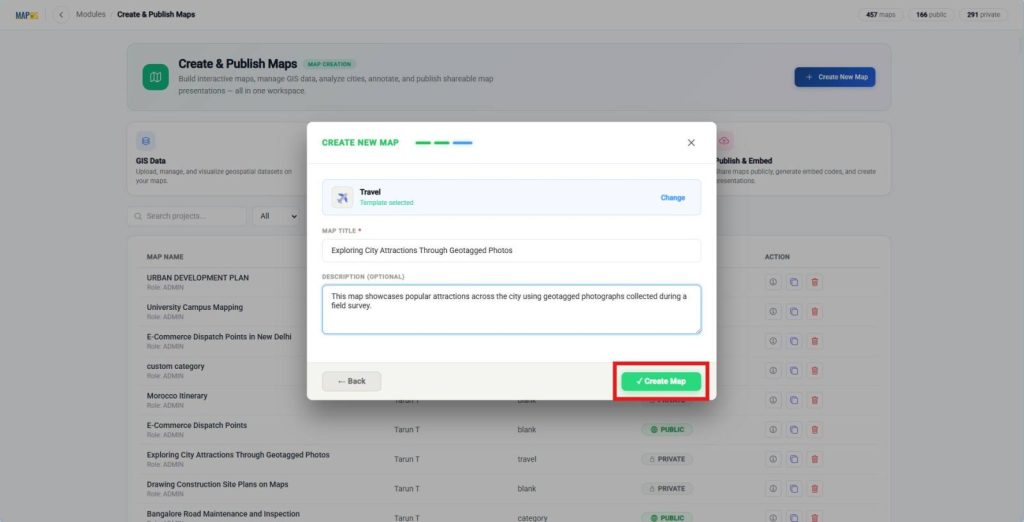
Now, enter a suitable Map Title and an optional Description. These details help viewers understand your map’s purpose. Once finished, click Create Map to open the Map interface.
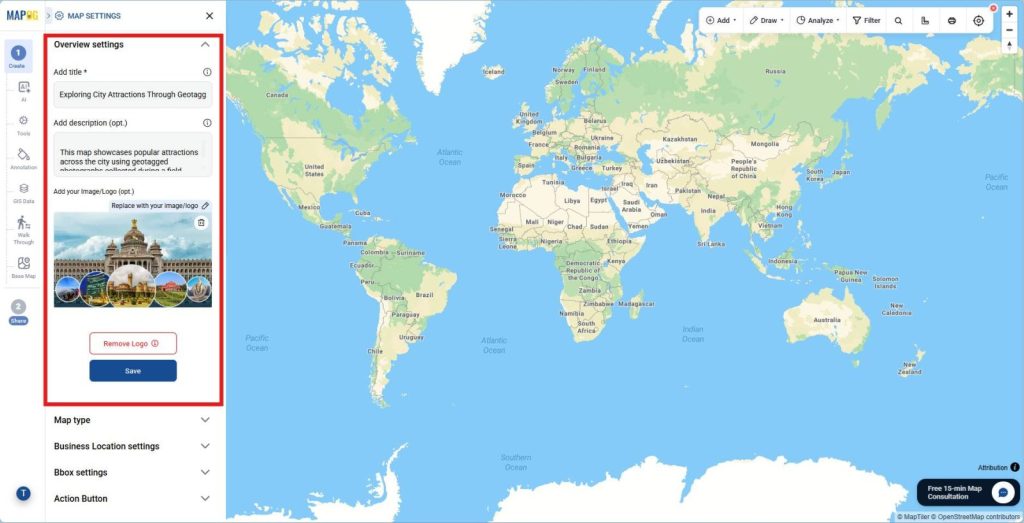
Next, open Map Settings and update the logo or cover image. As a result, your map gains a clear identity and professional appearance.
2. Open Annotation Tools
Afterward, click Annotation from the left toolbar to add visual elements and interactive content.
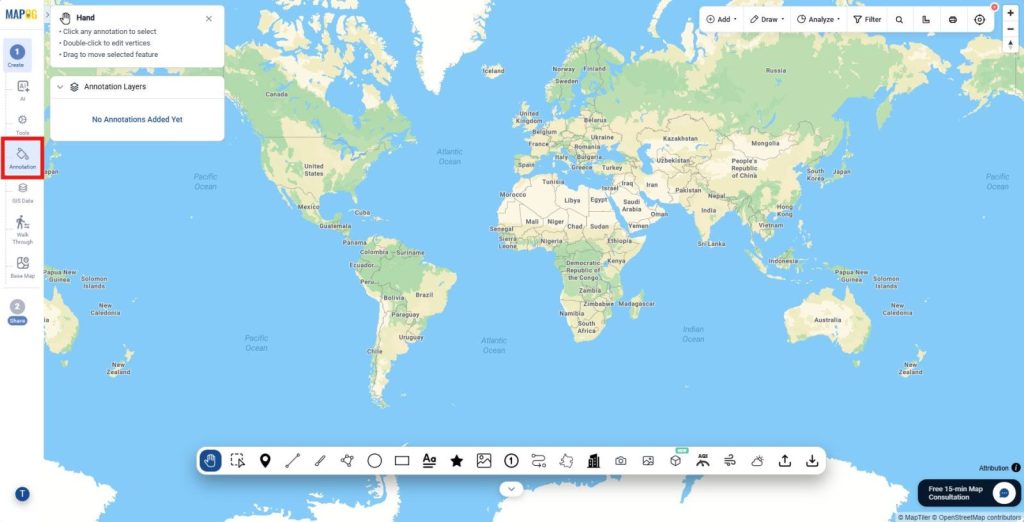
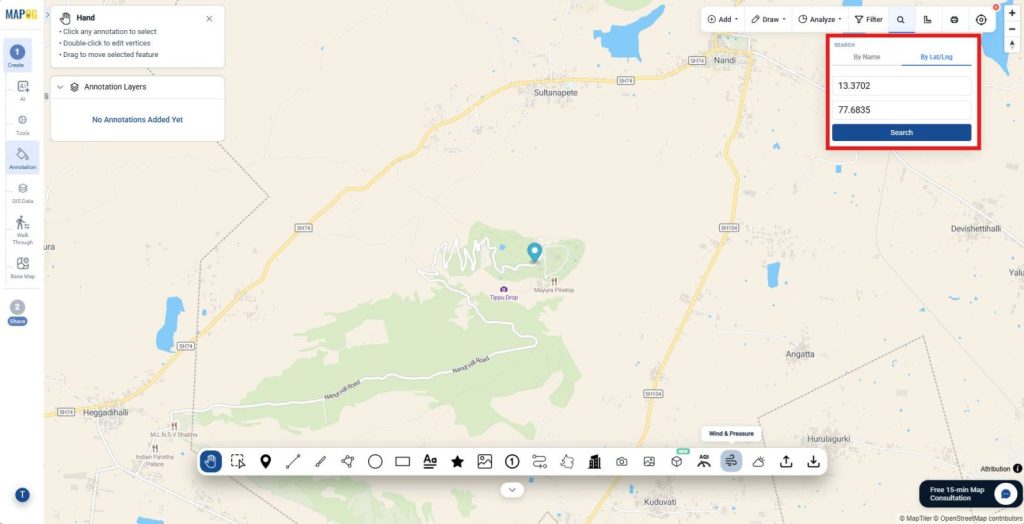
Use the toolbox to search for locations by entering either a place name or geographic coordinates.
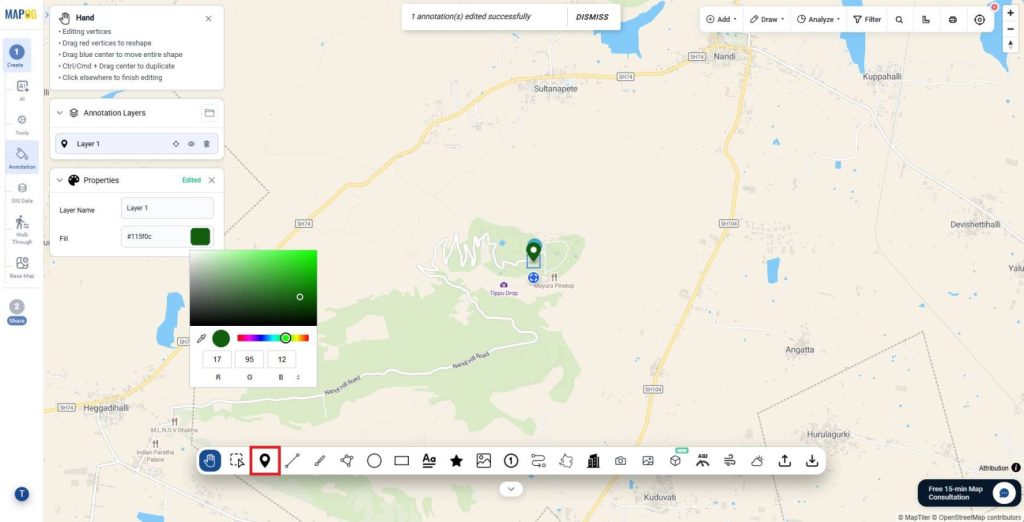
Meanwhile, use the Point tool to mark each location individually. Then, customize each point from the Properties panel by updating colors and labels. As a result, viewers can easily identify major stops and distinguish them from general breakpoints.
3. Connect Locations with the Route
After that, select the Route Line tool and connect the plotted locations in sequence by clicking them one after another.
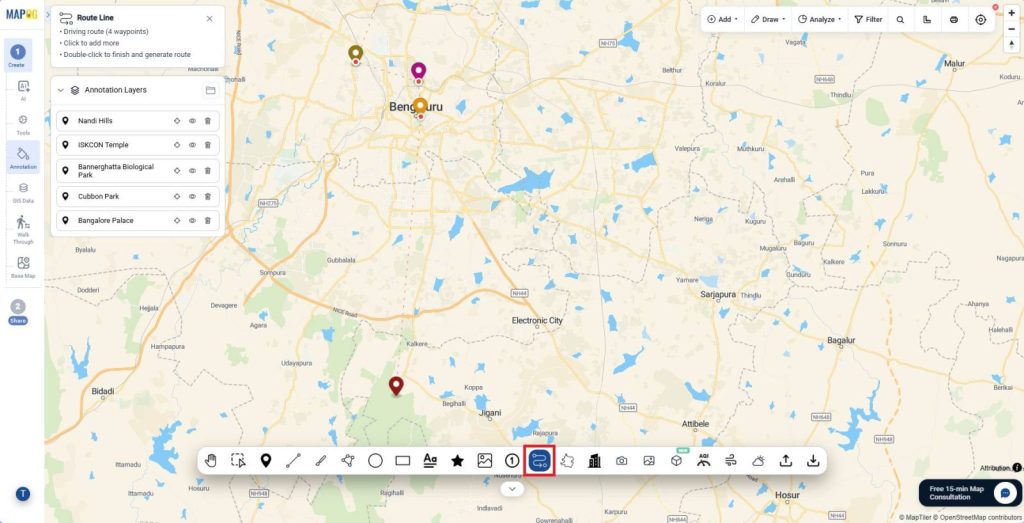
Then, double-click to complete the route so the system automatically generates the path between all selected points. Subsequently, open the Properties panel to refine the route appearance. Update the layer name, adjust the stroke color, width, and opacity,
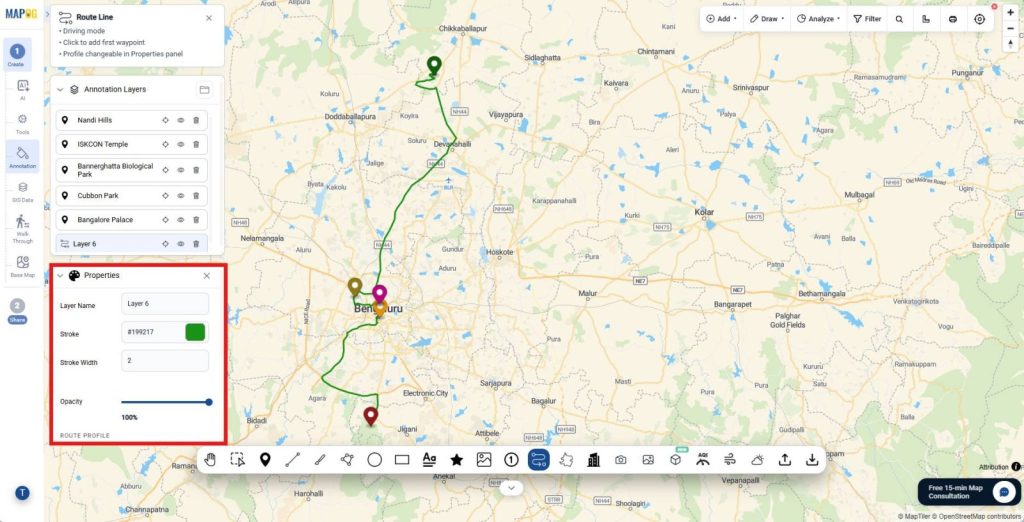
and select a suitable route profile such as driving, walking, or cycling. This ensures the route matches real-world travel conditions and improves map clarity.
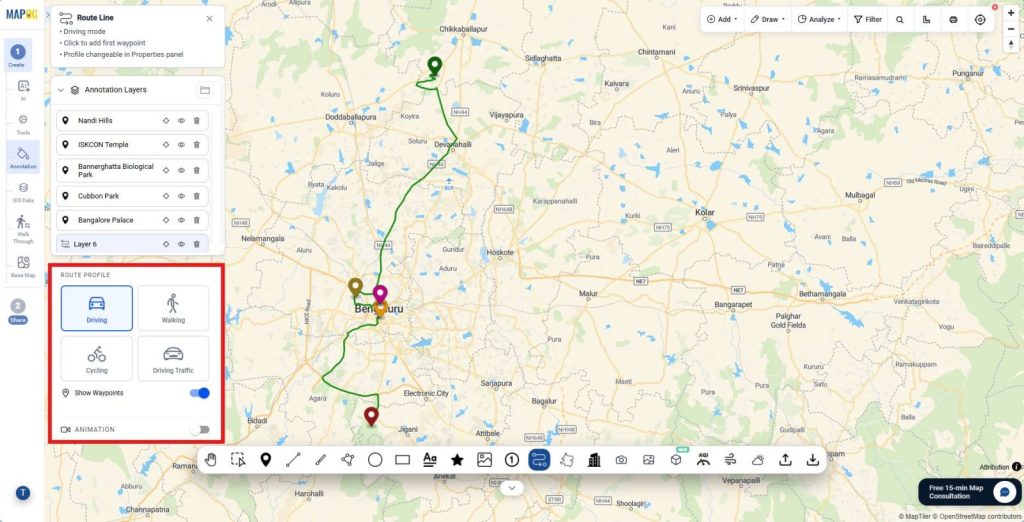
4. Upload Geotagged Photos
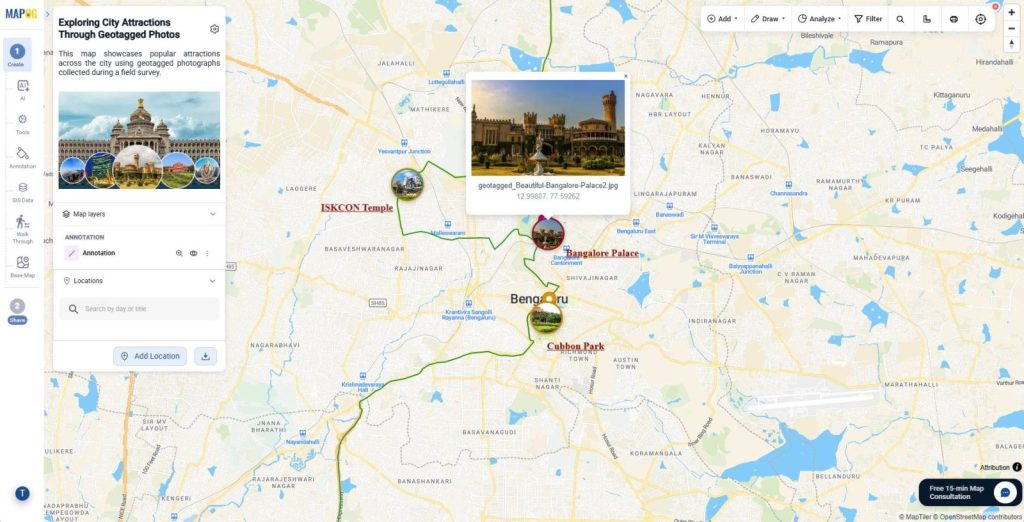
Next, select the GeoTag Media tool and upload geotagged photos, videos, or ZIP files by dragging and dropping them or browsing your device.
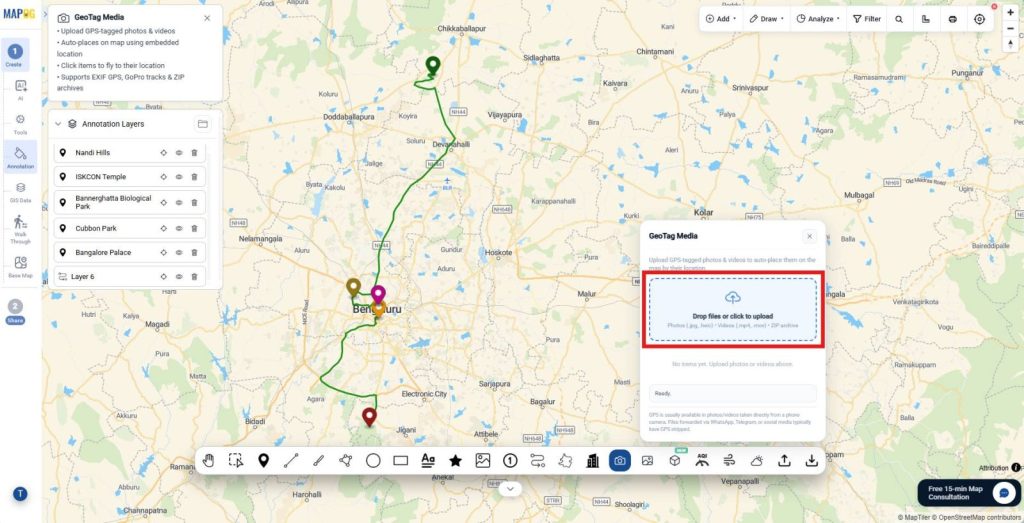
The platform automatically reads the coordinates and places each file at its exact location on the map.
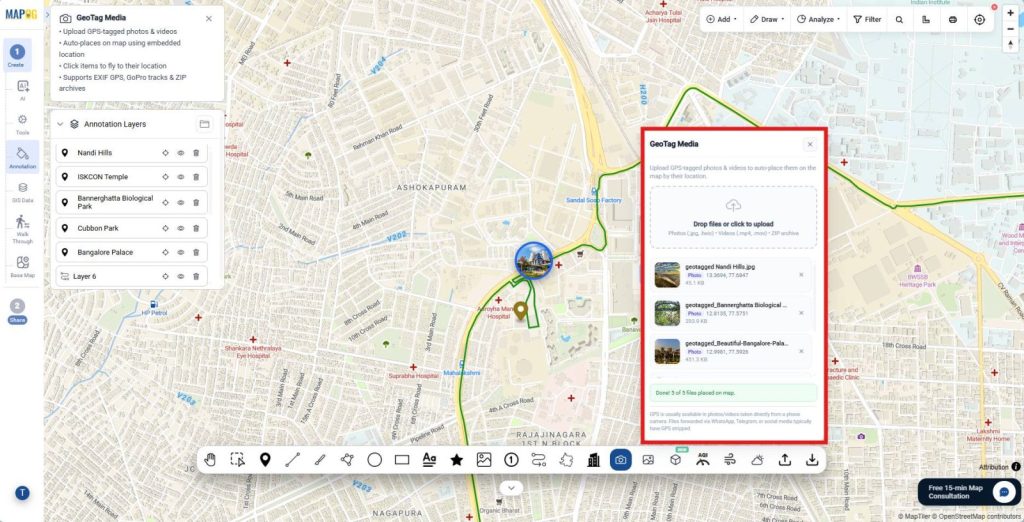
This automation removes the need for manual pin placement, saves time, and ensures your travel photos appear precisely where they were captured.
Finally, review the image markers displayed on the map and click any marker to preview the photo, verify its location, and inspect related details.
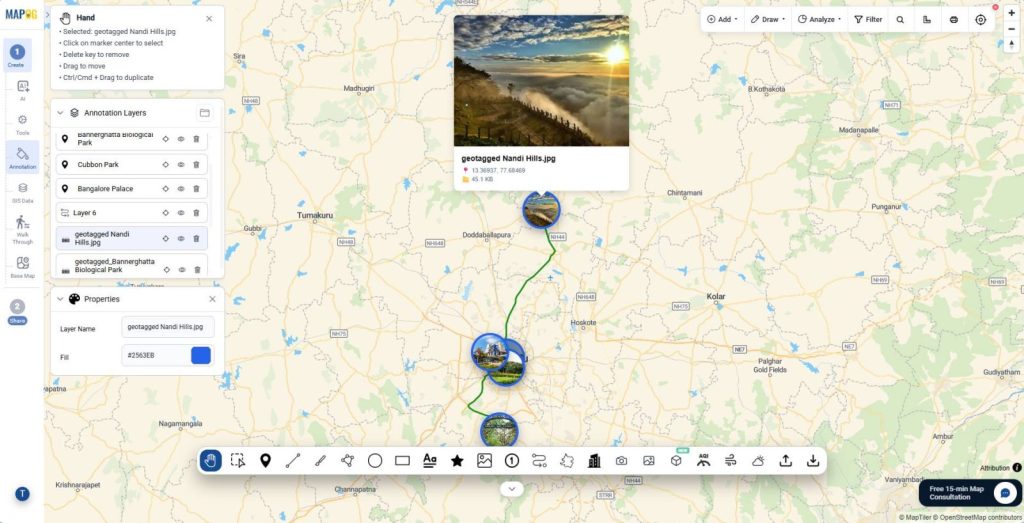
5. Add Text Labels and Notes
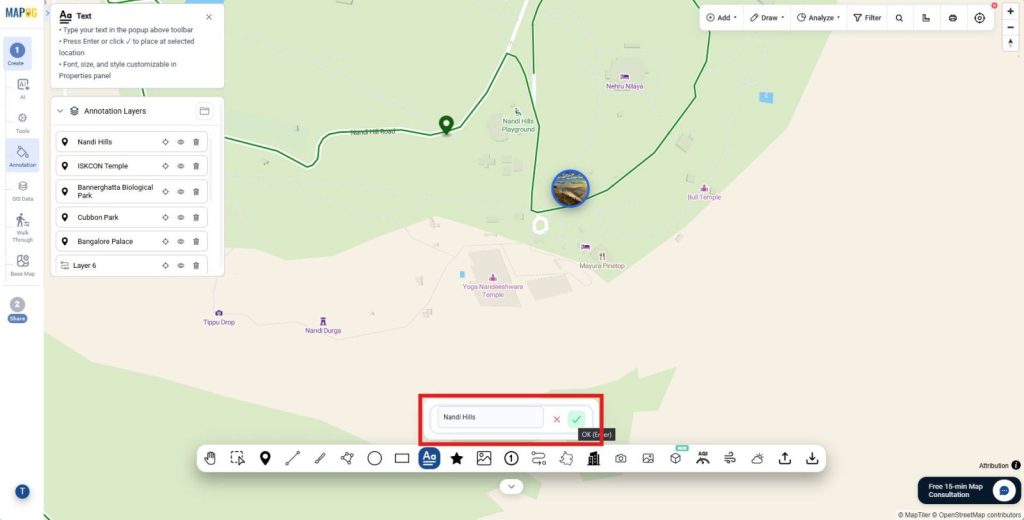
In the next step, activate the Text tool from the annotation toolbar and click the desired location on the map. Then, type a label or note, such as a landmark name, attraction, or travel tip, and press Enter to place it.
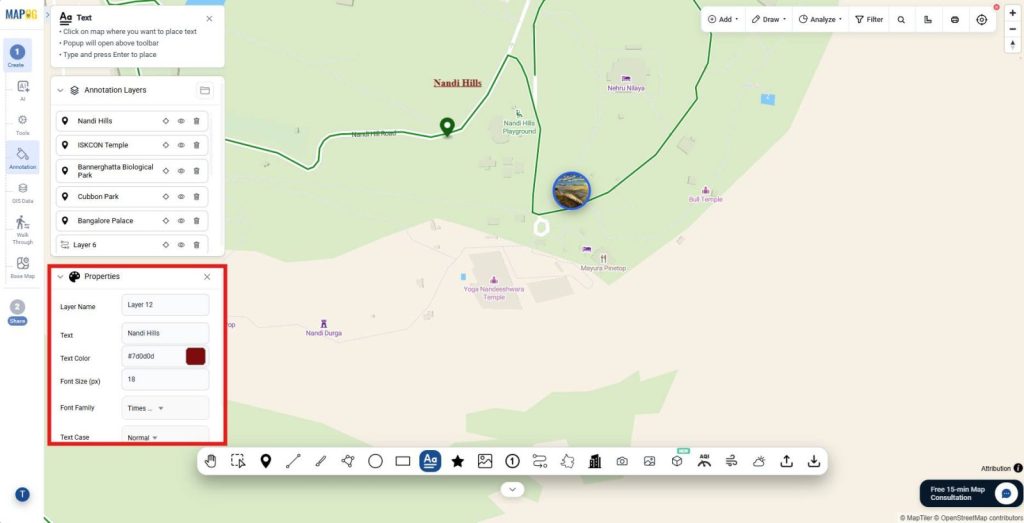
Furthermore, customize the text from the Properties panel by changing the font family, font size, text color, and text case. You can also apply styles such as Bold and Underline to improve readability and maintain a clear visual hierarchy across the map.
6. Share and Publish Map
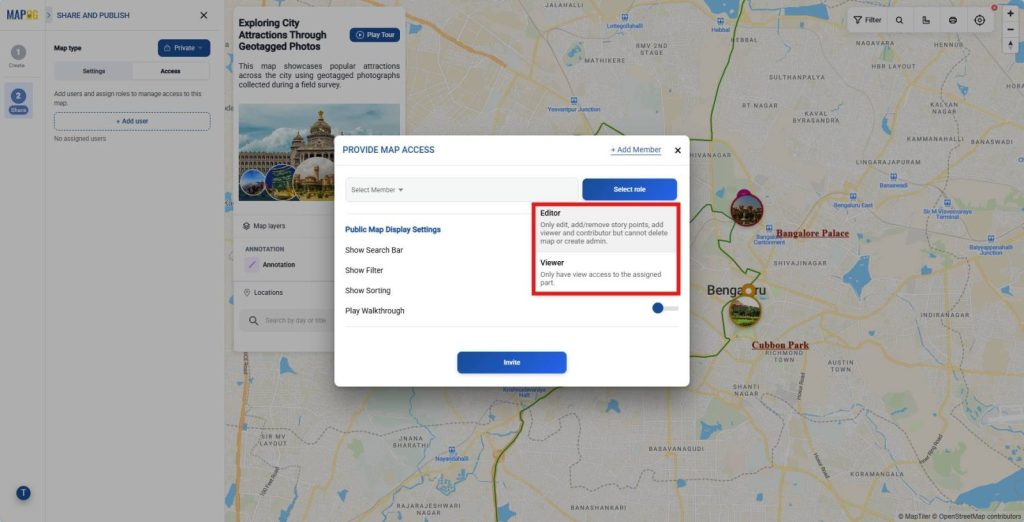
Finally, go to the Share and Publish section, share it privately by adding users and assigning roles like viewer or editor,
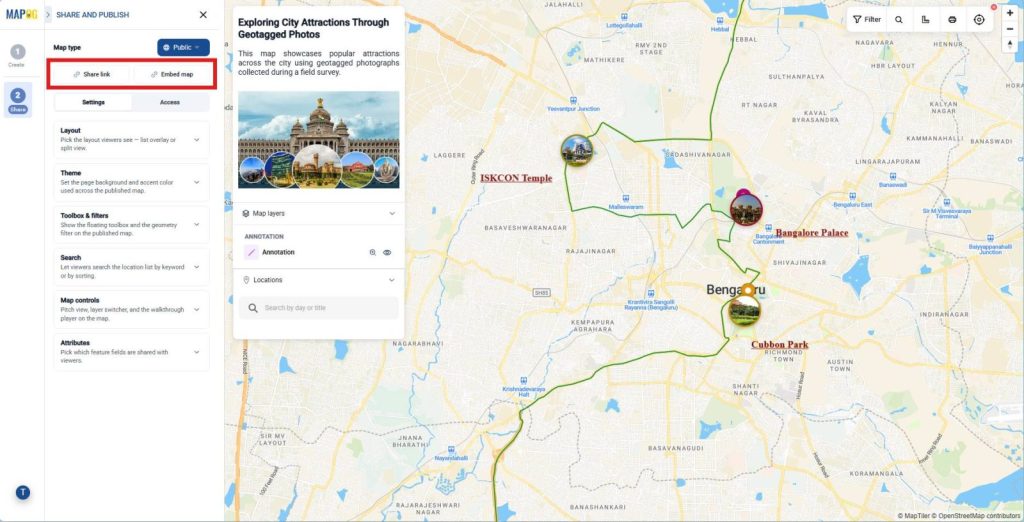
or make it public and share it through a link or embed option, which turns your map into a fully usable output.
Industries and Domains Leveraging Add Photos to a Map
Many industries now add photos to a Map to improve communication and decision-making.
- Tourism: Showcase attractions with photos and descriptions.
- Real Estate: Display property images at exact locations.
- Urban Planning: Monitor infrastructure and public spaces.
Moreover, geotagged media improves collaboration because teams can verify locations visually.
Conclusion
Geotagged media mapping turns static maps into interactive experiences. Organizations can Add Photos to a Map and share location-based stories with ease. MAPOG strengthens this workflow through its geo-tagged image upload capability and Annotation tools. Therefore, users can create informative maps faster while keeping location data and visuals connected.