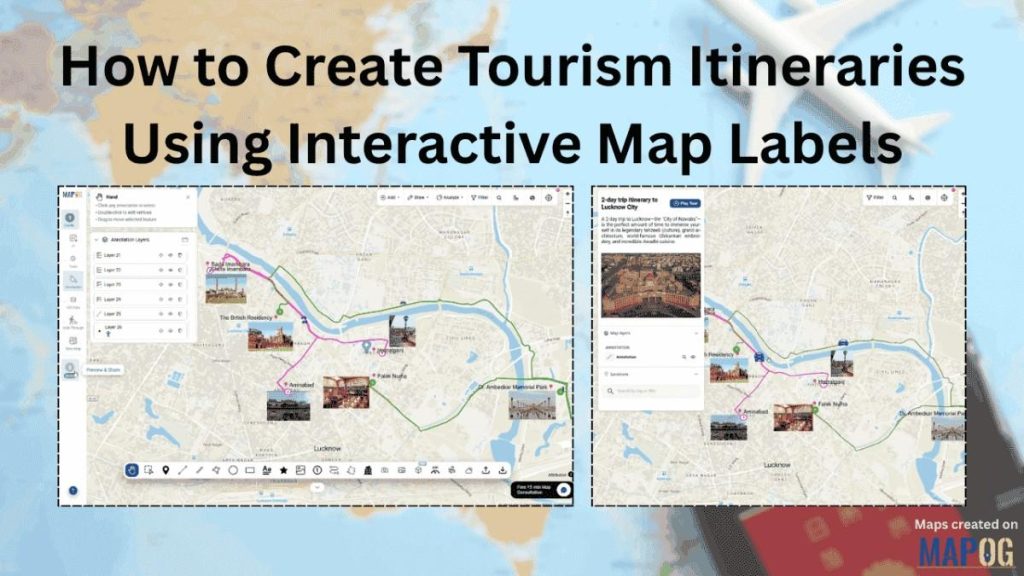
Interactive map labels used to make tourism or travel itineraries transform text-heavy destination lists into a structured, sequential, visual journey. This allows us to create a tourism itinerary with interactive map labels.
MAPOG elevates this workflow through smart annotation and labelling capabilities, ensuring every data of a trip tells a seamless story.
As a result, travel agencies, influencers, and planners move from a basic list of stops to a highly engaging spatial narrative.
Key Concept of Interactive Itinerary Labelling
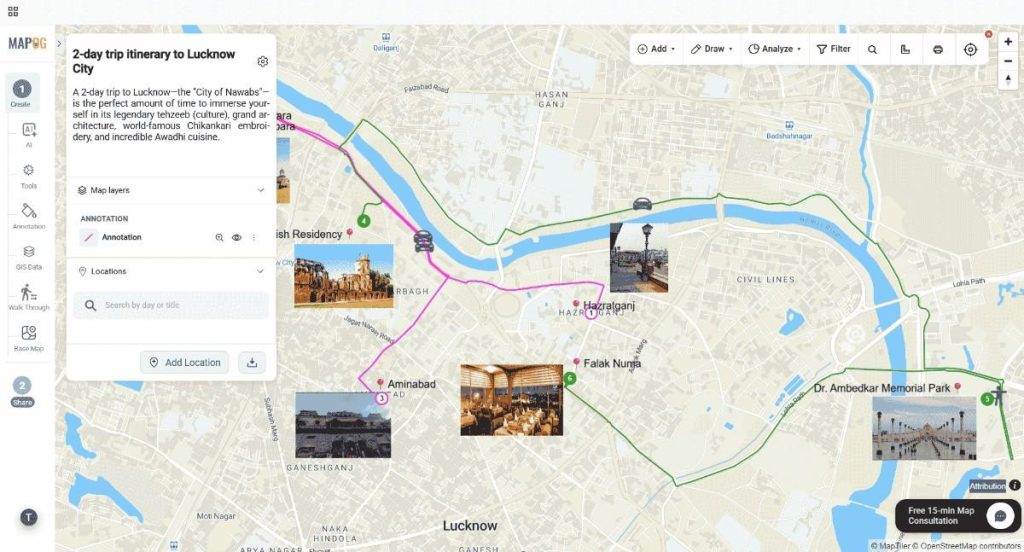
By combining routes, dynamic labels, schedules, and preview images, interactive maps consequently turn complex travel data into an intuitive guide that instantly clarifies sequences, landmarks, and routes.
This allows travelers to look at the map and immediately understand the sequence of their day, what to look out for, and how to get there. When you create an itinerary with interactive map labels, you turn complex travel data into an intuitive, user-friendly guide.
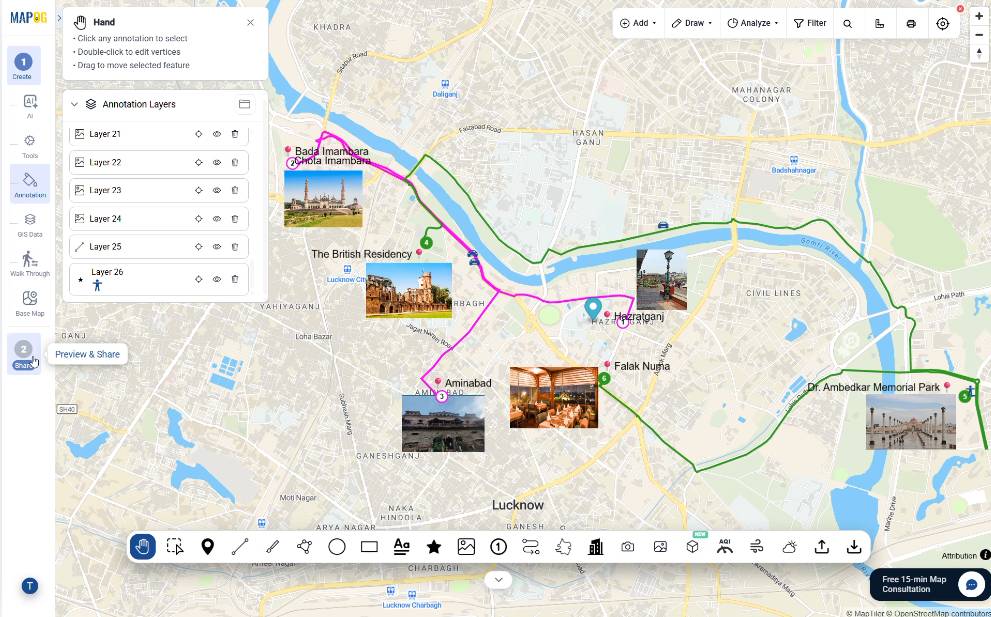
Step-by-Step Workflow to Create an Interactive Travel Itinerary using Map Labels
Step 1: Initialize and Brand your interactive itinerary map
To begin, head to MAPOG and open the Create and Publish Map workspace.
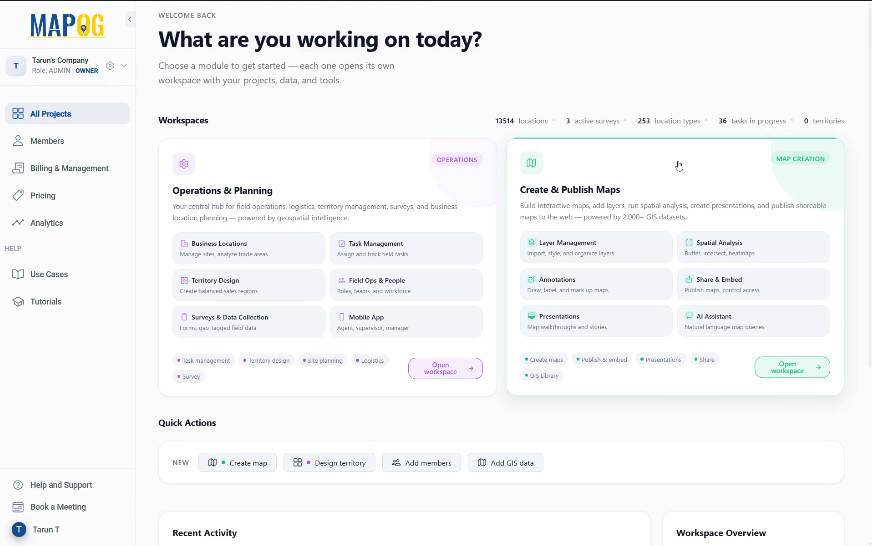
After that, click Create New Map,
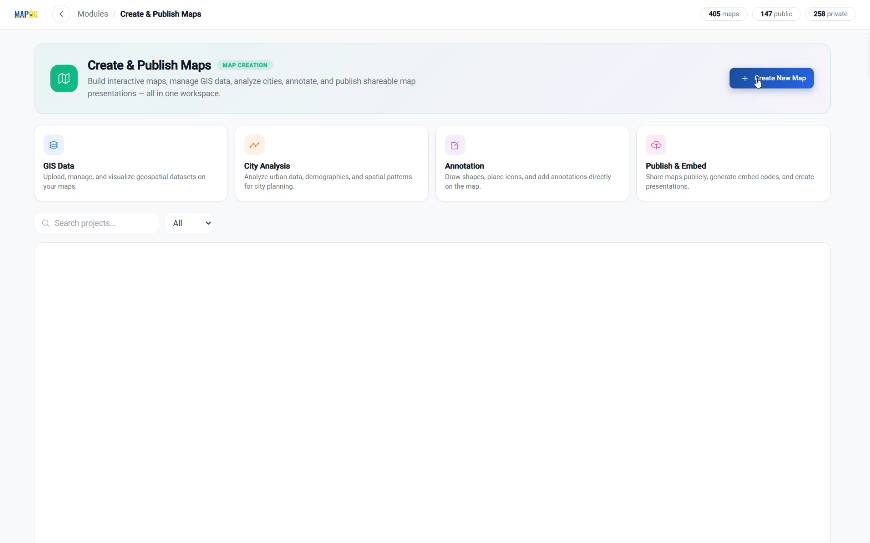
next, navigate to the with template section,
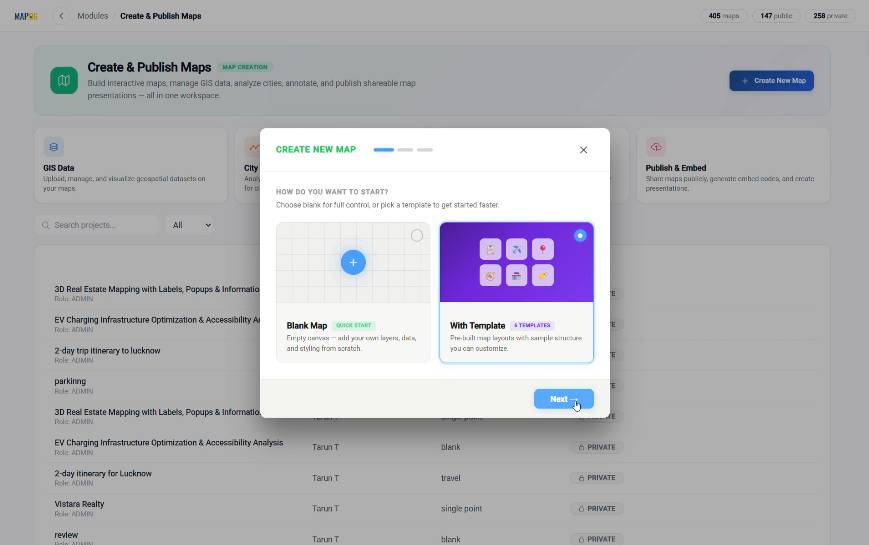
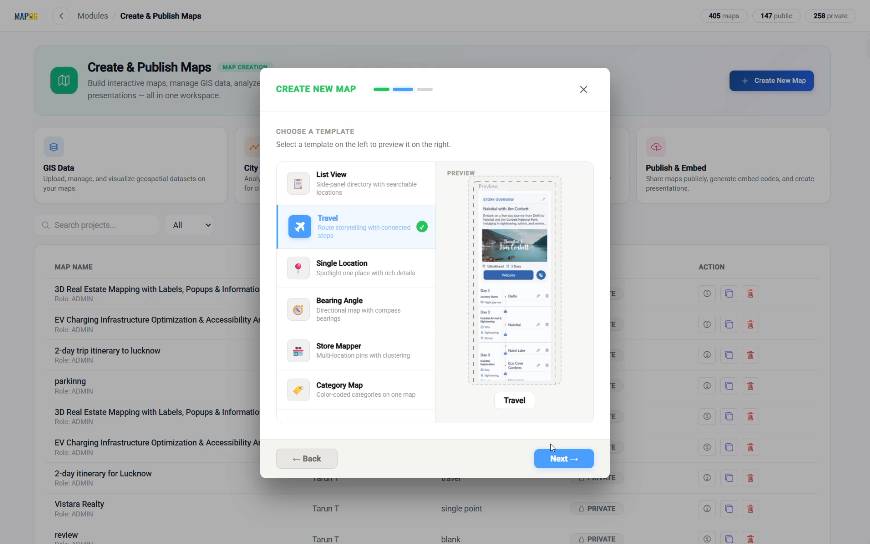
and choose the Travel Template to optimize your workspace.
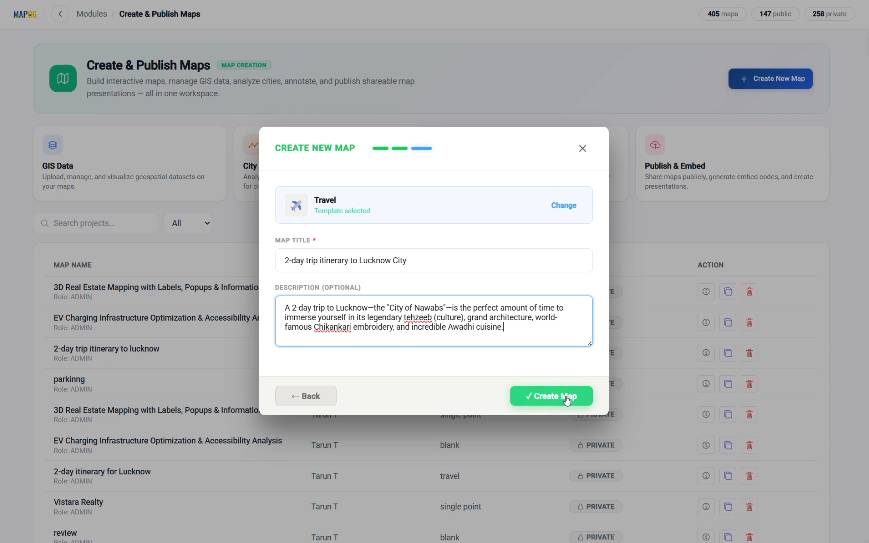
Add a compelling title and a brief description. Finally, click create map to save it.
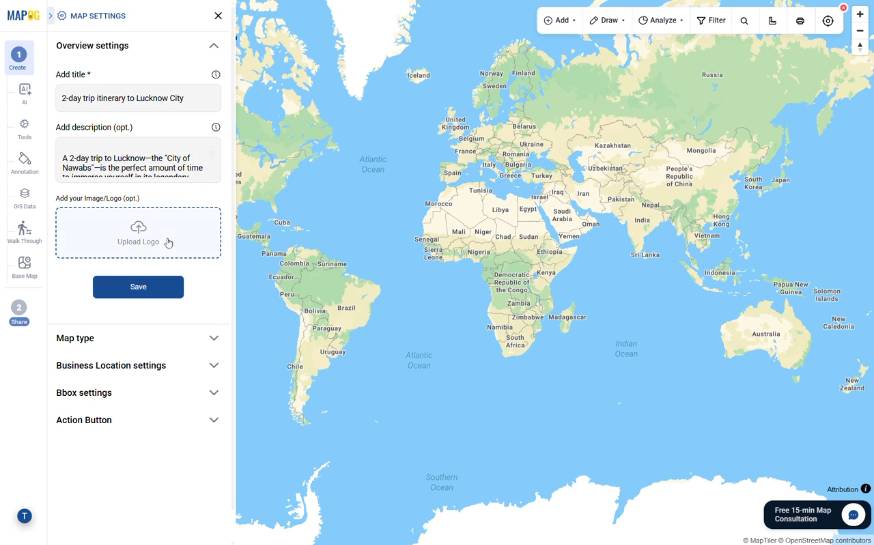
Finally, open the map settings and upload your brand image or logo to add credibility.
Step 2: Search and Plot Daily Breakpoints
Next, go to the Annotation section and use the search tool.
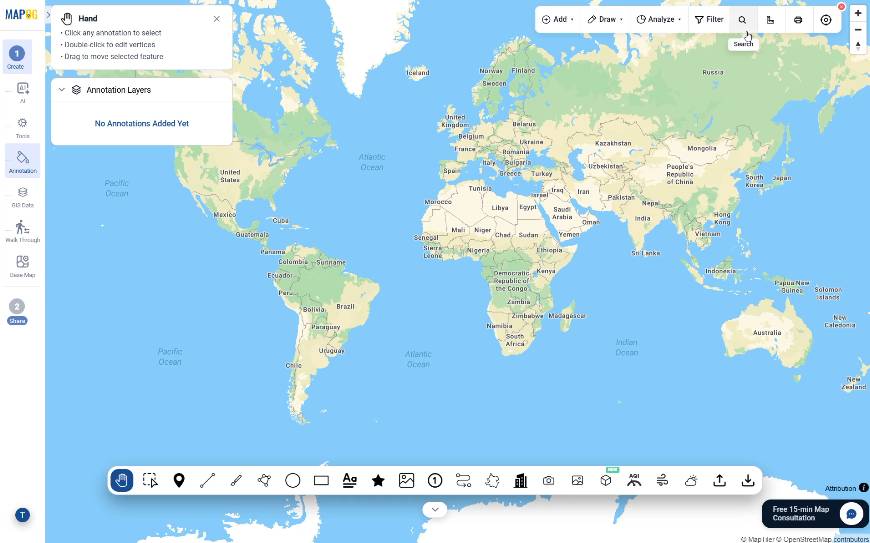
to locate your itinerary stops by entering either the place names or exact latitude/longitude coordinates.
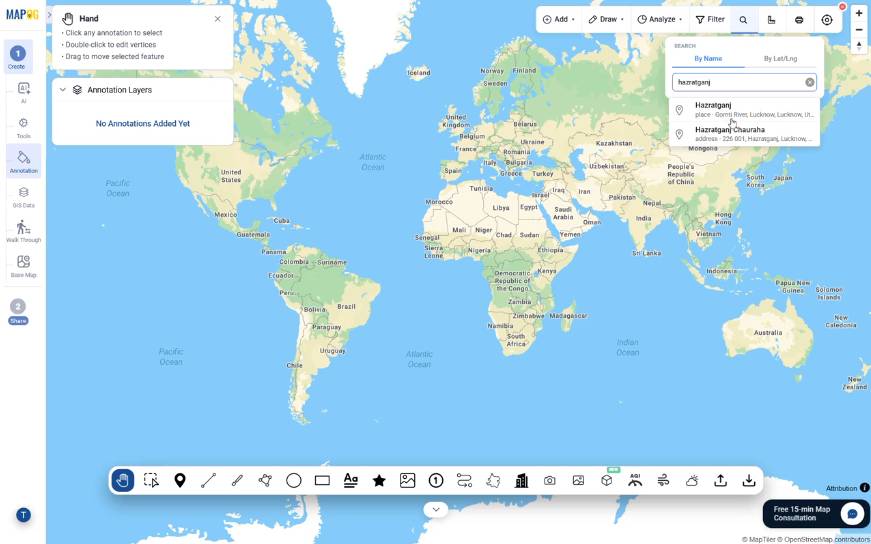
Once centered on a location, select the Shape Tool with labeling enabled to plot each breakpoint sequentially.
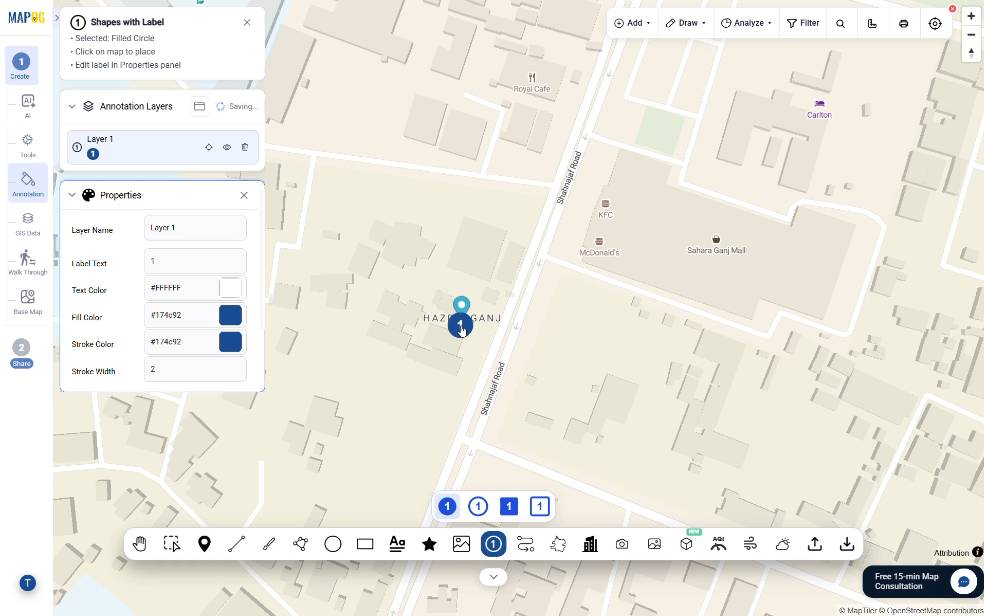
After that, assign proper layer names organized by timeline.
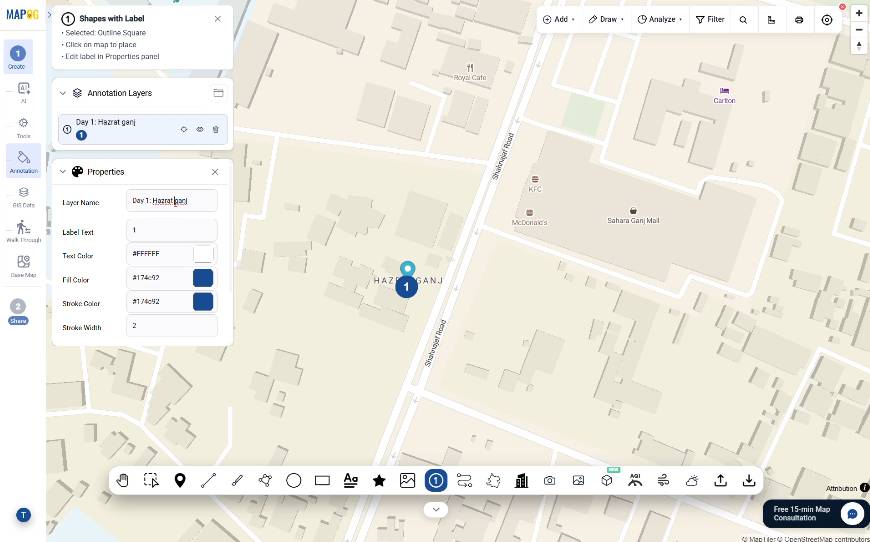
Customize your label text, color, and size to build a clear trip hierarchy.
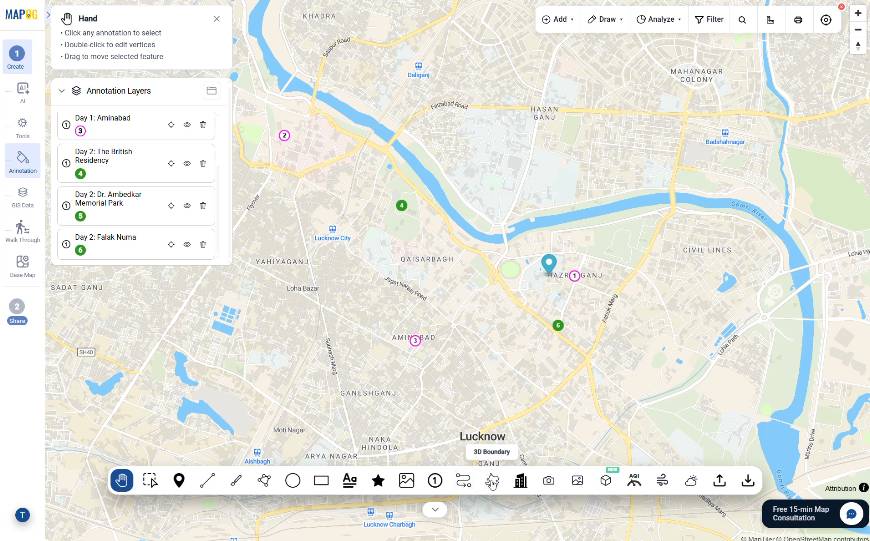
Step 3: Connect Stops with the Route Line Tool
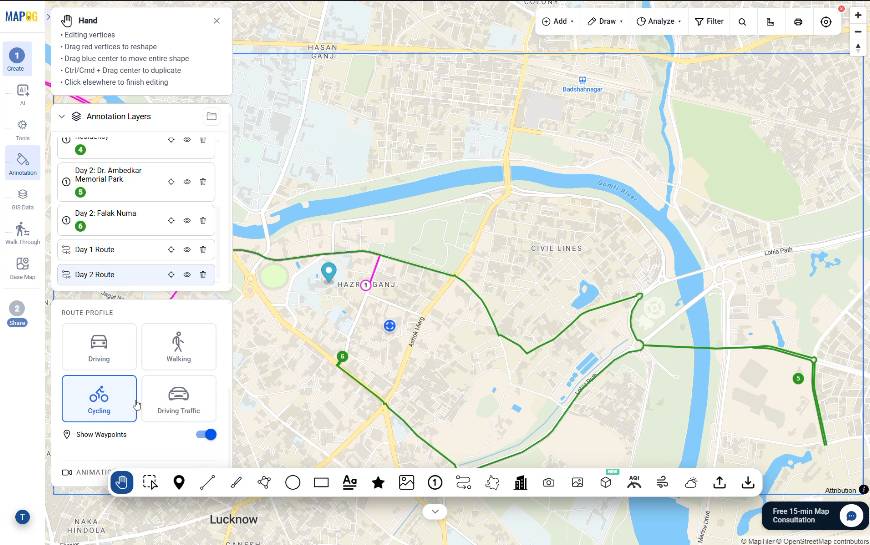
Choose the Route Line Tool to link your plotted locations in sequence.
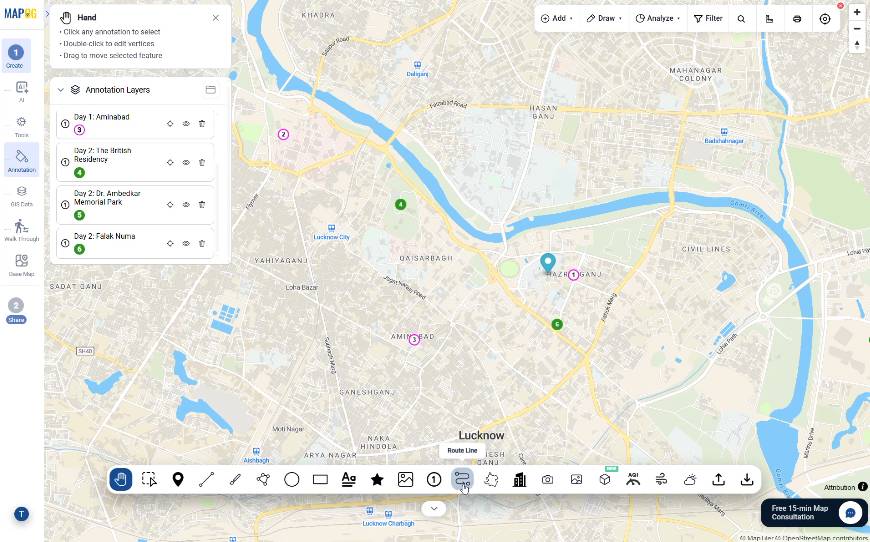
Click the points in order of travel and double-click to complete the path, letting the system connect them automatically.
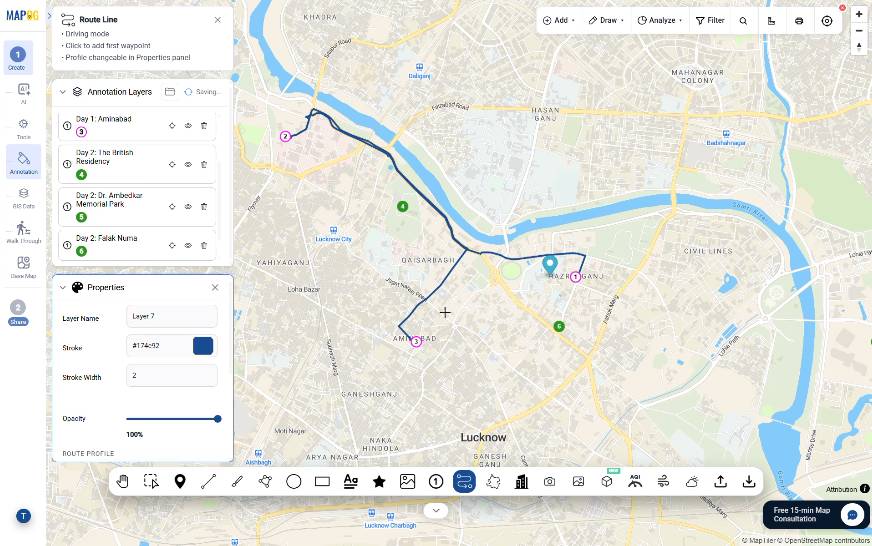
Consequently, from the properties section, refine the route by updating the layer name and adjusting the stroke color, width, and opacity.
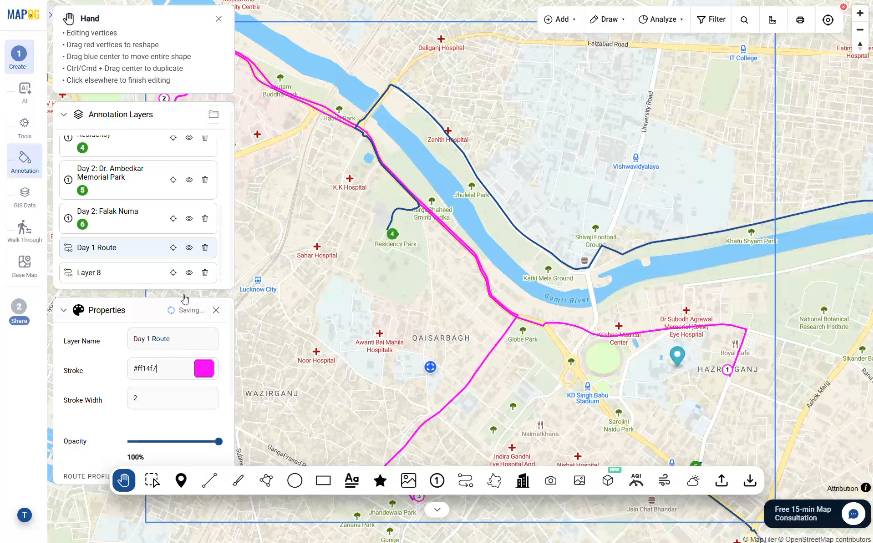
Make sure to select a suitable route profile—such as driving, walking, or cycling—to give travelers accurate expectations for real-world movement.
Step 4: Add Interactive Text Labels and Notes
After that, activate the Text Tool to add descriptive labels, opening hours, or quick insider tips directly next to each breakpoint.
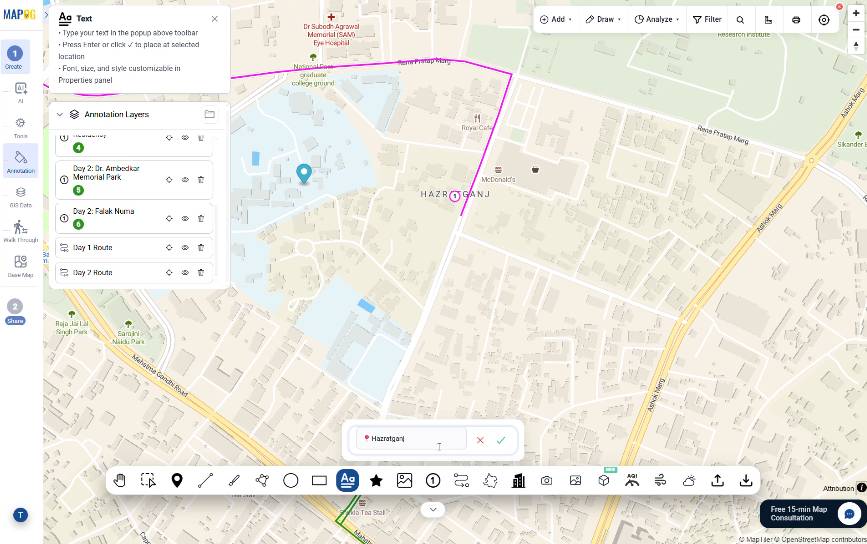
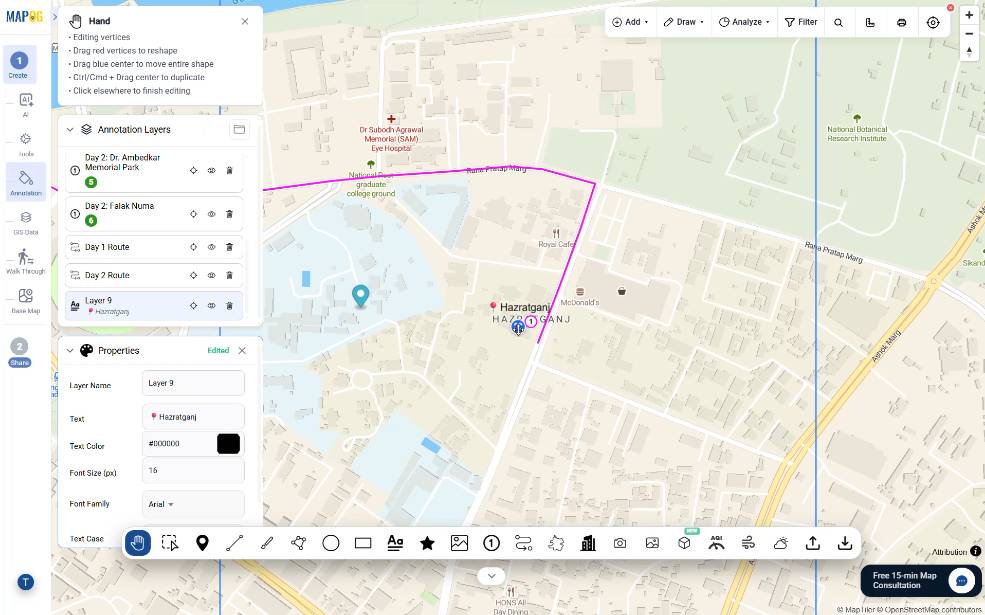
Subsequently, type your content, drag the text box into position, and customize the font style, size, and emphasis to maintain a clean visual hierarchy.
Step 5: Embed Contextual Icons for Quick Recognition
Enhance your map’s glanceability by using the Icons Tool.
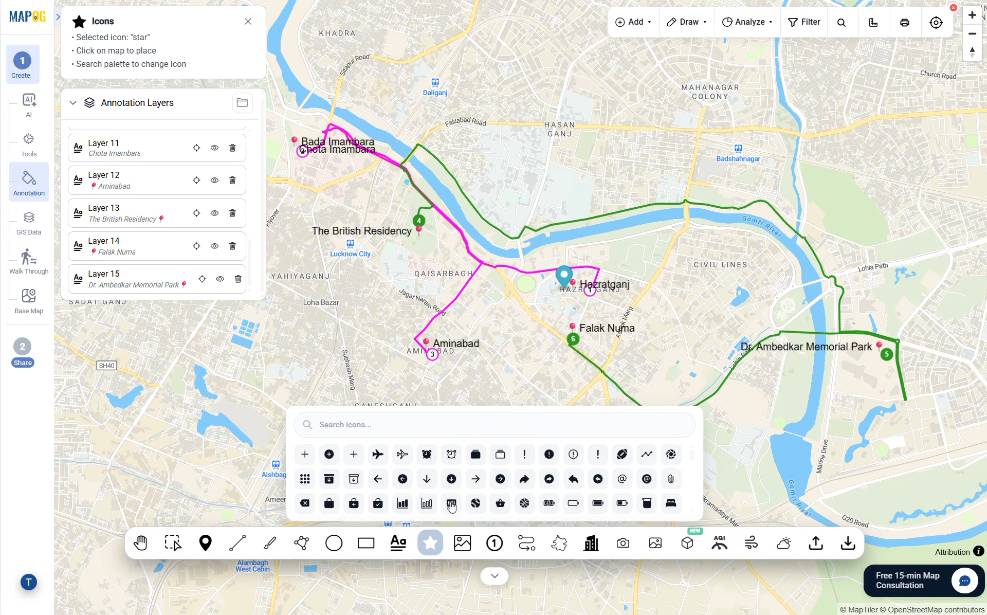
Place and customize icons over map breakpoints so users instantly recognize destination types without reading dense text.
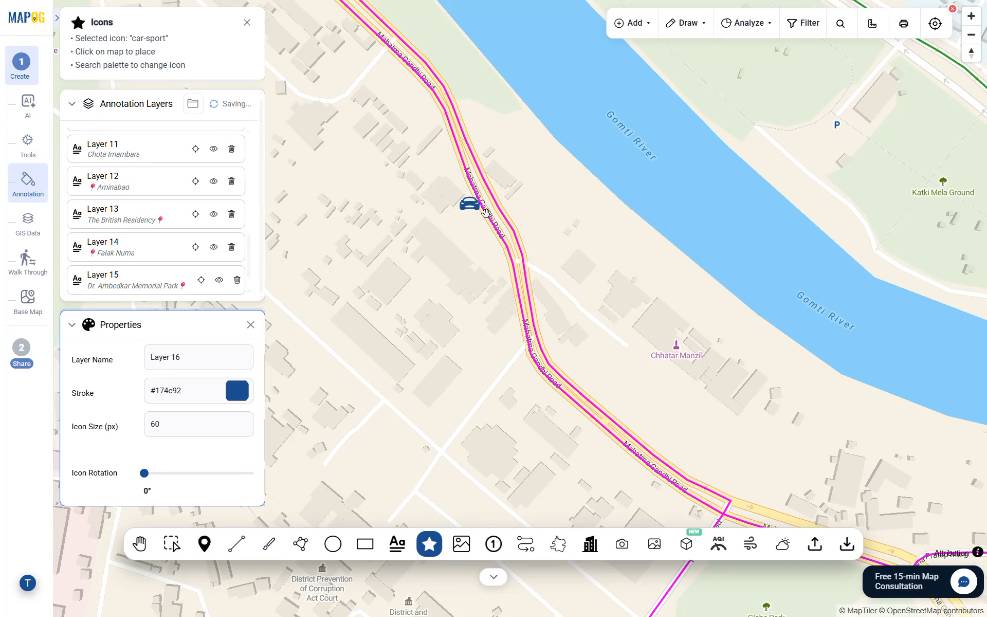
Step 6: Upload Visual Previews to Locations
After that, add rich imagery by selecting the Image Tool to upload or drag-and-drop photos of landmarks, cafes, or hotel rooms.
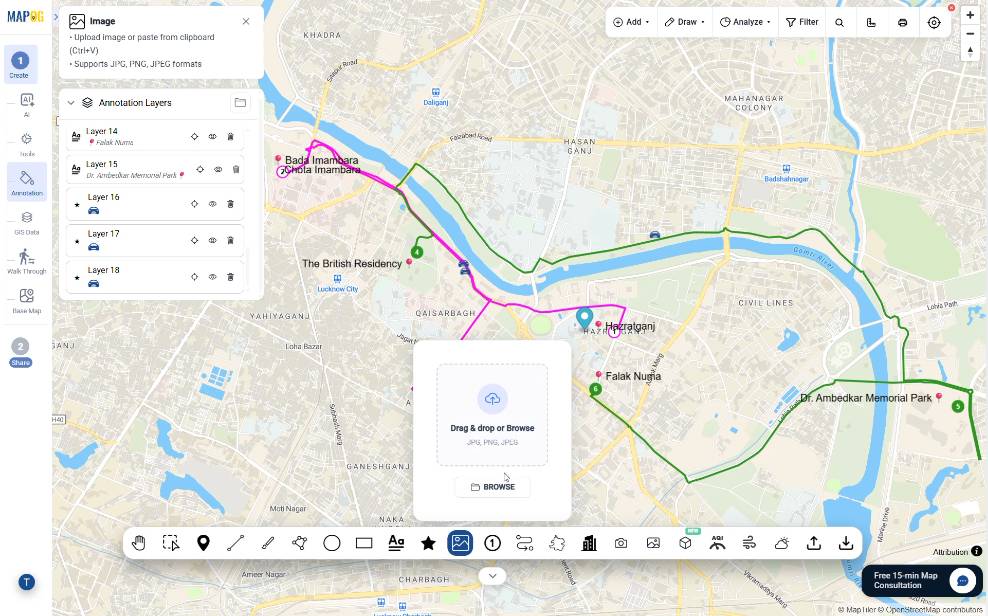
Further, draw a custom bounding area directly on the map where you want the photo preview to pop up.
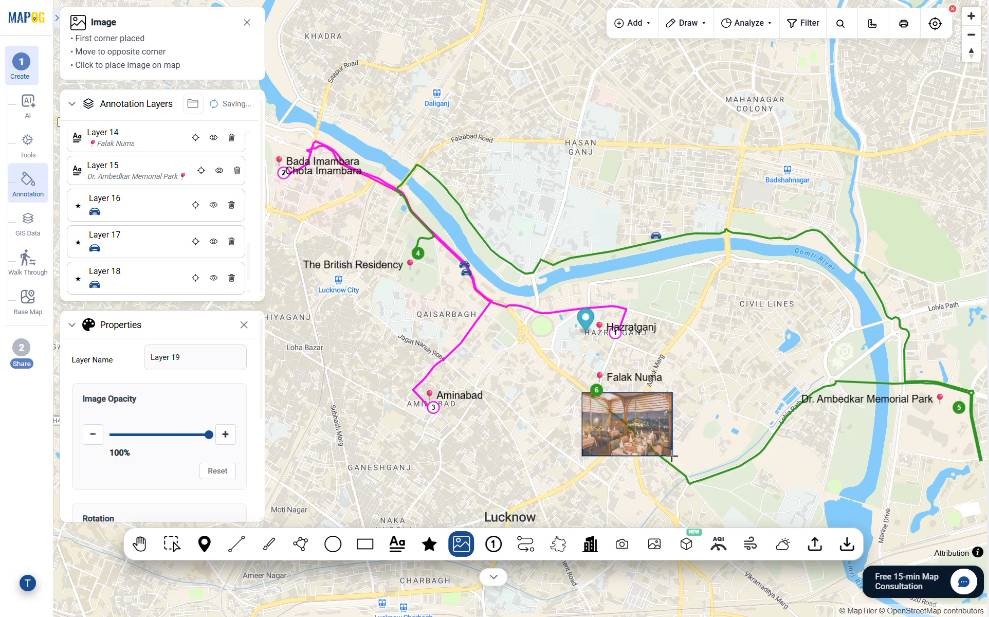
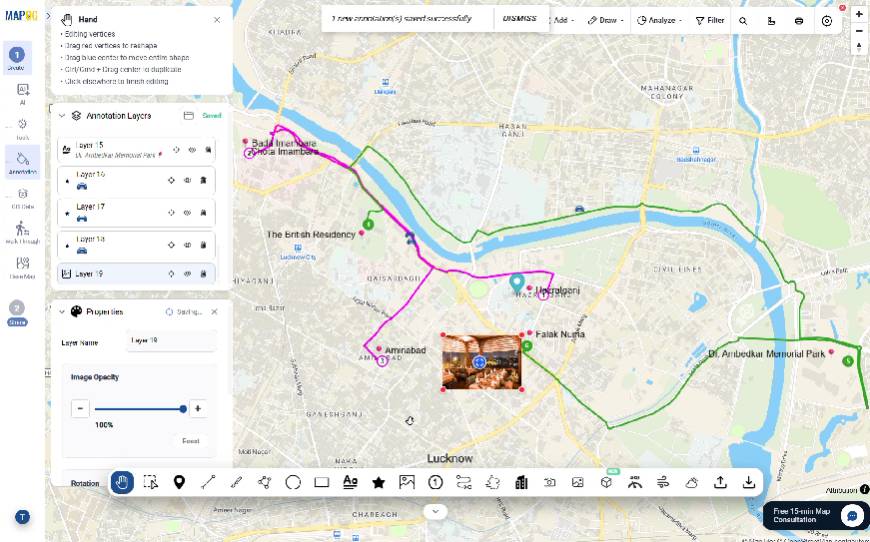
Position it precisely while adjusting the scale, rotation, and opacity to provide an exciting, clutter-free destination preview.
Step 7: Share and Publish the final itinerary
Once your itinerary is finalized, navigate to the Share and Publish panel.
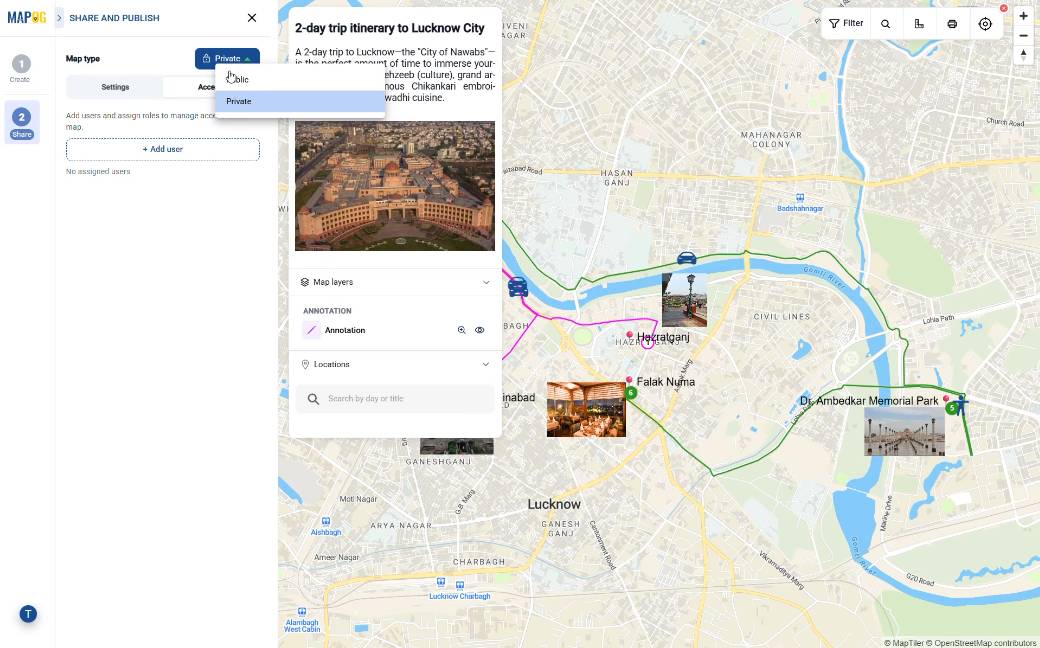
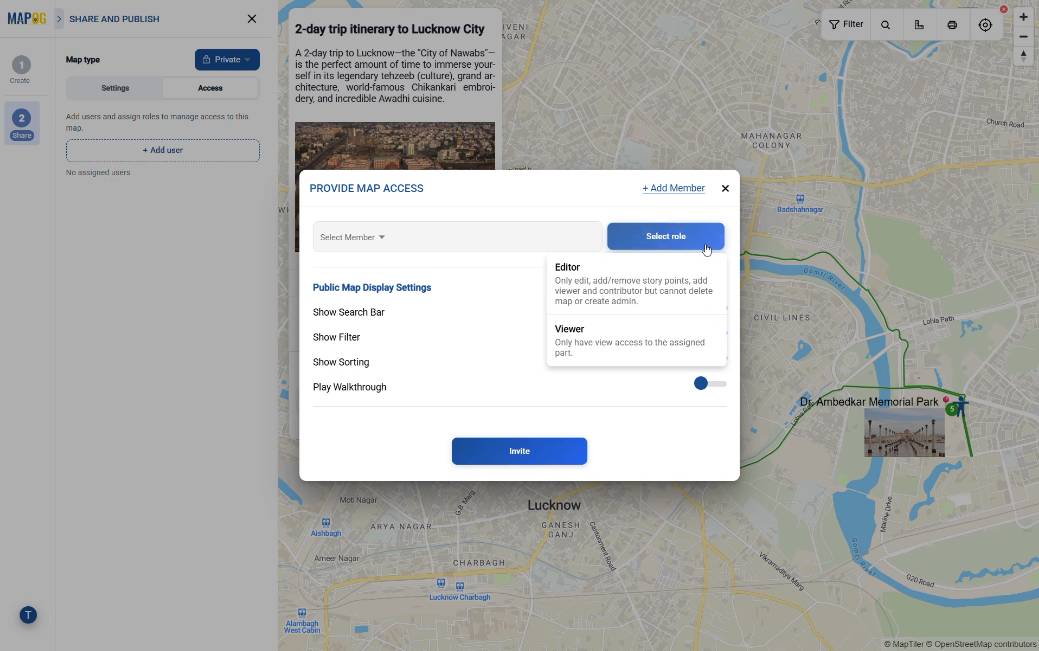
Afterwards, you can share the map privately with clients or internal team members by adding specific users and assigning roles like viewer or editor.
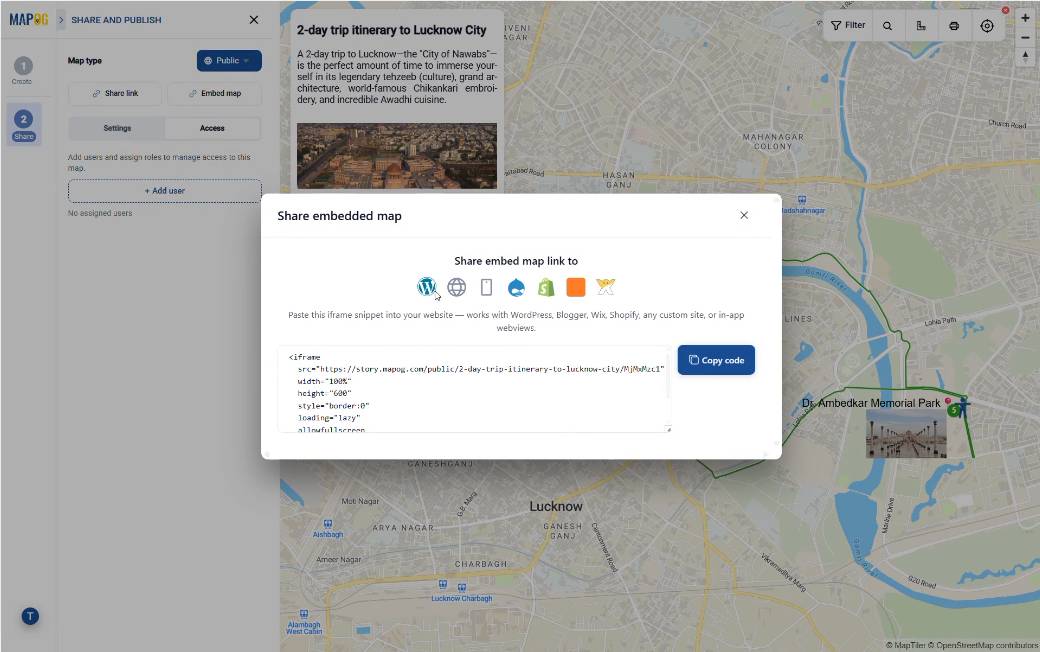
Similarly, you can make the itinerary public to generate a shareable link or a clean embed code, allowing you to drop the fully interactive map directly into a travel blog, digital brochure, or WordPress post.
Applications of Tourism Itineraries Using Interactive Map Labels
There are multiple uses of tourism itineraries curated by using interactive map labels across various industries and domains. Some of them include,
- Travel Agencies & Tour Operators: Pitch immersive, interactive daily schedules that replace boring text PDFs and close bookings faster.
- Travel Bloggers & Influencers: Replace flat, static map screenshots on your website with fully zoomable, embeddable guides your readers can actively explore.
- Corporate Event Planners: Seamlessly map out multi-venue conferences, guiding international attendees effortlessly from hotels to convention centers and evening dinner spots.
- Hospitality and Resorts: Provide arriving guests with a curated, localized map of nearby attractions and dining spots recommended directly by the concierge.
Conclusion
To sum up, in a digital landscape crowded with travel content, clarity is your ultimate competitive advantage. When you create a travel itinerary using interactive map labels, you convert raw geographic coordinates into a structured, engaging, and highly actionable guide. MAPOG’s flexible annotation tools close the loop by making your travel plans interactive, credible, and scalable. Build your itinerary map once, update it seamlessly, and let the journey speak for itself.