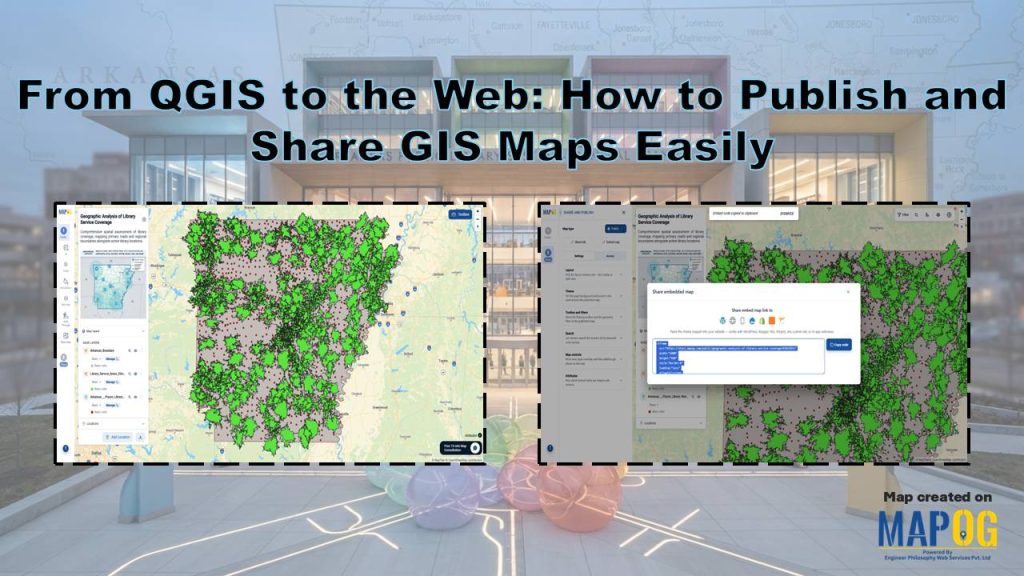
Modern GIS projects rarely stay on a single desktop. Teams need interactive maps that everyone can access. From QGIS to the Web makes this transition simple and practical. Instead of sharing large project files, organizations can publish interactive maps that support collaboration, public engagement, and faster decision-making. With the MAPOG Plugin, users can move from desktop GIS to web mapping without complicated workflows.
Key Concepts of From QGIS to the Web
A QGIS project works well for creating and analyzing spatial data but sharing it with others often proves difficult because recipients need the software and project files. From QGIS to the Web removes that limitation by converting desktop maps into interactive web maps that open in any modern browser. Using the MAPOG Plugin, you can upload layers from QGIS directly to MAPOG Maps, preserve your map styling, and publish the project online.
Step-by-Step Workflow: From QGIS to the Web
1. Prepare and Analyze Your GIS Map
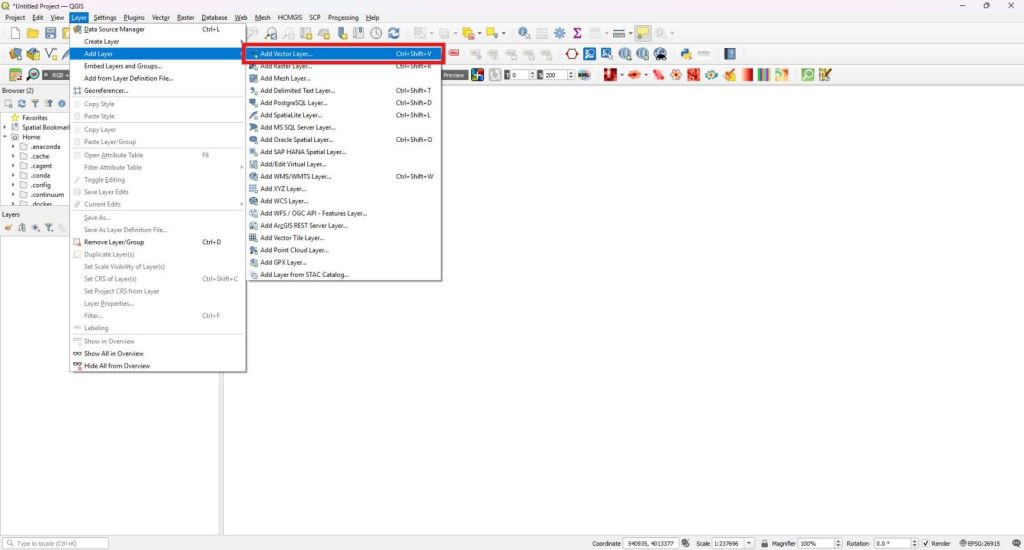
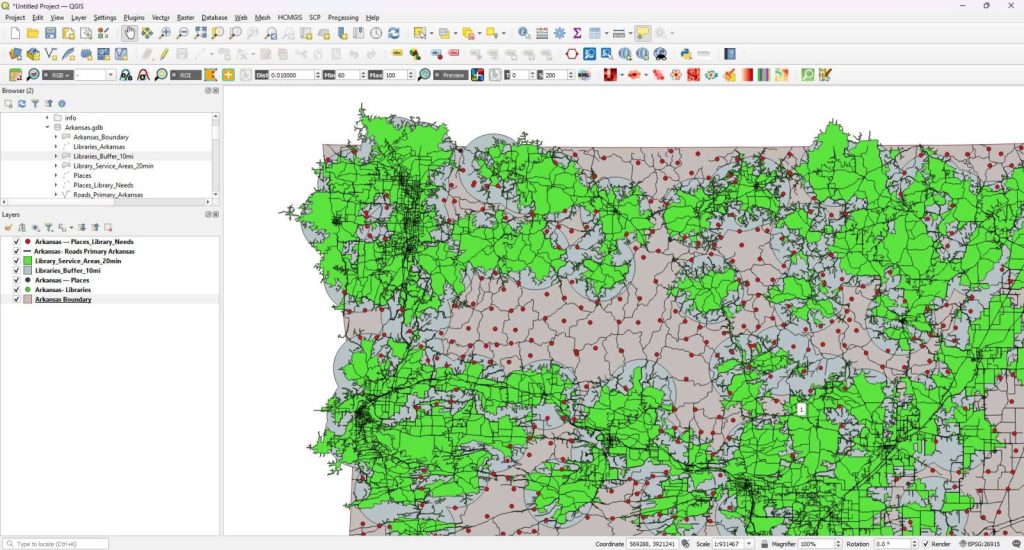
Begin by opening QGIS Desktop. Next, open an existing project or create a new one. After that, open the Layer menu and select Add Layer followed by Add Vector Layer.
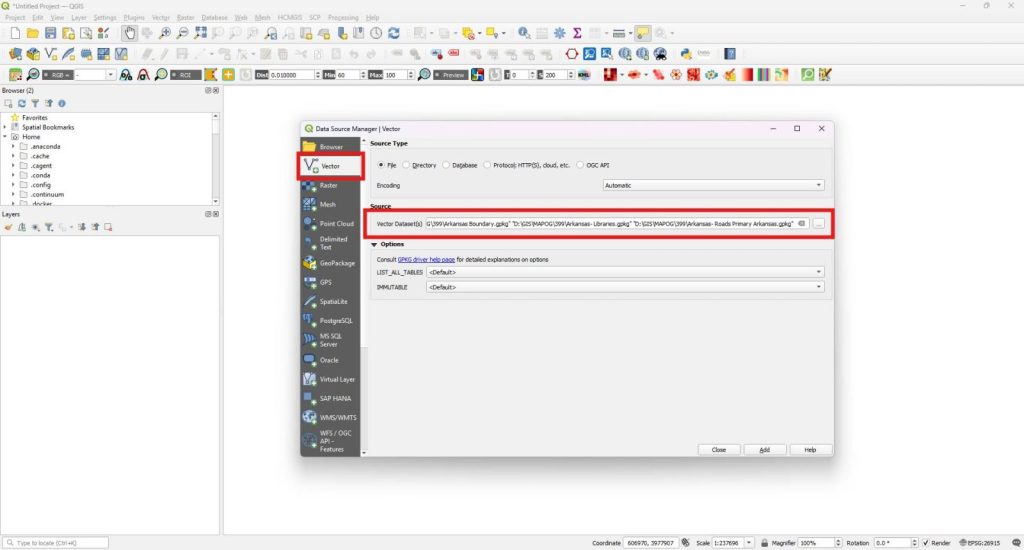
After that, browse to your datasets, select the required files, and add them to the project.
Consequently, the datasets appear in the Layers panel and become ready for visualization and analysis.
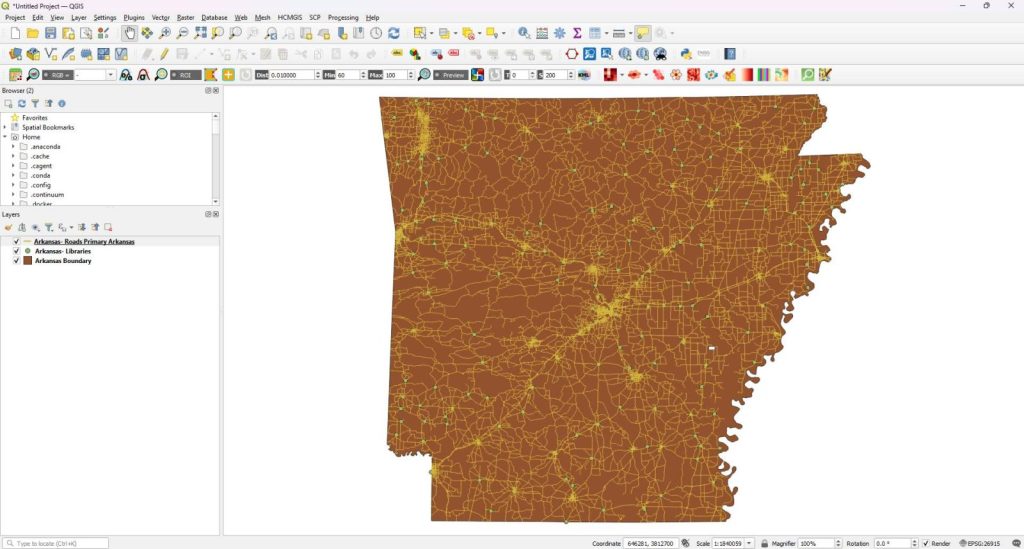
Once the layers load successfully, organize them in a logical order to improve map readability. Afterward, perform the required GIS analysis using QGIS tools.
2. From QGIS to the Web Map
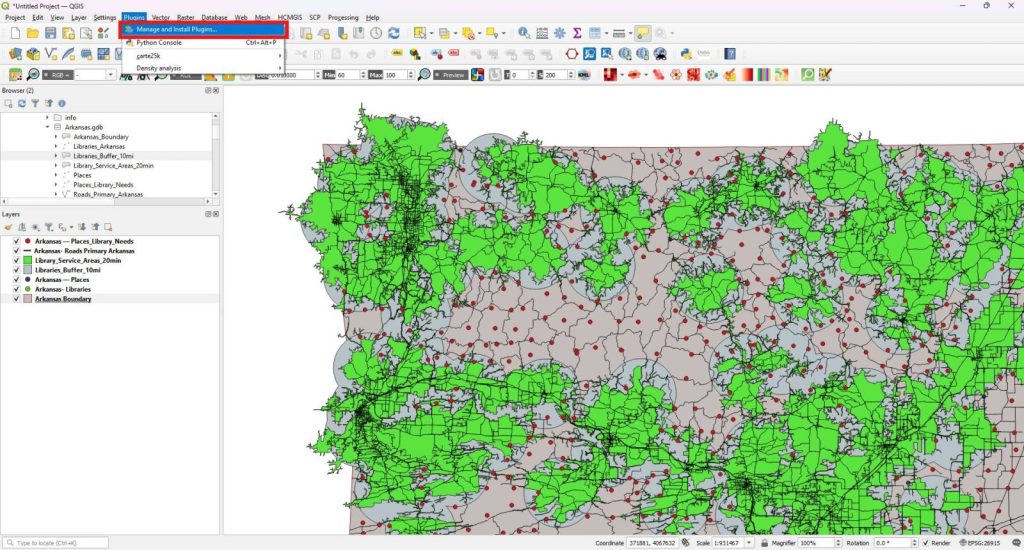
Then completing the analysis, open the Plugins menu and select Manage and Install Plugins.
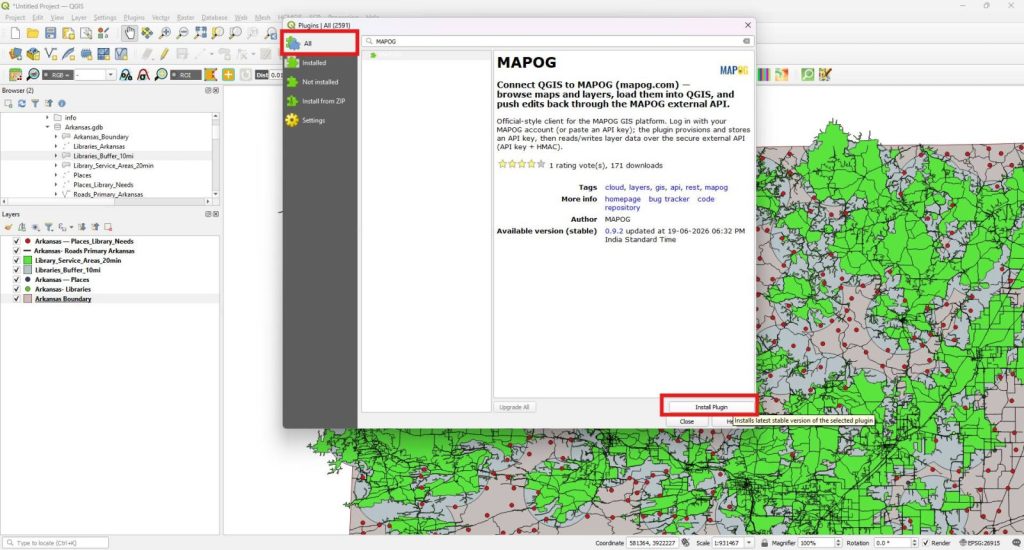
After that, search for the MAPOG plugin and install it from the All section.
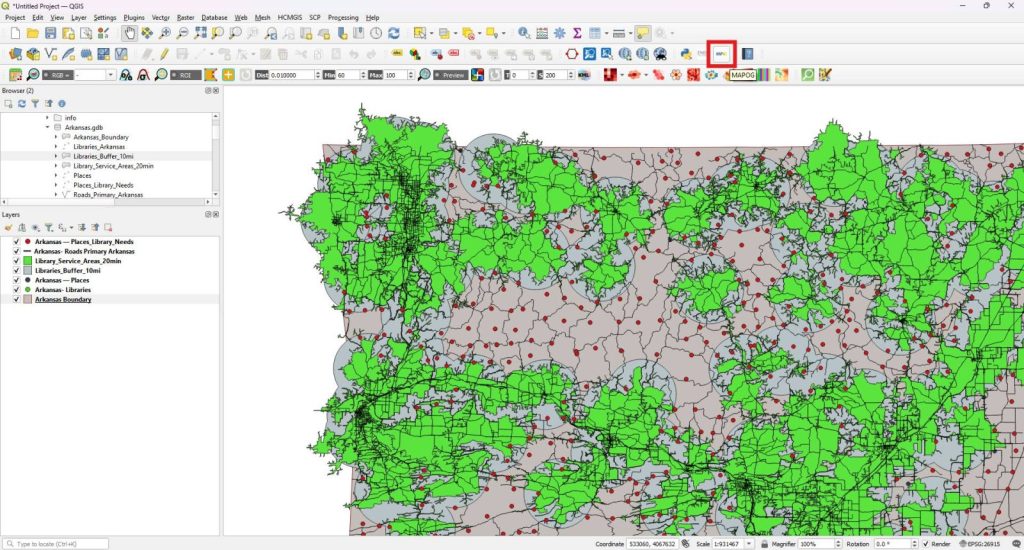
Once the installation finishes, click the MAPOG icon from the QGIS toolbar.
Then, sign in using your MAPOG account credentials.
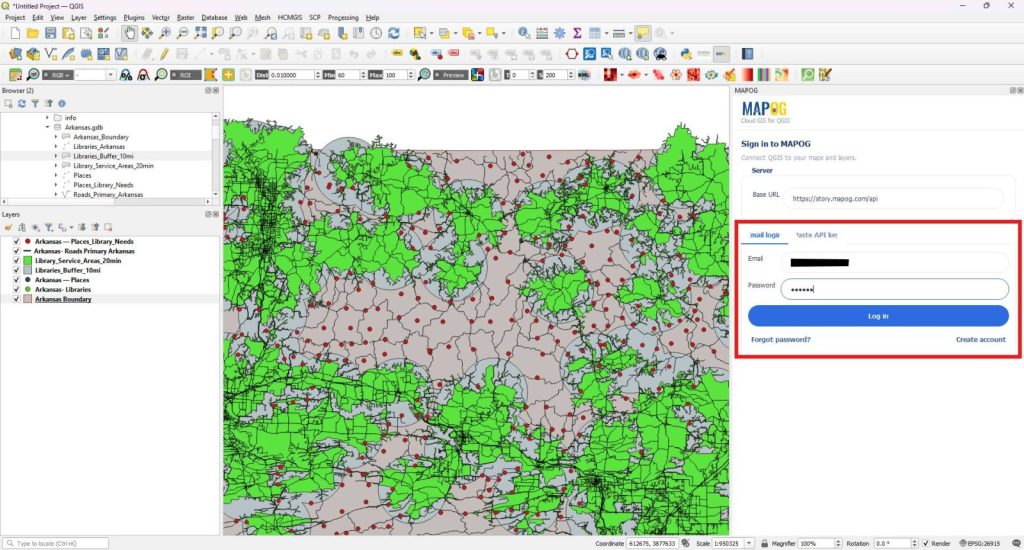
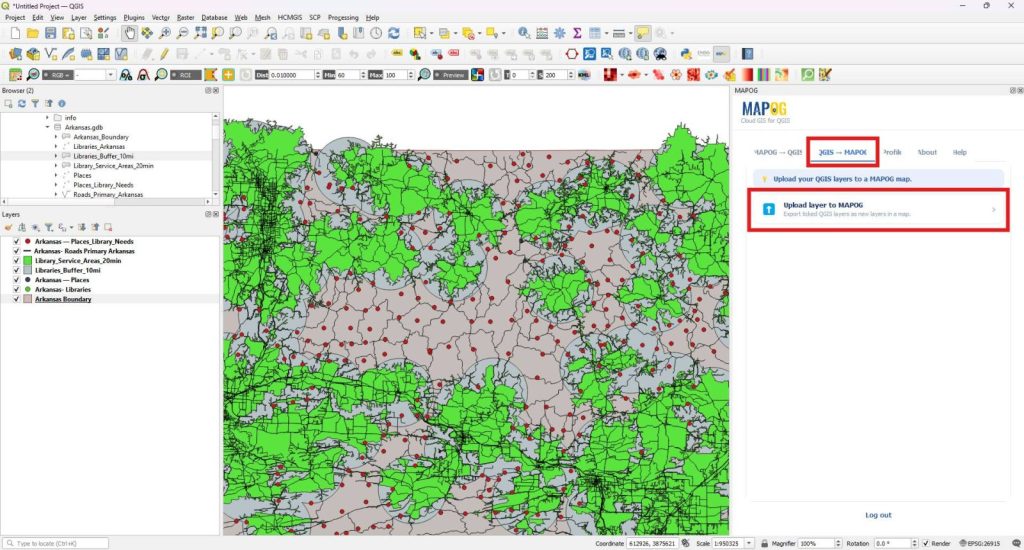
After logging in, open the QGIS to MAPOG section and select Upload layer to MAPOG.
Next, choose an existing target map from the available list or create a new map.
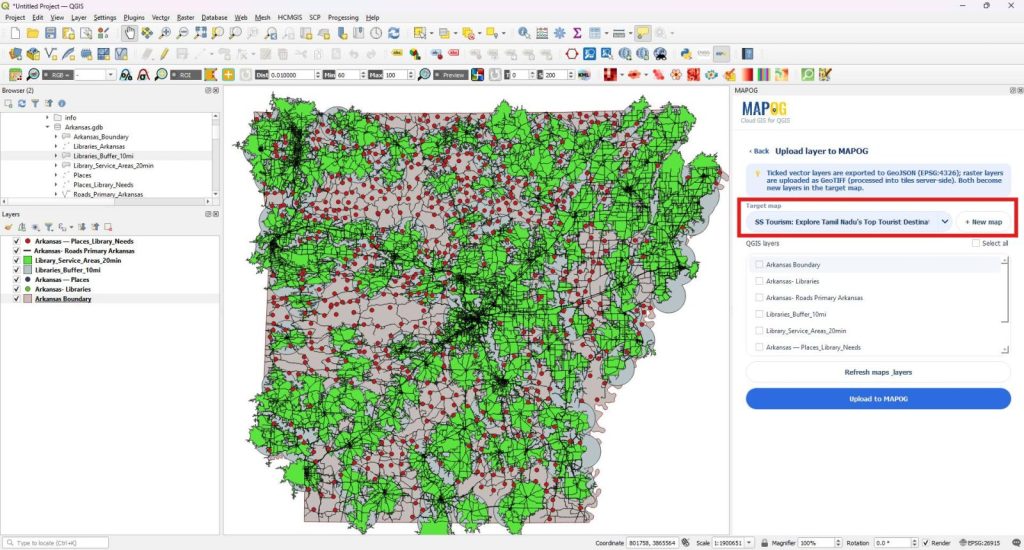
By clicking New map and entering a suitable project name.
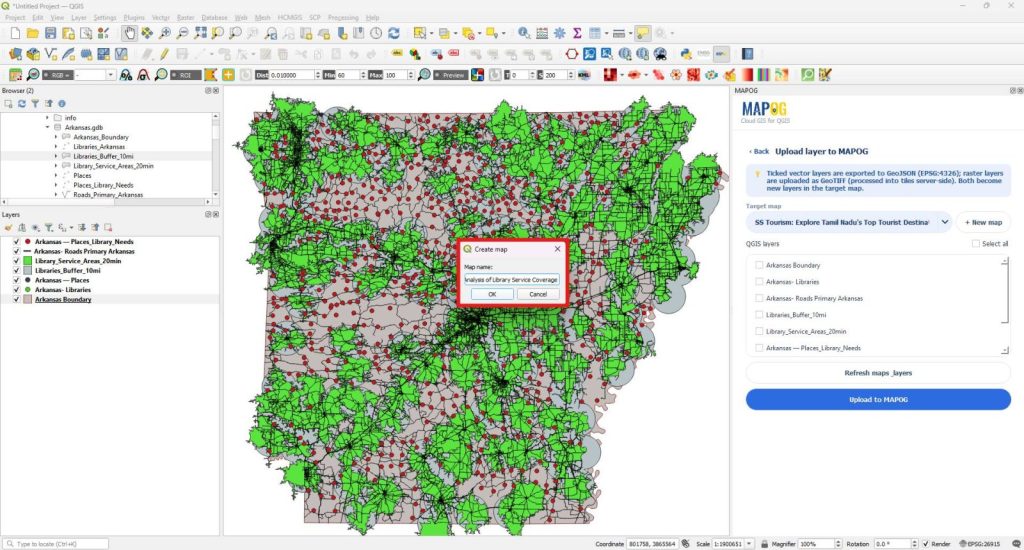
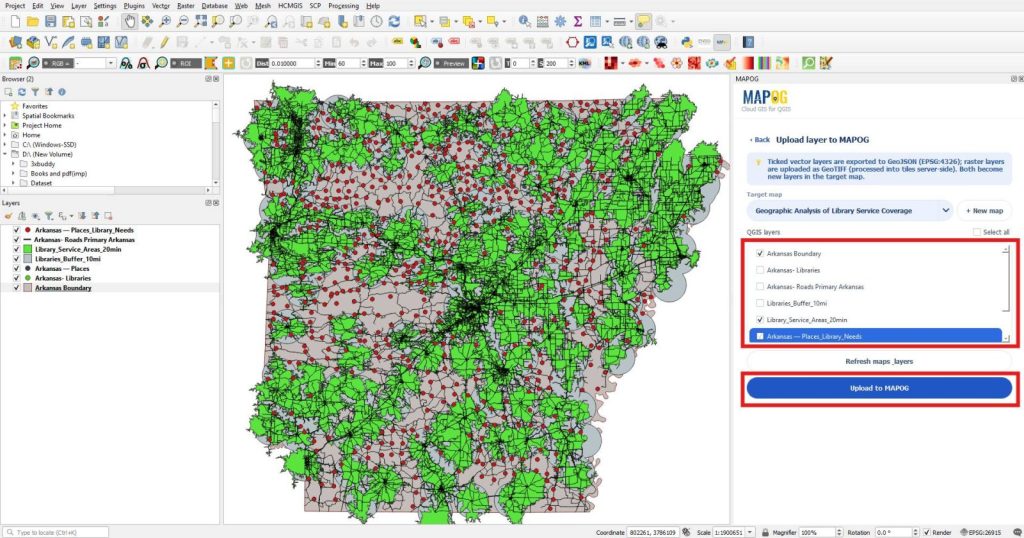
Then, select the layers you want to publish. Finally, click Upload to MAPOG. The plugin automatically uploads them securely to the target map.
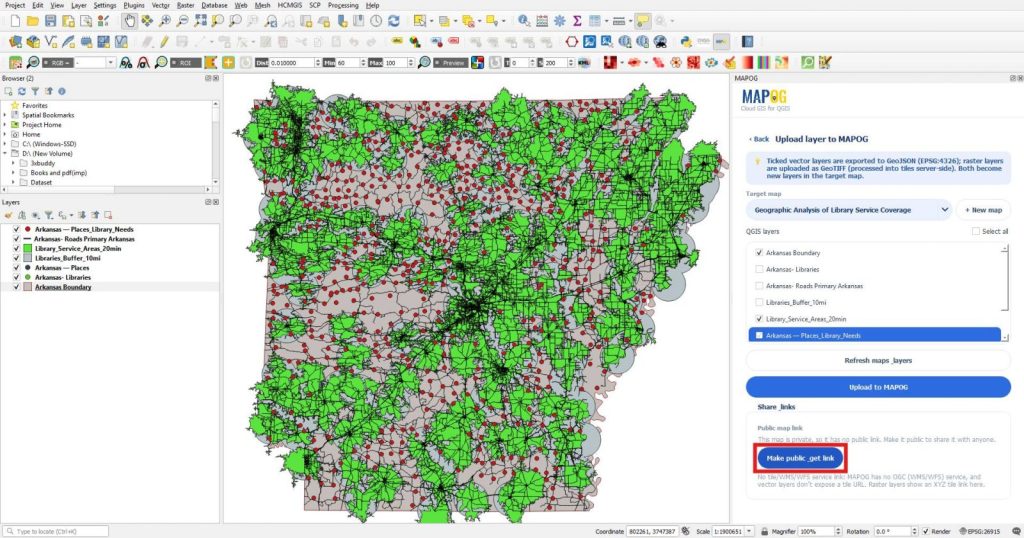
After the upload finishes successfully, scroll to the Share links section and click Make public, get link.
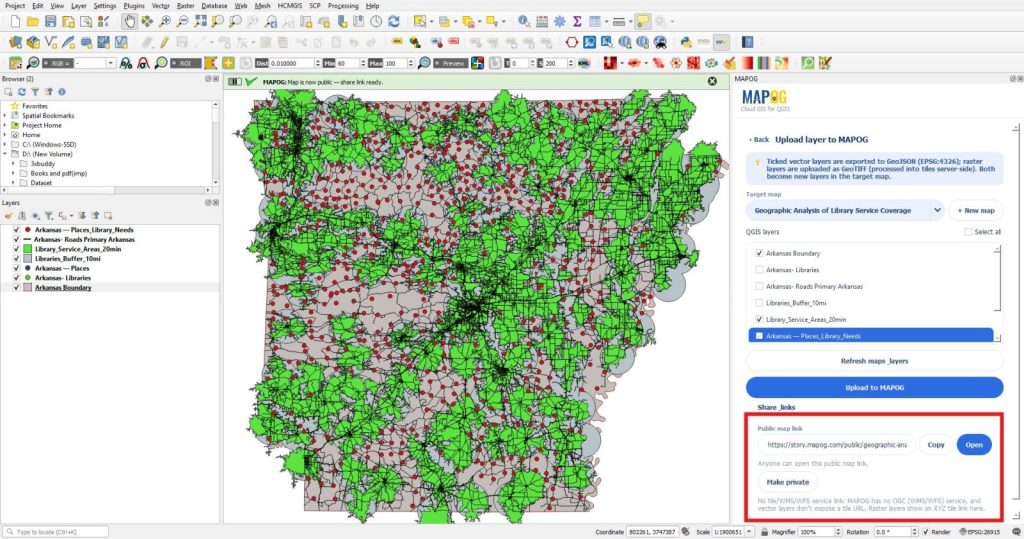
It generates a public map link that you can copy and share with others or open directly in your web browser.
3. Open and Verify the Map
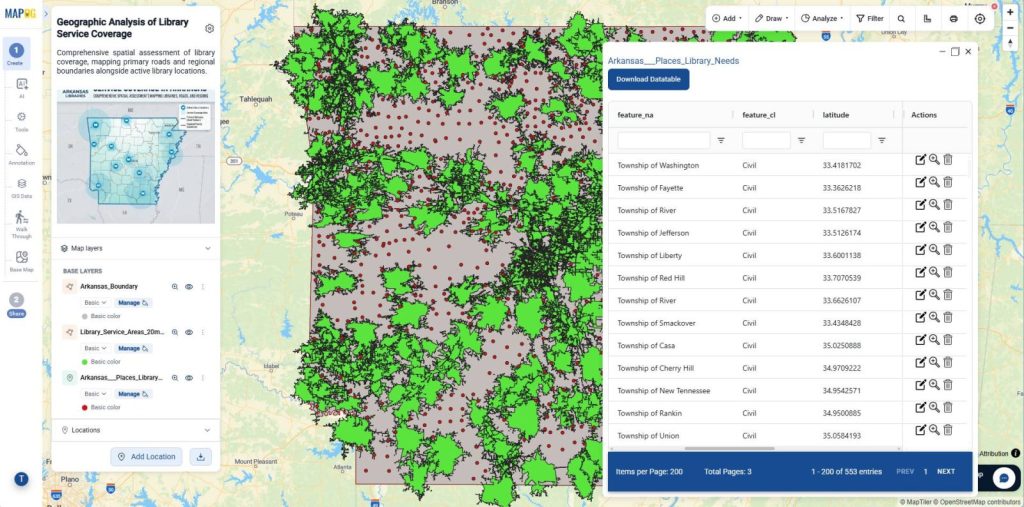
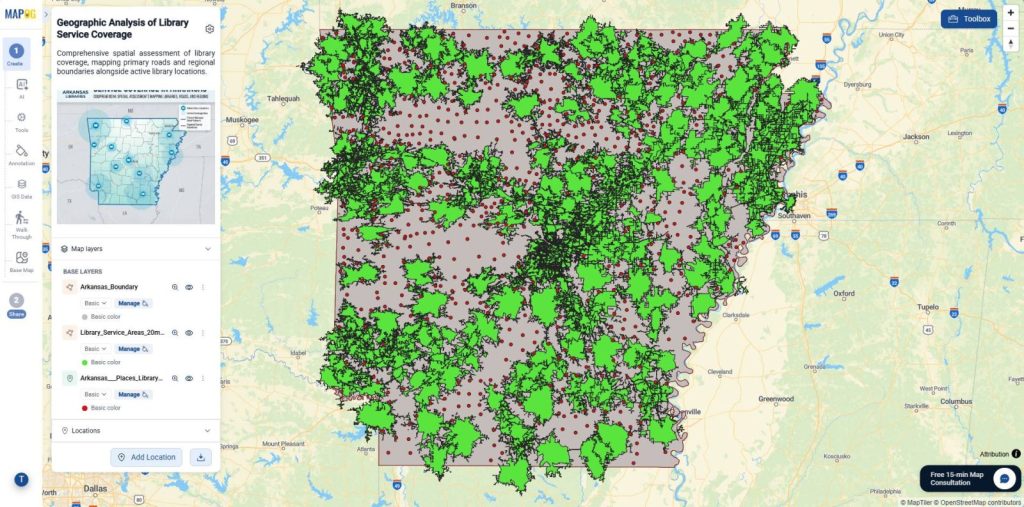
After the upload completes, open MAPOG and sign in to your account. Next, navigate to the Create & Publish Maps module and open the same map. This step lets you verify the published project before sharing it.
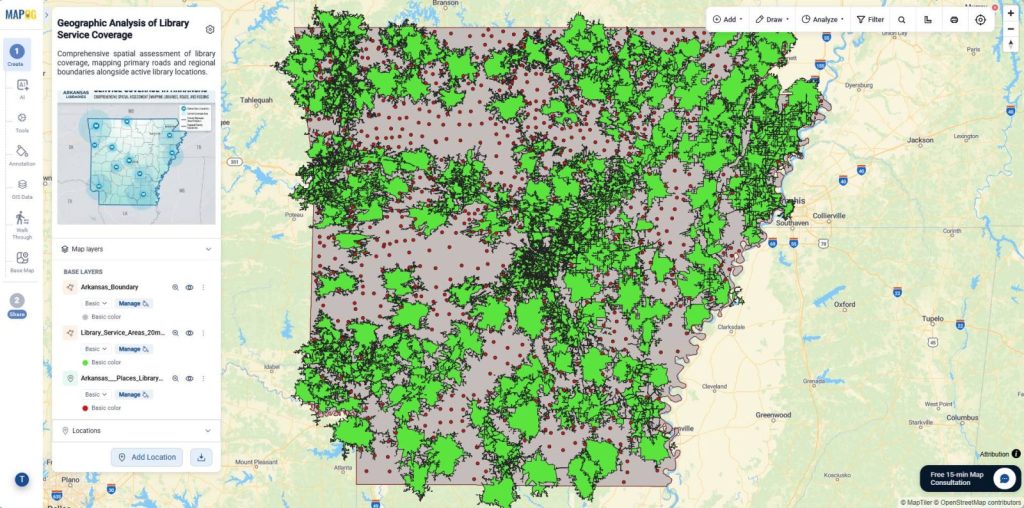
Then, review every uploaded layer in the Map layers panel. You can toggle layer visibility, inspect attribute tables, download datasets, and confirm that the uploaded information matches your QGIS project.
4. Share and Publish the Map
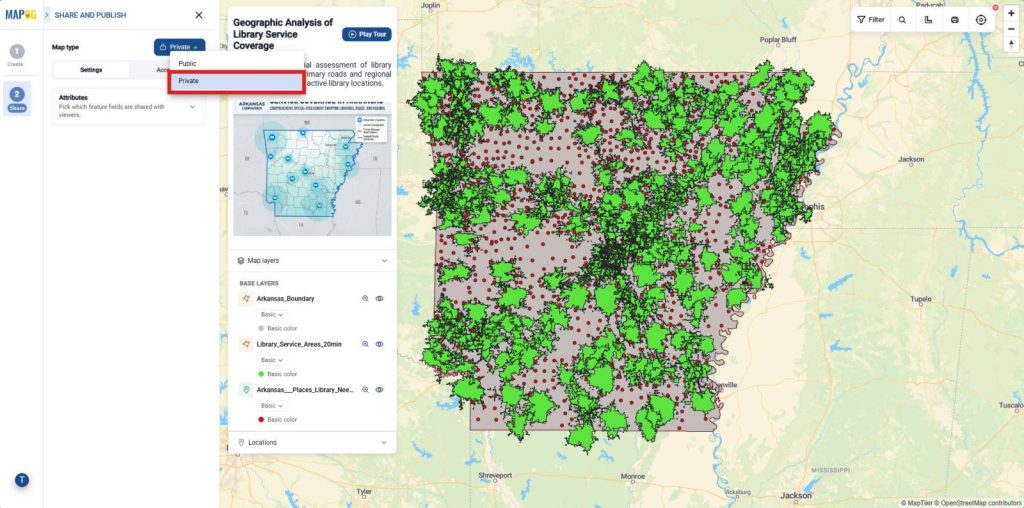
Once the verification is complete, open the Share and Publish section. By default, the platform keeps new projects private to protect your data.
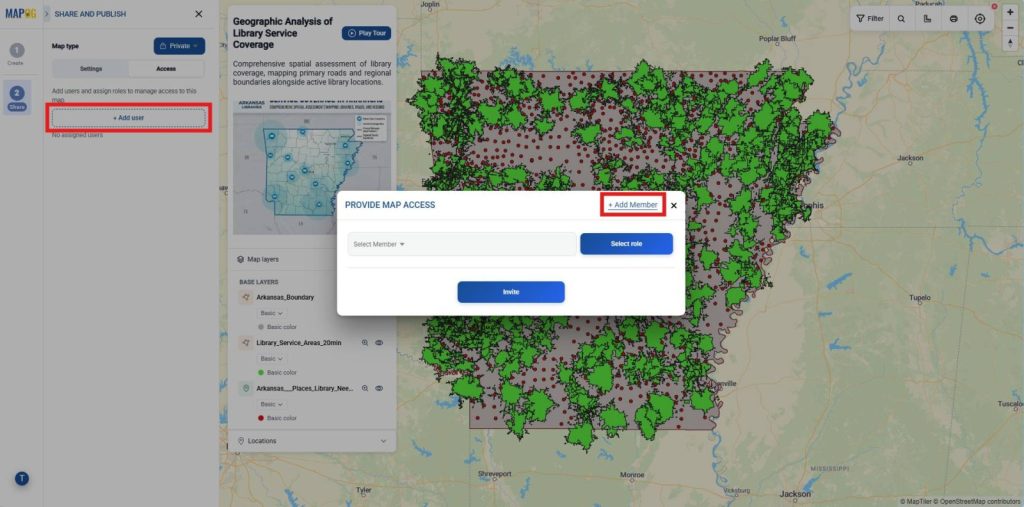
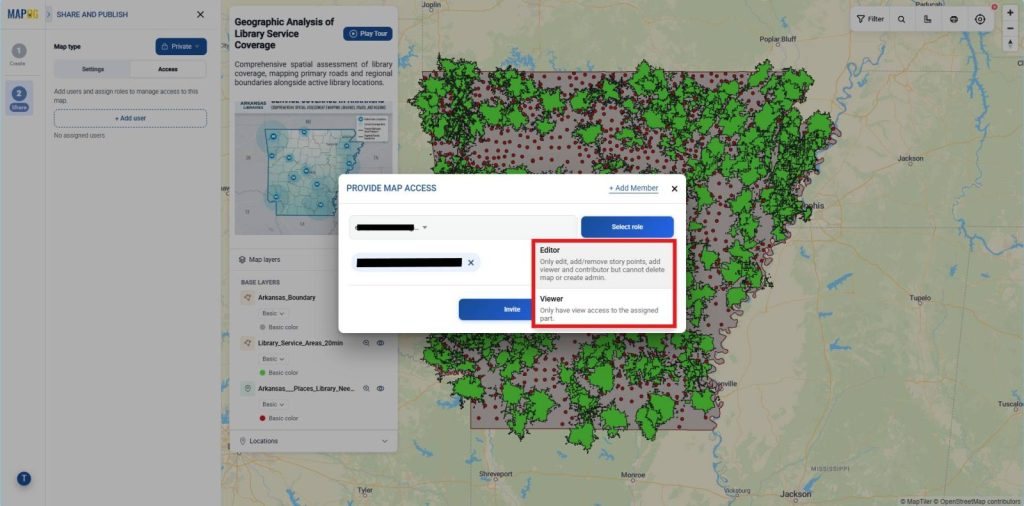
Next, click Add User, and go to add member to add new members.
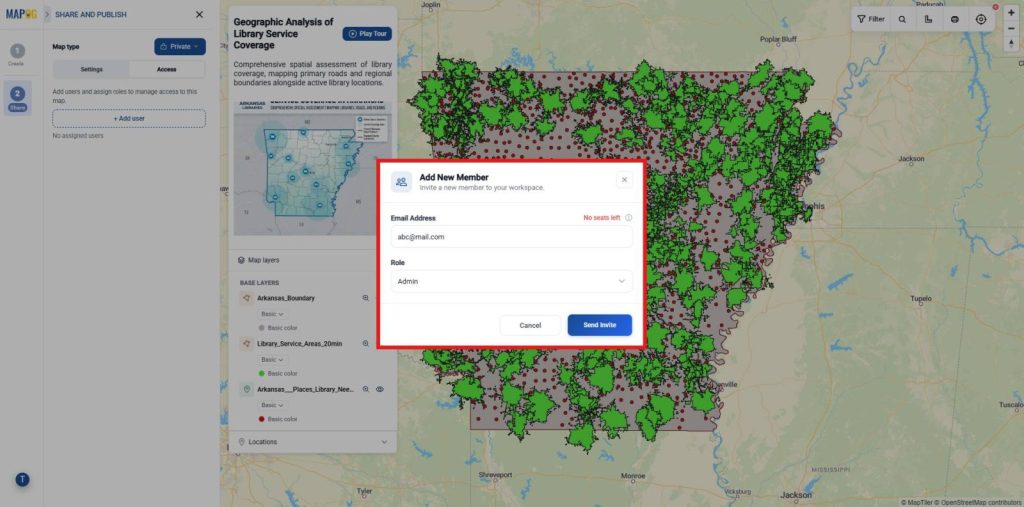
enter the member’s email address. After that, choose Admin for full access or Others to assign Editor, Contributor, or Viewer permissions. Finally, click Send Invitation.
After that, Select members from the select member dropdown and assign the appropriate role, including Editor, or Viewer then click Invite. Therefore, each stakeholder receives suitable permissions while sensitive retail and customer catchment data remains secure.
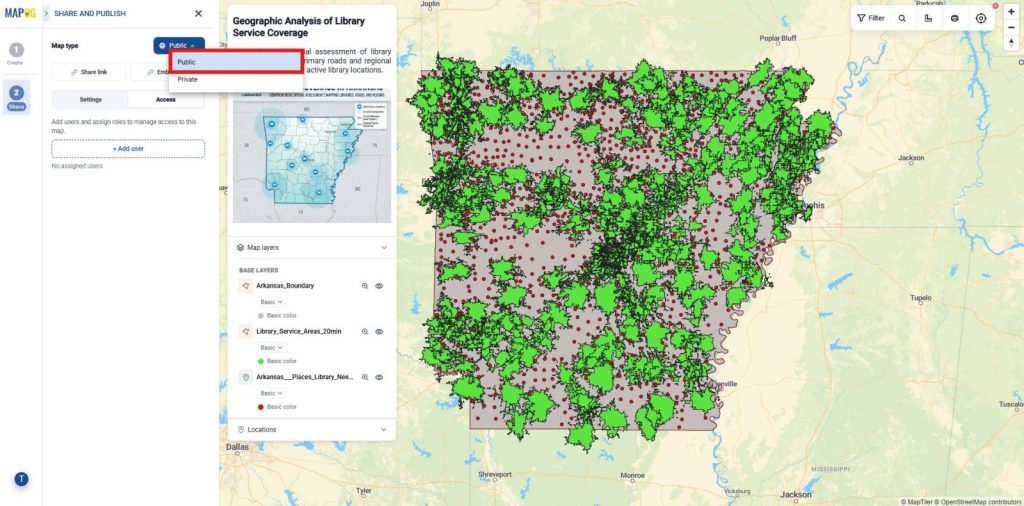
Alternatively, change the Map type to Public when the project is ready for wider distribution.
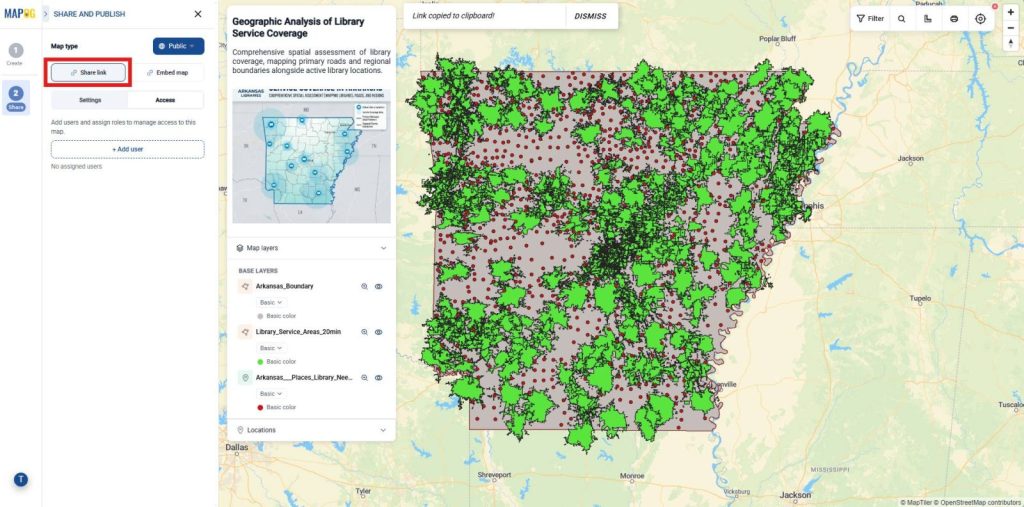
Use Share link to copy a public URL for reports, presentations, emails, or social media.
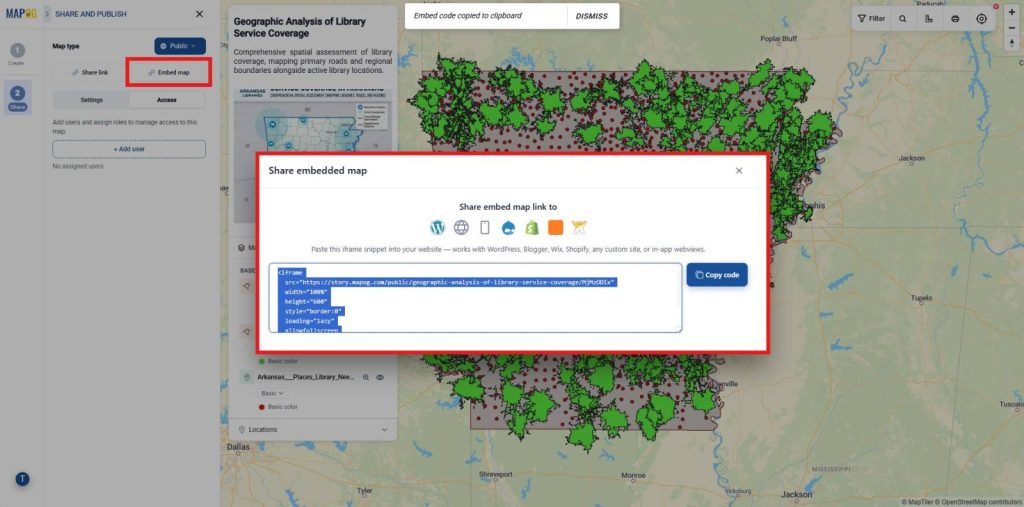
Likewise, use Embed map to generate an embed code for websites, blogs, or web applications. Consequently, stakeholders can interact with the live GIS map.
Industries and Domains Benefitting from From QGIS to the Web
- Urban Planning: Planners can publish zoning maps, infrastructure projects, and public consultation maps for citizens and decision-makers.
- Utilities: Utility providers can publish infrastructure networks and asset maps, allowing field teams to access updated information from any location.
- Real Estate: Property developers and agencies can showcase project locations, amenities, and nearby facilities through interactive web maps, helping clients explore locations more effectively.
Conclusion
From QGIS to the Web transforms desktop GIS projects into accessible, interactive web experiences. With the MAPOG Plugin, users can upload layers directly from QGIS to Web Maps, create professional interactive maps, and publish them within minutes. After uploading, MAPOG allows users to share maps through links or website embedding, making geographic information available to a wider audience.