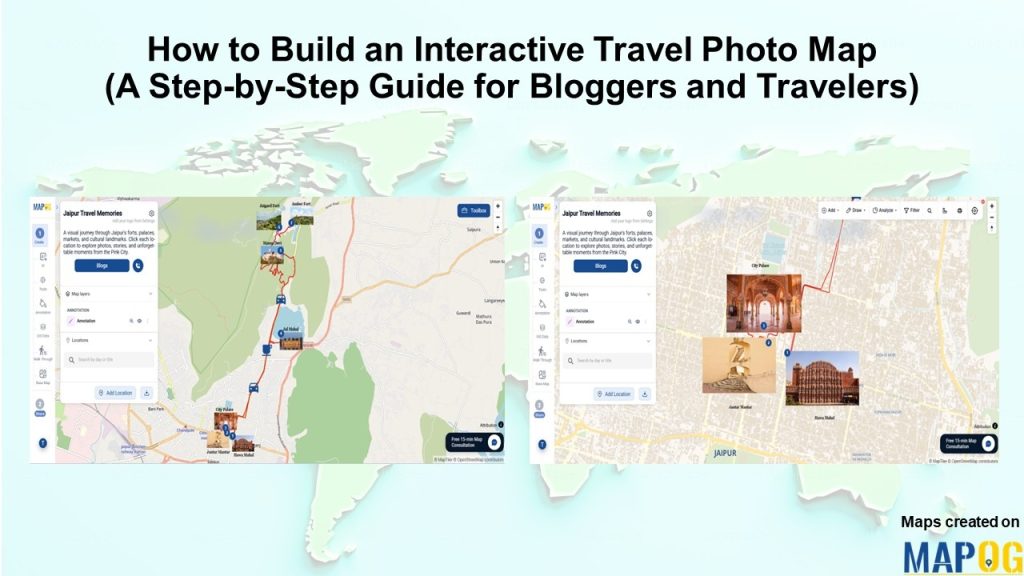
Travel photos often end up scattered across photo galleries, cloud storage, hard drives, and social media platforms. While the photos remain accessible, the story behind the journey becomes fragmented and difficult to revisit. An interactive travel photo map solves this challenge by bringing destinations, photos, notes, and travel experiences together in a single visual interface.
Instead of scrolling through endless albums, viewers can explore a map, click on destinations, and discover the memories associated with each location. MAPOG simplifies this process by combining mapping, storytelling, and multimedia content into one interactive travel experience. Whether you are a travel blogger, photographer, influencer, or an avid traveler, an interactive travel photo map helps transform ordinary travel records into engaging digital scrapbooks.
Key Concept of Interactive Travel Photo Maps
An interactive travel photo map combines geographic locations with visual storytelling. Every destination becomes more than a marker on a map, it becomes a memory hub containing photos, travel notes, recommendations, and personal experiences.
By combining routes, labels, images, and annotations, travellers can document their journeys in a structured format that is easy to share and explore. Instead of presenting disconnected travel photos, the map creates a complete narrative that allows viewers to follow the journey exactly as it happened.
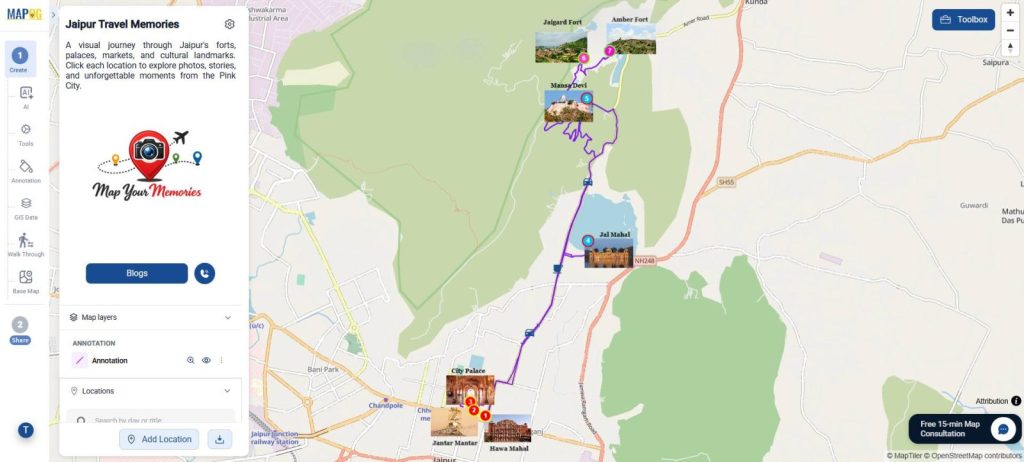
Step-by-Step Workflow
Step 1: Create and Brand Your Travel Photo Map
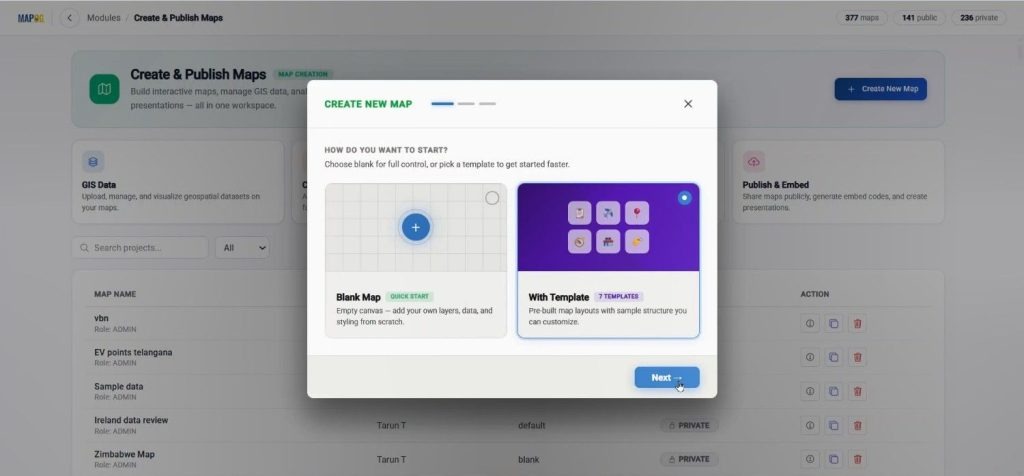
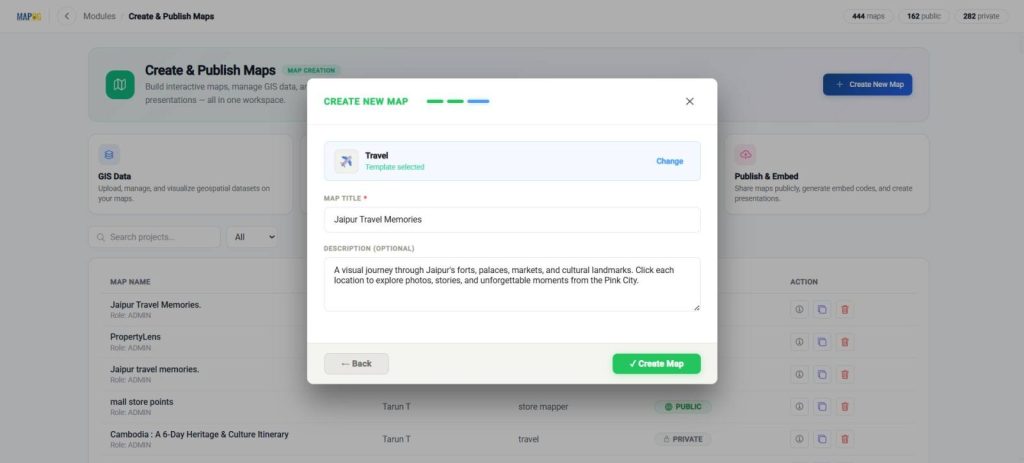
To begin, open MAPOG and go to the Create & Publish section. Then click Create New Map & choose with template option.
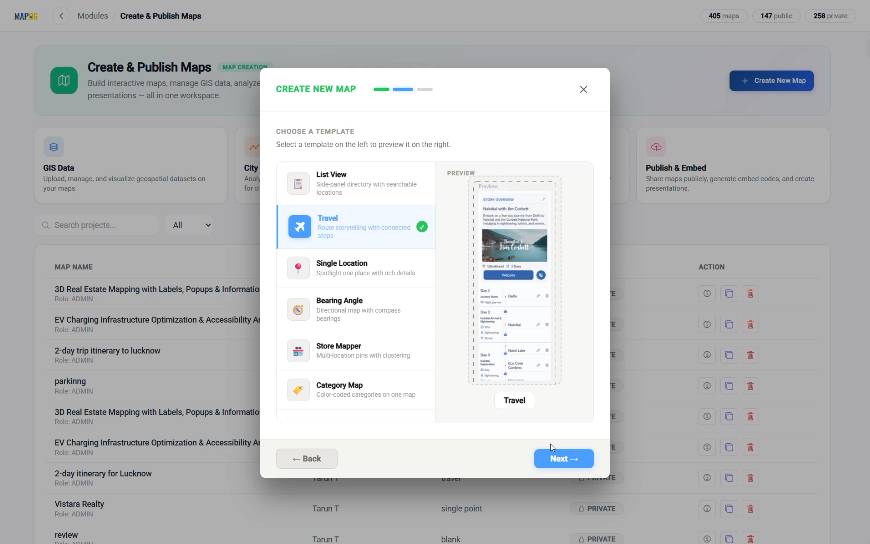
Choose the Travel Map Template, which provides a ready-made workspace designed specifically for documenting travel experiences.
Next, enter a title and description for your project. Once everything is configured, click Create Map.
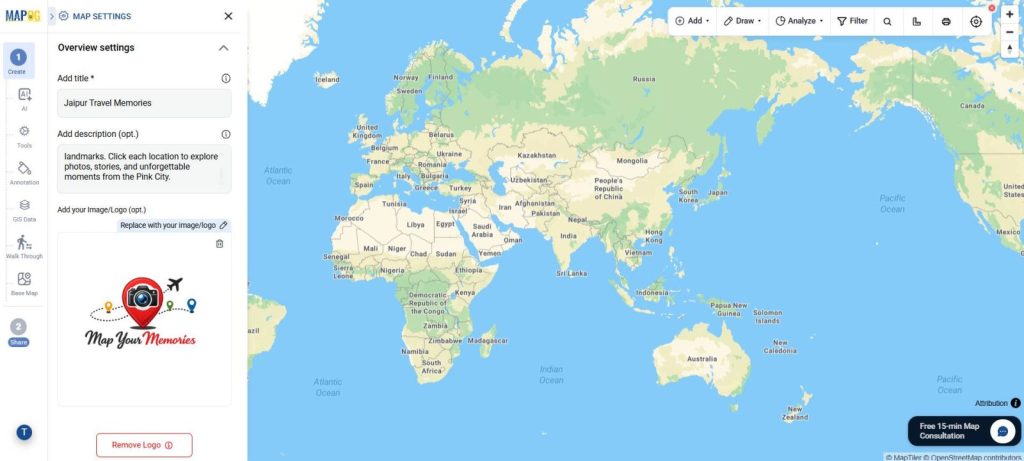
To make your project visually appealing, open Map Settings and upload a cover image.
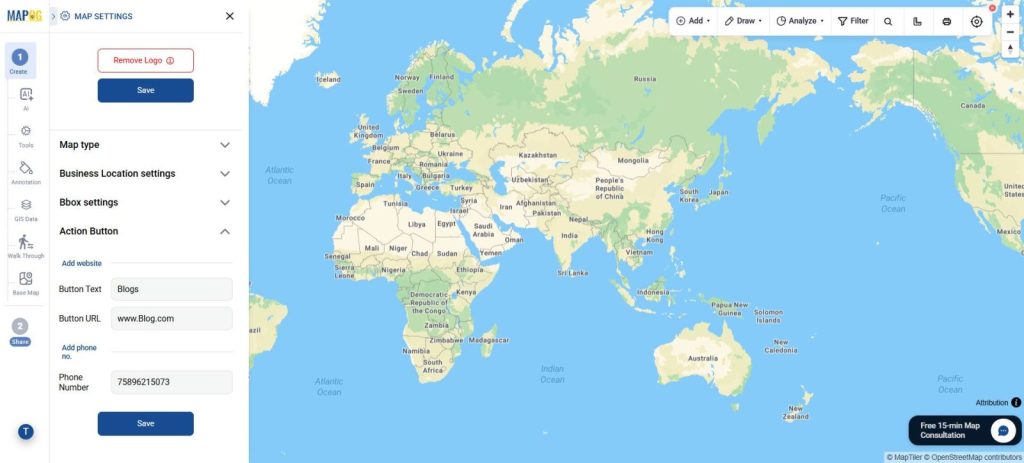
You can also configure action buttons to include your travel blog, website, or contact information, allowing visitors to explore additional content related to your travels.
Step 2: Search and Add Travel Destinations
The next step is to add destinations to your map. Navigate to the Annotation section and use the search bar to locate destinations by place name or exact coordinates.
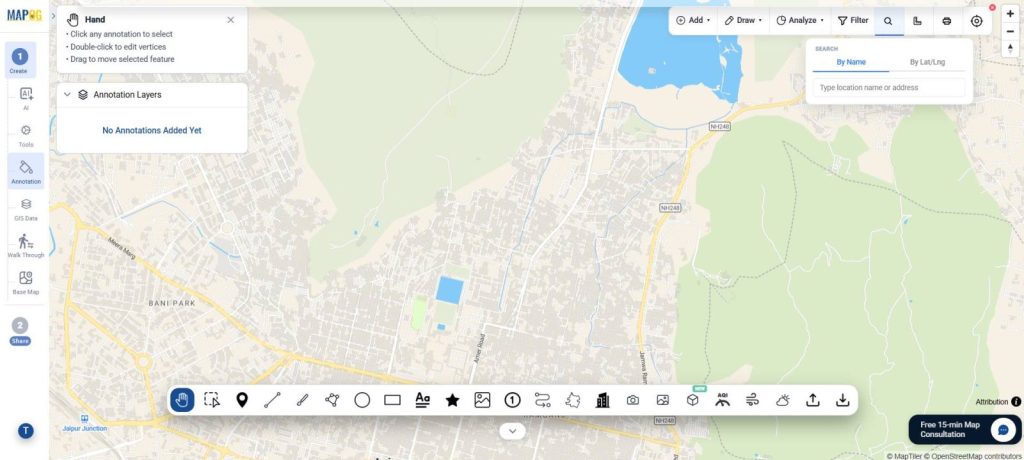
Once the map centers on a location, Choose a shape with a label and place it directly on the destination.
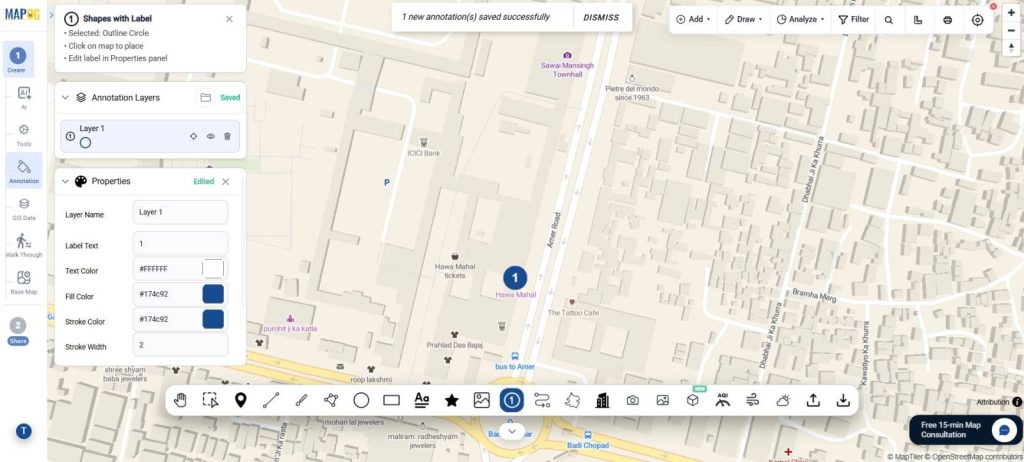
To maintain clarity and organization, rename each marker using the actual destination name rather than generic labels. Properly named locations make the map easier to navigate and understand. Edit color, size & opacity of each location.
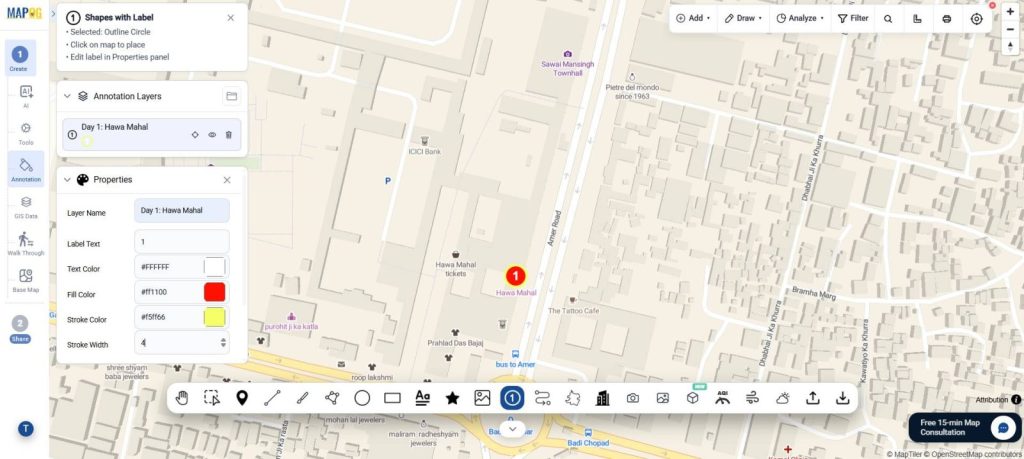
Repeat this process for every location you want to include in your travel story. These could be landmarks, viewpoints, restaurants, hotels, hiking trails, cultural attractions, or hidden gems discovered during your journey.
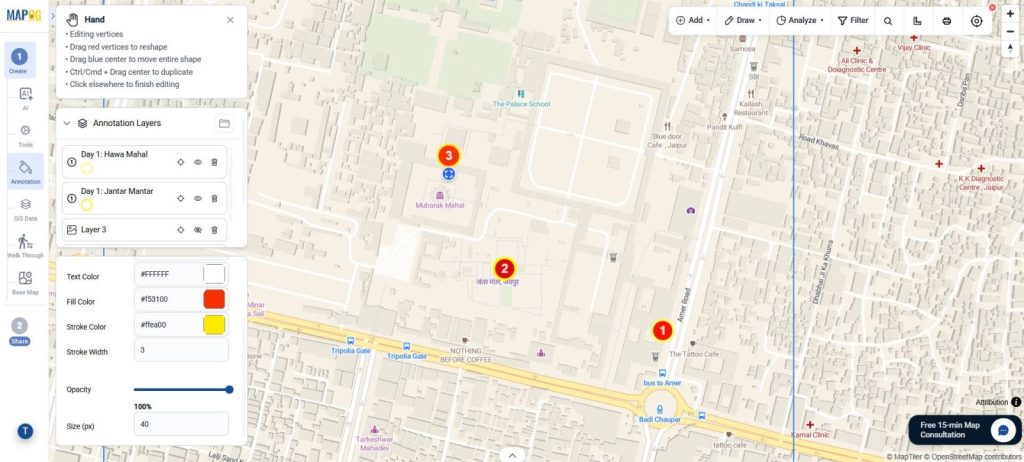
Step 3: Upload Travel Photos and Visual Content
Select the Image Tool and upload photographs associated with each destination. Draw a designated area on the map and position the image appropriately.
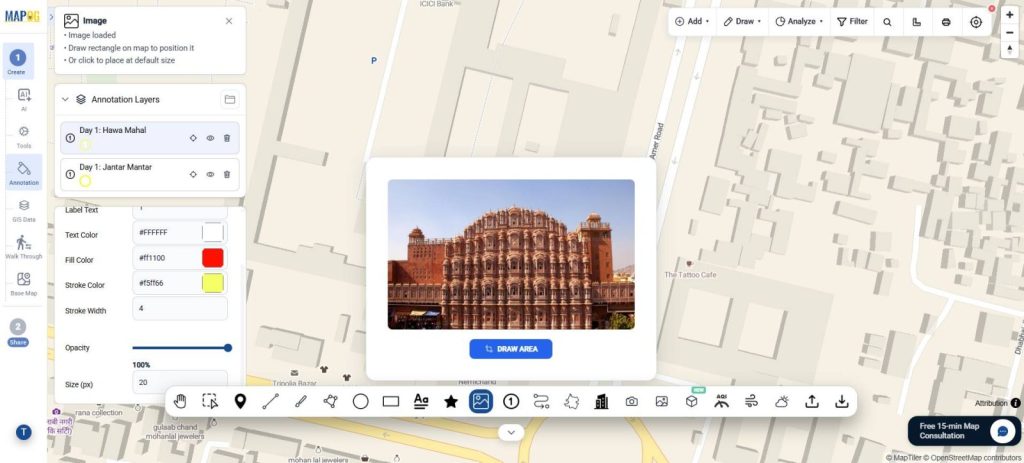
Adjust image size, scale, and opacity to ensure that photos complement the map without overwhelming other information.
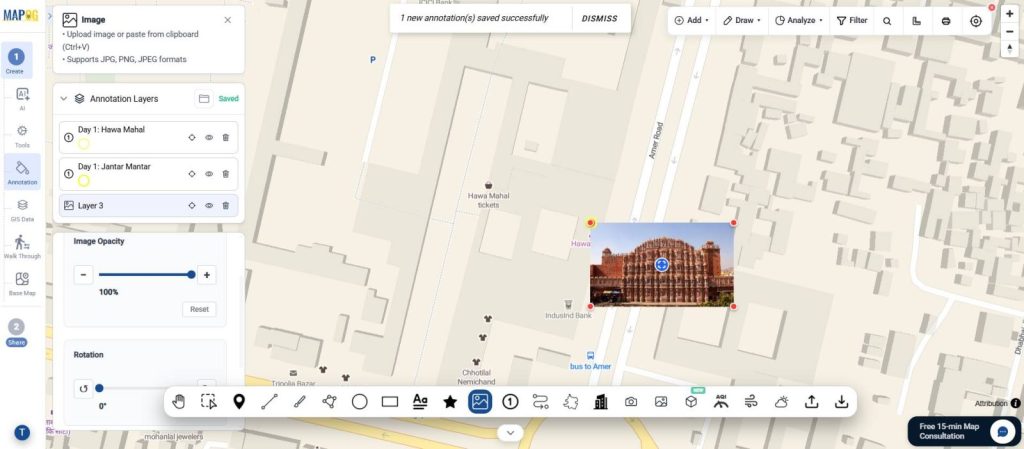
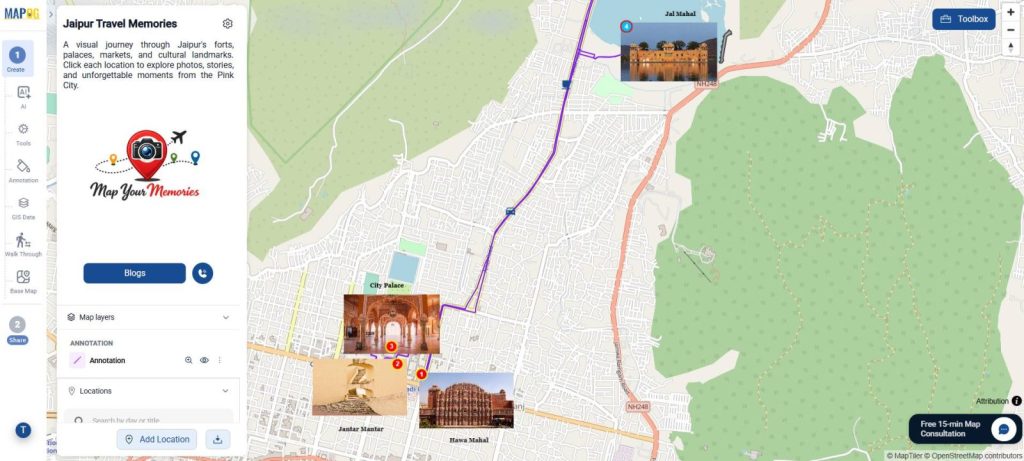
Adding destination photos transforms the map from a collection of points into an immersive visual experience. Visitors can immediately connect locations with real-world experiences, landscapes, architecture, food, and memorable moments from the trip.
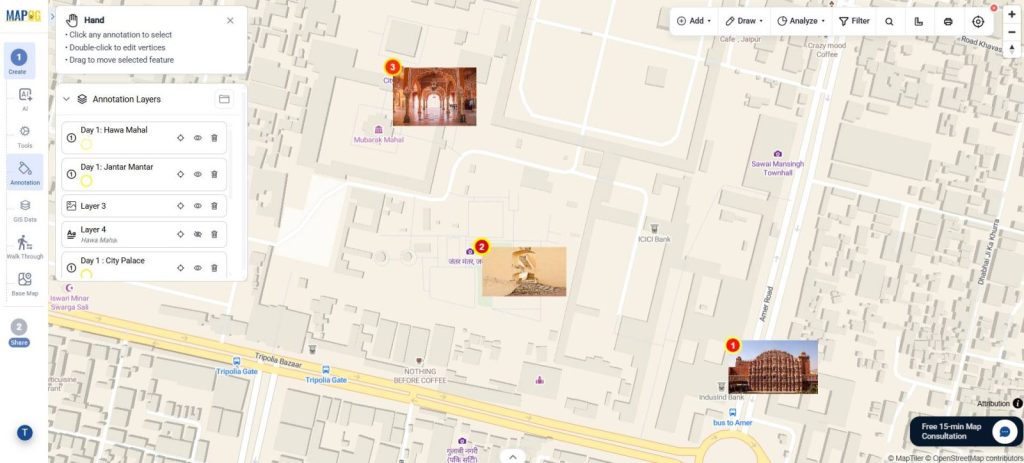
Step 4: Add Travel Notes and Personal Stories
Use the Text Tool to add travel notes, personal observations, or memorable experiences associated with each destination.
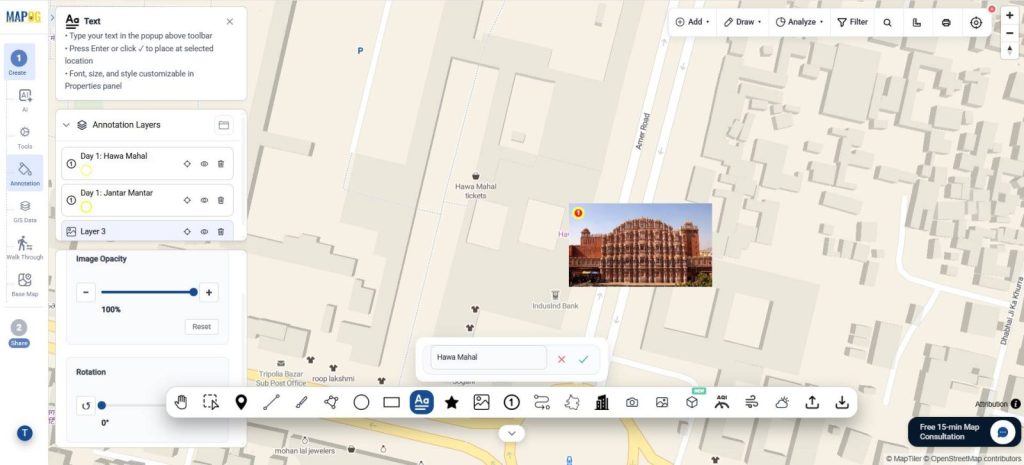
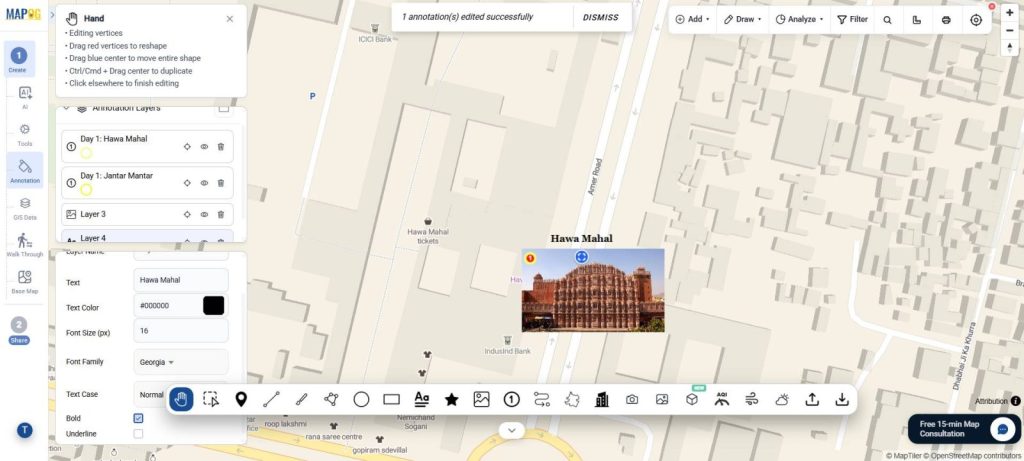
You can edit the properties like changing font, color, size & many more things, from the properties.
Step 5: Connect Destinations with Travel Routes
To visualize the journey, use the Route Tool to connect destinations in the order they were visited.
Simply select the route tool and click on each destination sequentially to create a travel path.
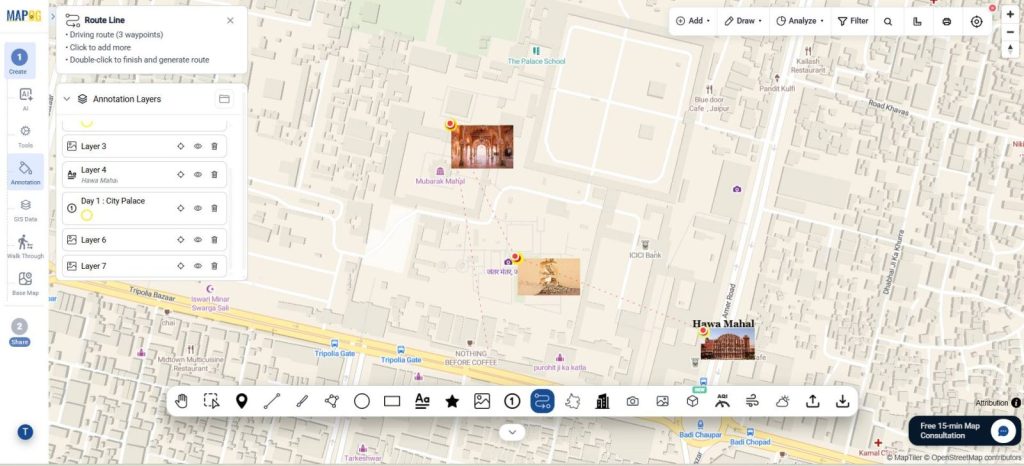
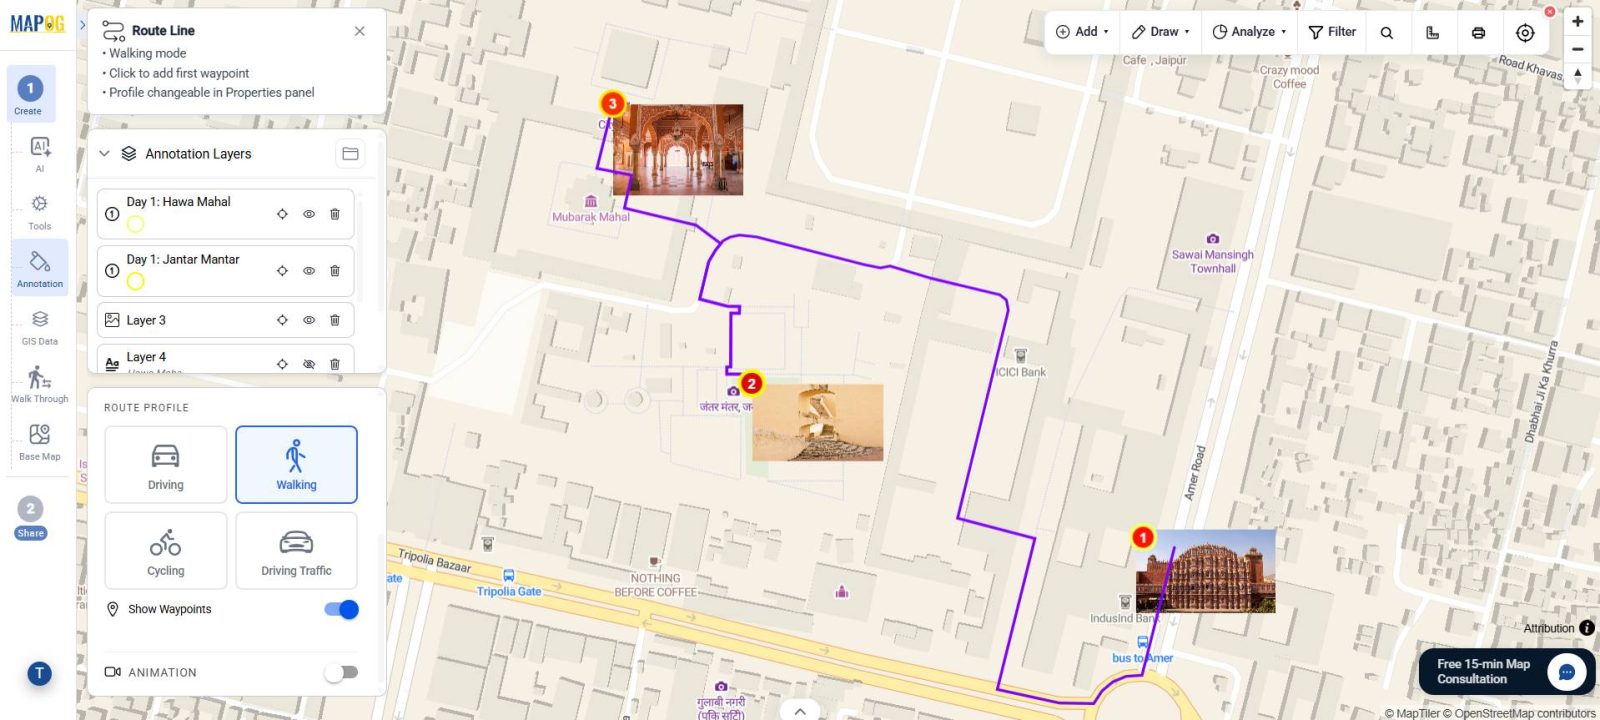
By linking locations together, the map evolves from a set of isolated destinations into a complete travel story. Visitors can clearly understand how the journey progressed from one place to another. Routes can be customized by adjusting colors, line styles, opacity, and thickness to match the overall design of the map.
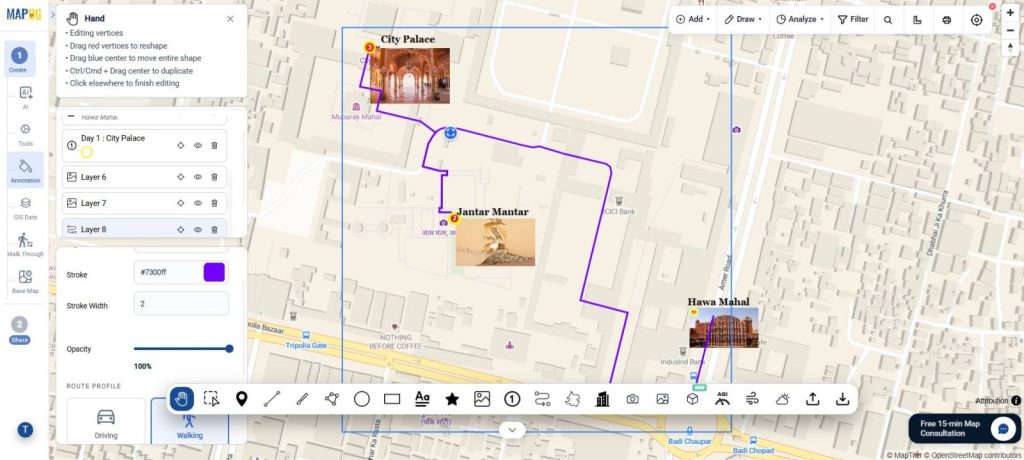
From the properties menu, you can choose different travel modes, like Driving, Walking etc, and your route will get adjusted accordingly.
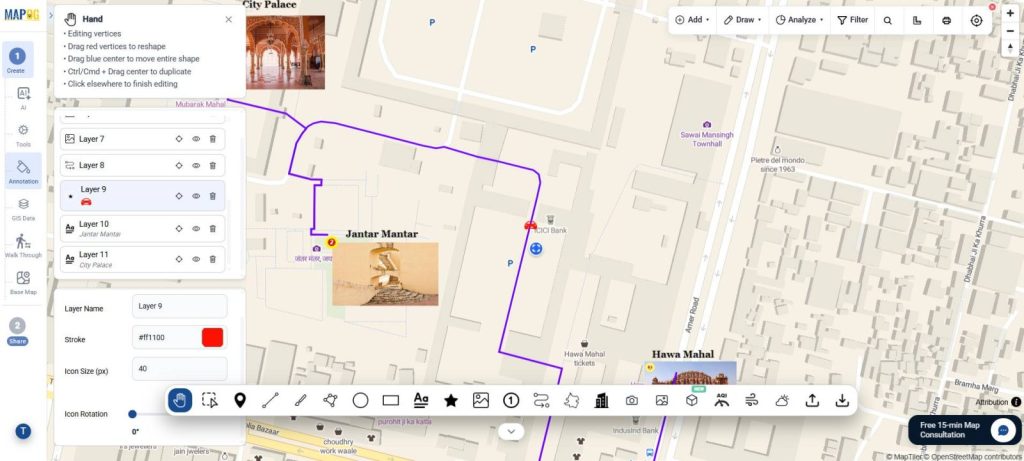
Step 6: Add Icons for Better Visualization
Visual cues make maps easier to interpret. Use the Icons Tool to add relevant symbols that represent different types of locations and experiences.
Step 7: Preview, Share, and Publish
Once your map is complete, navigate to Preview & Share. From here you can make your map Public or keep it Private.
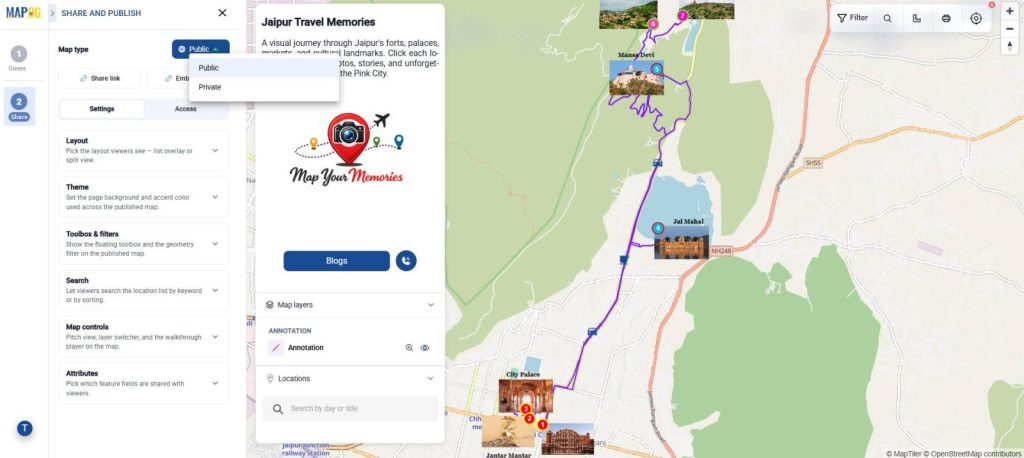
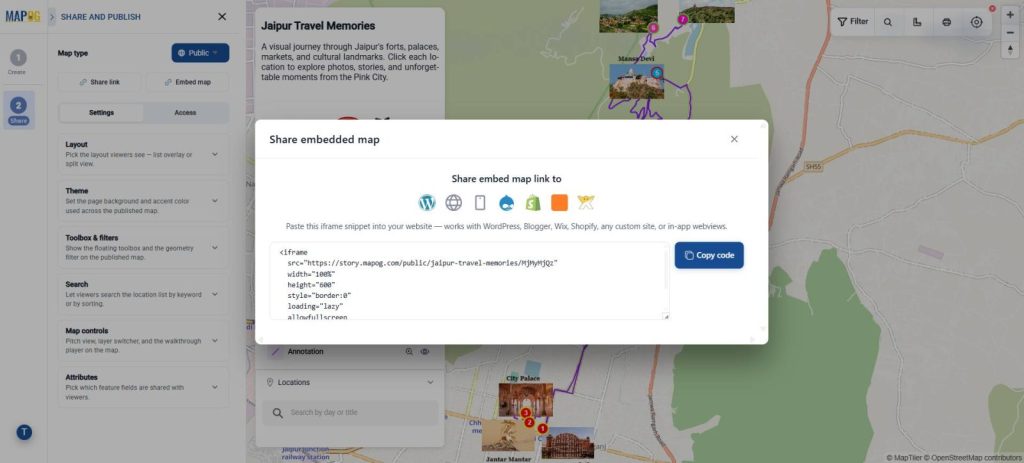
Share links and embed links are also available, allowing maps to be added directly to websites or presentations.
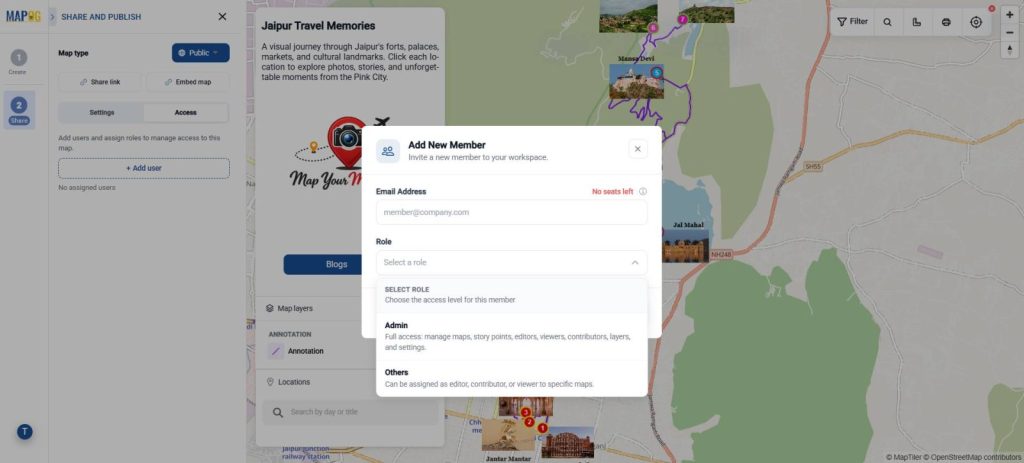
You can also share the map with team members, using add a new member option.
Benefiting Industries and Domains
Interactive travel photo maps are valuable for a wide range of users, including travel bloggers, influencers, photographers, tour operators, travel agencies, tourism boards, and solo travelers. They help transform static photos and travel records into engaging visual stories, making it easier to showcase destinations, photography portfolios, travel experiences, and local attractions. Whether used for marketing, storytelling, trip planning, or preserving personal memories, interactive maps provide an immersive way to share journeys and connect audiences with places in a meaningful way.
Conclusion
Travel experiences deserve more than disconnected photo albums and scattered social media posts. By building an interactive travel photo map, you can organize destinations, memories, photos, and stories into a single immersive experience.
MAPOG makes this process simple by combining destination mapping, multimedia content, route visualization, and interactive storytelling tools within one platform. Whether you’re documenting a weekend getaway, an international adventure, or years of travel memories, an interactive travel photo map helps transform your journeys into stories worth exploring.