Data tables serve as the backbone of Geographic Information Systems (GIS), housing crucial information about spatial features. In the realm of GIS, understanding and effectively manipulating these tables are essential for comprehensive data management and analysis. Enter MAPOG, a powerful platform that revolutionizes data table exploration and utilization. Explore the application of MAPOG in various field through these articles-Create Point, Line, Polygon on Map, Creating Travel Guides: Mapping with GIS Buffer Zones and Make Routes for Military Aerial Planning- Through Bearing angle and Distance calculation – Online Route Compass.
Key Concept for Online GIS Data tables viewer
In this article, we’ll delve into the importance of comprehending data tables using the MAPOG platform, from basic operations like adding or deleting attributes to more advanced tasks like attribute editing. By harnessing the capabilities of MAPOG, users can streamline data management processes, unlock deeper insights from spatial datasets, and make informed decisions with greater precision and efficiency.
Steps for Exploration of GIS Data tables
Step 1 Upload the data
Navigating to the MAPOG map analysis tool, add the GIS data for our needs.
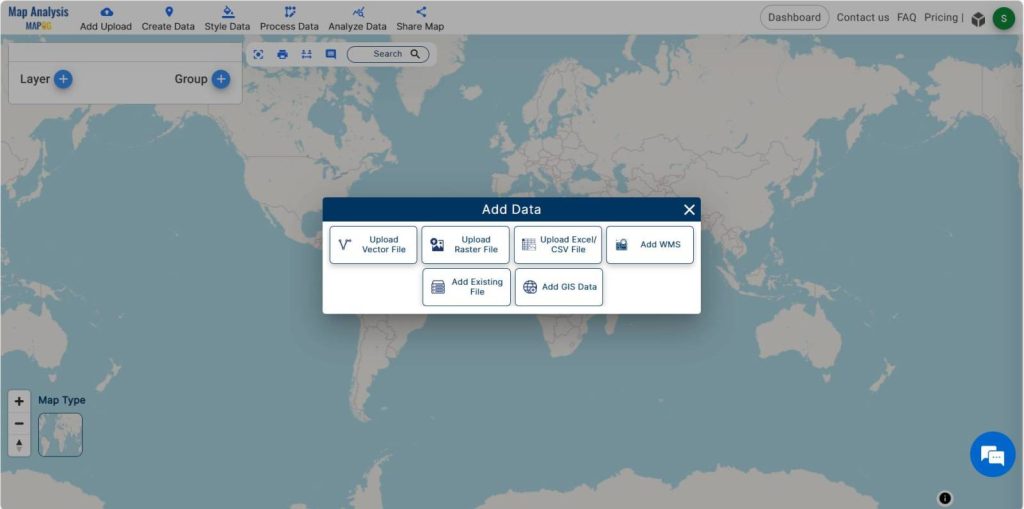
Transitioning to the MAPOG map analysis tool, we add the GIS data for our needs. MAPOG offers a wide range of data. Herein, the District level data in an area is added. You may opt to manually select or utilize the AI search option for data addition.
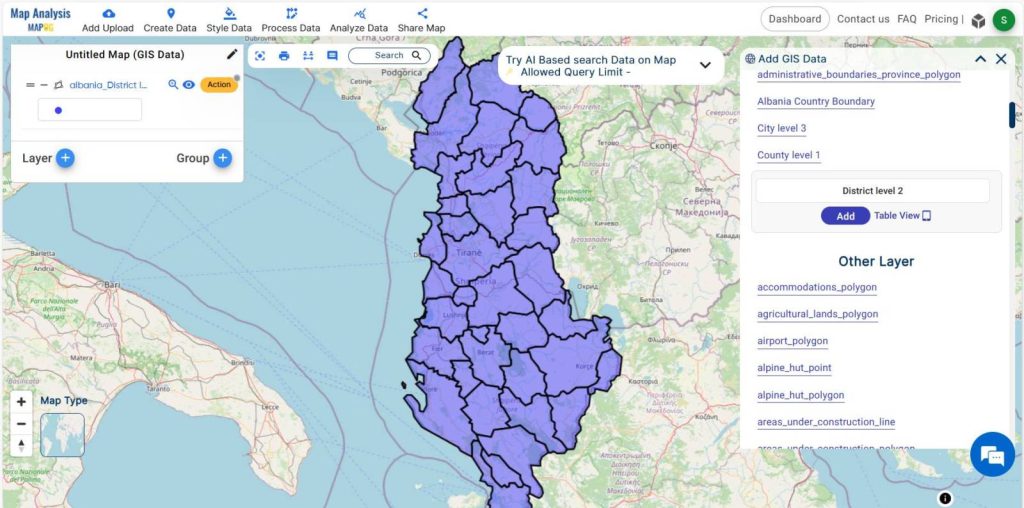
Selecting the district level data and adding them to the layer, the data in this area becomes visible on the screen.
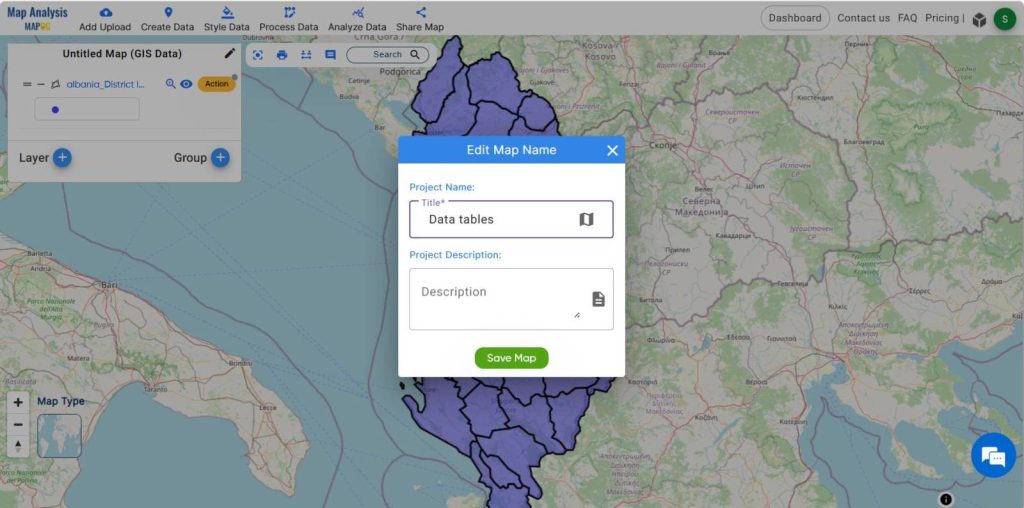
Step 2 Project Title
Give the project a title instead of leaving it untitled. Additionally, describe your project in the description box.
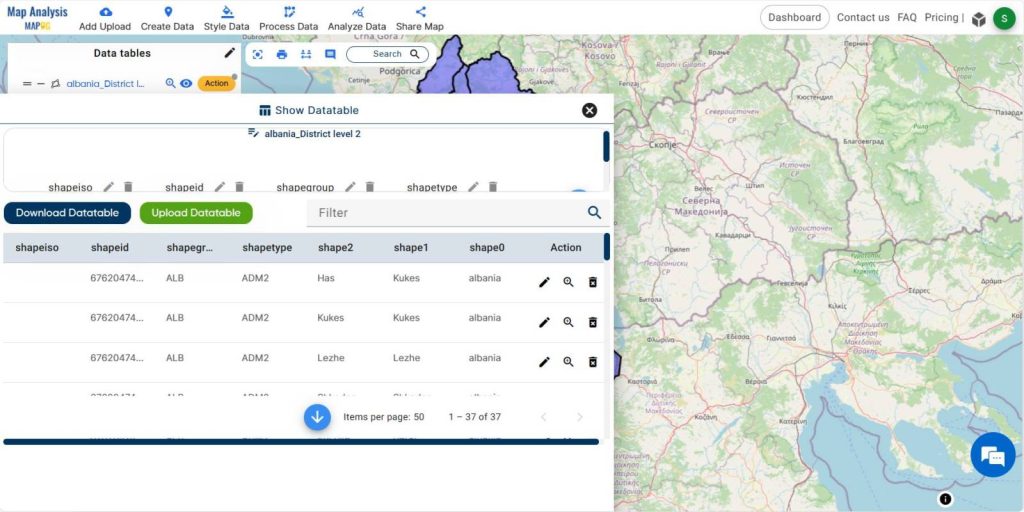
Step-3 Data tables
Click on the action button associated with the data layer to reveal the added data and select the “show data table” option to gain further insight.
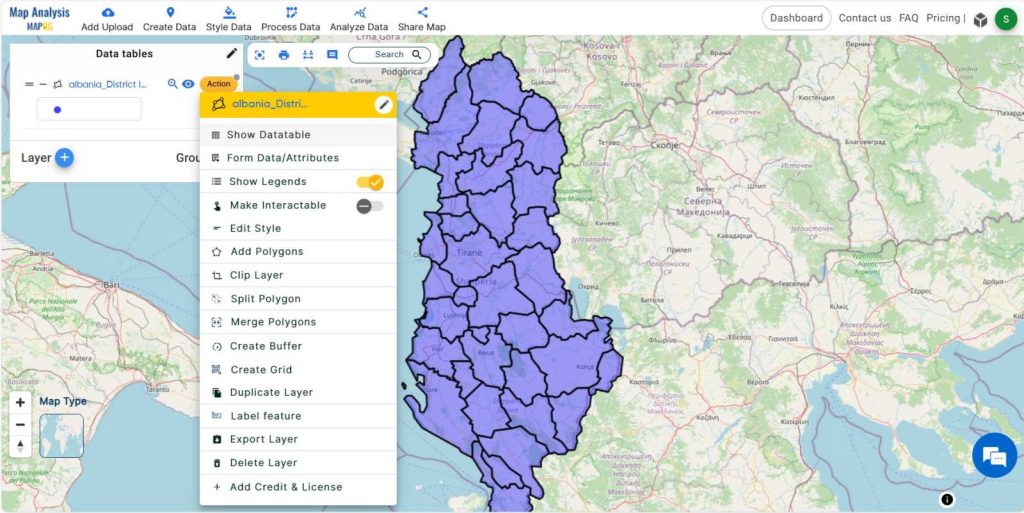
Consequently, the field table of the data becomes visible.
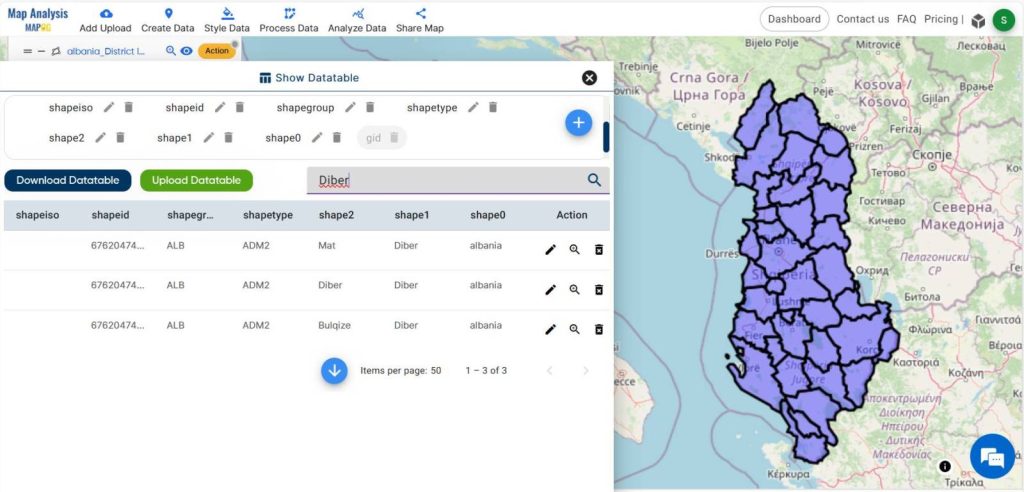
Step 4-Filter data table
To filter the data for a specific area, utilize the filter option. Input the required data and then proceed to click on the search button.
Step 5- Delete a field
Using the delete field option, remove any unnecessary field that is not needed.
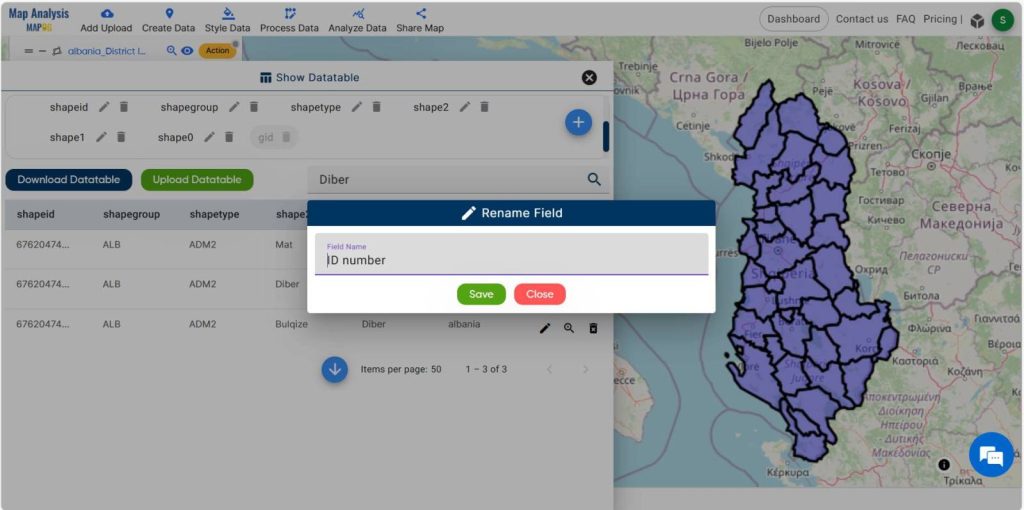
Step 6- Rename the field
To rename the fields, click on the edit button linked with the fields and proceed to rename them.
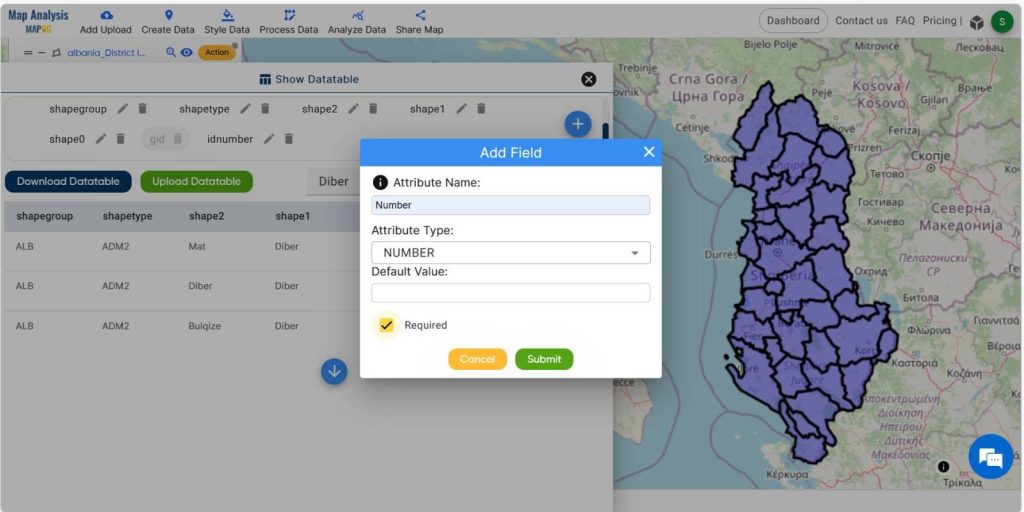
Step 7- Add a field
To add any fields other than those provided, click on the “add field” option and input the field name, type, etc.
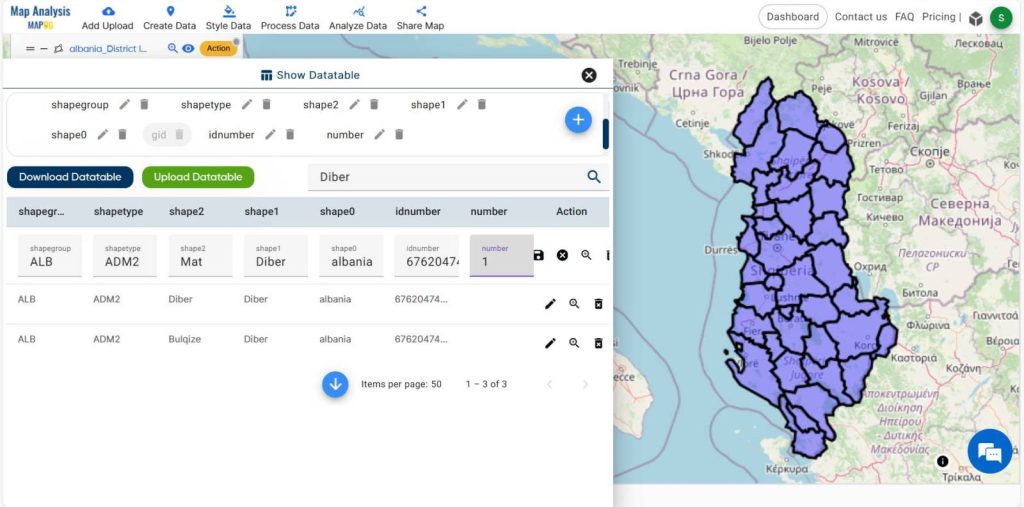
Step 8- Edit the field
By clicking on the edit fields icon, we can edit the fields and provide appropriate data.
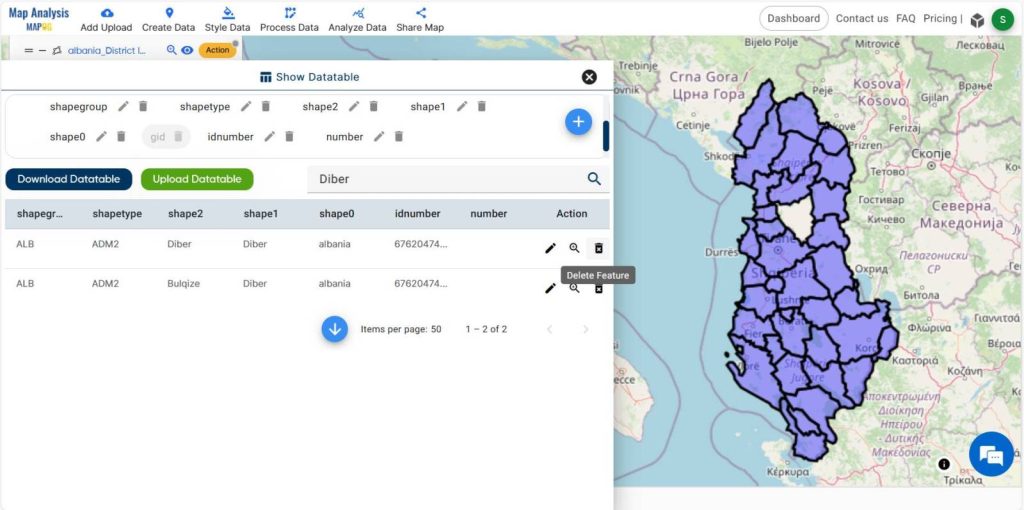
Step 9- Delete the field
We can delete an area from the map by utilizing the data table. To do so, first, filter the desired area through the filter menu, and subsequently, click on the delete field icon linked with that particular area. Consequently, the area will be removed from the map. Similarly, unnecessary areas can also be eliminated from the map in this manner.

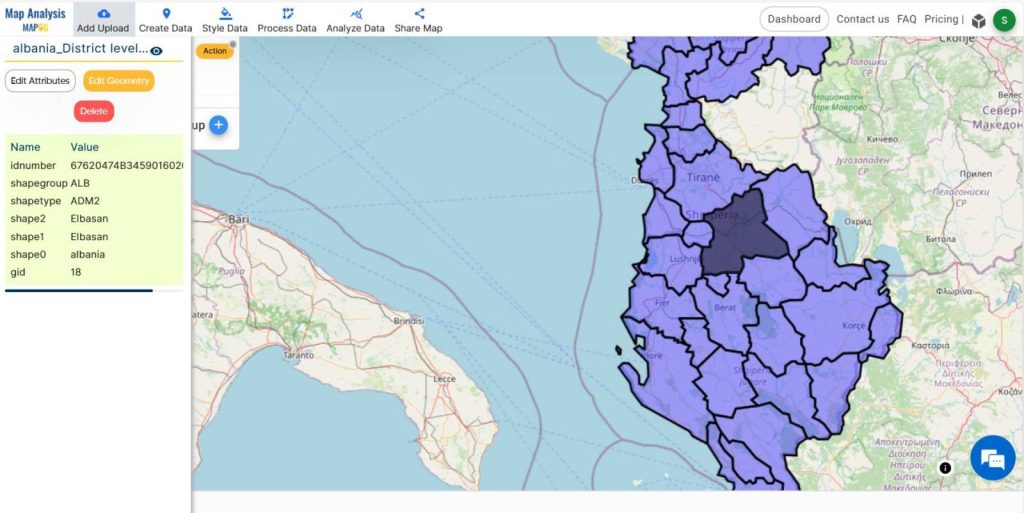
Check the added and deleted fields in data tables by clicking on the district level data.
Major Findings
- Efficient Data Management.
- Data Customization
- Data Quality Assurance
- Enhanced Analysis Capabilities
- Improved GIS Proficiency
Domain and Industry
The exploration of GIS data tables using MAPOG holds significant relevance across various domains and industries. Professionals in fields such as geography, geology, urban development, and resource management can leverage MAPOG to streamline workflows, optimize data-driven decision-making, and drive innovation in their respective domains.
Conclusion
The exploration of GIS data tables using the MAPOG platform offers unparalleled opportunities for enhanced data comprehension and utilization. By mastering basic and advanced data manipulation tasks, users can unlock the full potential of spatial datasets, leading to improved decision-making and innovation across diverse domains and industries.
GIS Data Links- District level data