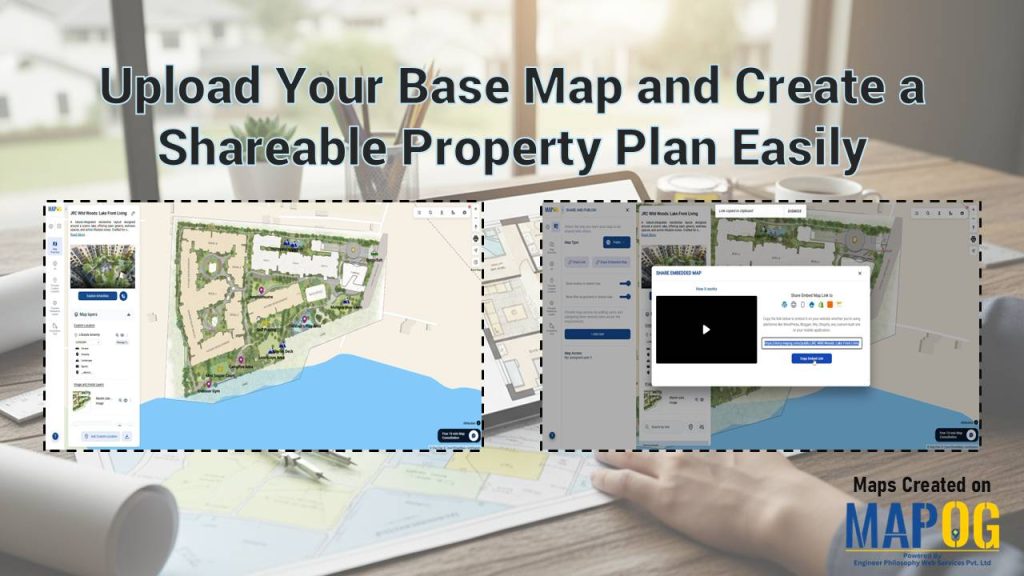
Static floor plans often confuse potential buyers because they lack real-world context. Brokers and developers struggle to convey a lifestyle when using a static PDF. Therefore, you should Upload Your Base Map and Create a Shareable Property Plan Easily to bridge this gap. By leveraging the MAPOG georeferencing capability, you transform a simple layout image into a spatially accurate asset. Consequently, clients visualize the property exactly where it sits.
Key Concept: Upload Your Base Map and Create a Shareable Property Plan
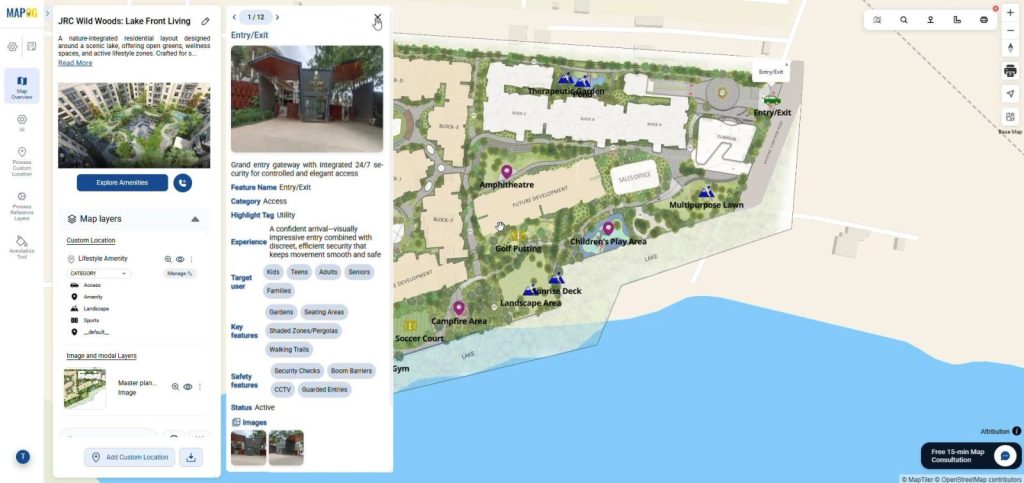
This workflow turns a flat drawing into a dynamic digital map. Essentially, every amenity; from the swimming pool to the parking zone, becomes a clickable, interactive point. Overall, it provides a transparent view that allows users to explore the property with total clarity.
Step-by-Step Workflow: Upload Your Base Map and Create a Shareable Property Plan
1. Create Your Map Project
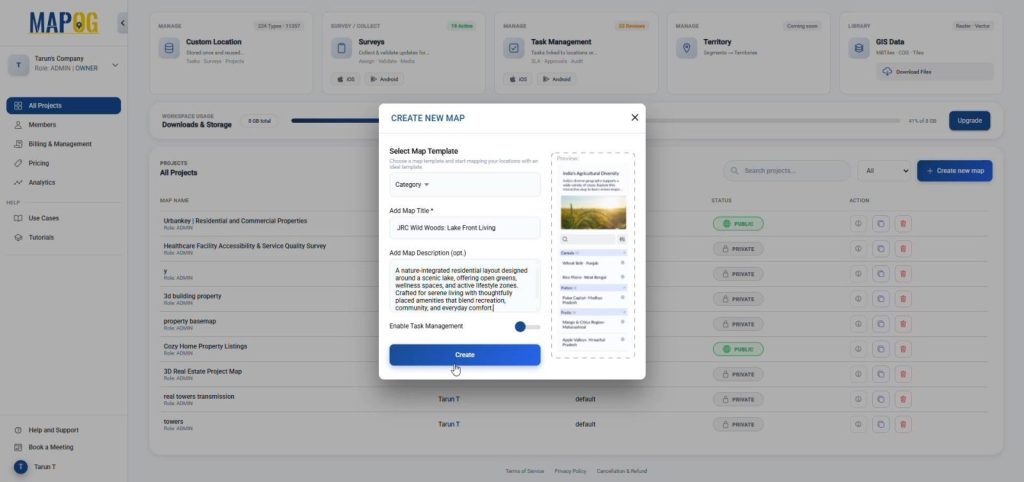
First, go to MAPOG and click Create new Map. Next, select the category template, then enter a clear title and description, and click Create to proceed.
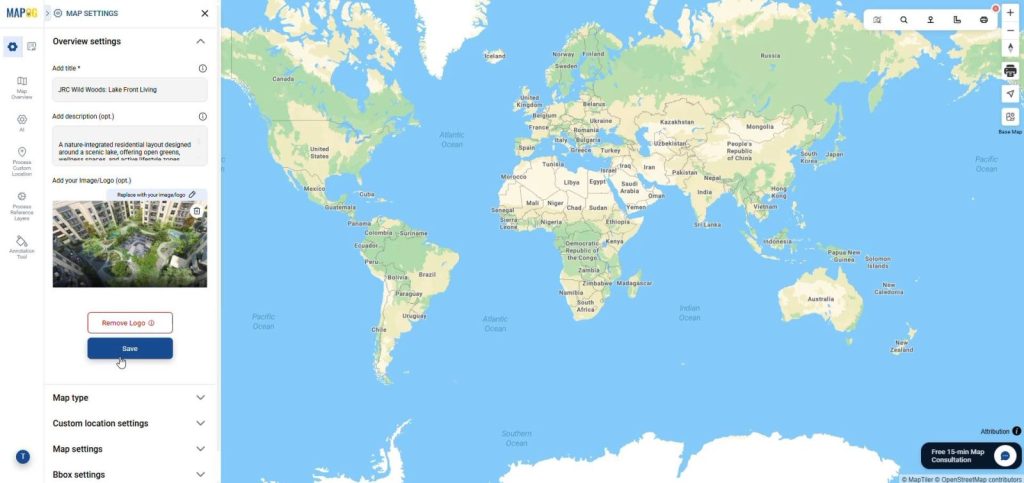
After that, replace the default logo with your own so that your map reflects proper branding and looks credible when shared.
2. Geo Reference Your Layout
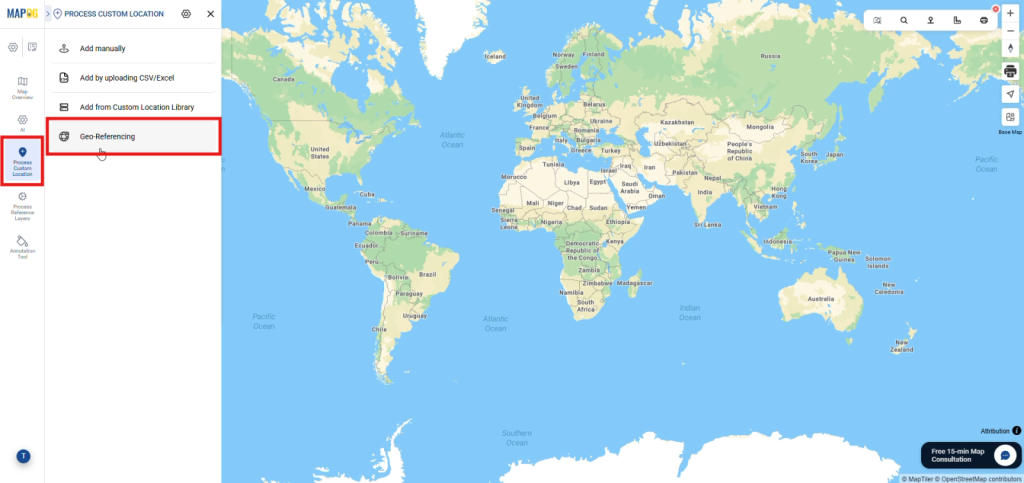
Now, go to Process Custom Location and select Geo-Referencing.
Then, search for your location using either place name or coordinates so that the map aligns with the real world accurately.
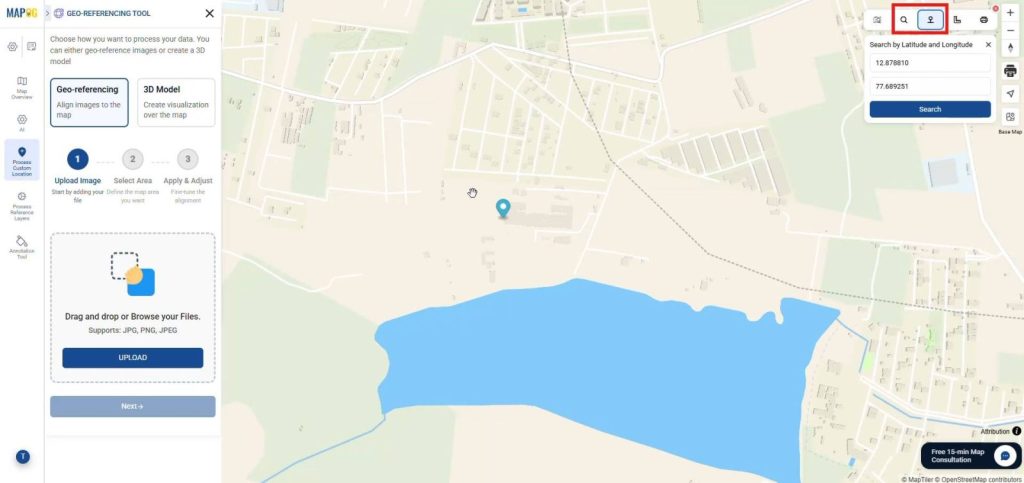
After that, upload your layout image in PNG or JPG format and click Next.
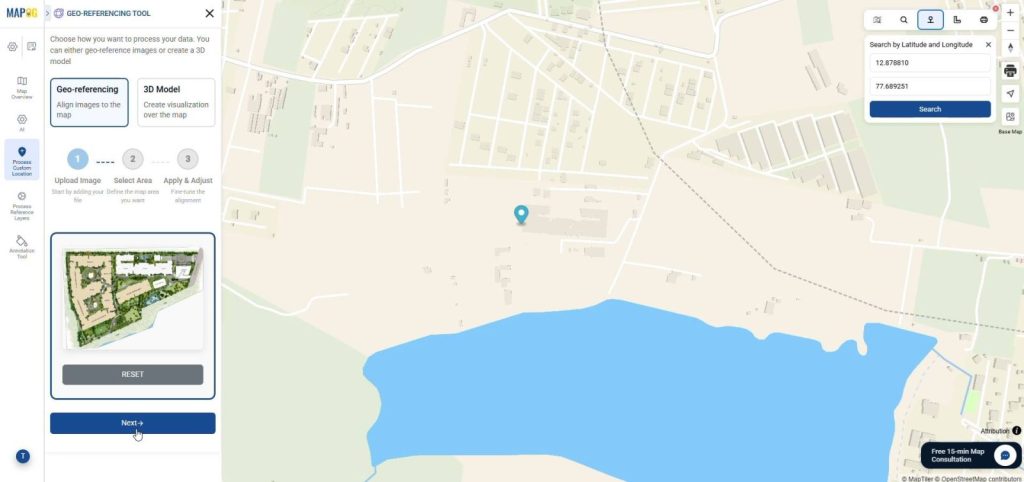
Next, provide a proper label to keep your image organized, choose a drawing mode such as four points, rectangle, or square, and click Start Drawing.
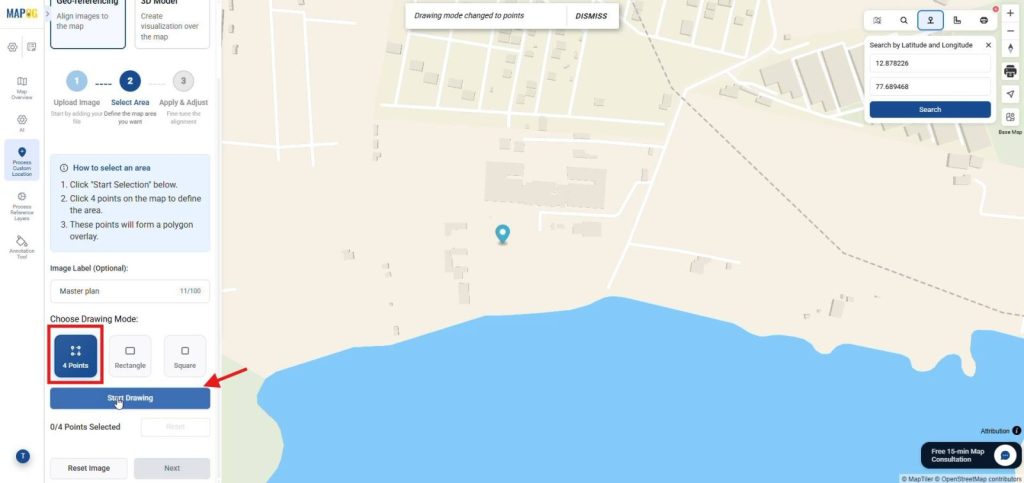
Then define the boundary on the map carefully so that your layout fits correctly.
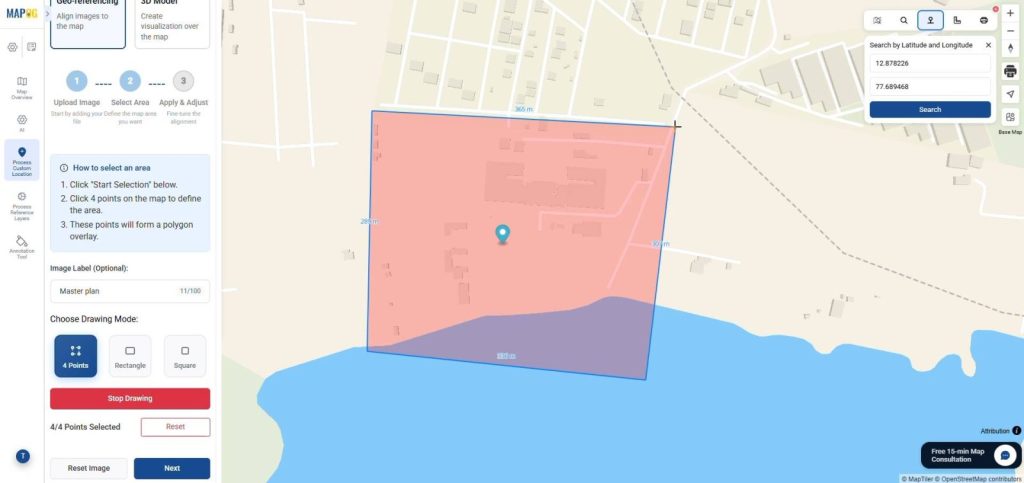
Afterward, click Next and adjust the opacity, rotation, and scale, while aligning the image precisely with the base map before saving, ensuring spatial accuracy.
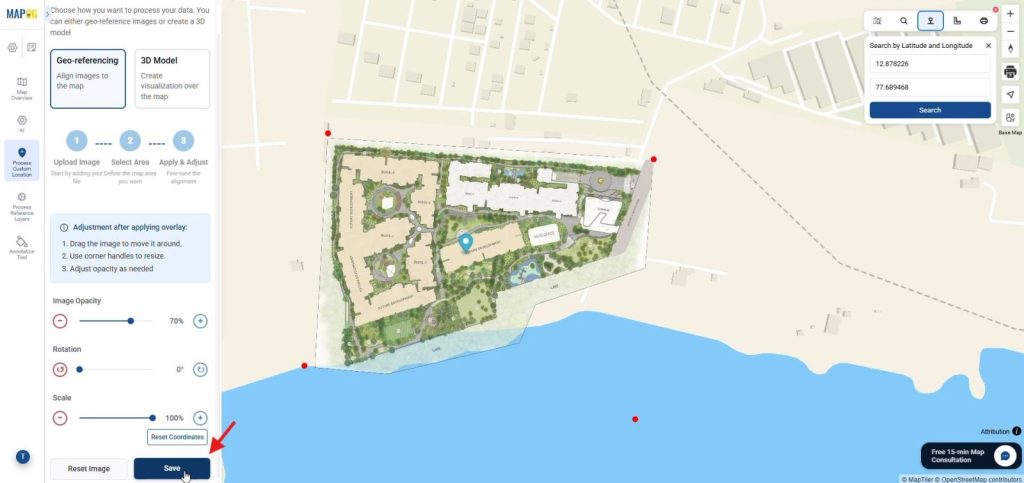
3. Create and Add Custom Locations
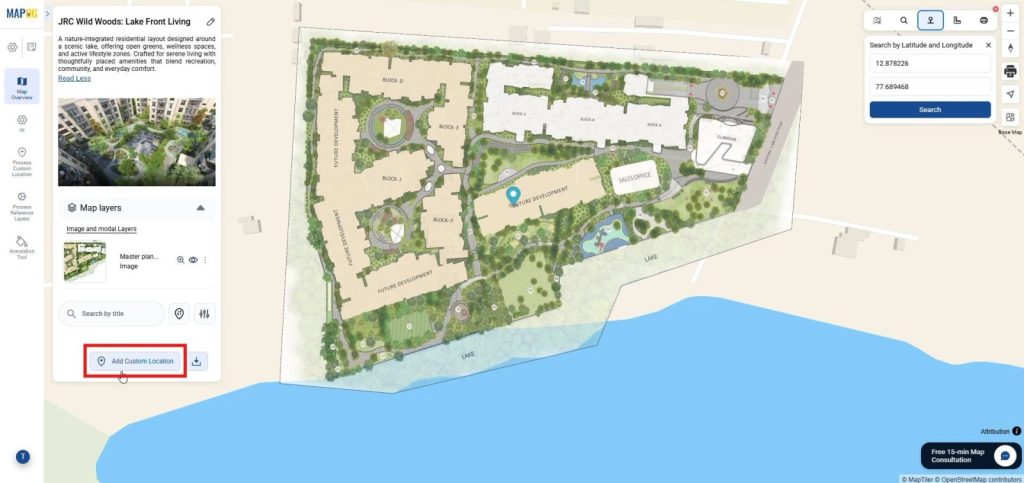
Then, click on Add Custom Location and go to Select Custom Location Template Settings.
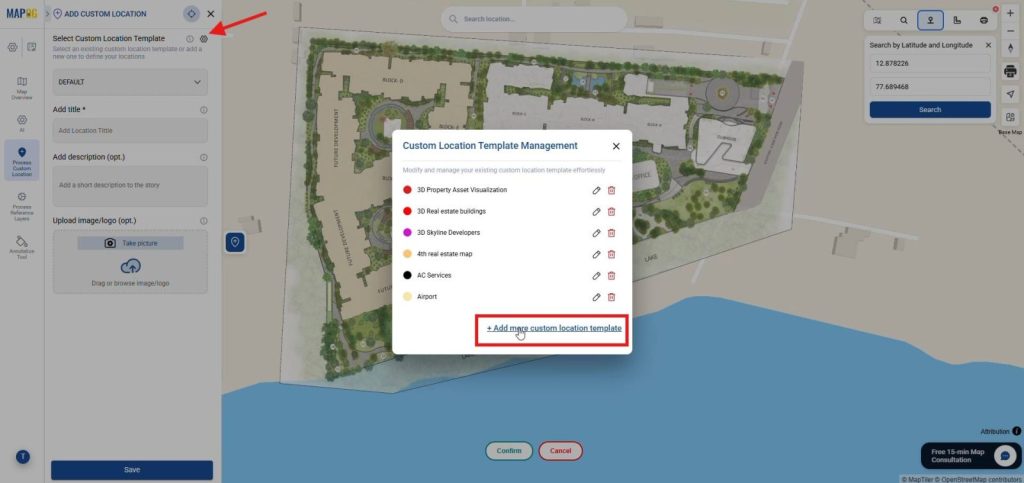
After that, click on Add More Custom Location Template so that you can create a reusable structure instead of repeating the same setup every time.
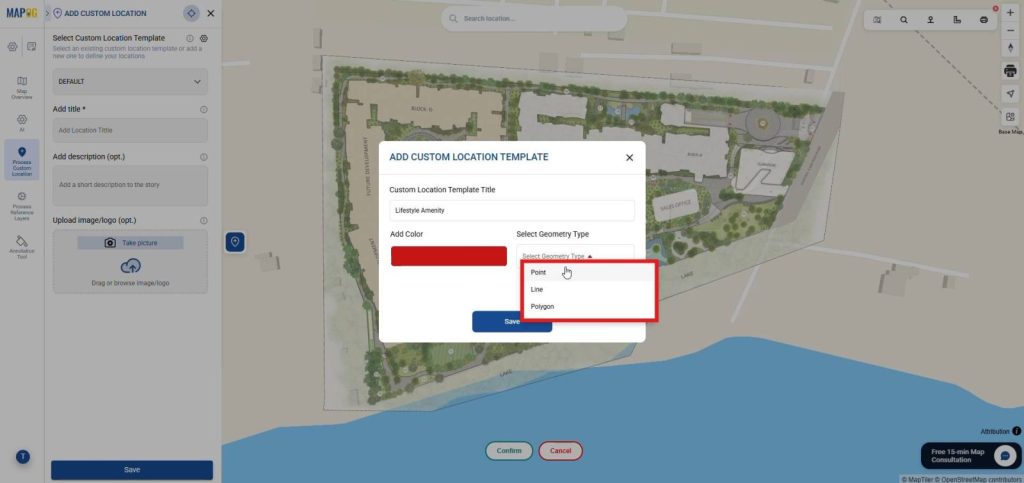
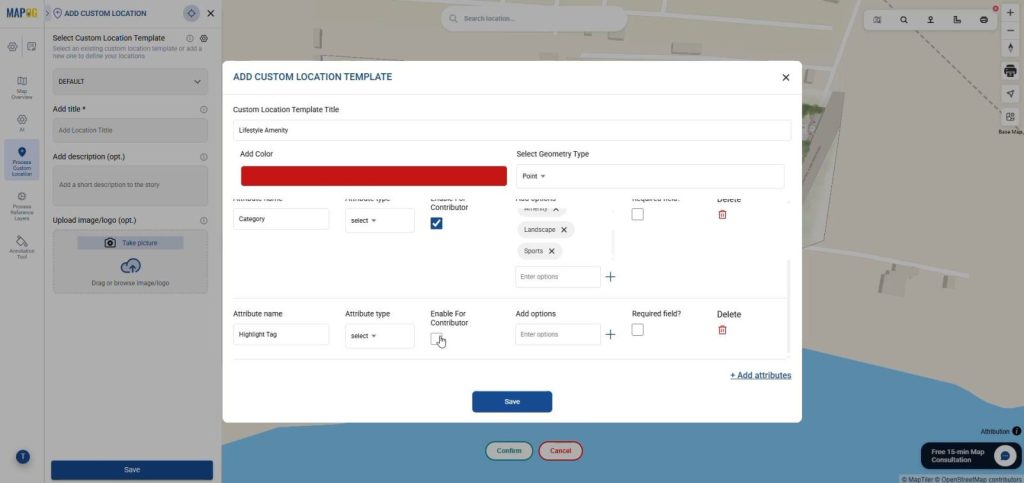
Next, give the template a title, choose a color, and select the geometry type as point.
Then add attributes such as multi select for amenities, select for category, and photo uploads to capture complete information. Afterward, toggle enable for Contributor so that team members can update data when needed, then save the template.
Next, select the template from the dropdown.
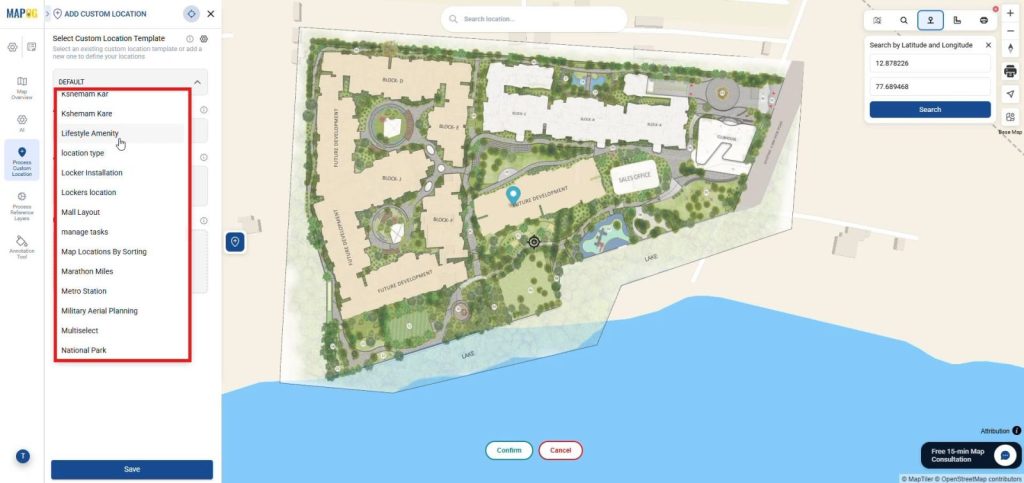
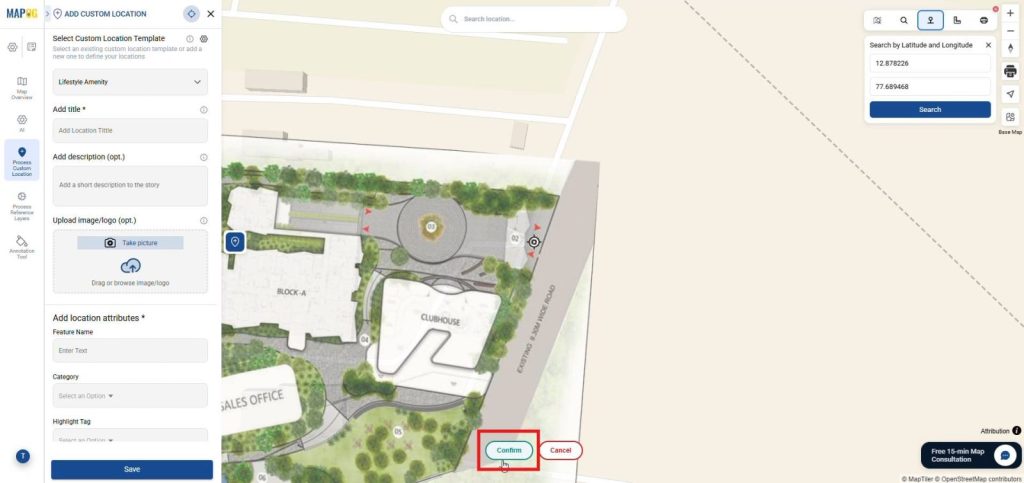
Then plot a location point, confirm it.
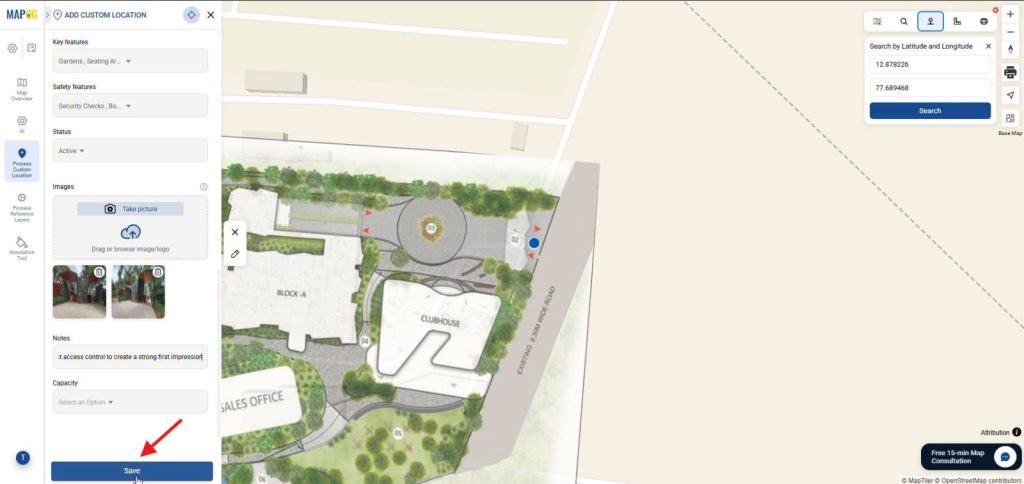
Fill in all the details and save. Similarly, repeat this process for all locations so that your map becomes complete.
4. Style Map Layers Labels and Legends
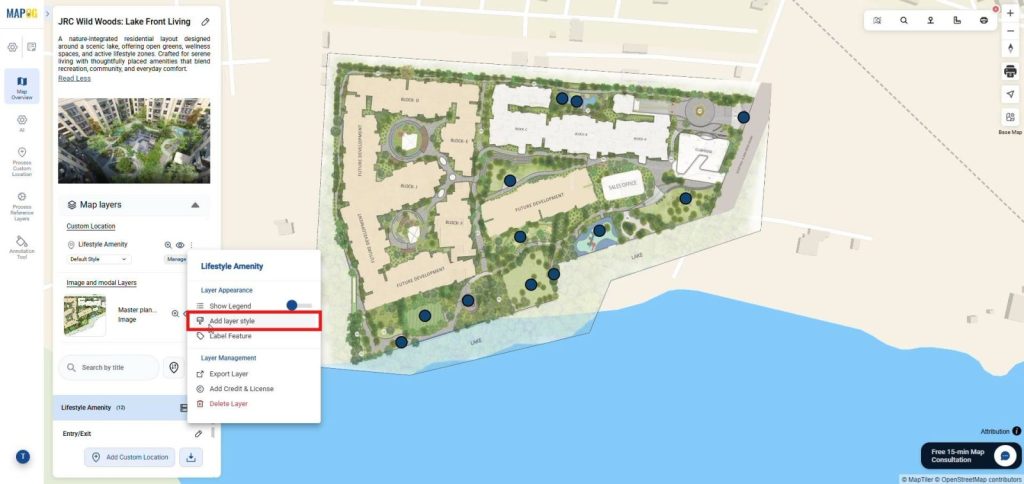
After that, go to Map Layer and click Add Layer Style.
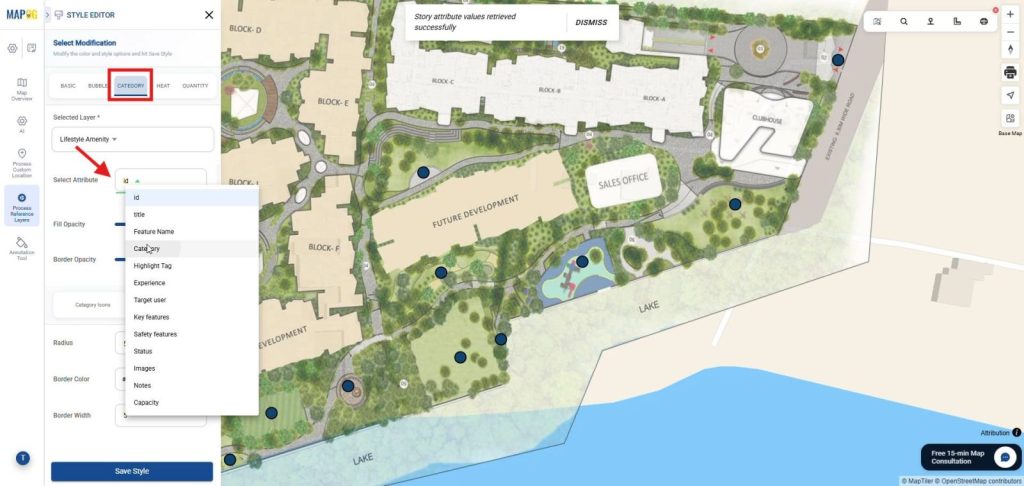
Then choose Category and select an attribute field.
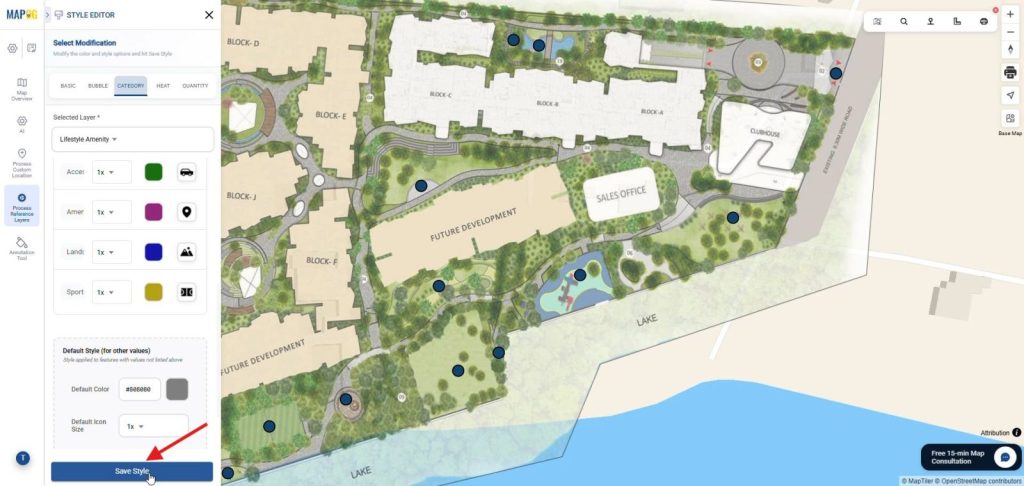
After which assign distinct icons and color coding for each category so that differences are visually clear. Next, click Save Style and continue.
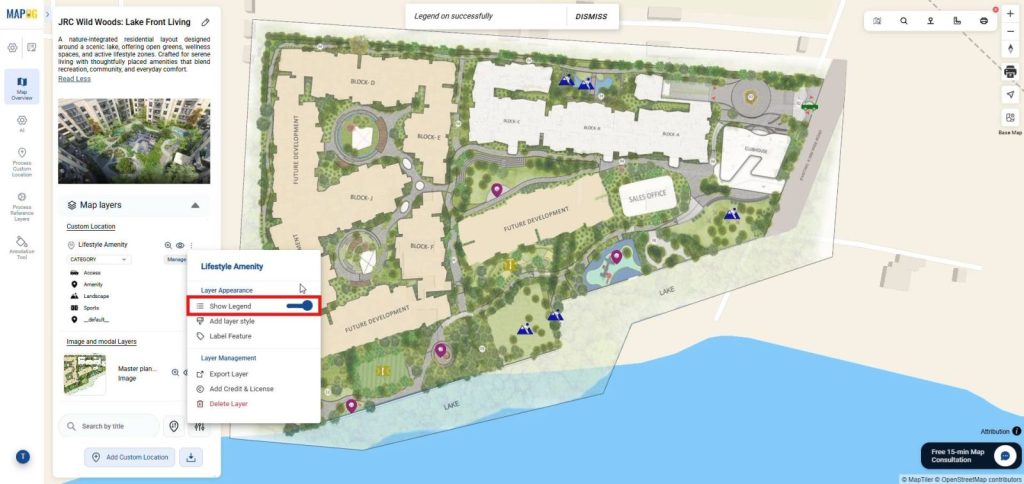
Then enable Show Legend so that users can easily understand what each icon represents without needing additional explanation.
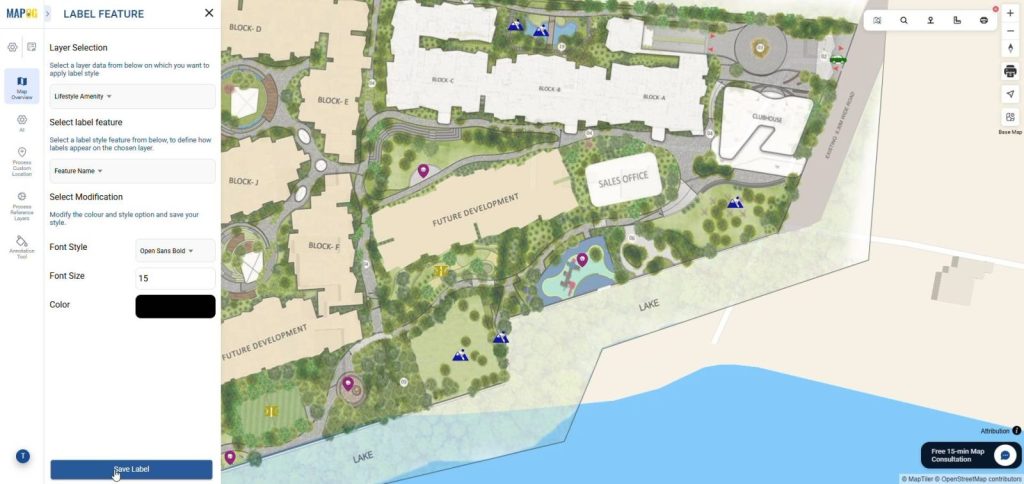
Then, turn on the Label Feature so that each location name appears directly on the map, making identification faster.
5. Group by Attribute
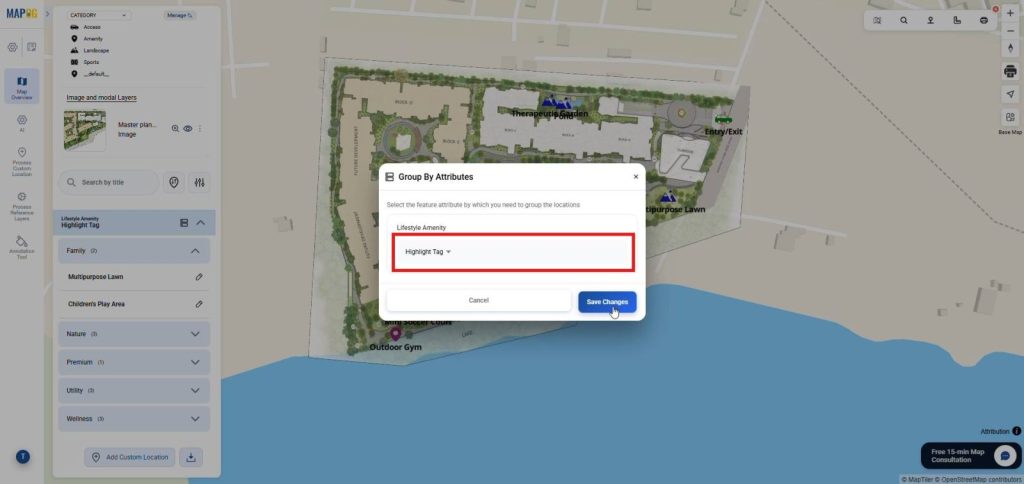
Then, click on Group by Attribute and select an attribute. After that, click save changes so that locations are grouped logically, which helps in managing large datasets without confusion.
6. Filter and Sort Locations
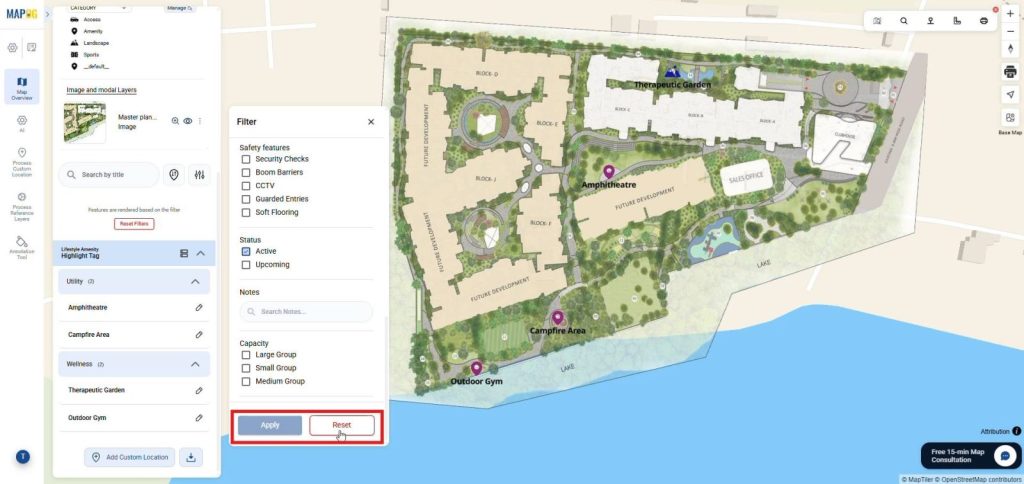
Next, click on the Filter icon and apply filters based on attribute fields so that you can focus only on relevant information.
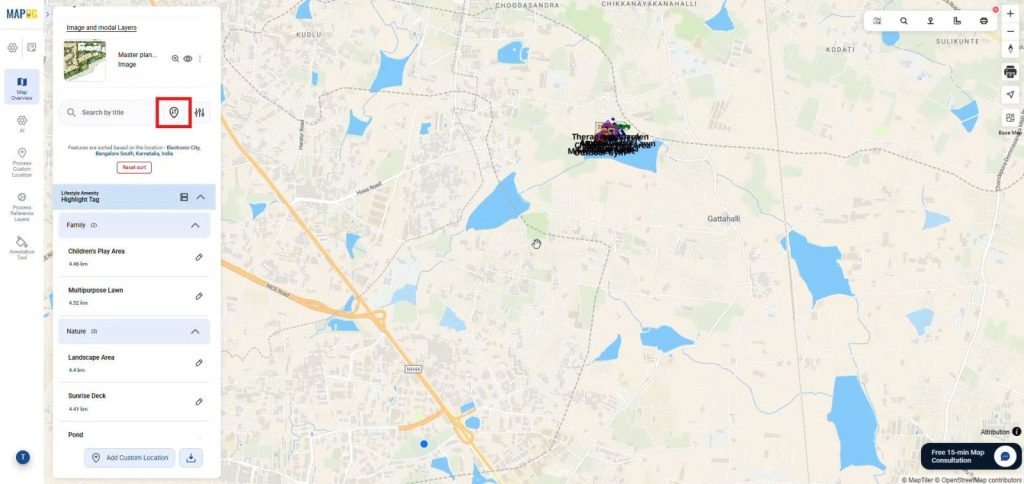
After that, use Sort by Live Location or the Search option, so that you can quickly locate specific points and make faster decisions.
7. Add an Action Button
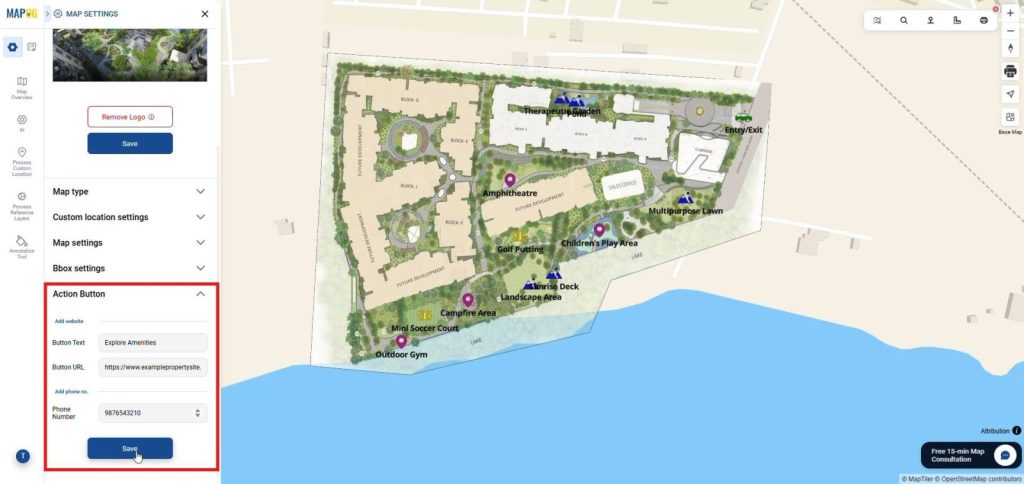
Then, go to Map Settings and open the Action Button Section, add button text, a URL, and a phone number so that users can directly take action such as contacting or visiting a page without leaving the map interface.
8. Preview and Share Your Map
Finally, go to Preview and Share and review your map. Then choose the map type.
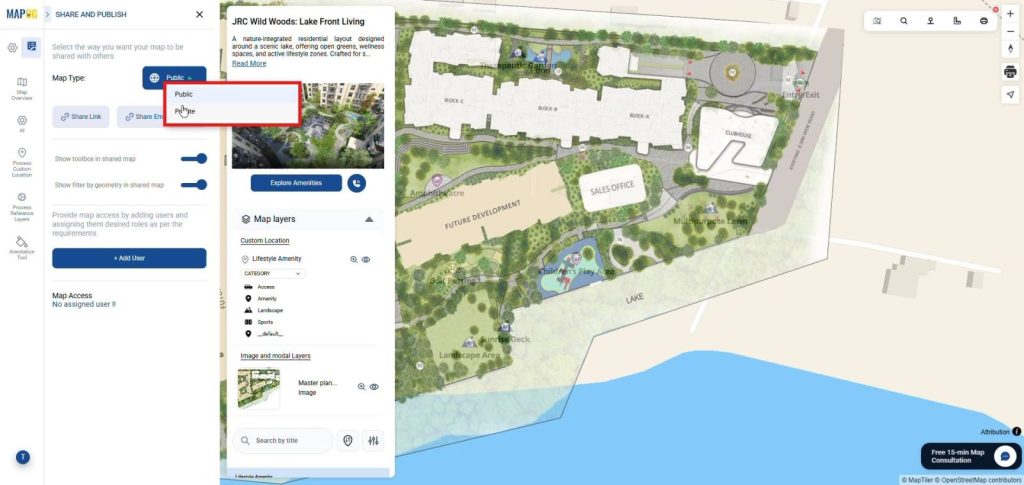
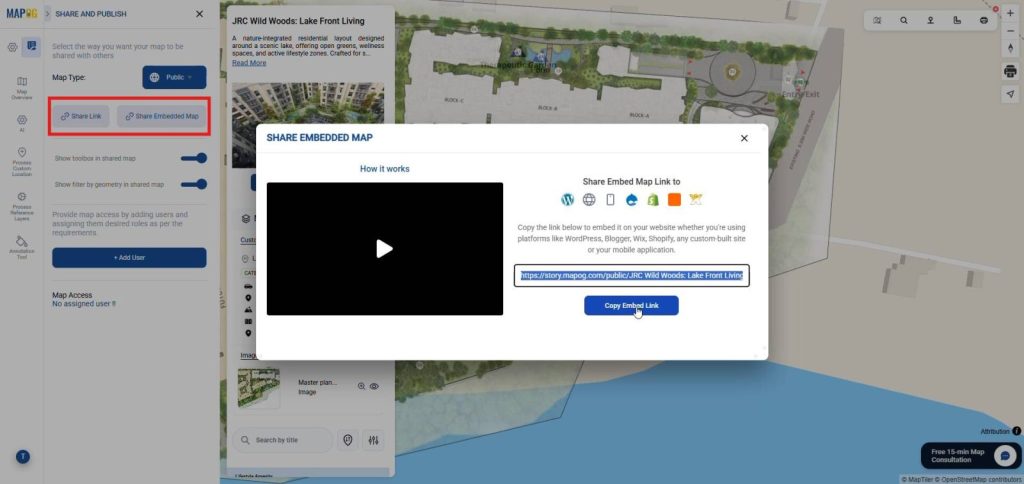
Select a public map, click Share Link to copy and distribute it easily, or click Share Embedded Map to generate an embed link so that the map can be added to a website or WordPress page.
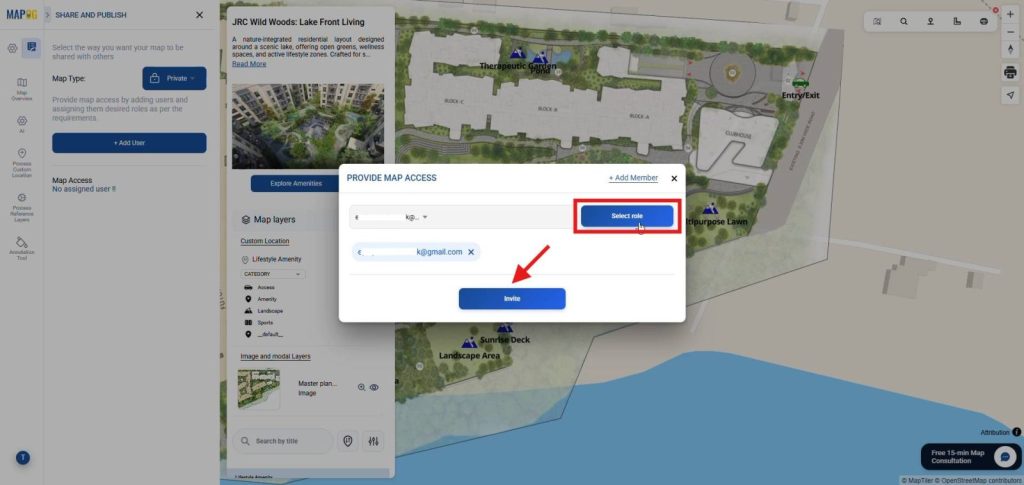
Or choose private, click Add User and add members via email IDs. Then assign roles such as Admin, who has full control, or others who have limited access and add.
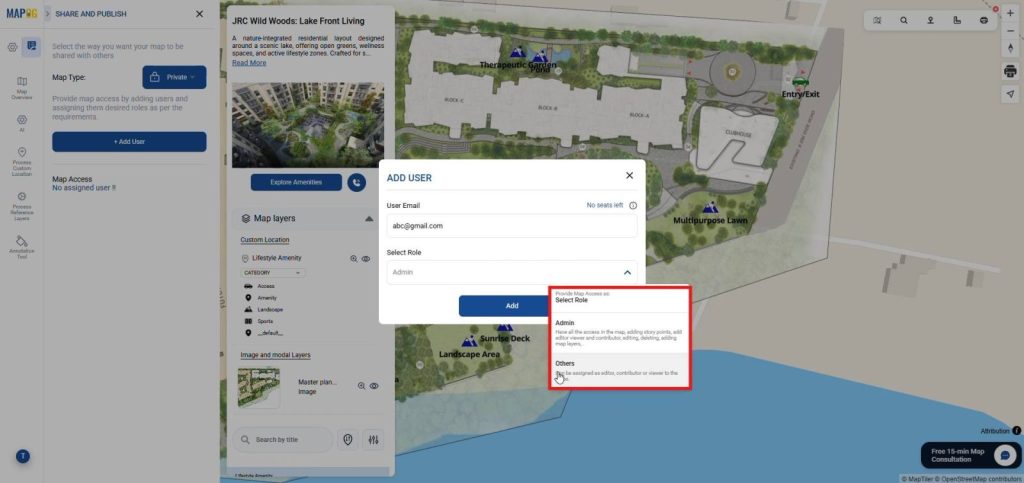
After that, select the member, assign the role, and send the invite so that collaboration remains secure and controlled.
Industries and Domains Benefitting
- Residential Real Estate: Highlight clubhouses and parks to drive sales.
- Commercial Leasing: Showcase office suites within a larger business park.
- Resort Management: Map out guest trails, dining areas, and pool locations.
Conclusion
Interactive mapping replaces outdated brochures to build immediate trust with the audience. Because you can Upload Your Base Map and Create a Shareable Property Plan Easily, your marketing becomes more professional and engaging. Moreover, the MAPOG georeferencing capability ensures your site plans remain accurate and reliable. In summary, this transforms how you showcase your property.