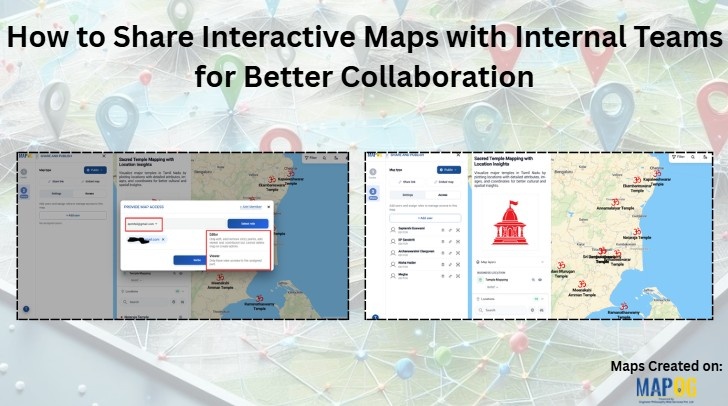
Creating a interactive maps is only the first step. The real value comes when teams can access, explore, and collaborate on that map effectively. In many organizations, location data is shared through spreadsheets, screenshots, or static files, making it difficult for team members to stay aligned and work with the latest information. So, how can organizations make location-based information accessible while ensuring smooth collaboration across teams?
With MAPOG, teams can securely share interactive maps and manage access based on specific roles and requirements. Whether team members need editing permissions or view-only access, maps can be shared in a controlled environment. Additionally, built-in search, filtering, and monitoring tools help users quickly find relevant information and make better decisions using the same source of truth.
Why Interactive maps Sharing Matters for Team Collaboration
Maps often contain multiple layers of information, including assets, project locations, field updates, customer sites, or operational data. Therefore, simply sharing a map link is not enough. Team members should be able to search locations, filter data, and navigate the map efficiently to find the information they need.
For example, a project manager may want to monitor active work sites across different regions, while field teams need to update location-specific information directly on the map. Similarly, operations teams might need access to asset locations, while executives require a high-level view of overall project progress, Share Interactive maps sharing ensures everyone can access relevant information without unnecessary complexity.
By giving teams access to a centralized, interactive map, organizations can improve communication, reduce information silos, and make location-based collaboration more efficient.
Steps to Share Interactive Maps with Full Control
Step 1: Open Your Map
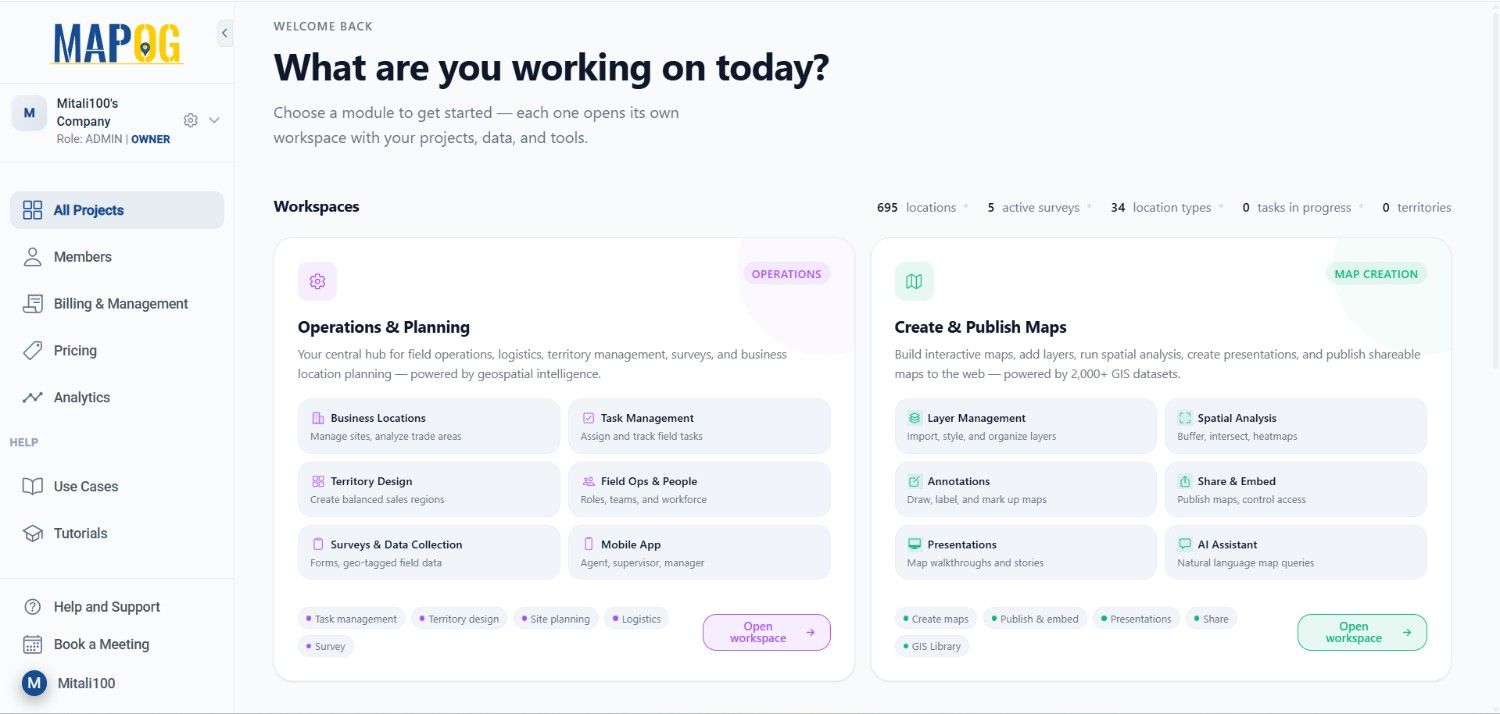
First, open your project in MAPOG and open the map in Create & Publish Maps.
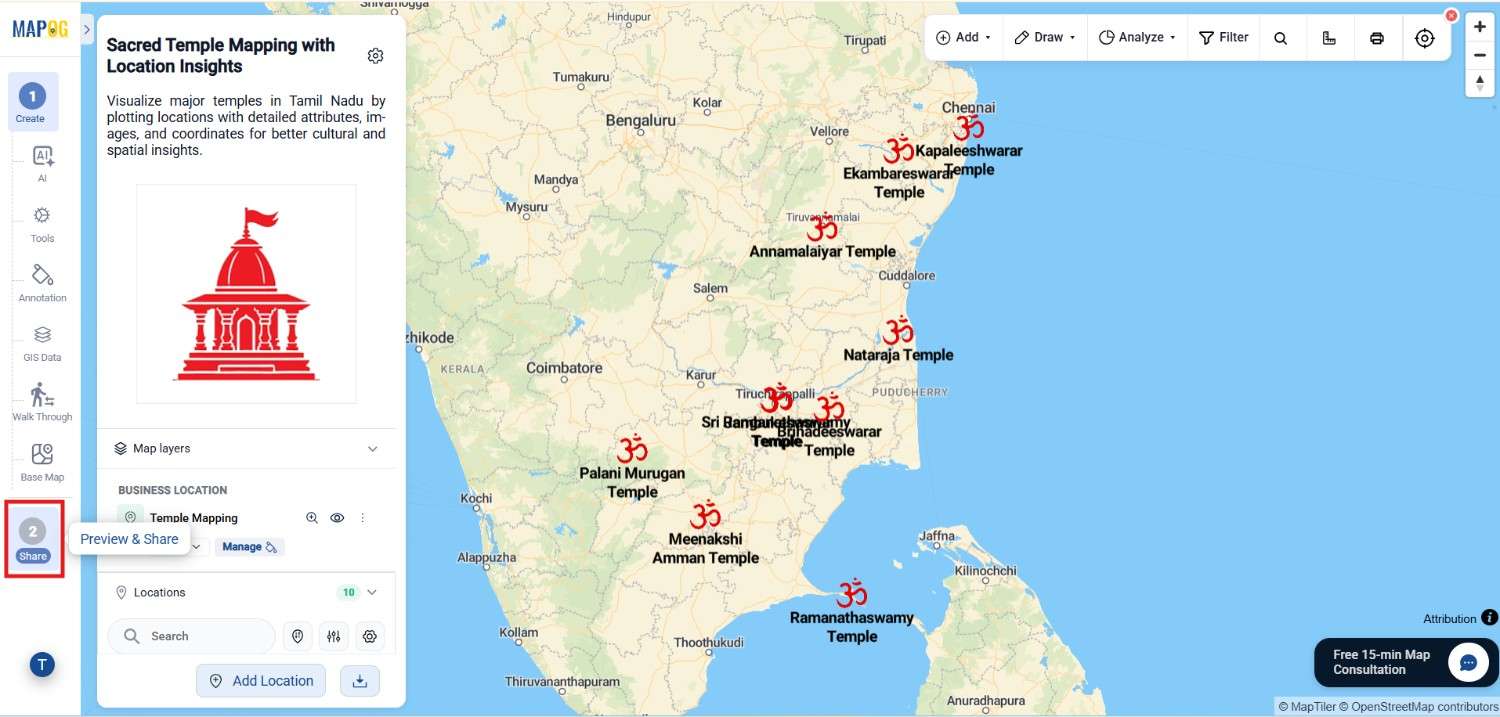
Once your map is ready, go to the Share and Publish section. Here, you can manage both visibility and interaction settings.
Step 2: Choose Between Public and Private Access
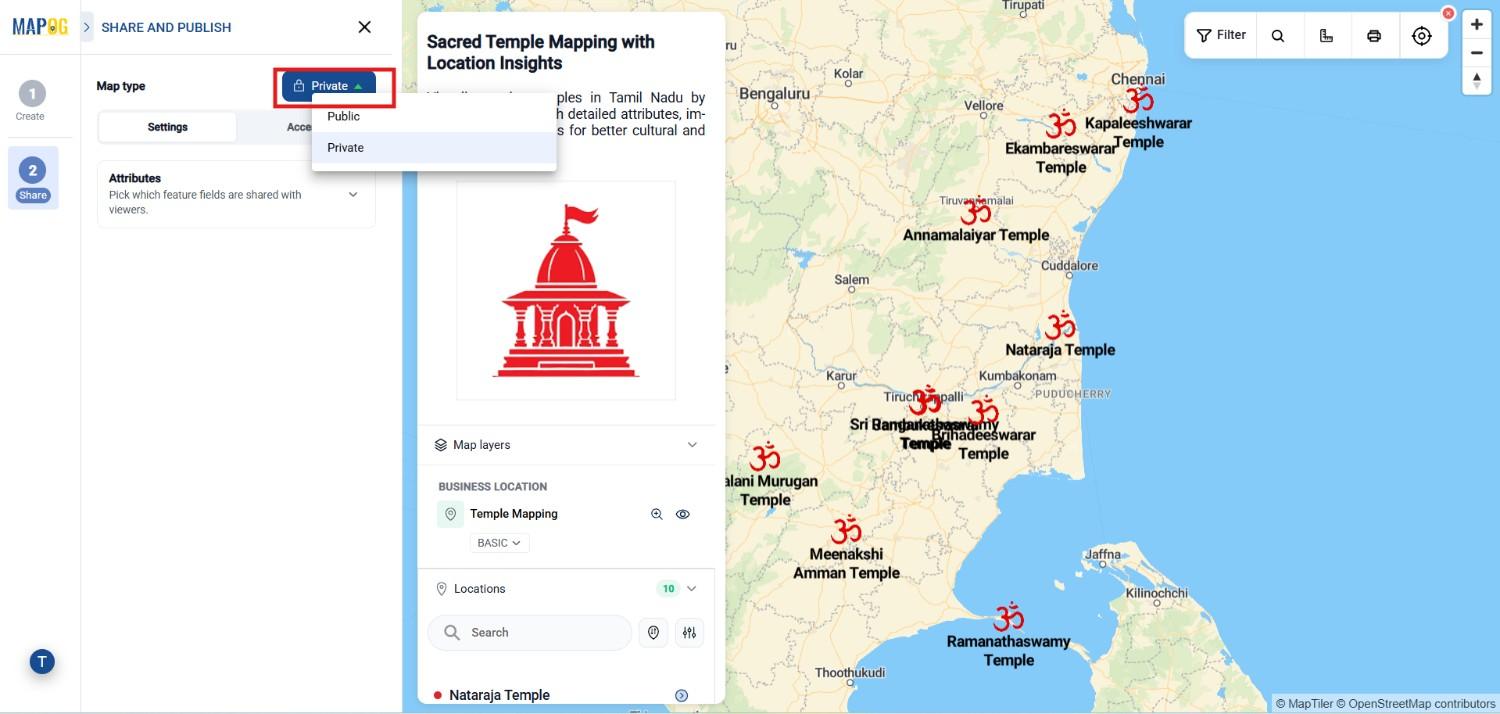
Next, decide how you want to share your map.
If you select Public, anyone with the link can view your map. This is useful for presentations, marketing, or showcasing projects.
On the other hand, if you select Private, only selected users can access it. This is ideal for internal projects or sensitive data.
Therefore, choosing the right visibility ensures both accessibility and security.
Step 3: Improve User Experience with Search and Discovery
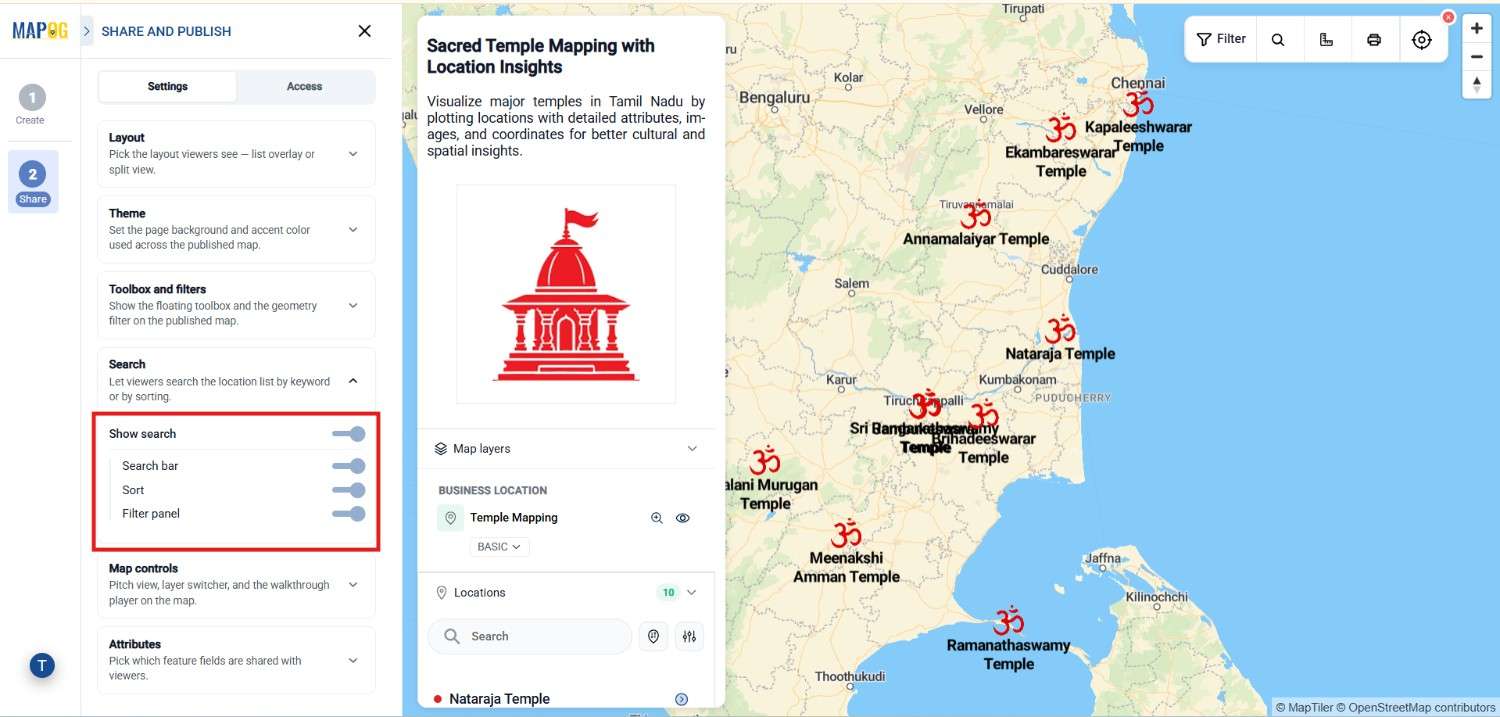
Once visibility is set, you can enable Search and Discovery features to make your map easier to explore.
For instance, the Toolbox can be enabled from the top panel to display options like draw, analyze, and filter, allowing users to directly interact with map data in real time. Moreover, the Geometry Filter allows users to focus on a specific area by selecting or drawing a region on the map. This is particularly helpful when analyzing location-based data within boundaries.
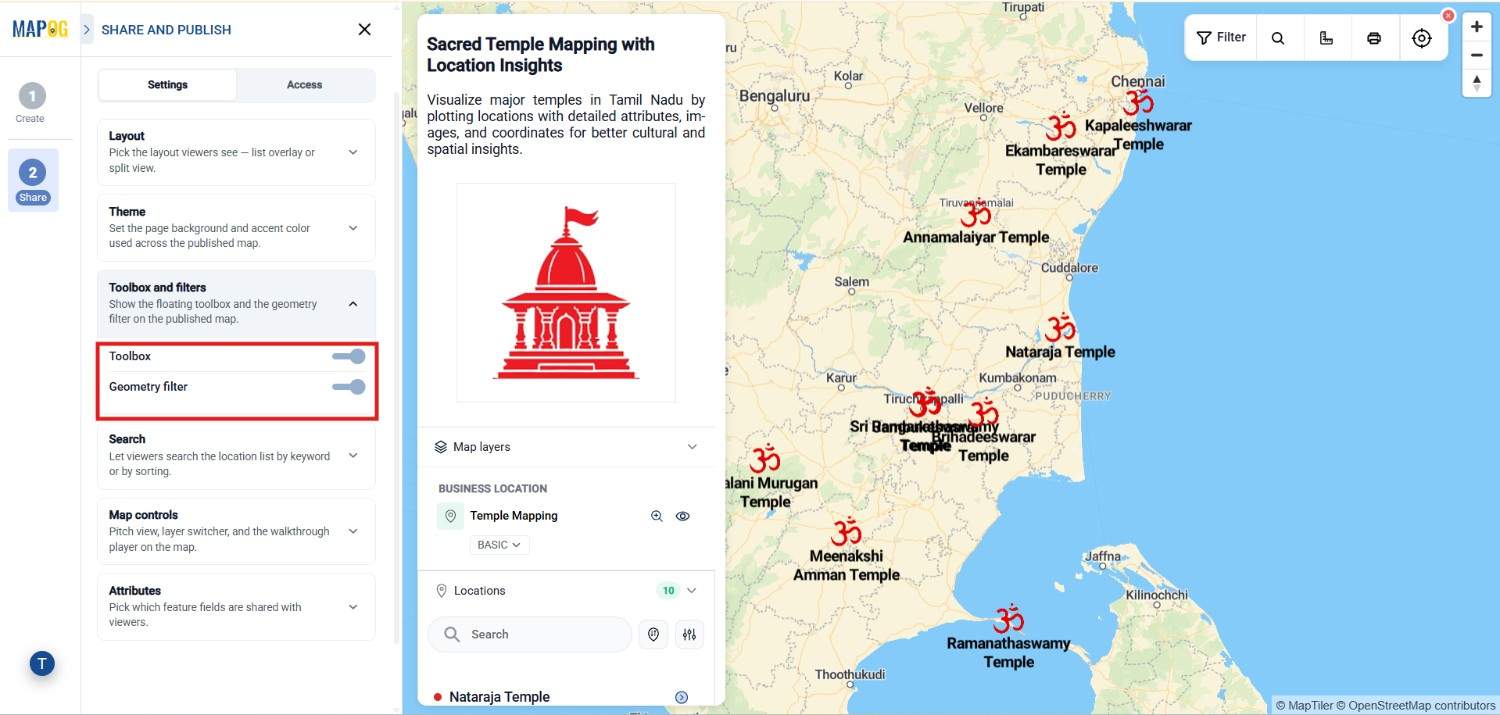
In addition, Attribute-Based Filtering helps users refine results based on specific criteria such as category, amenities, or type. This is especially useful when your map contains multiple data points.
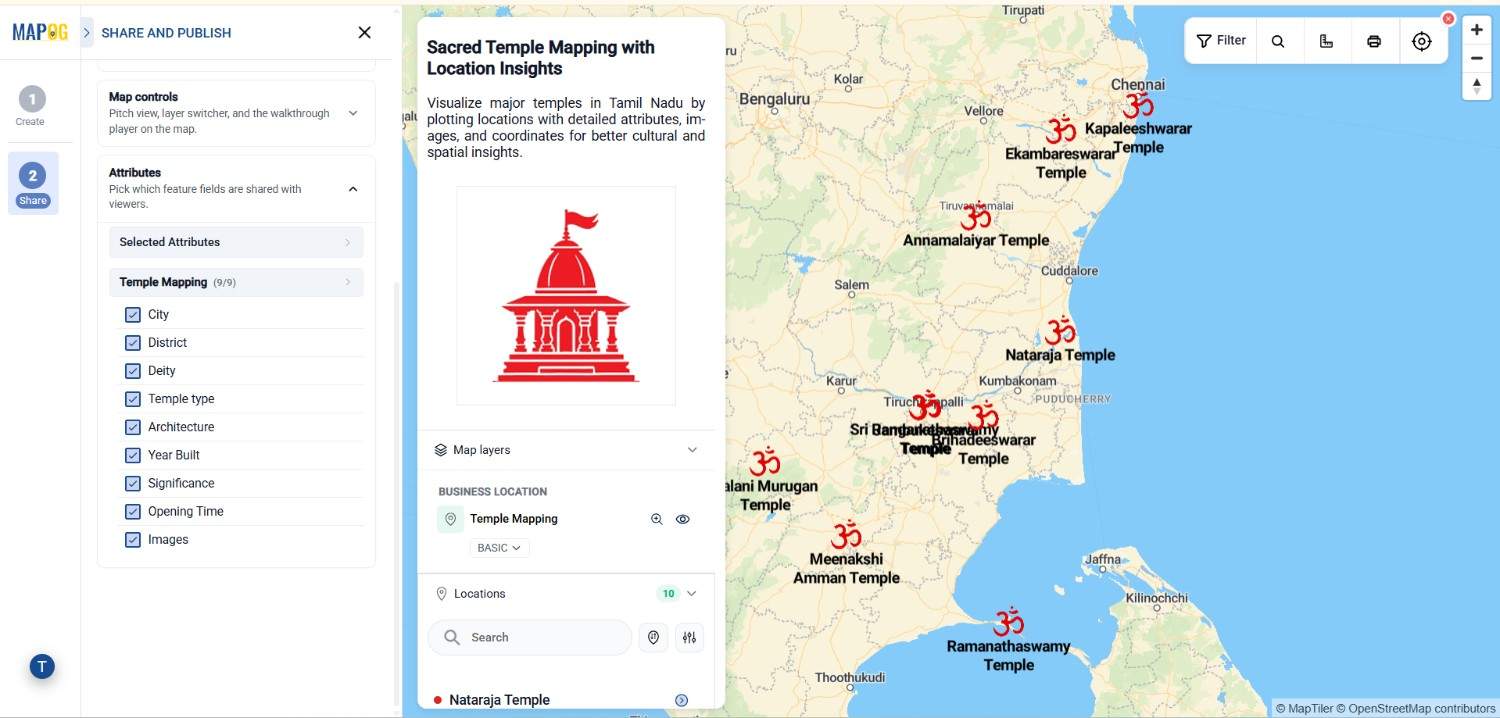
To begin with, Keyword Search allows users to quickly find locations by typing names or attributes. Instead of manually scanning the map, they can directly jump to relevant results.
Step 4: Enhance Interaction with Toolbox and Map Controls
Beyond search and filters, MAPOG provides several UI controls that improve how users interact with the map.
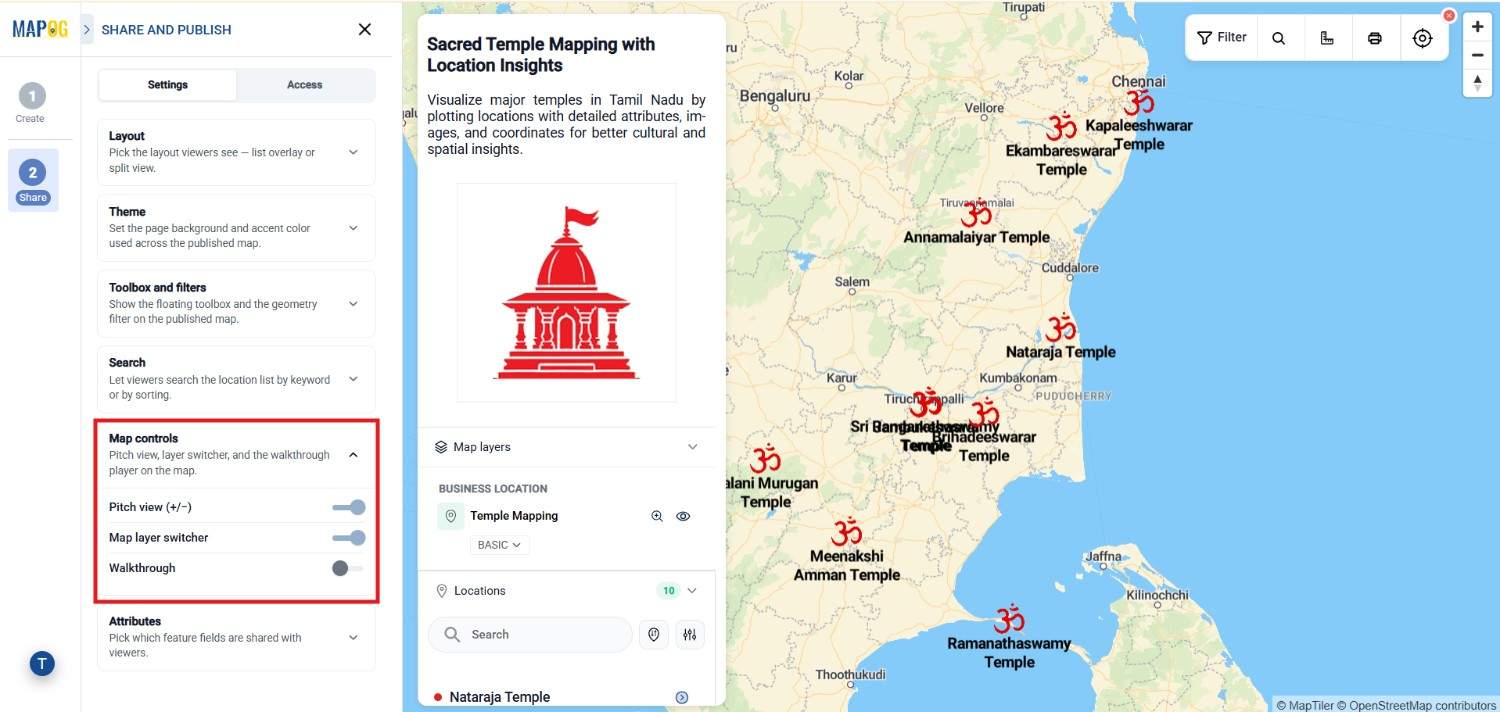
Similarly, Pitch View (+/−) allows users to tilt the map and view it from an angle. This creates a more realistic, 3D-like experience, especially useful when working with buildings or terrain. Another important feature is the Map Layer Switcher, which lets users change between different map styles such as satellite or standard view. This helps users understand both visual and structural details.
In addition, the Play Walkthrough feature provides a guided navigation experience. Instead of manually clicking each point, users can view a smooth tour of the map. This is particularly useful for presentations or storytelling.
Step 5: Assign Survey Areas to Teams
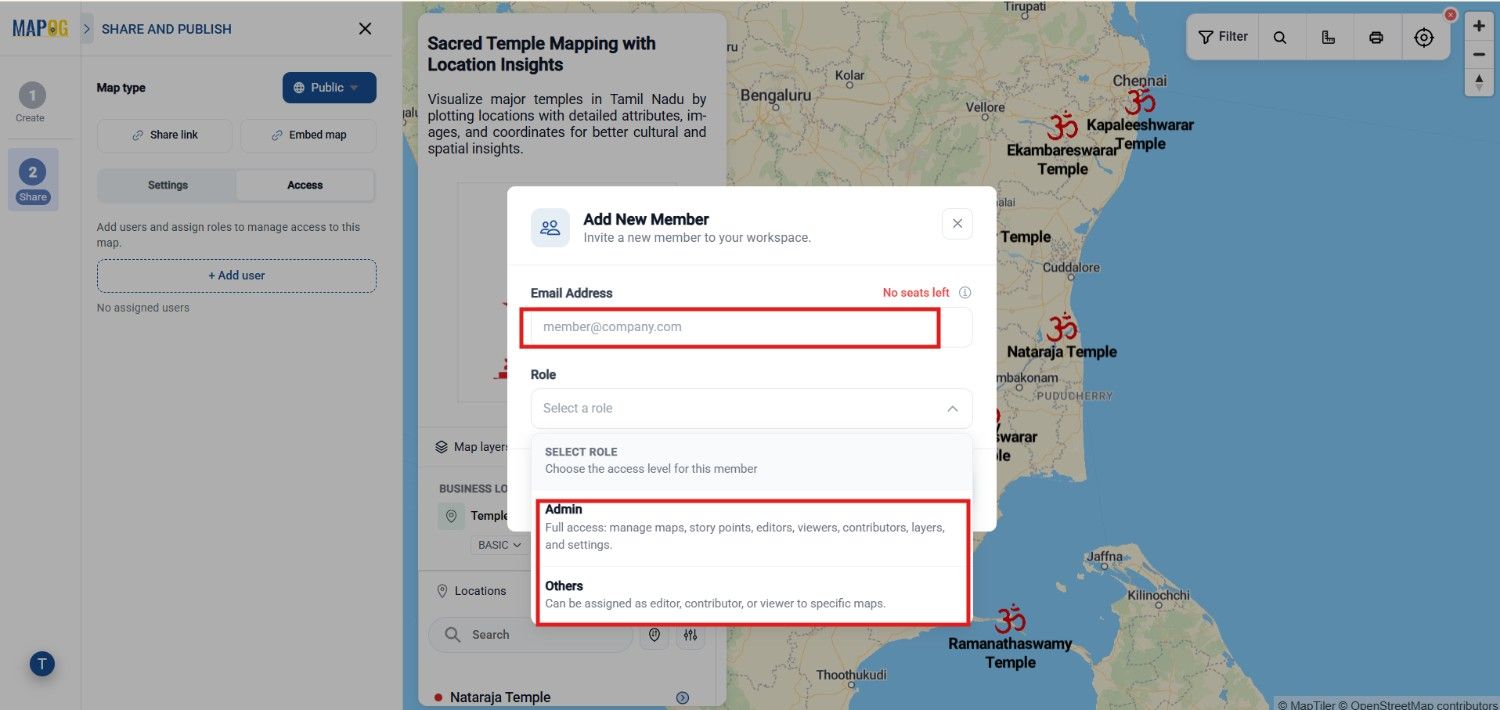
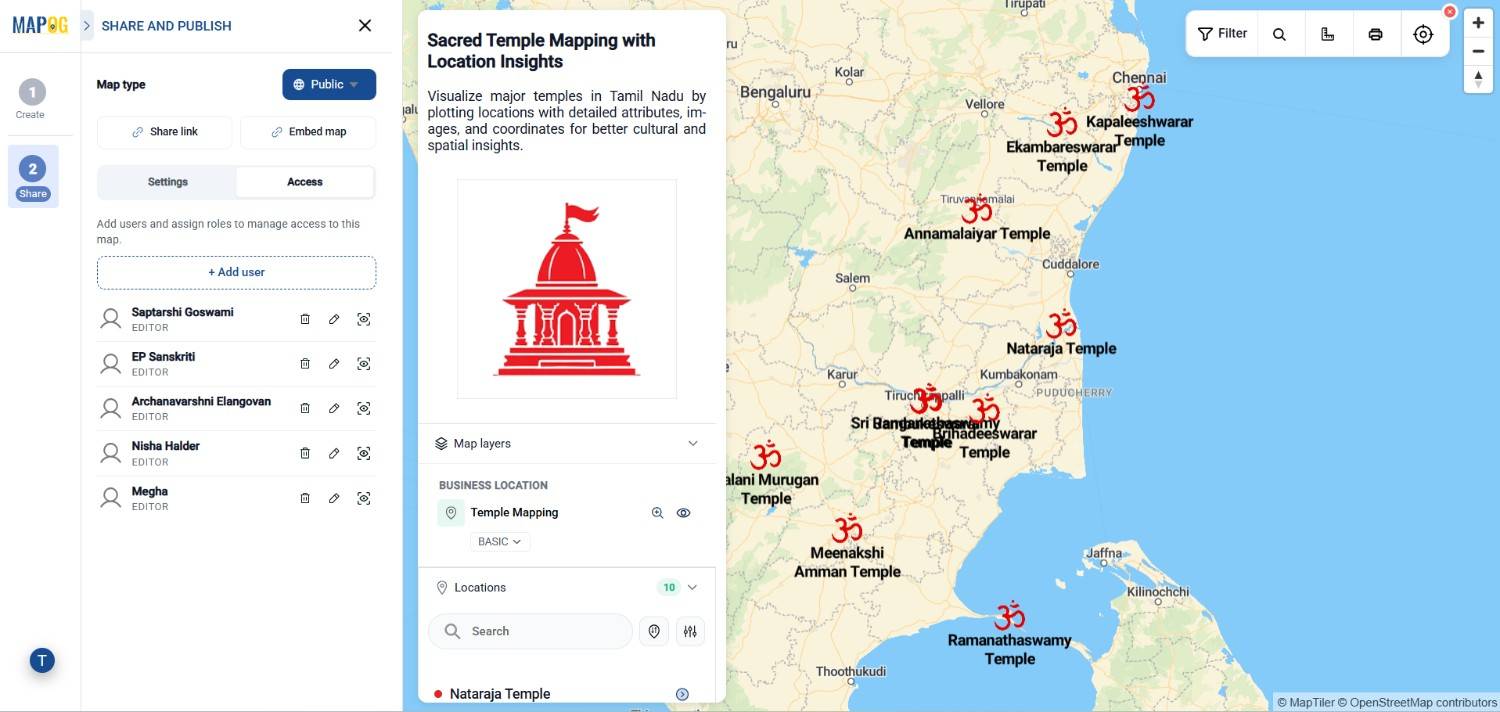
After changing the map , assign survey locations to field contributors. Go to Access and click Add Member through Add User. Enter the assignee’s email and set roles like Admin or others depending on access needs.
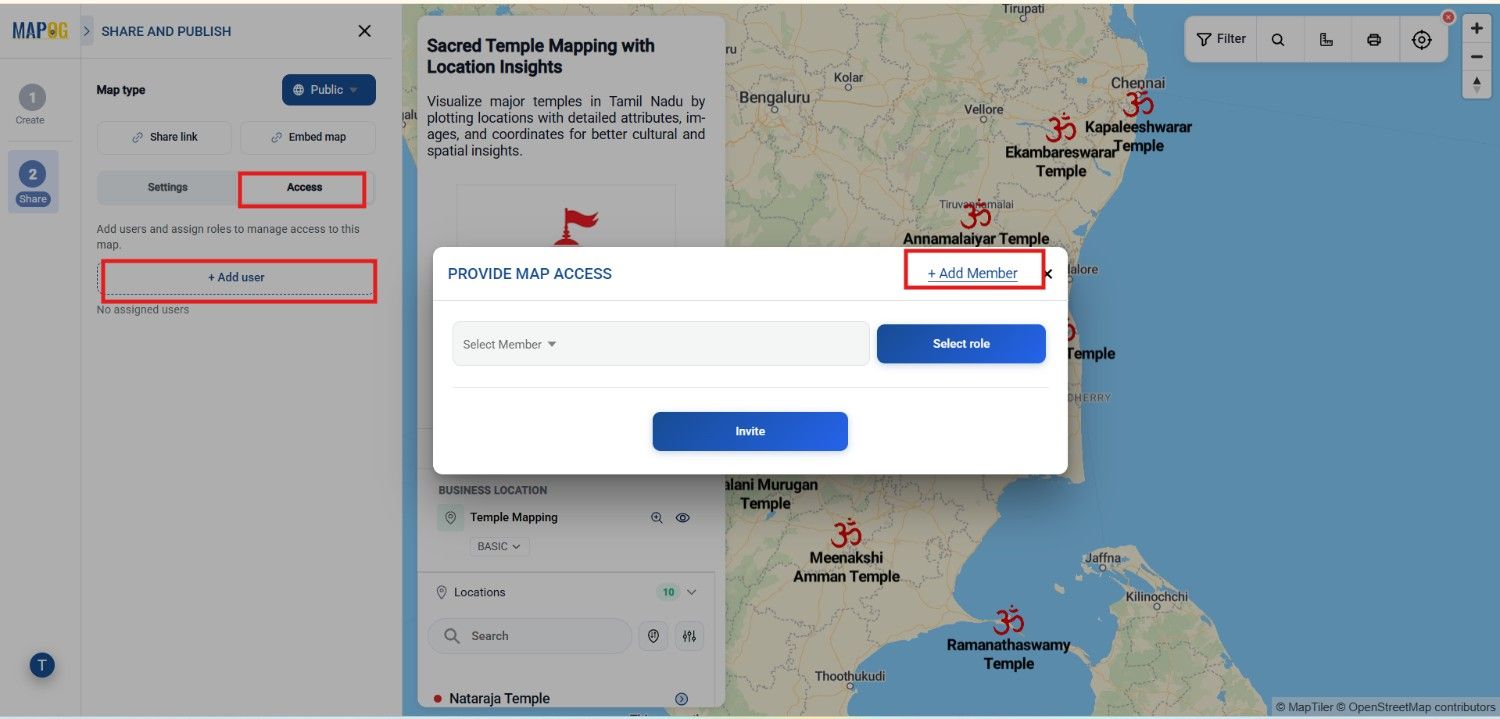
By adding their email id and select roles like, You could elaborate it like this:
Assign user roles based on their responsibilities. Administrators (Admins) have full access to the map, allowing them to create, edit, delete, organize, and manage all map layers, points, routes, media, and settings. They can also control sharing permissions and invite or remove collaborators.
In contrast, other users can be assigned Viewer or Contributor roles. Viewers have read-only access, enabling them to explore the map without making changes. Contributors can add new points, upload geotagged photos or videos, update assigned information, and edit content based on the permissions granted by the administrator. This role-based access control ensures that every team member has the appropriate level of access, improving collaboration while protecting the accuracy and integrity of the map.
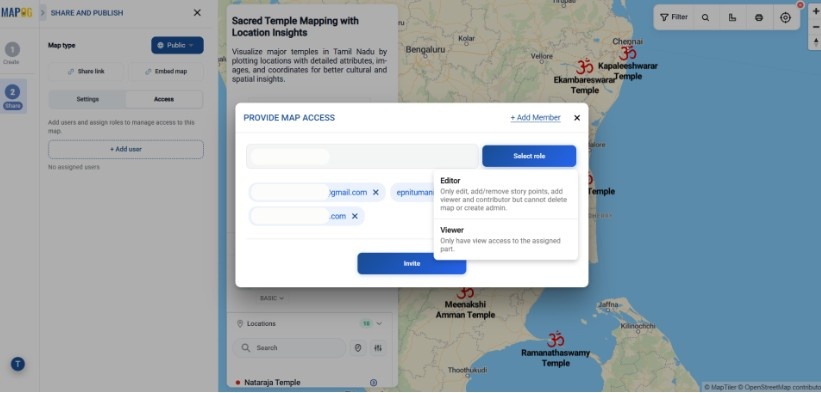
Now add team members by entering their email addresses and assign roles based on their responsibilities. Select the Editor role for members who need full access to create, edit, and manage map content, or choose the Viewer role for members who only need to view the assigned parts of the map without making changes. Once the roles are assigned, click Invite to share the map and start collaborating with your team. This ensures everyone has the appropriate level of access while keeping the map secure and well-organized.
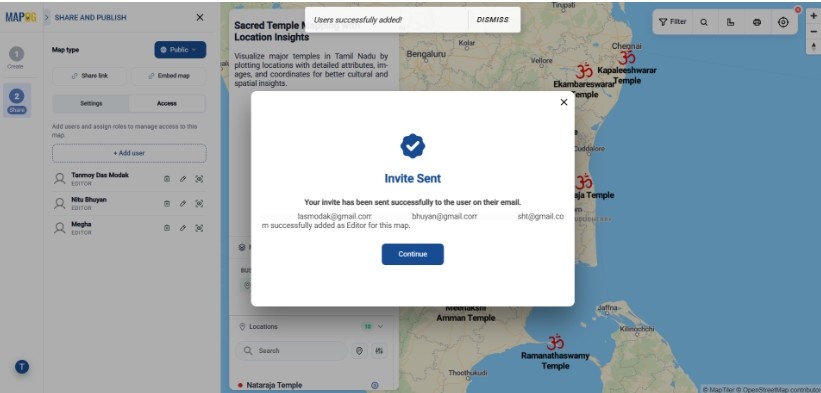
As more members join, everyone can contribute or review content according to their permissions, making teamwork more organized while maintaining control over the map data.
Benefits of Using These Features
Using these combined features significantly improves the overall value of your map.
- First, it enhances accessibility by making maps easy to share and open.
- Second, it improves usability through search, filters, and structured navigation.
- Additionally, it increases engagement by allowing users to Share Interactive maps using tools and walkthroughs.
- Most importantly, it ensures data security while still enabling collaboration.
Conclusion
Although , interactive maps help transform location data into a shared workspace where teams can collaborate more effectively. Instead of relying on static files or disconnected datasets, organizations can provide a centralized map that everyone can access, explore, and update based on their role. With features such as controlled sharing, search, filtering, and collaborative access, MAPOG helps teams stay aligned, improve visibility across operations, and make faster, data-driven decisions.