Travel agencies struggle to present complex itineraries because raw GPS tracks and scattered notes often confuse tourists. Consequently, travelers lose context, and memories fade into fragmented data. However, businesses now Explain Travel Routes Using these Travel Maps to transform these fragments into interactive experiences. By using the MAPOG’s Map annotation tool, travel professionals weave routes, breakpoints, and photos into a living narrative that tourists can revisit and share anytime.
Key Concepts: Explain Travel Routes Using Map Annotations
The core concept of map annotation involves adding text, icons, and media directly onto geographic paths. Travel businesses must Explain Travel Routes Using Map Annotations to bridge the gap between technical data and human emotion. Effective mapping relies on a clear visual hierarchy, ensuring that travelers see the most important information first. Ultimately, turning a basic map into a digital journal that keeps every mile significant.
Benefits
When travel companies Explain Travel Routes Using Map Annotations, they highlight essential information rather than overwhelming the tourist with raw data.
- Waypoints and Breakpoints: These markers provide structure to a long trip and highlight where tourists can rest, dine, or explore landmarks.
- Ordered Sequences: Numbering stops with the Assign Number Tool ensures a journey flow that is unmistakable and easy for a visitor to follow.
- Media Integration: Adding photos and personal reflections transforms a technical map into a vivid, living memory.
- Contextual Clarity: Annotations preserve the “why” behind every stop, ensuring that memories remain vivid long after the trip ends.
Step-by-Step Process: Explain Travel Routes Using Map Annotations
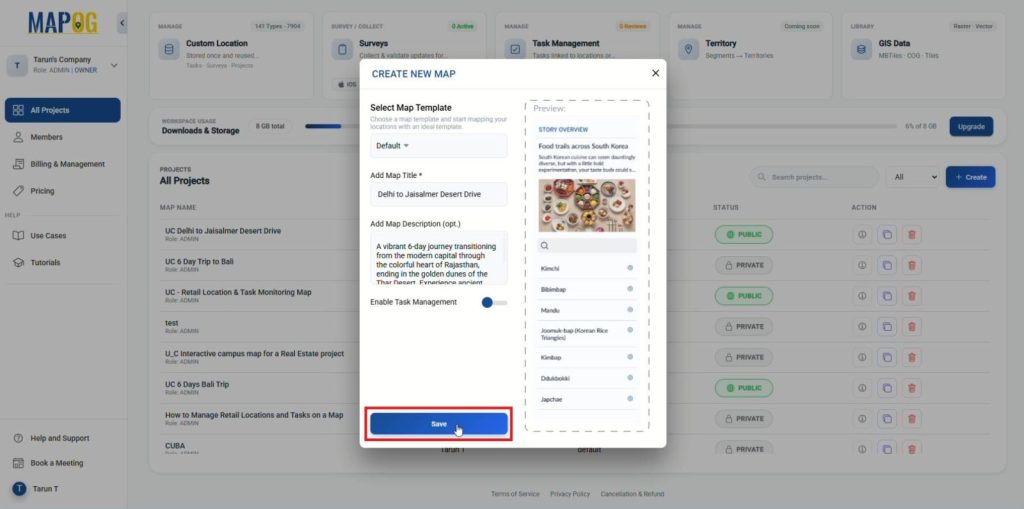
Step 1: Start with Project Setup
To begin, visit MAPOG and click “create” to create a new project, give it a suitable title, add a description then save and proceed.
Step 2: Plot Locations with Annotations
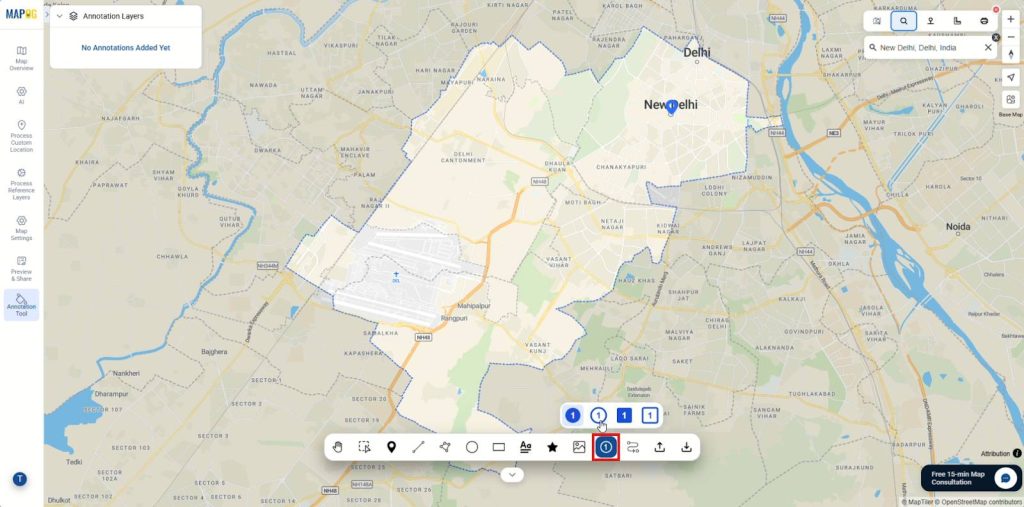
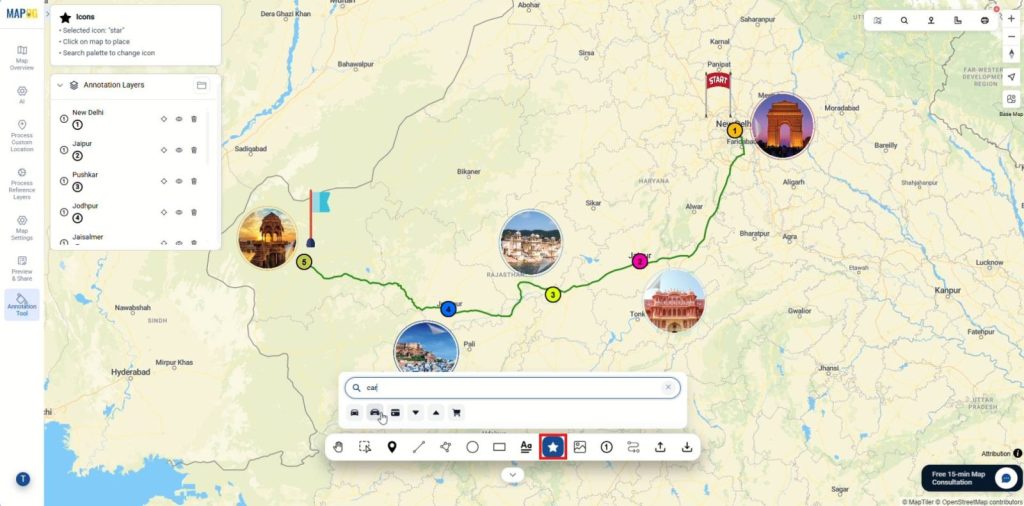
Next, open the annotation tool from the left panel and search for breakpoints and stops on your trip by address or precise coordinates.
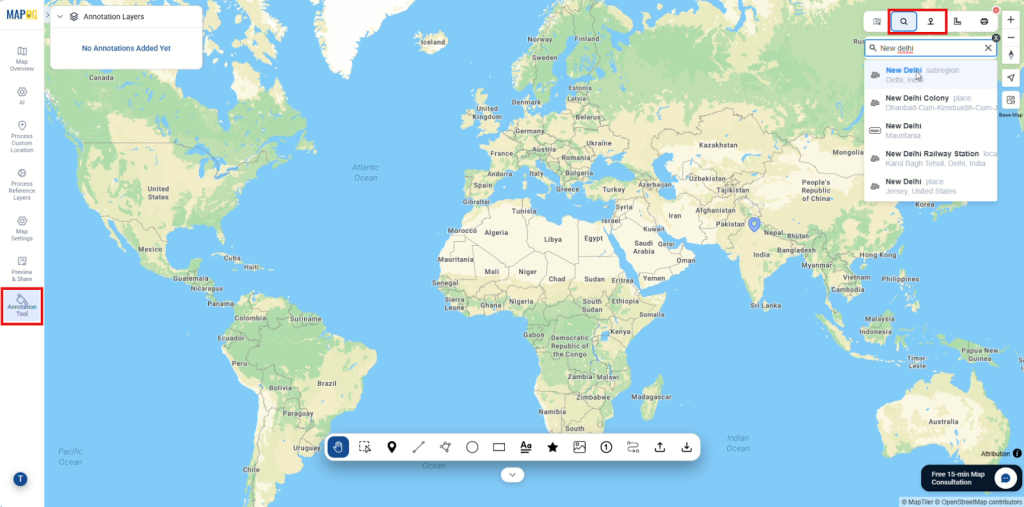
Start placing points for each stop one by one using the category symbols.
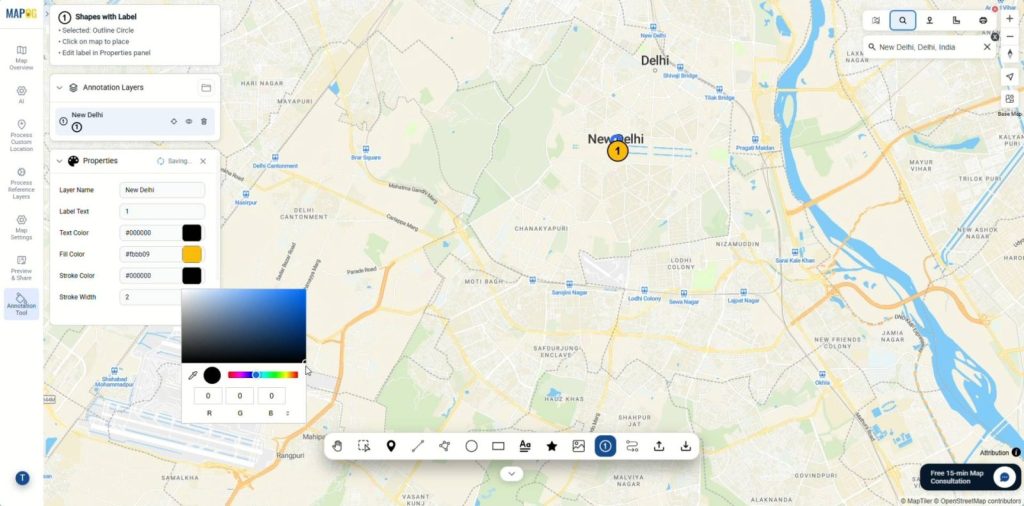
Step 3: Organize Days and Categories
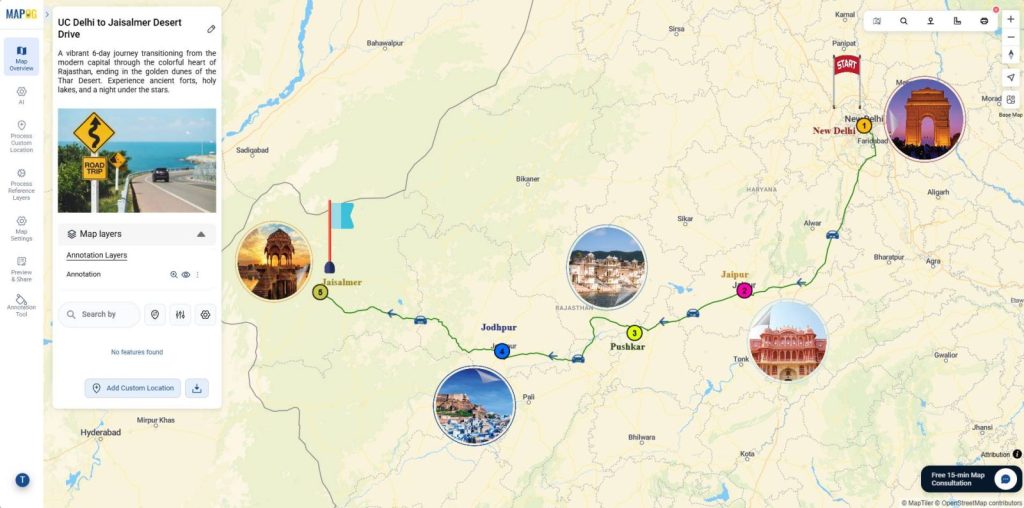
After placing the stops, add layer names, style them with distinct colors and label texts from the properties section. As a result, Day 1, Day 2, and beyond appear visually different, making itineraries easy to scan at a glance.
Step 4: Connect Routes and Add Visuals
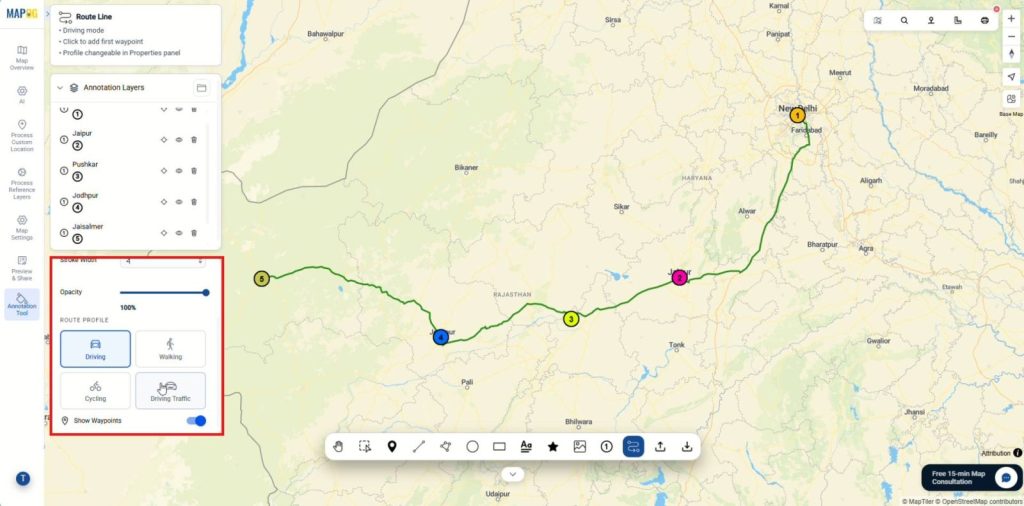
Then, choose the route line feature and link all the location points and double click to finish and connect the route.
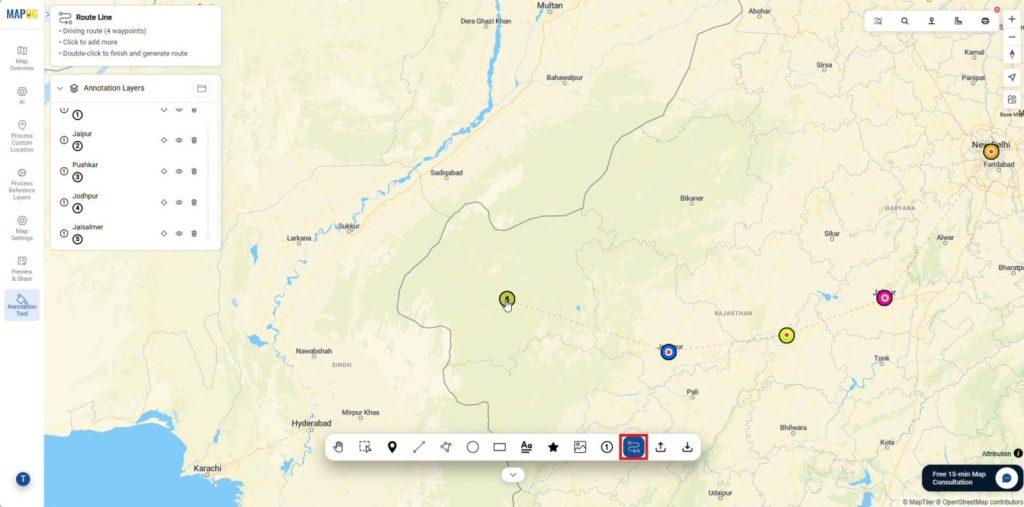
After that, update preferred mode, such as walking or driving, while adjusting route properties like name, colors and opacity.
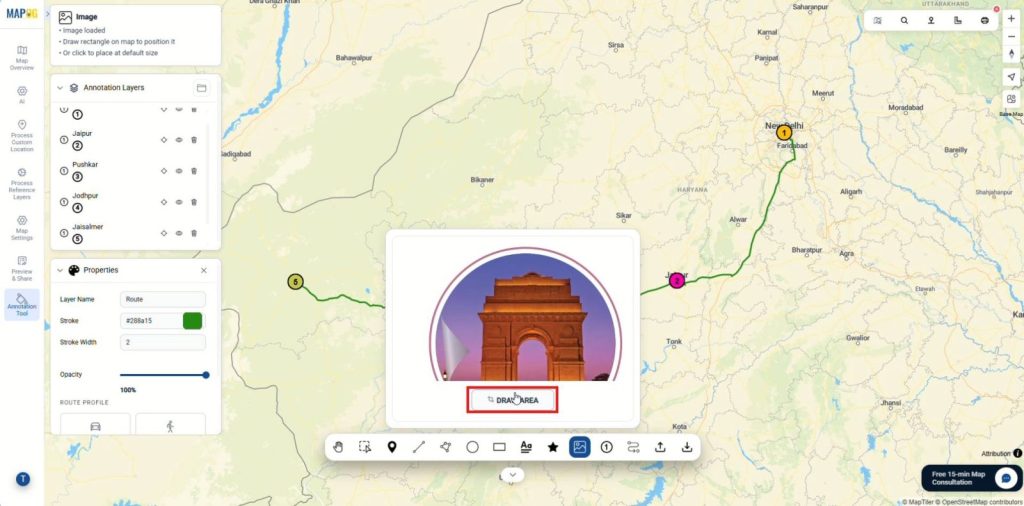
Subsequently, click on the image button then browse and select images to upload onto the map.

Then, click on the draw area and place your image.
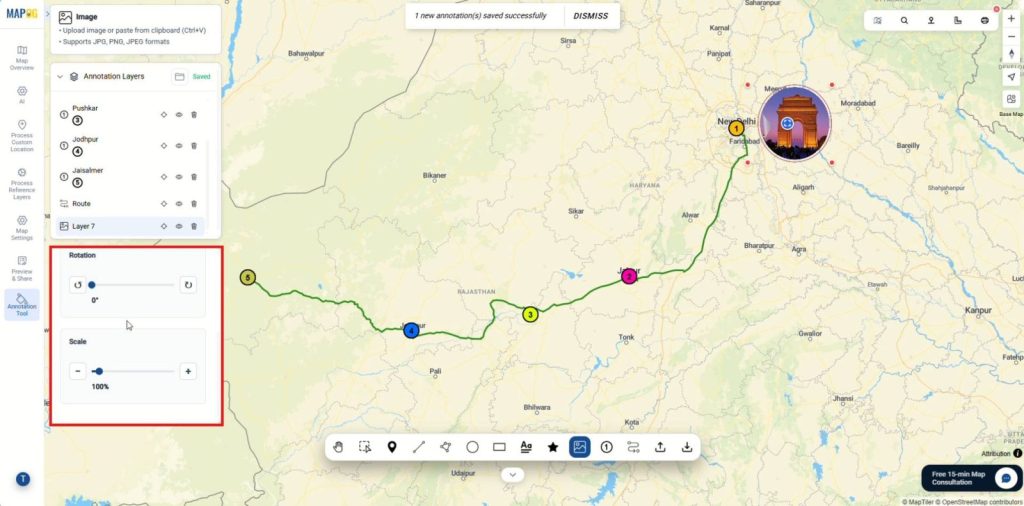
add layer names, resize or rotate them from the properties section.
Then, add meaningful symbols using icons so distances, directions, and travel flow become instantly understandable which can be changed using properties.
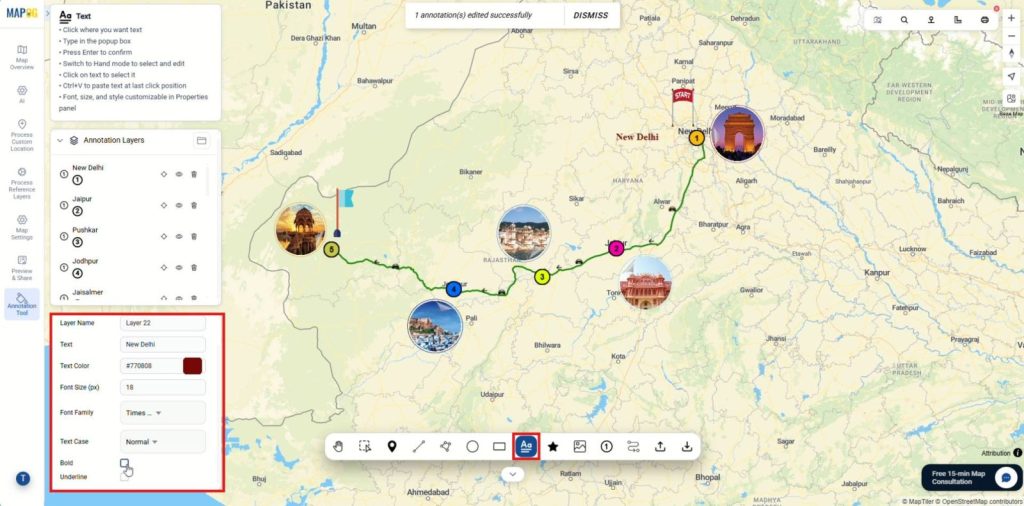
Step 5: Add Labels and Export
Finally, add texts to label key places using the label option, customize text color, size, and font, and refine any remaining map details.
Once everything looks polished, the map can be exported in GeoJSON format for GIS workflows or easy sharing, also it can be printed as a PNG file for offline use.

Industries and Domains
Various sectors utilize these visual tools to improve communication and operational efficiency. In the tourism industry, annotated routes promote eco-travel and showcase hidden gems to attract visitors. Meanwhile, transport planners use plotted breakpoints and route profiles to understand real travel behavior and design safer infrastructure. Finally, logistics managers use these markers to manage schedules and provide clear directions for complex delivery paths.
Conclusion
The ability to Explain Travel Routes Using Map Annotations bridges the gap between raw GPS data and the human experience. These tools connect the “where” with the “why,” making them indispensable for modern travel storytelling. Ultimately, the MAPOG annotation tool ensures that travel businesses preserve every journey as a complete narrative rather than just scattered fragments.