In today’s franchise industry, customers expect to quickly find nearby outlets and know exactly how far or accessible they are. A basic store locator often falls short, showing only static locations without real insight into coverage or delivery reach—leading to missed customers and poor user experience. MAPOG helps you build a store locator that goes beyond this by turning it into an intelligent, interactive map.
It lets you visualize outlets along with real travel-time zones, service availability, and demand hotspots. When embedded into your website, it helps customers find stores faster while giving your business clear insights to optimize coverage and plan smarter expansion.
Key Concepts to Build a Store Locator Map for your Franchise
The key concepts focus on how to build a store locator that improves both customer experience and business decisions. Customer convenience is essential, as users want quick ways to find nearby outlets. A store locator connects online discovery to offline action, but basic maps often fail to show real coverage, leading to missed opportunities. Adding data layers like demand and services makes the locator more effective, while interactive mapping and website integration enhance usability and provide insights to identify gaps and optimize expansion.
Step by Step Process to Build a Store Locator Map for your Franchise
1. Start with a New Map
Open MAPOG and click on “Create New Map”, select Story Mapper as template, give your project a title and a brief description, then hit save.
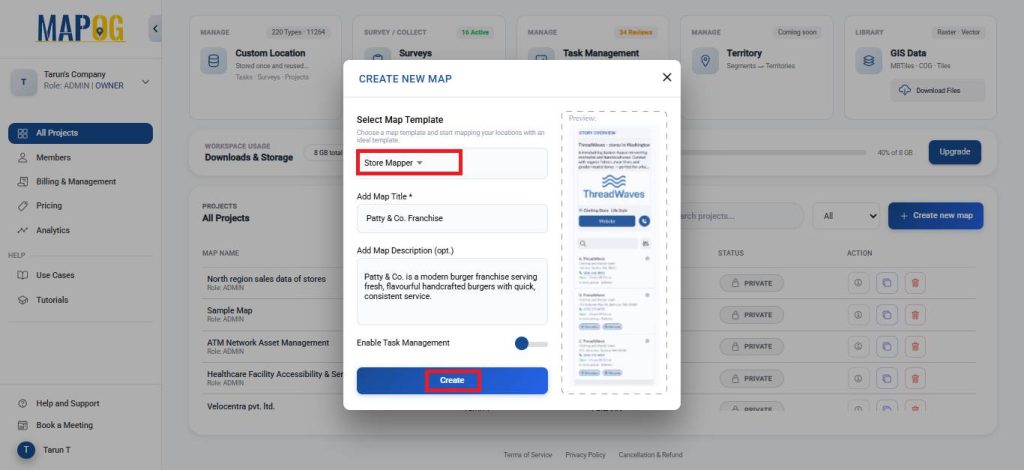
Next, open Map Settings and select Replace with your image or logo to upload your company logo.

2. Add coordinates using an Excel or CSV file
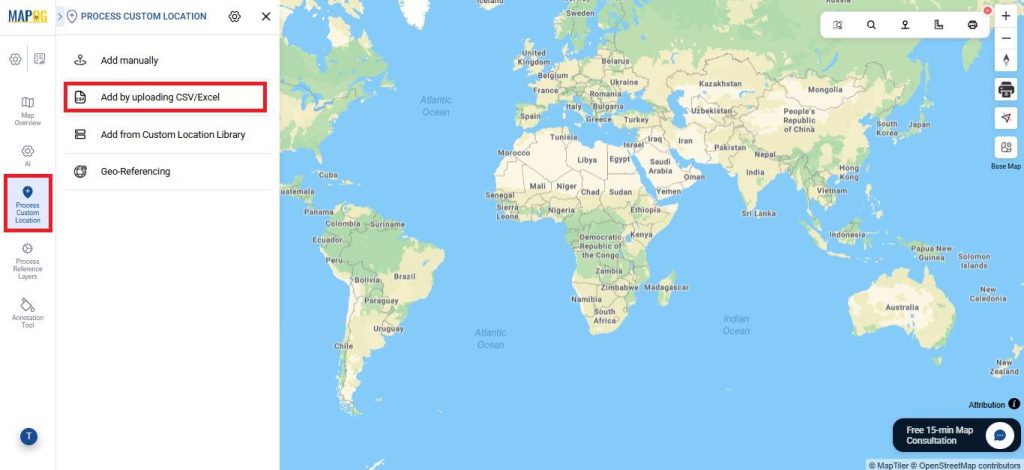
Go to Process Custom Location and then select Add by uploading CSV/Excel.
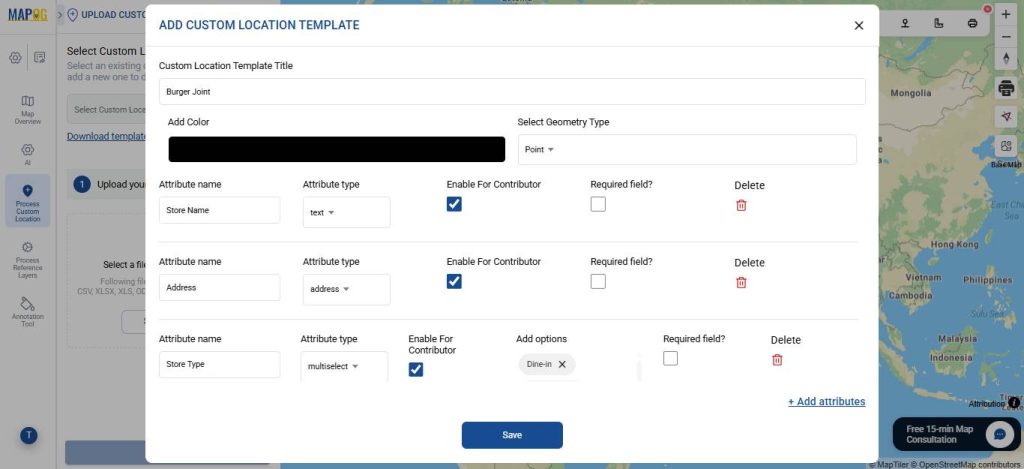
Go to Custom Location Template Settings and create a new template, for example Burger Joint, to standardize how location-based tasks are recorded and ensure consistent data collection. Select the geometry type as Point, choose a suitable colour, and add required attributes using text, number, select, or multi-select fields based on the information you want to capture. Moreover, you can enable contributor access so that data can be updated directly from the field. Once configured, save the template.
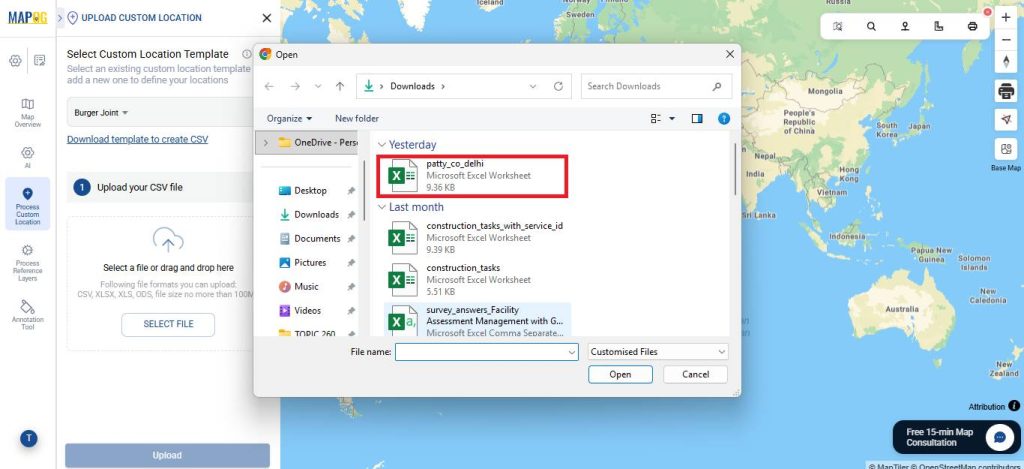
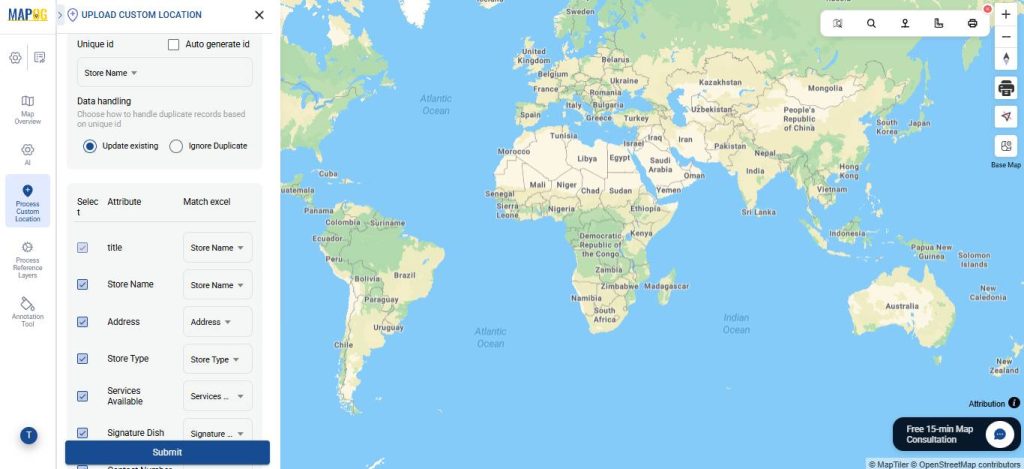
And then, select the template from the dropdown and upload your desired Excel file.
Then, Assign a Unique ID to uniquely identify every location, helping prevent duplicates.
Match your Excel columns with the corresponding attributes.
Select the field type as latitude and longitude (or WKT location, if preferred). After that, click Submit.
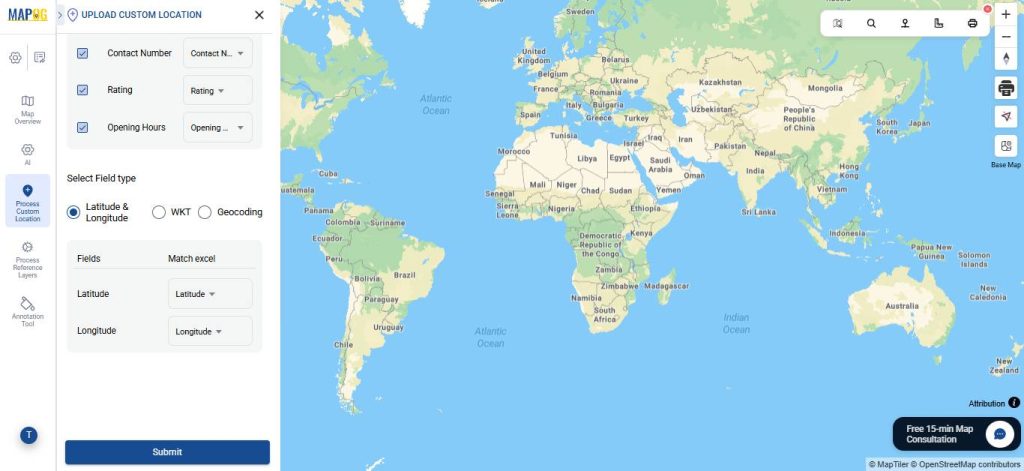
Your points will now appear on the map.
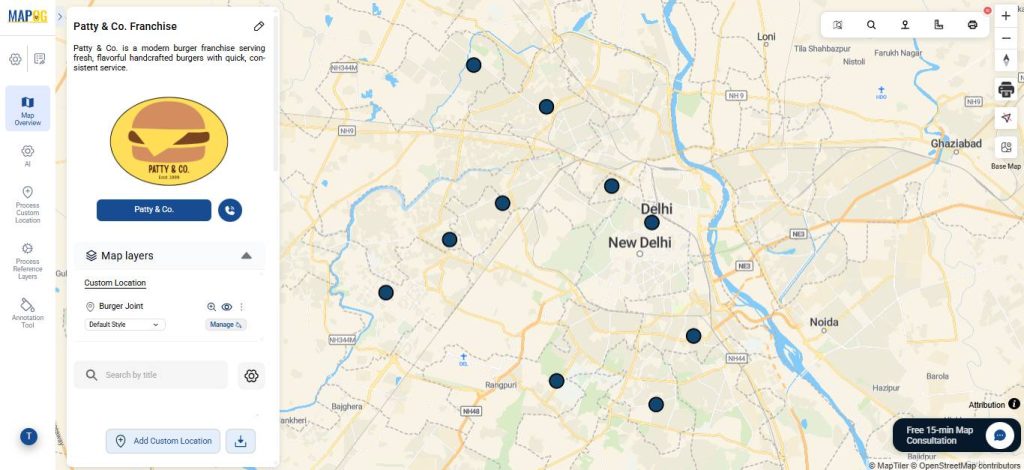
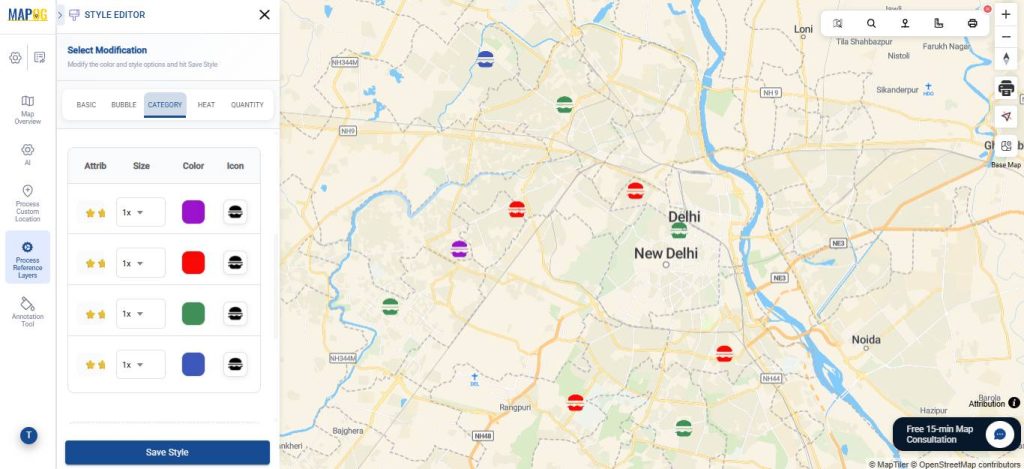
3. Style the icon
After that, click Add Layer Style to customize how the point appears.
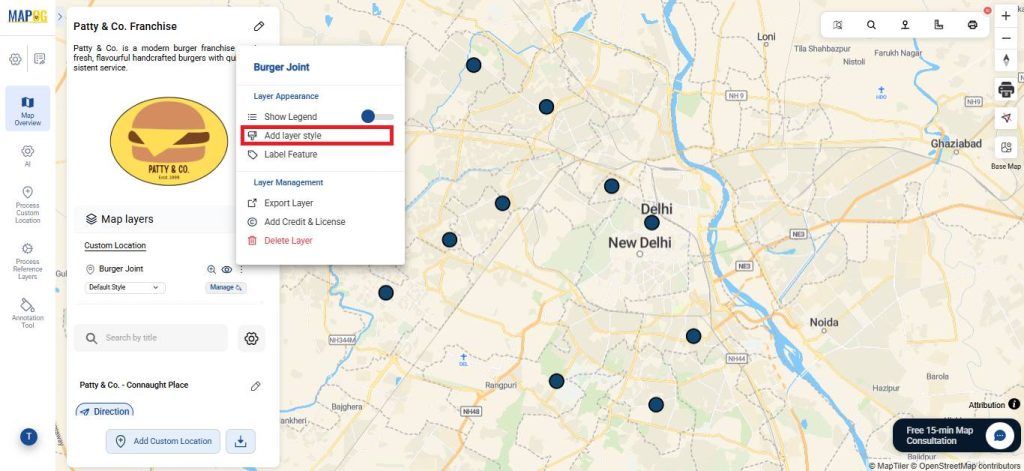
Choose category icons and assign suitable icons and colours for each option.
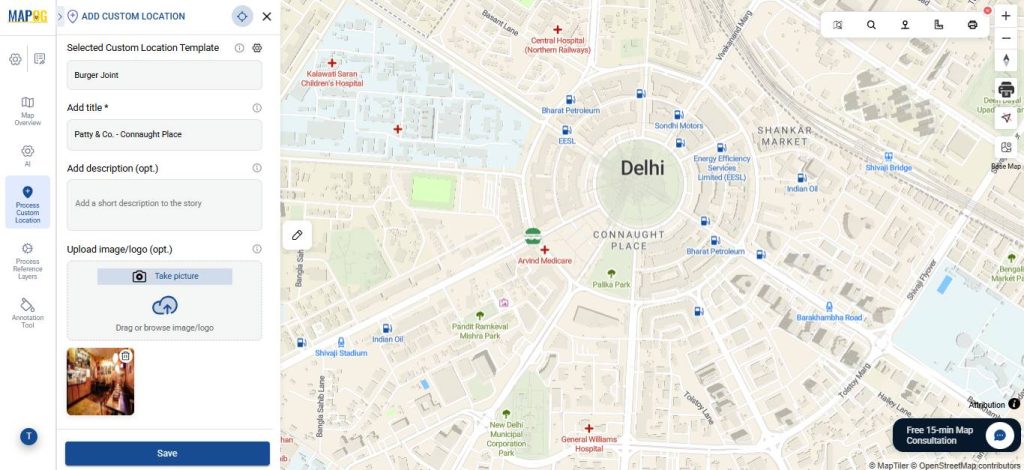
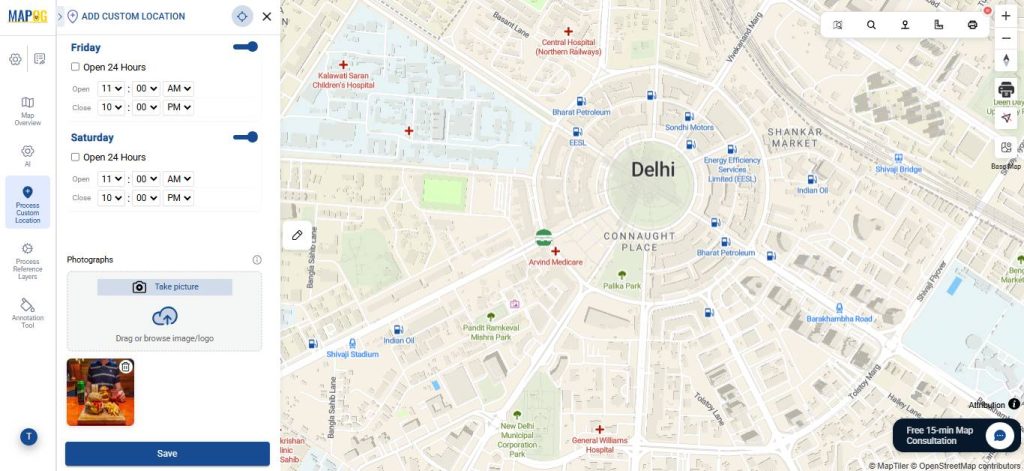
4. Editing the points
Open Edit Custom Location Details and add description and images to complete the attributes.
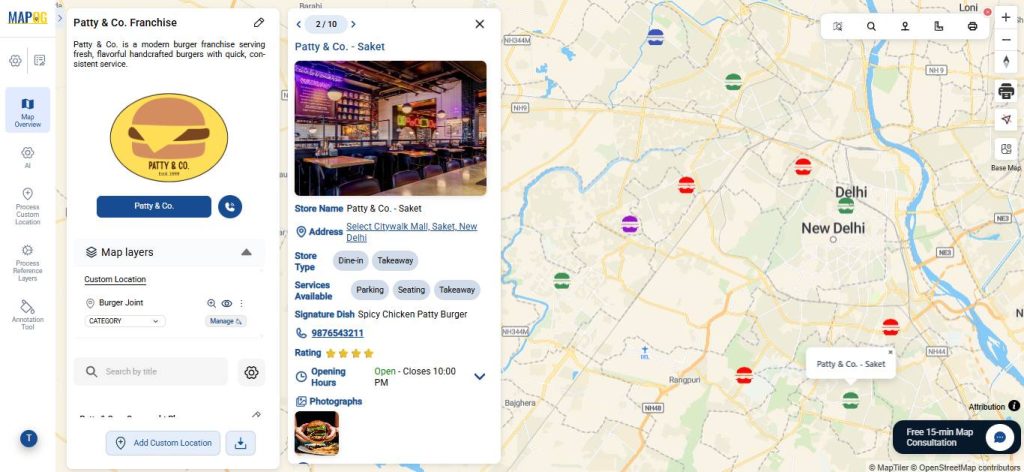
5.Display Properties
Click on the settings icon, select the properties you want to display, like store name, address, rating, or contact number. These will then appear on the map overview, making each location more informative than just a pin.

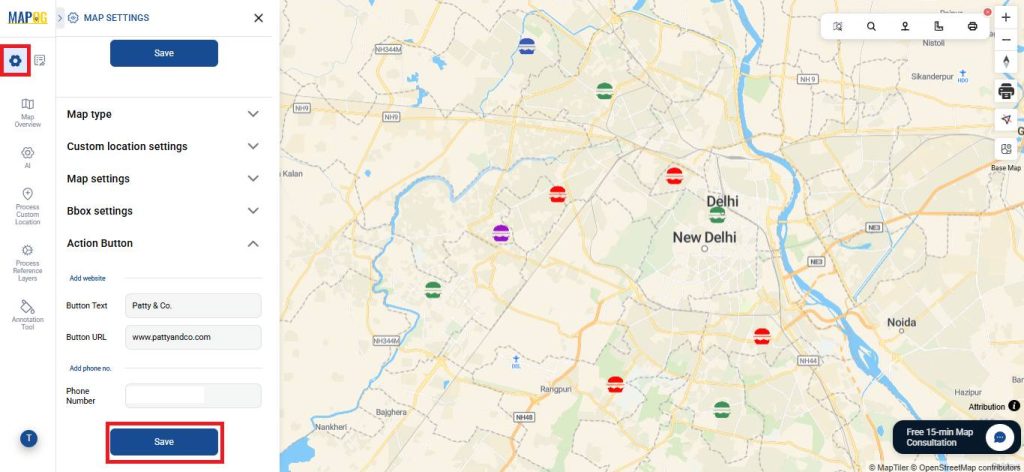
6. Add Call to Action Button
Use call-to-action buttons for website visits, or contact. They let users take quick action directly from the map, improving experience and conversions.

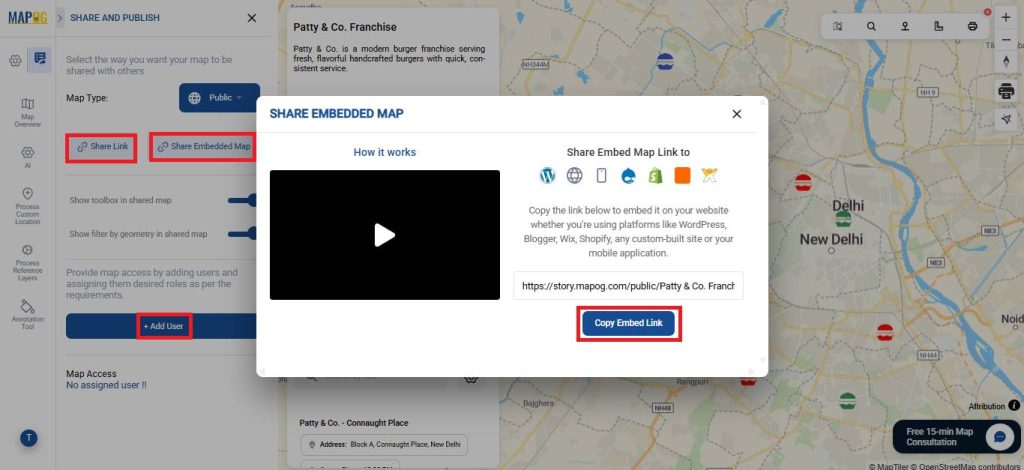
7.Preview and Share
To share your map, click Preview and Share share via link or embed it on your website using the copy embed link option. After clicking Copy Embed Link, paste the provided link into your website’s HTML or an embed block. This displays a fully interactive map directly on your page, which updates automatically whenever you make changes to the map. You can also invite users to collaborate and edit the map using the add user option.
Real World Applications
Across industries, the ability to build a store locator is key to connecting customers with nearby outlets. In food and beverage, it helps users find stores and check delivery options; in retail, it guides customers to the right locations; and in service businesses, it directs them to the nearest branch with relevant details. For franchises, it also supports expansion by revealing demand patterns and coverage gaps, improving both customer experience and business decisions.
Conclusion
In conclusion, the ability to build a store locator is no longer optional but essential for modern franchises. It helps customers quickly find and access nearby outlets while enabling better business decisions through improved visibility and insights. With MAPOG, this becomes even more powerful—transforming a simple locator into an intelligent tool that enhances user experience, reduces missed opportunities, and supports efficient growth and expansion.
Here are some other blogs you might be interested in: