Construction projects involve multiple parallel activities happening across different parts of a site. To manage builder tasks like electrical wiring, plumbing installation, and pipeline work that often run simultaneously, handled by different teams. Without a structured system, tracking progress becomes difficult, and delays become common. A map-based task management approach using MAPOG, helps manage builder tasks by linking every task to its exact on-site location.
Key Concepts for Managing Builder Tasks on Map using Task Management
Map-based task management allows to manage builder tasks like electrical, plumbing, or pipeline tasks, by assigning directly to specific site locations, improving clarity. Tasks can be categorized as installation, maintenance, repair, or inspection, while multiple teams can work in parallel with dependencies clearly visible. Meanwhile, field teams update progress in real time, giving managers a centralized view. As a result, coordination and efficiency improve.
Step by Step Guide on using Task Management for Managing Builder Tasks
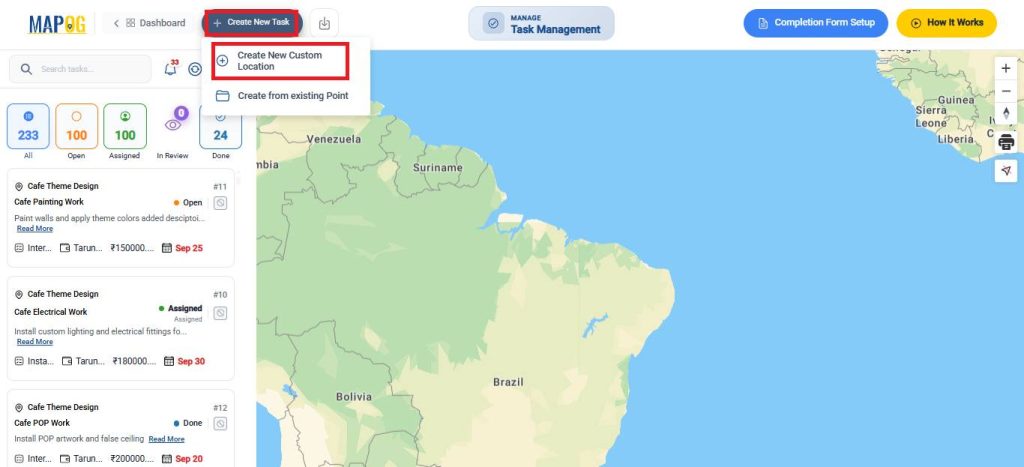
1. Create a New Task and Custom Location
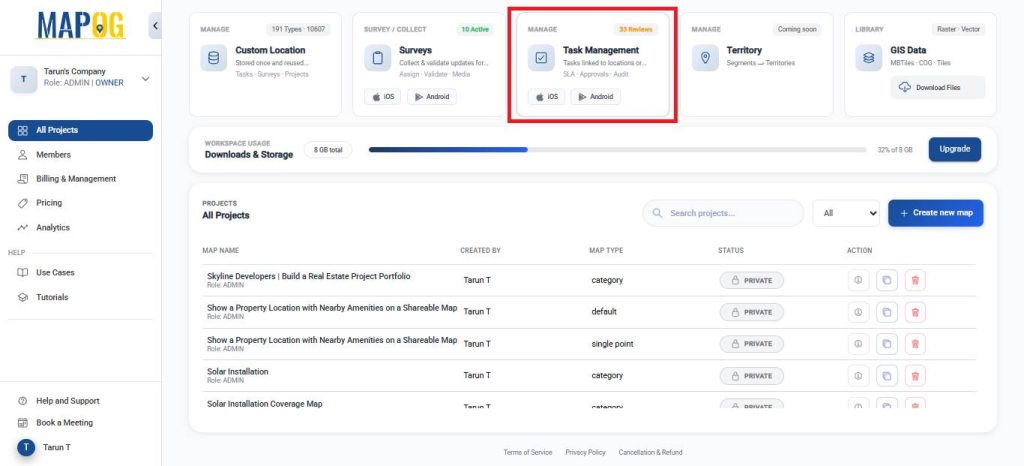
Open MAPOG and click on Task management.
Then, click on create new task and select Create New Custom Location.
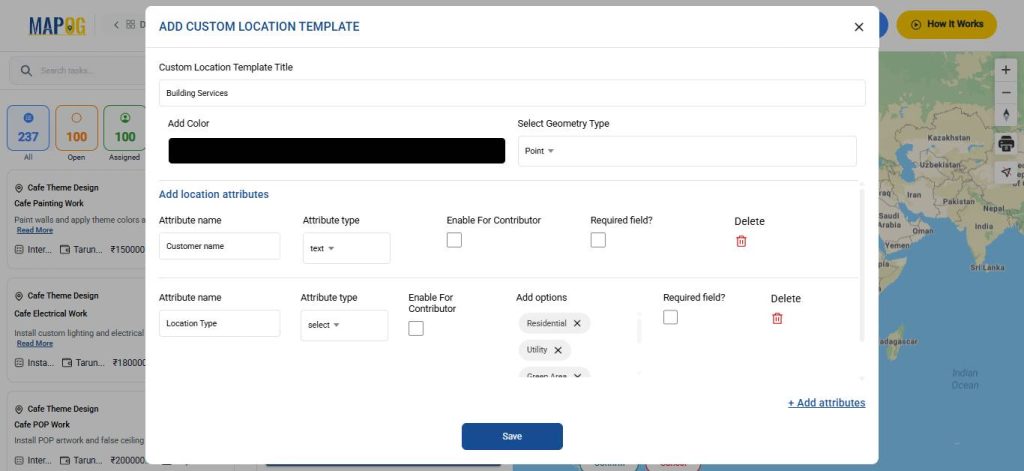
2. Configure Custom Location Template
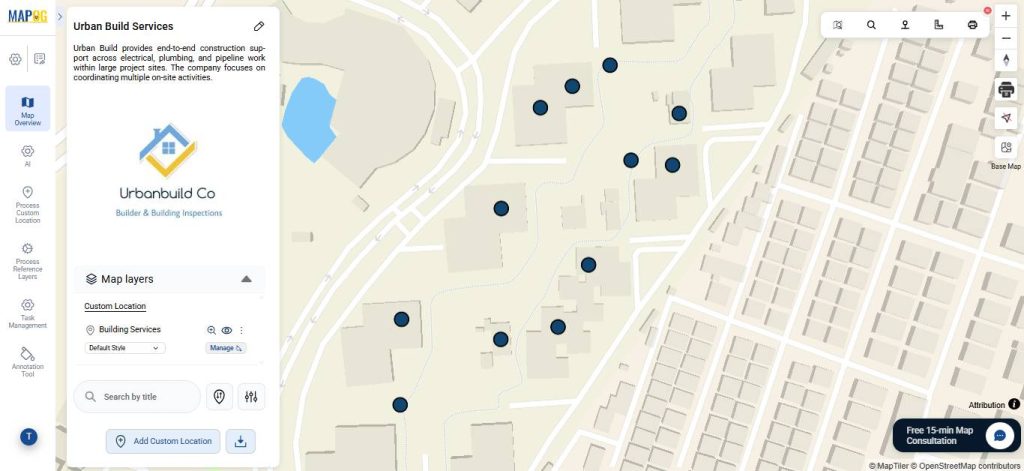
Go to Custom Location Template Settings and create a new template, for example Building services, to standardize how location-based tasks are recorded. Then, select the geometry type as Point, choose a suitable color, and add required attributes using text, select, or multi-select fields. Once configured, click save.
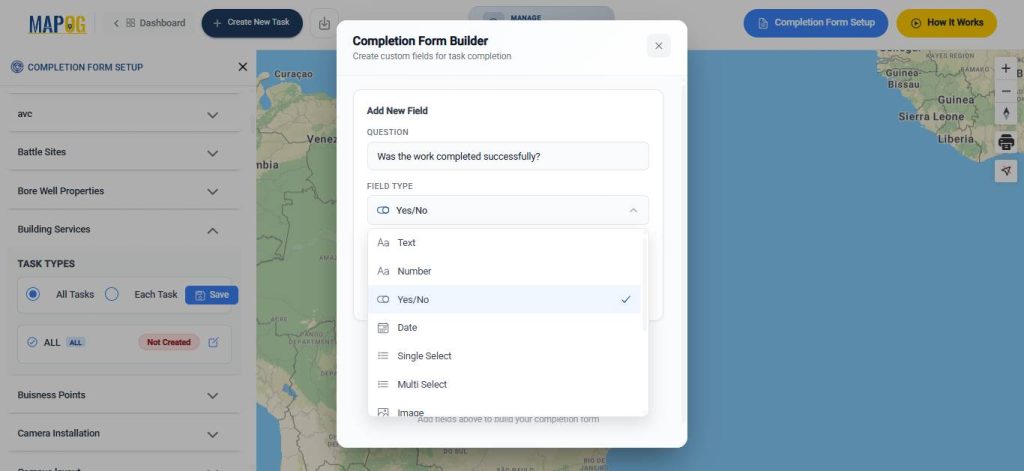
3. Set Up Completion Forms
Next, click on Completion Form Setup select the custom location template to capture standardized, location-specific information and ensure consistent task reporting.
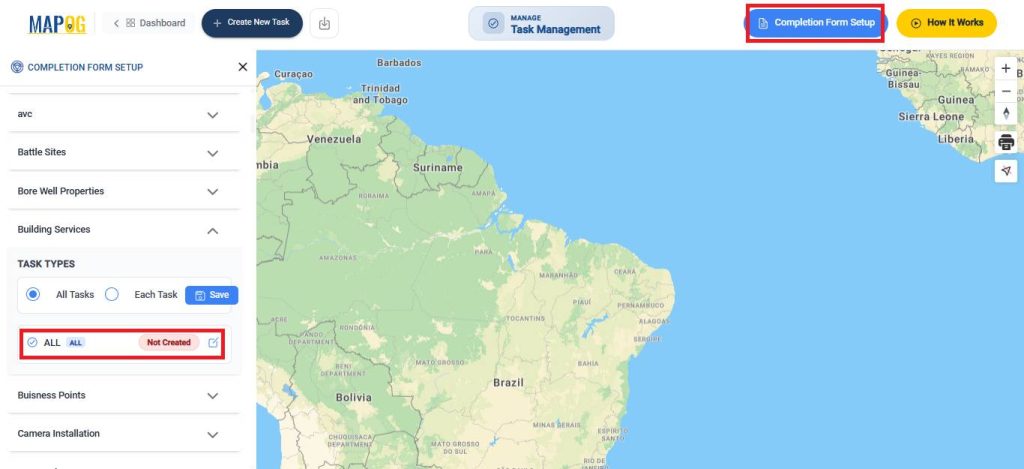
Select all tasks and create a questionnaire by adding relevant questions using field types such as text, select, or multiselect. After configuring, click Save.
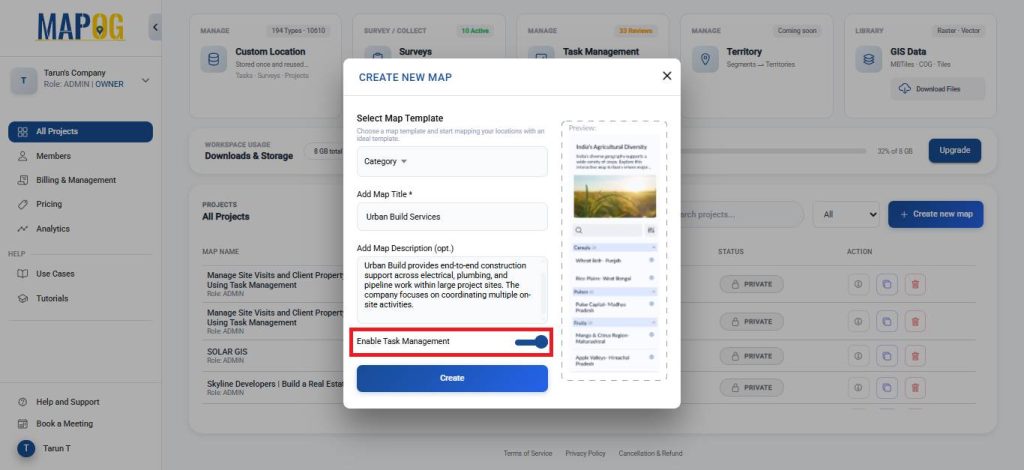
4. Create a Map
Return to the MAPOG Dashboard and click Create New Map. Select Template as the category, add a project title and description, enable Task Management, and click Create to save the project.
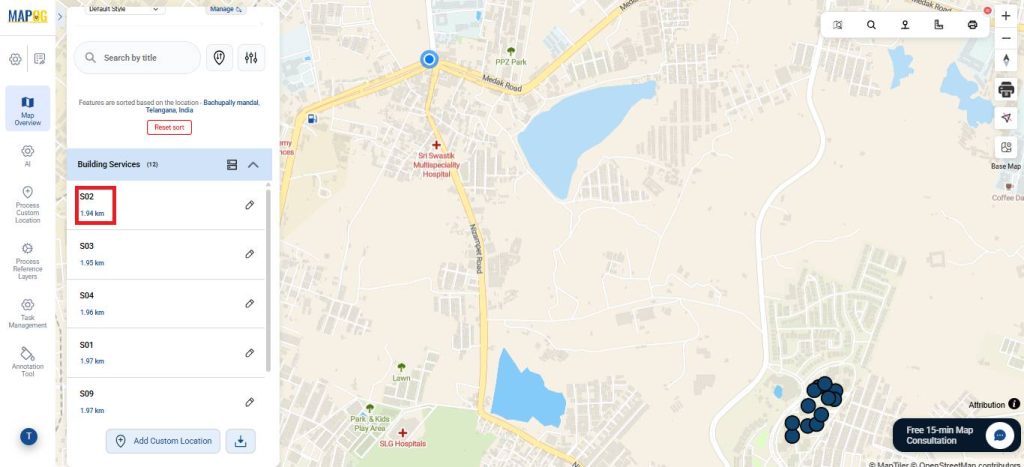
5. Add coordinates using an Excel or CSV file
Go to Process Custom Location and then select Add by uploading CSV/Excel to quickly upload multiple locations at once.
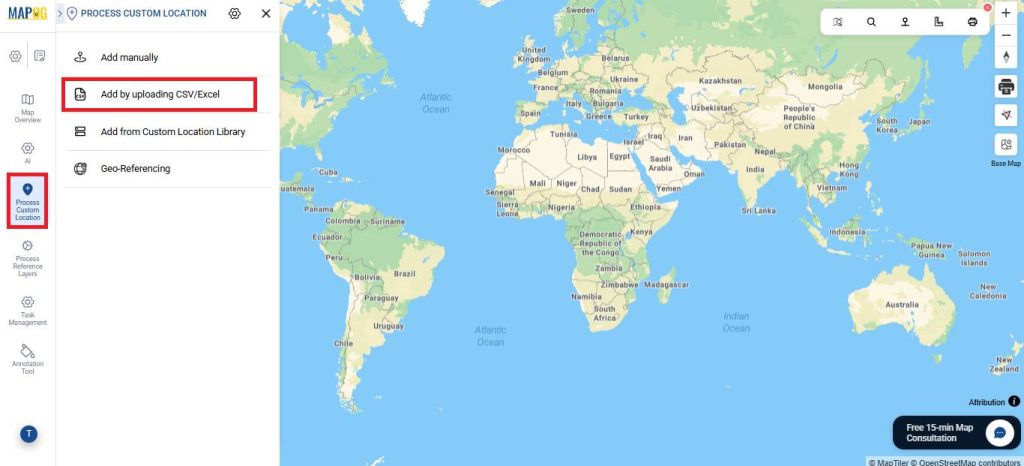
Select the custom location template you created earlier from the dropdown. And upload your desired file.

Assign a Unique ID to uniquely identify every location, helping prevent duplicates.

Match the attributes with excel and field type to latitude and longitude. Lastly, hit submit.
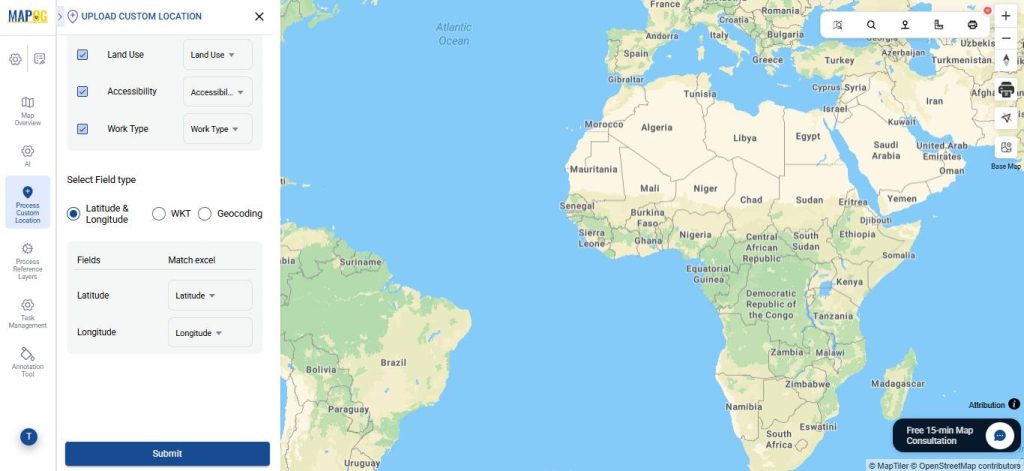
Your points will now appear on the map.
6. Edit, Group, Filter and Sort the points
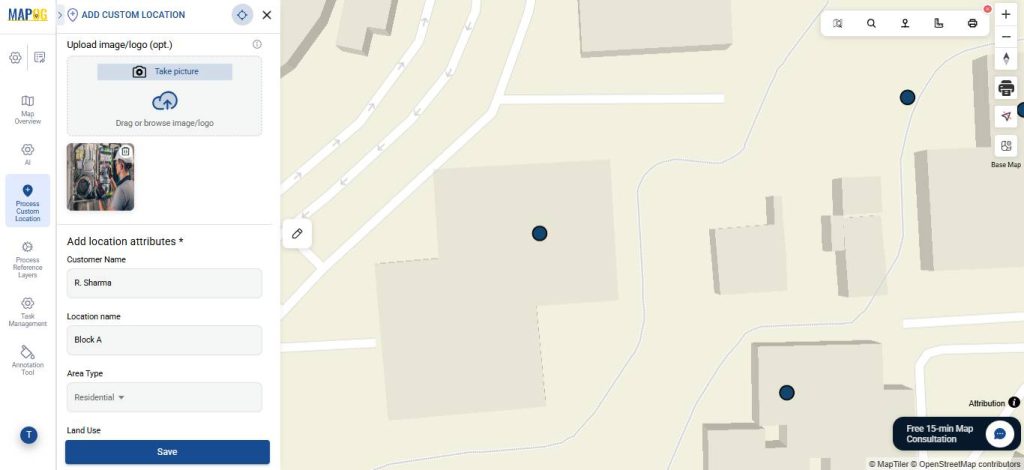
Then, go to Edit Custom Location Details and add description and images to complete the attributes.
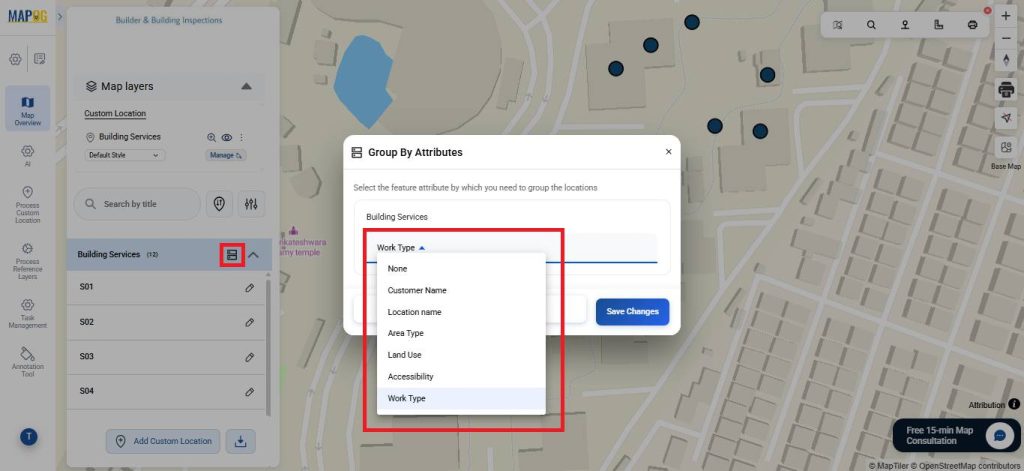
Next, select Group by Attributes to categorise the points based on one particular attribute.
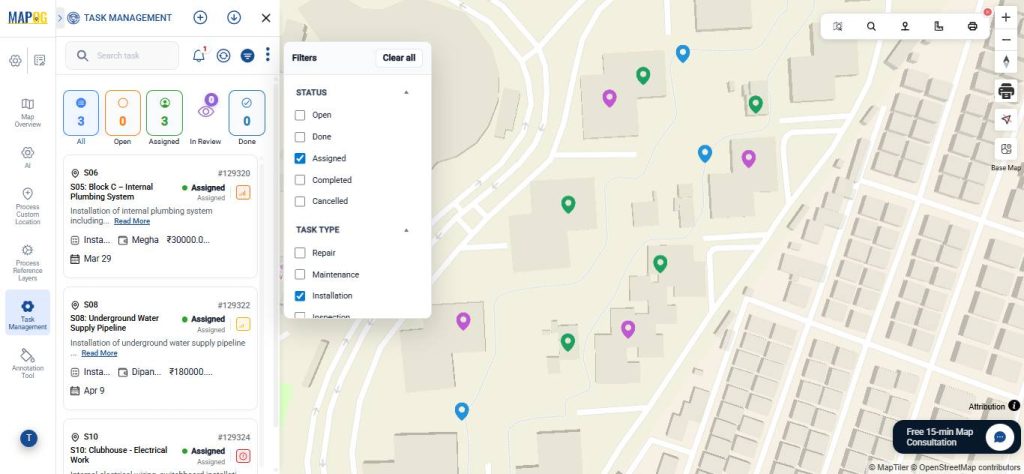
Use the filter option to show specific points by attributes like type, area etc focusing on the most relevant information applied.

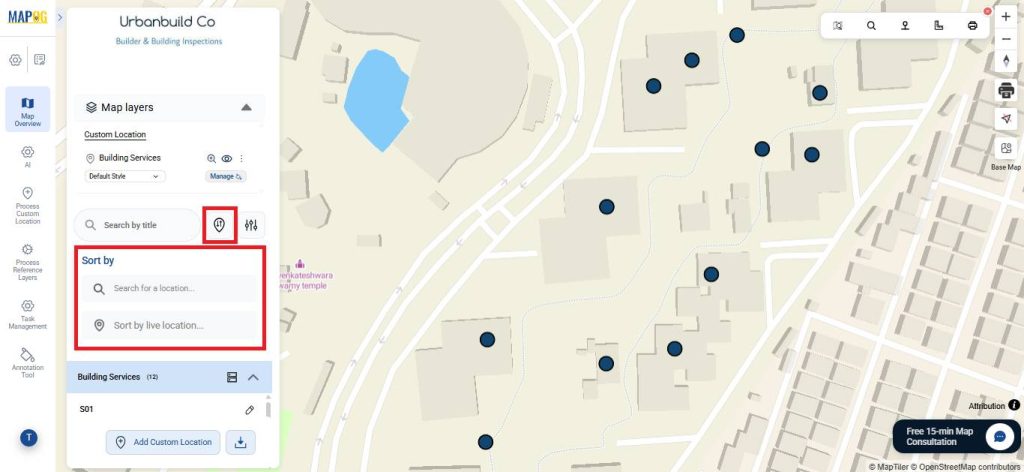
Features like Sort by Live Location and Search for Location let users quickly see distances between mapped points and searched locations.
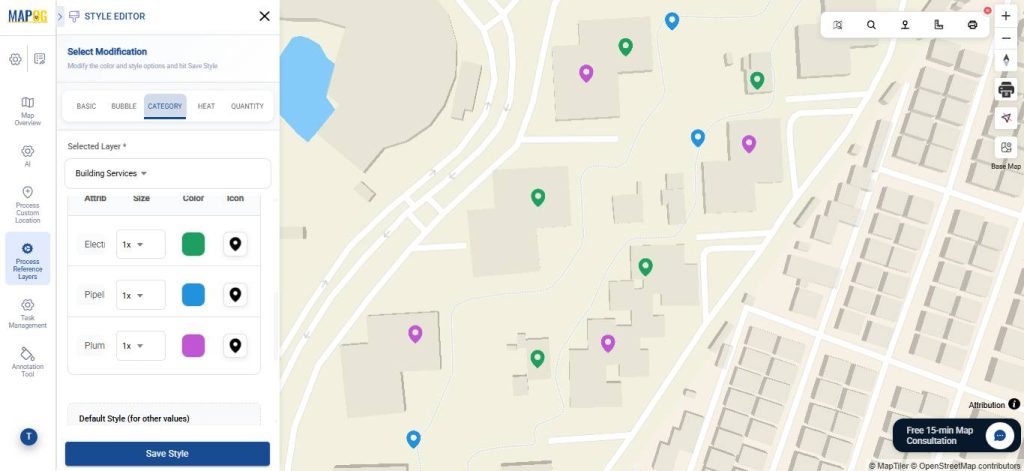
To style the icons, first click Add Layer Style, then choose Category Style, and select the attribute to categorize the points.
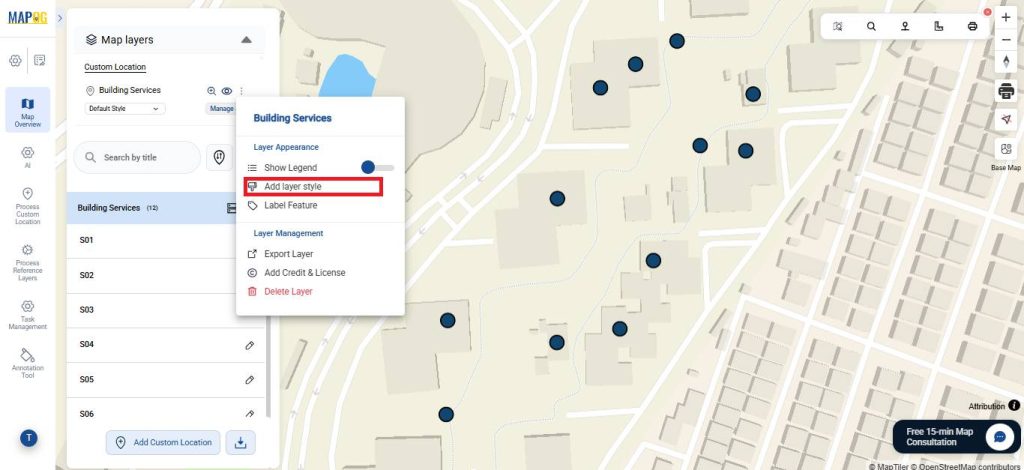
Then, select icons and colours—green for electrical, blue for pipeline, and purple for plumbing—and save the style.
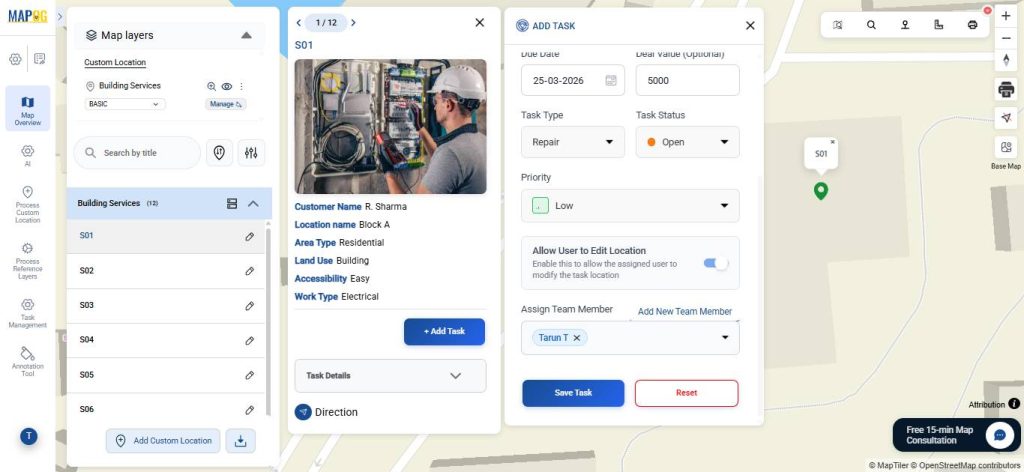
7. Assign Tasks
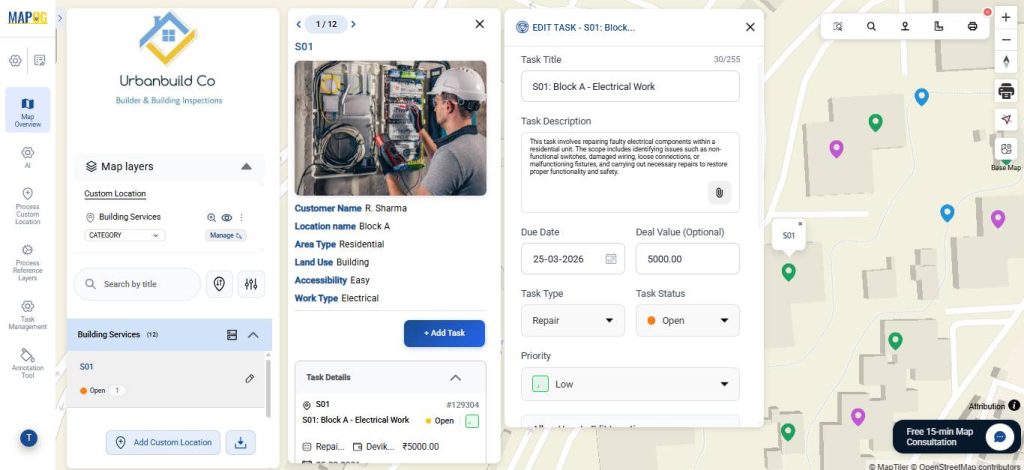
Select a point on the map and click Add Task. Fill in task details such as, Task title, Description, Due date, Deal value etc.
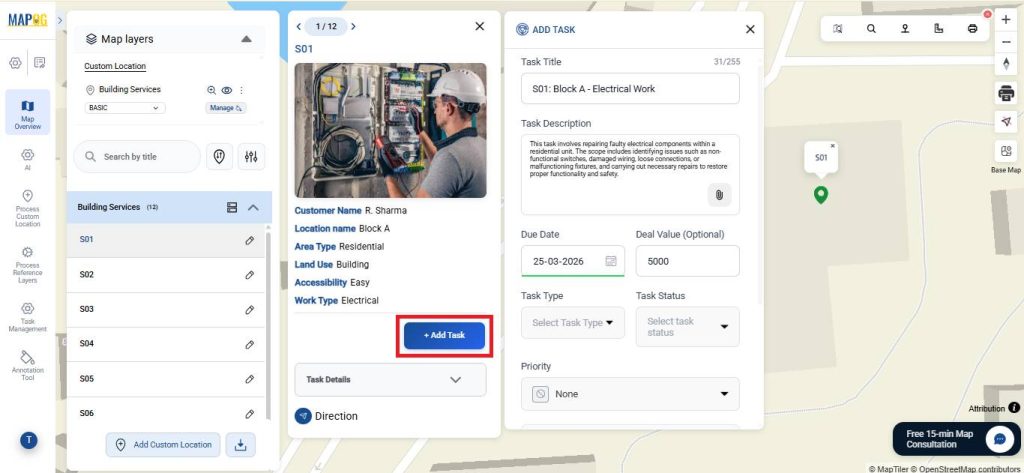
Next, assign a task type like Installation, Maintenance or Inspection.
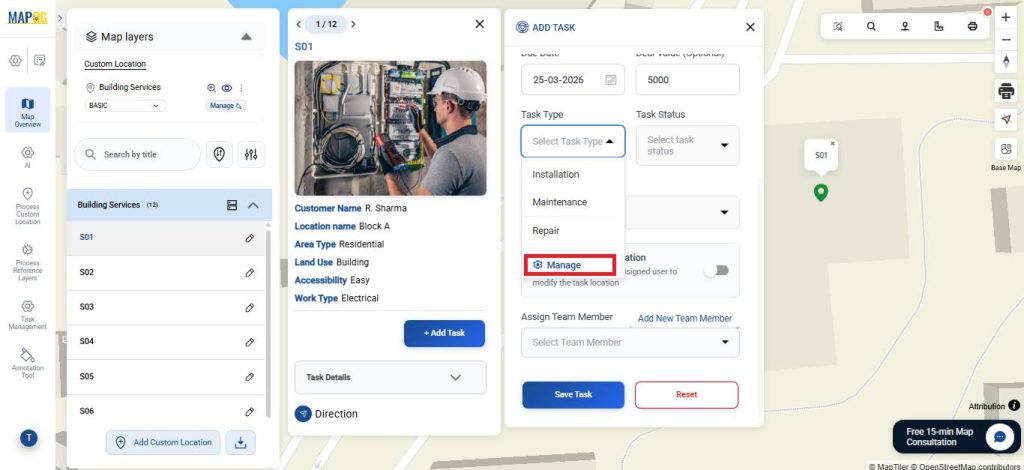
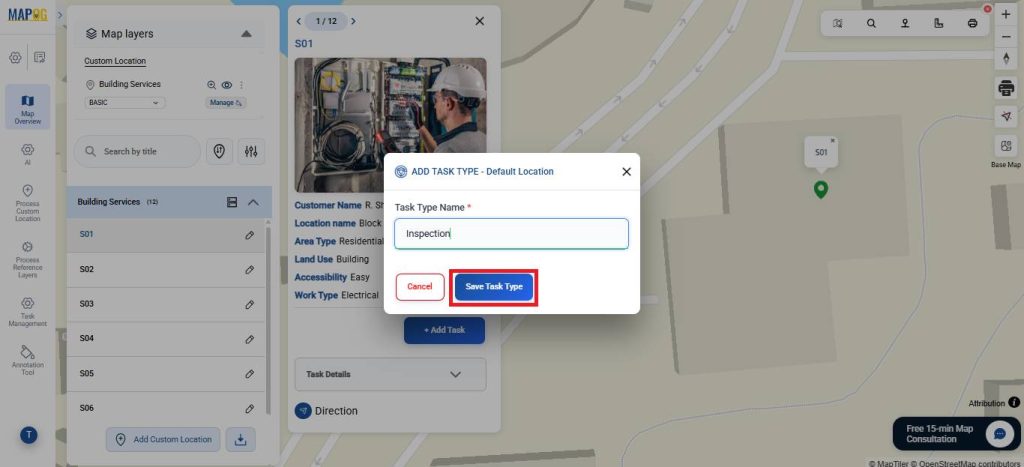
or create new ones via the Manage option, then name and save them.
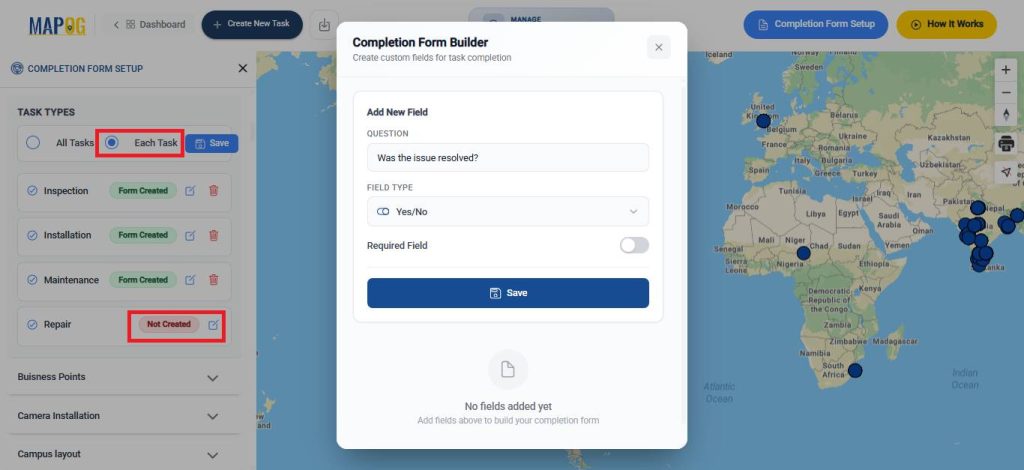
You can create completion form for each task type in the task management completion form builder section.
Add members using the Add New Team Member option, provide email & assign appropriate roles such as admin or others.
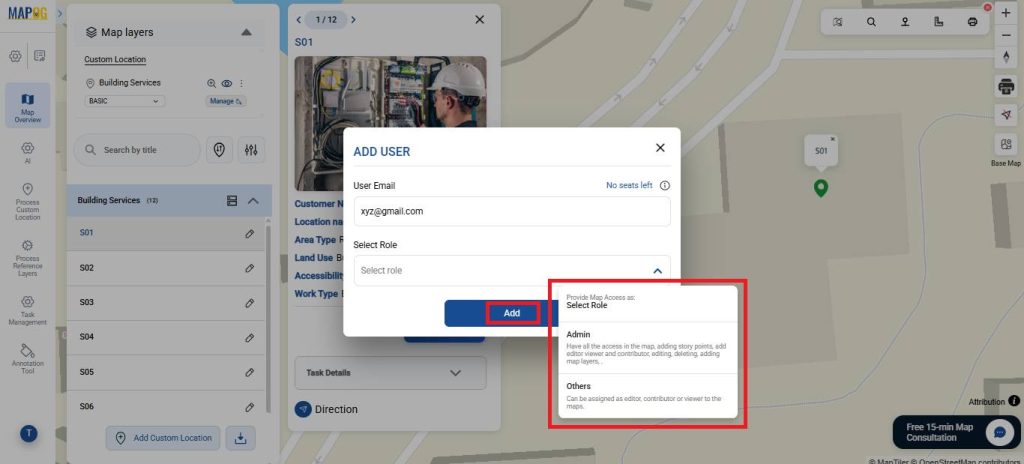
Then, assign members via the Assign Team Member section, enable location editing if needed, save, and repeat for other locations.
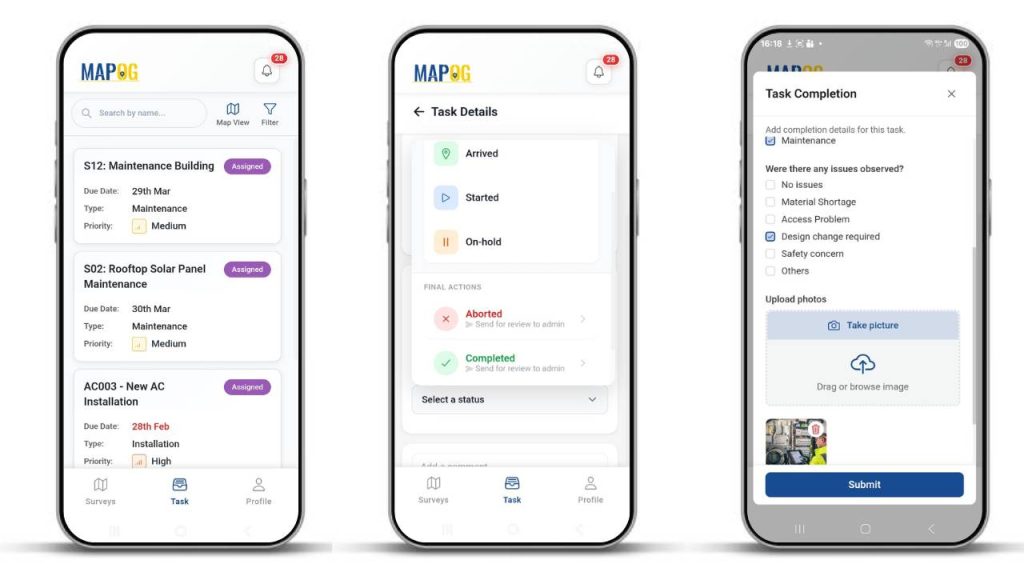
8. Task Execution and Completion
Meanwhile, on the MAPOG Contributor App, users can update tasks as complete, add comments, upload images, and submit completion forms.
Back on the dashboard, go to Task Management to monitor the progress using filters.
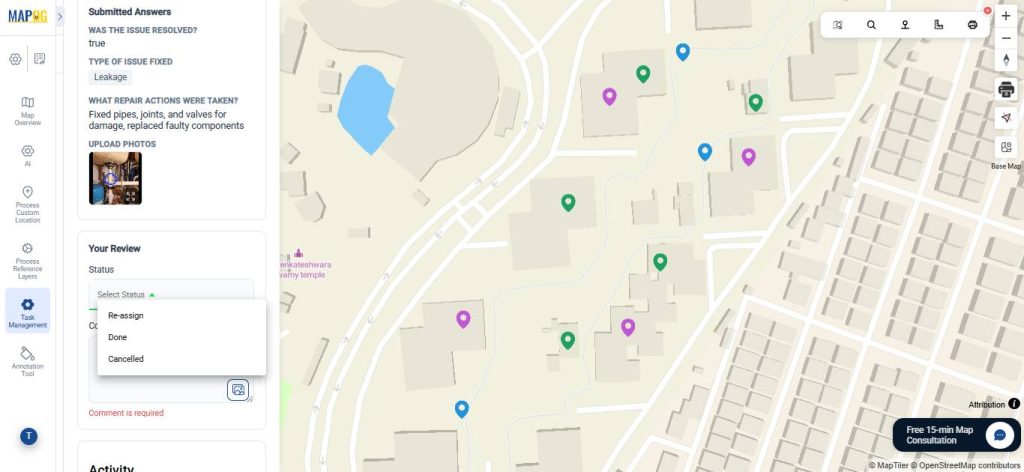
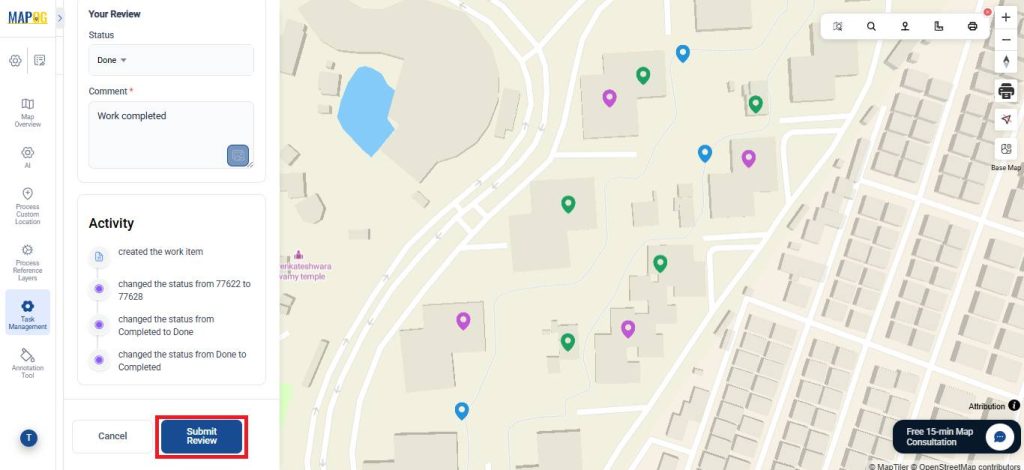
Then, review submissions, comments, and completion forms, ensuring cross-checking and reducing discrepancies.
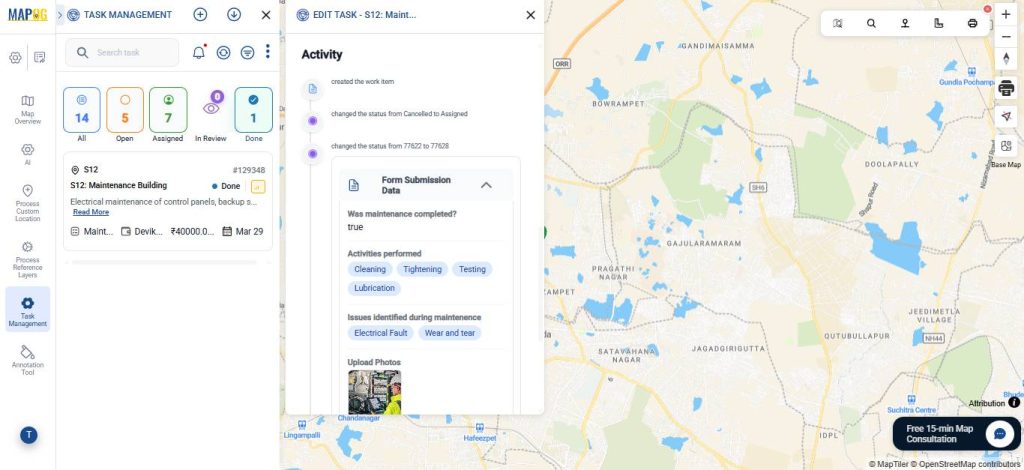
In the in-review section, approve the tasks and provide comments, then click submit review.
9. Preview and Share
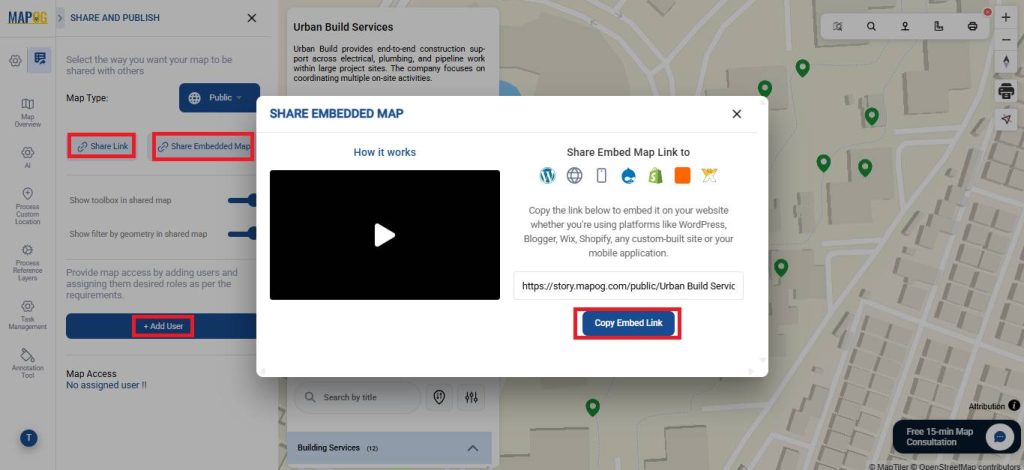
To share your map, click Preview and Share. Share via link or embed on website, and invite users to collaborate and edit the map using the add user option.
Real World Applications
Map-based task management is used across industries to improve coordination and tracking. For example, in real estate, it manages electrical, plumbing, and pipeline work across buildings. Similarly, commercial projects use it for HVAC, fire safety, and utility installations, while infrastructure projects track pipeline installation and maintenance. Meanwhile, industrial plants rely on it for equipment setup and system upkeep, and property management teams use it to schedule inspections and repairs efficiently.
Conclusion
Map-based task management with MAPOG transforms construction and facility operations by linking tasks to specific locations. It enhances visibility, coordination, and accountability, enabling teams to work efficiently and managers to track progress in real time, keeping projects organized and on schedule.
Want to check out MAPOG contributor app, Here’s the links below
Here are some other blogs you might be interested in: