In today’s competitive real estate market, presentation is everything. Buyers and investors don’t just want to see where a property is—they want to understand what surrounds it. Adding Points of Interest (POIs) such as schools, restaurants, parks, hospitals, and transit hubs transforms simple property maps into a powerful storytelling tool. It helps viewers visualize lifestyle, convenience, and community at a glance. Traditional listings often lack this contextual depth, but with MAPOG, users can easily integrate POIs into property maps, highlight nearby amenities, and create interactive experiences that showcase location value—turning static listings into engaging, data-rich visual stories.
Key Concepts
Adding Points of Interest (POIs) to property maps goes beyond placing location markers—it’s about enriching spatial context and enhancing the story behind every listing. With MAPOG, users can integrate nearby amenities such as schools, cafes, parks, hospitals, and transit stations directly into interactive maps. Moreover, this spatial insight helps highlight a property’s accessibility, convenience, and lifestyle value. By visualizing what surrounds a property, users can make listings more engaging, support smarter buyer decisions, and create data-driven, interactive presentations that stand out in the real estate market.
Steps-How to Add POIs:
1. Add building polygon manually
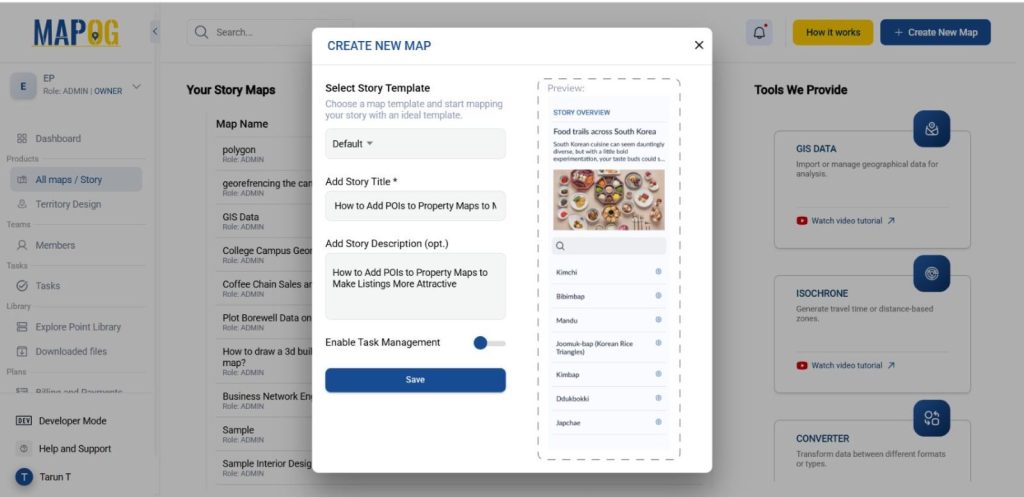
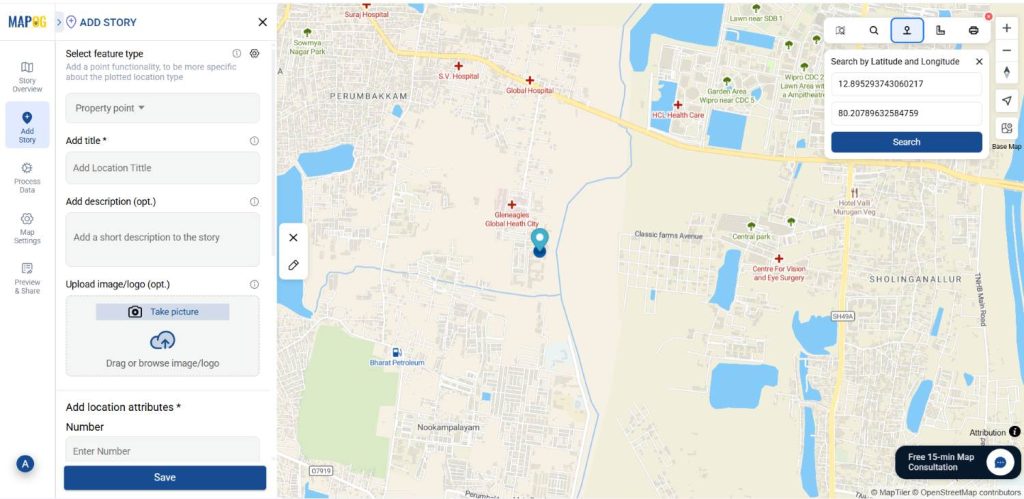
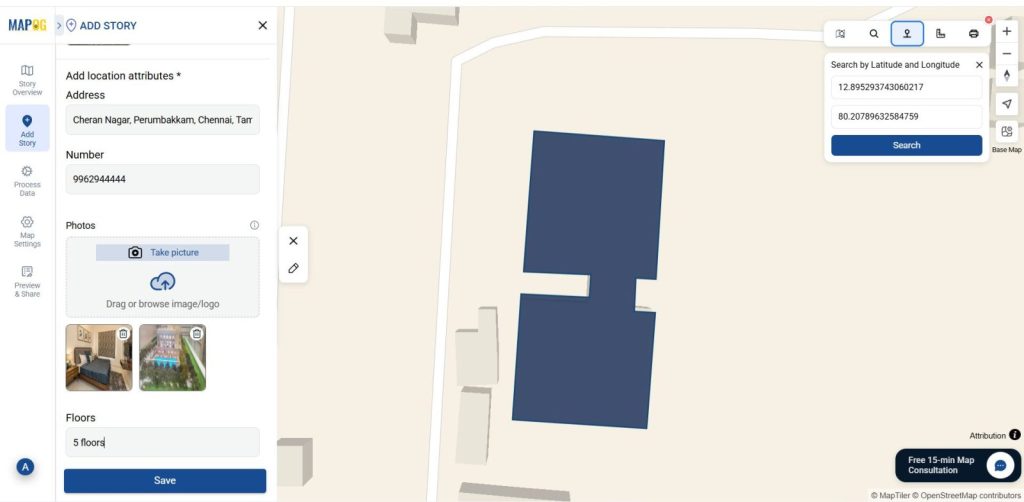
First log into MAPOG & create a map. Use the “Add story” then select “add manually” option then Using the select feature type settings option, create location type such as “Property polygon”. Then change feature type to polygon to draw polygon & add different relatable attributes such as address, number, photos, floors.
2. Select your area
Then choose Real estate buildings you want to plot by using Search by Latitude and Longitude.
After that select the building in which you want to draw a polygon. Then carefully click around its perimeter. Every time a vertex is clicked, MAPOG automatically creates a straight line connecting them. After drawing it conform it to save the polygon.
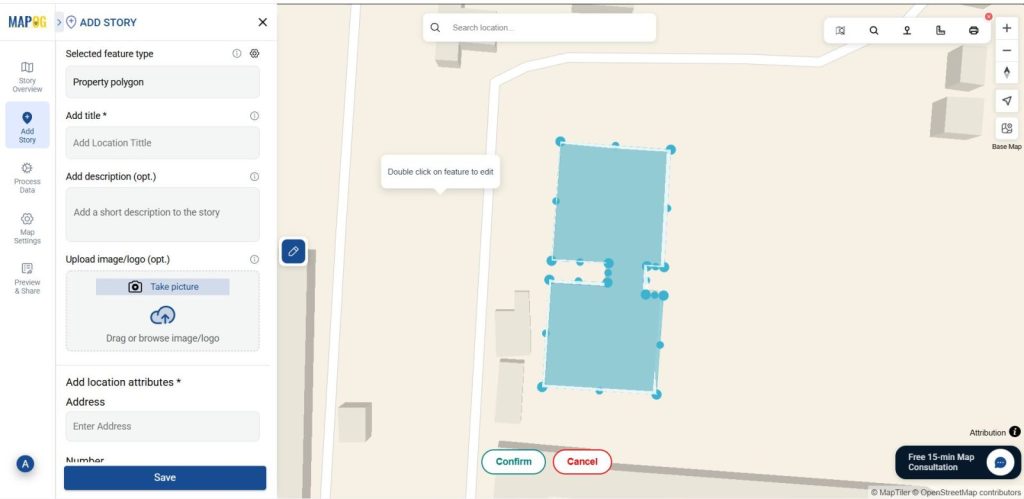
Then give the title for your polygon, write a short description about it, and upload a suitable image and fill required attributes. Now you have created a polygon.
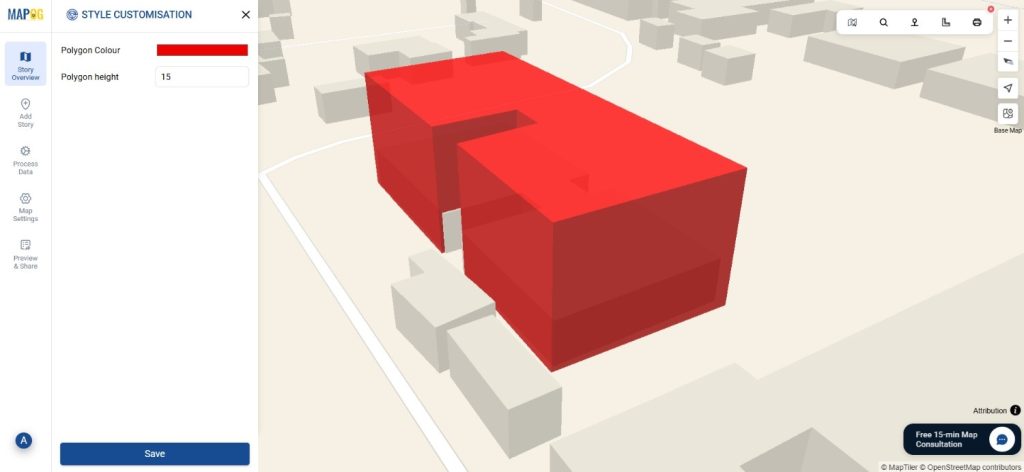
3. Customize Polygon for Visual Appeal
Then provide a suitable colour and give a proper height for your building polygon using Style customization.
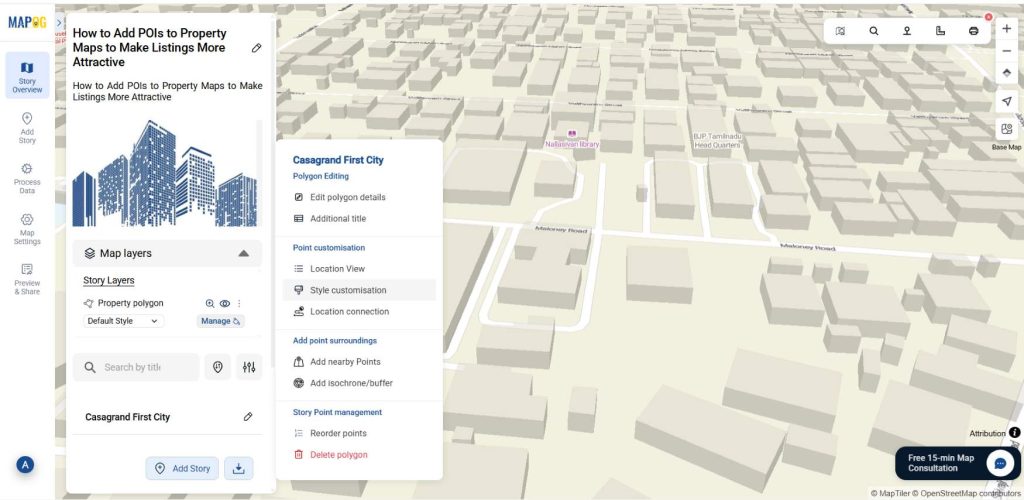
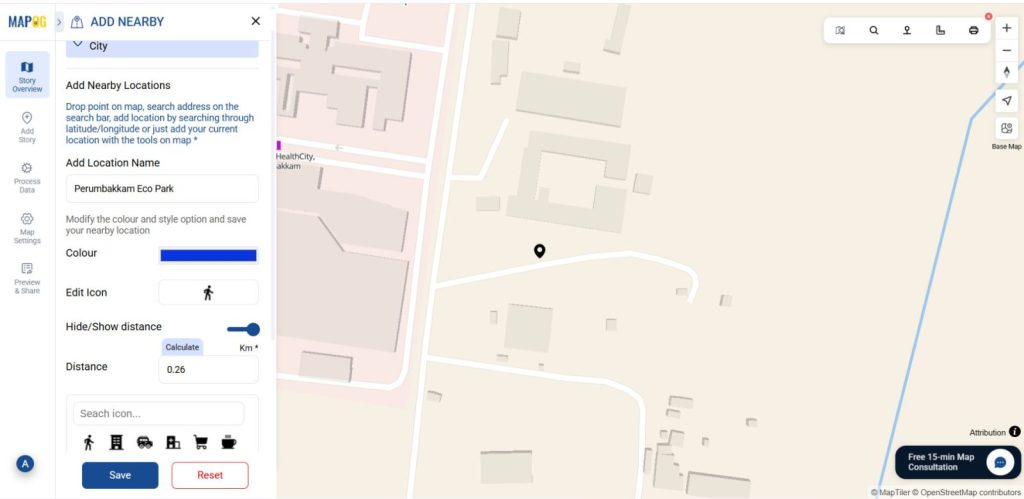
4. Add nearby points
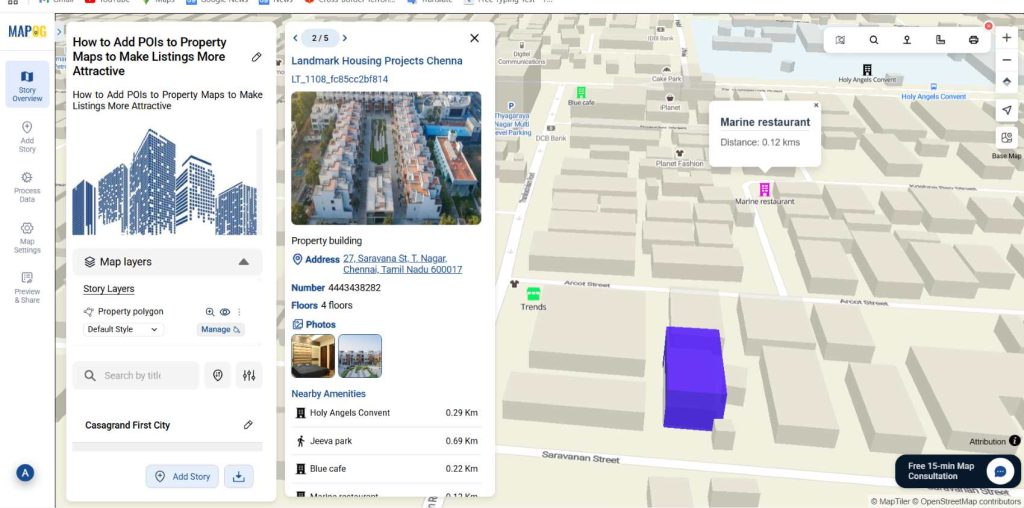
Then go to the Add nearby points option, there you can add nearby amenities such as schools, cafes, parks, hospitals, and transit stations.

To plot nearby amenities using latitude and longitude, you can check the nearby localities & check what kinds of amenities are available. Then, confirm that amenities location, add a name in the “Add Location Name” field, click the edit icon to modify details such as the marker color, and enable the “Hide/Show Distance” option. There click on the calculate option to automatically calculate the distance from your selected location and display the distance in Km. Once all details are set, click Save to store your selected point on the map. This way you can add several amenities from your desired location.
Applications of Adding POIs to Property Maps
Real Estate Agents and Developers can showcase nearby amenities to highlight neighborhood value and attract potential buyers effectively.
Urban Planners and Local Governments can map key POIs to analyze accessibility and plan data-driven urban development.
Tourism and Hospitality Professionals can map attractions and hotels to enhance visitor experiences and promote destinations.
Conclusion:
Adding Points of Interest (POIs) to Property Maps becomes seamless and insightful with MAPOG. Furthermore, by integrating nearby amenities and landmarks, you can transform static property visuals into dynamic, context-rich maps that tell a more complete story. This approach not only enhances the appeal of real estate listings but also supports better decision-making for developers, planners, and investors.
Here are topics related to this topic: