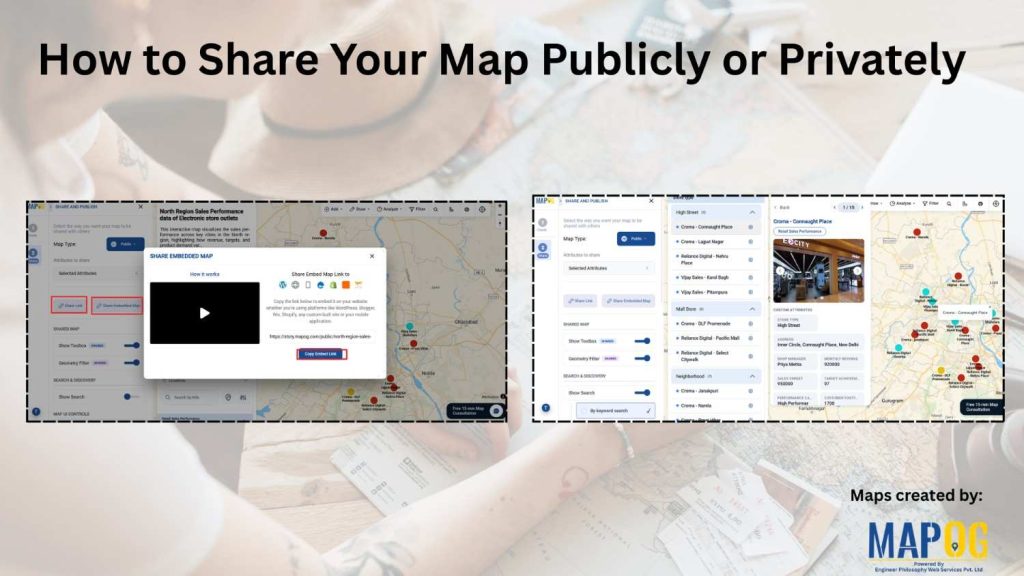
Creating a map is just the beginning. However, the real value comes from how you share it and how users interact with it. In many cases, maps are shared without proper controls or usability features. As a result, users either struggle to explore the data or fail to get meaningful insights.
So, how can you make your map’s location both accessible and interactive?
With MAPOG, you can not only control map visibility (public or private) but also enhance user experience using advanced search, filtering, and UI controls. This ensures your map is easy to explore, secure, and highly functional.
Why Share your Map and Interact with Features Matter
A map often contains layered information. Therefore, simply sharing it is not enough. Users should be able to search, filter, and navigate easily.
For example, a client viewing a property map may want to quickly find nearby hospitals or filter locations based on amenities visually. Similarly, a team member might need editing access while others only need viewing rights.
Steps to Share your Map with Full Control
Step 1- Open Your Map and Access Share Settings
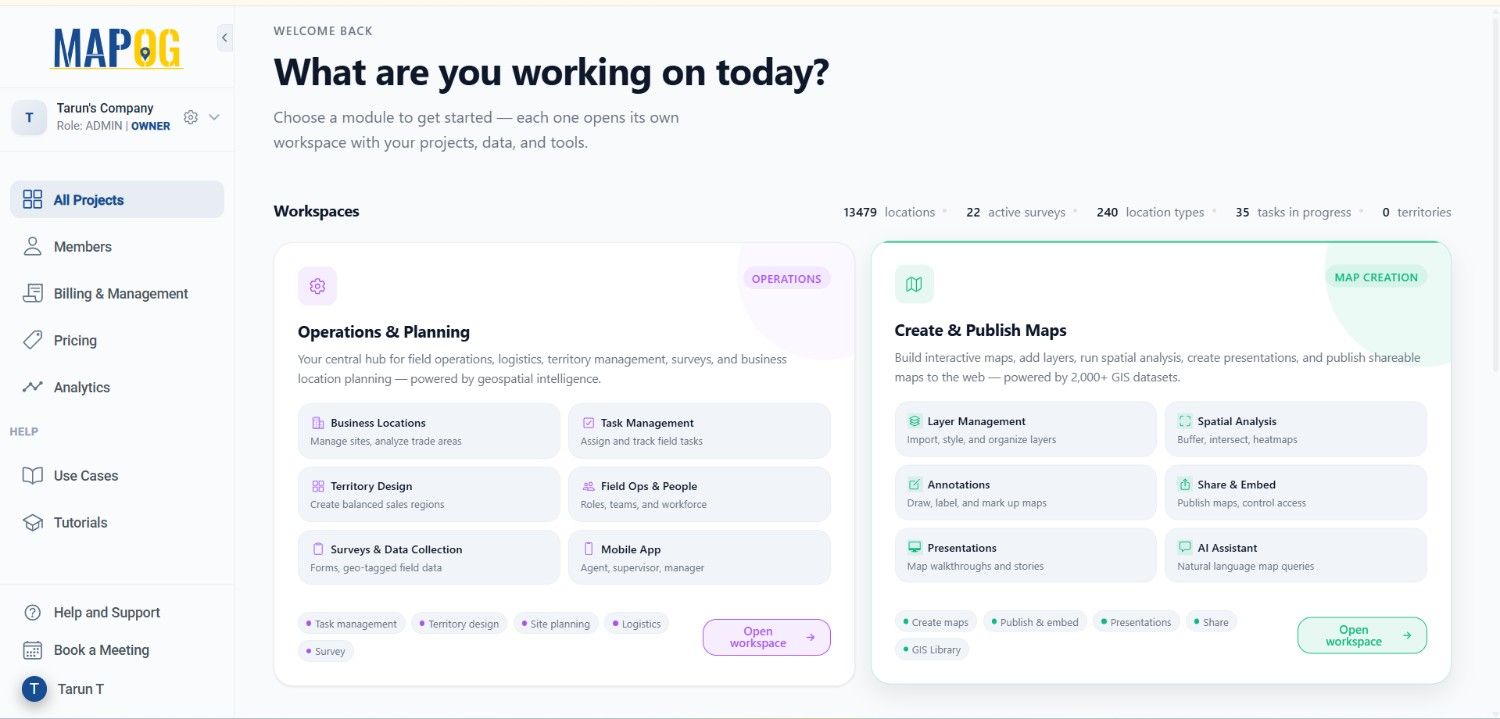
First, open your project in MAPOG.
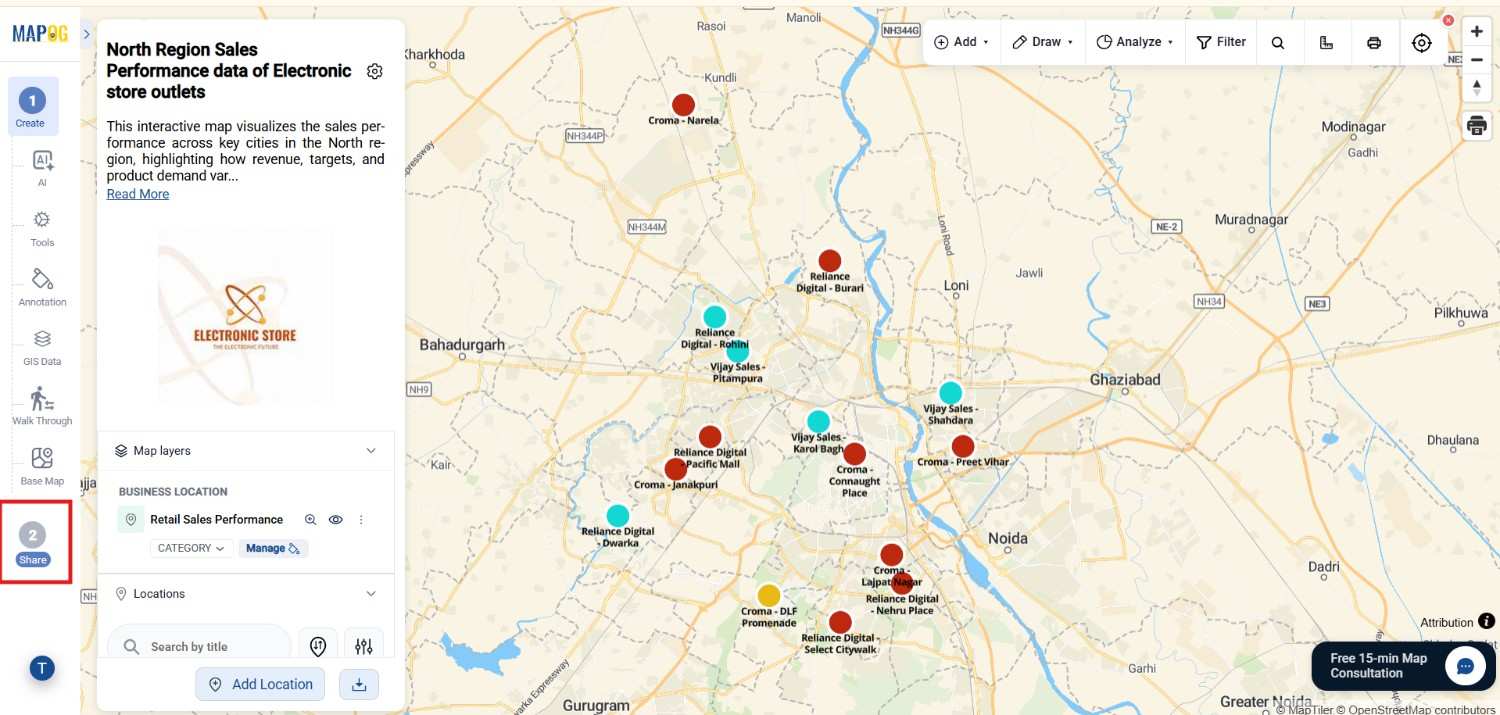
Once your map is ready, go to the Share and Publish section. Here, you can manage both visibility and interaction settings.
Step 2 -Choose Between Public and Private Access
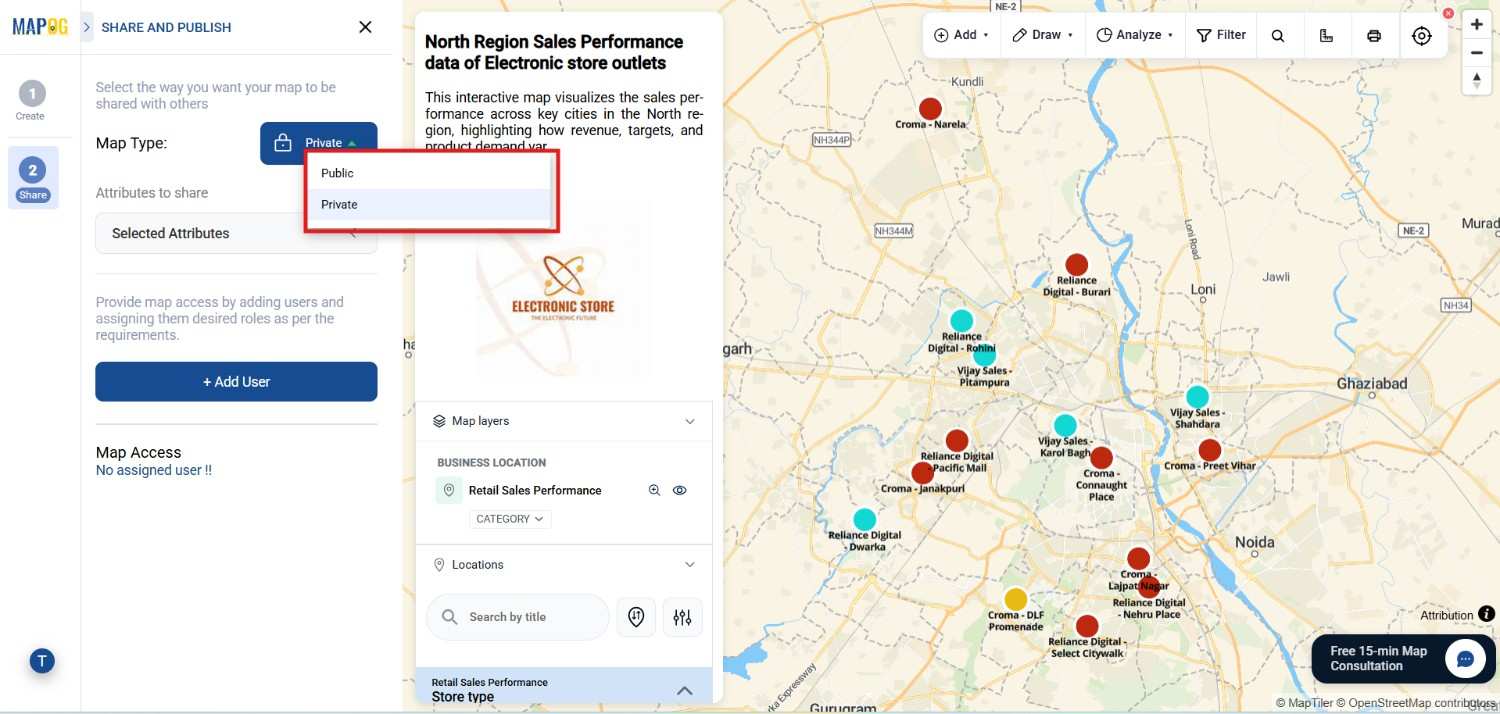
Next, decide how you want to share your map.
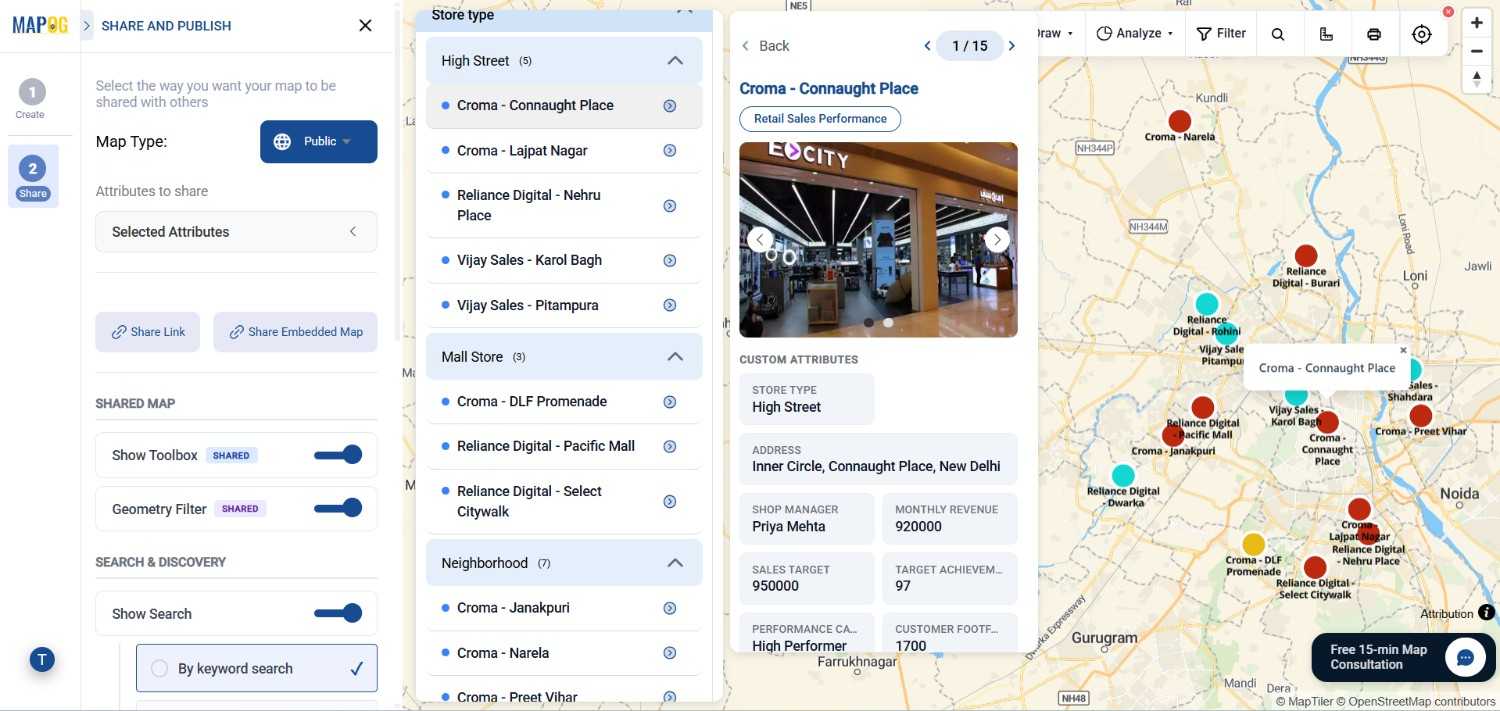
If you select Public, anyone with the link can view your map. This is useful for presentations, marketing, or showcasing projects.
On the other hand, if you select Private, only selected users can access it. This is ideal for internal projects or sensitive data.
Therefore, choosing the right visibility ensures both accessibility and security.
Step 3- Improve User Experience with Search and Discovery
Once visibility is set, you can enable Search and Discovery features to make your map easier to explore.
The Toolbox provides options such as draw, analyze, and filter from the top panel, enabling real-time interaction with map data. The Geometry Filter allows users to select or draw a specific area on the map, facilitating the analysis of location-based data within defined boundaries.
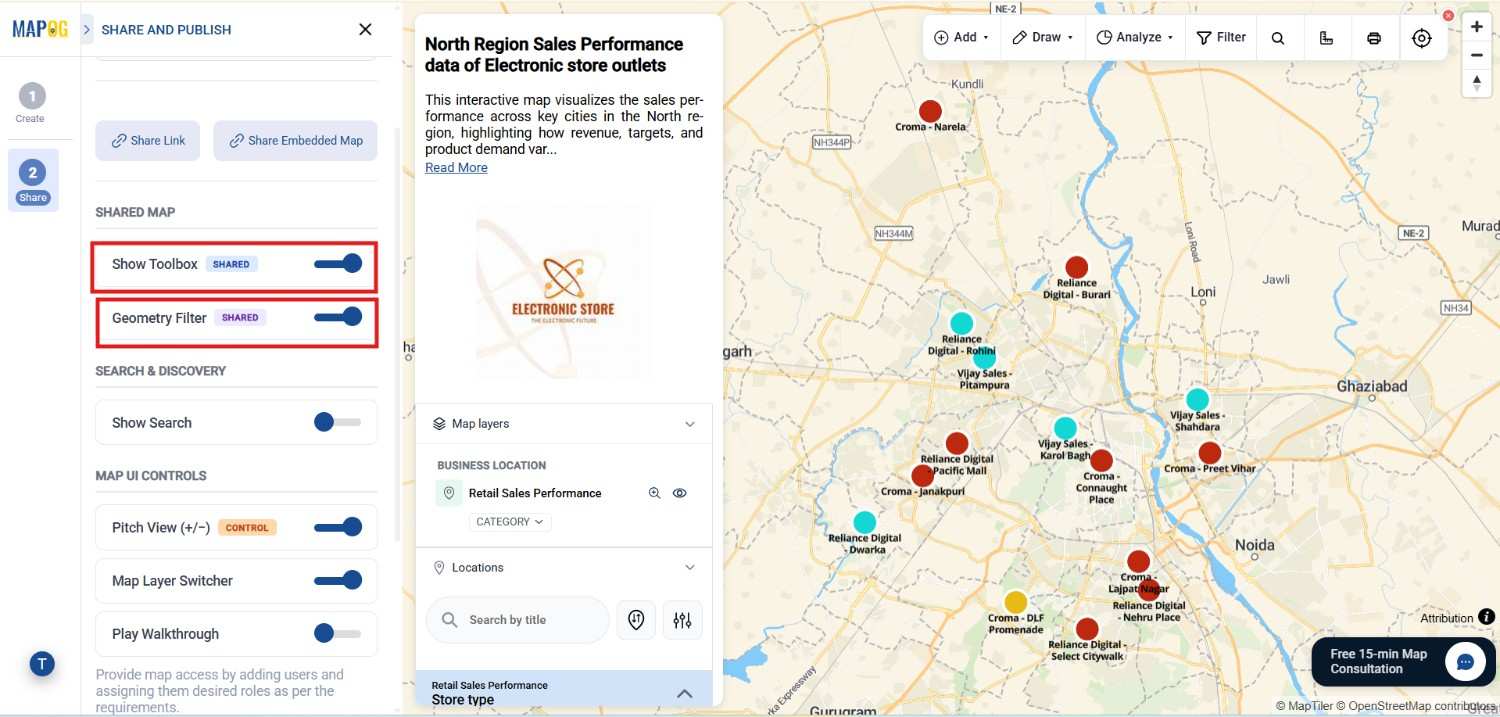
In addition, Attribute-Based Filtering helps users refine results based on specific criteria such as category, amenities, or type. This is especially useful when your map contains multiple data points.
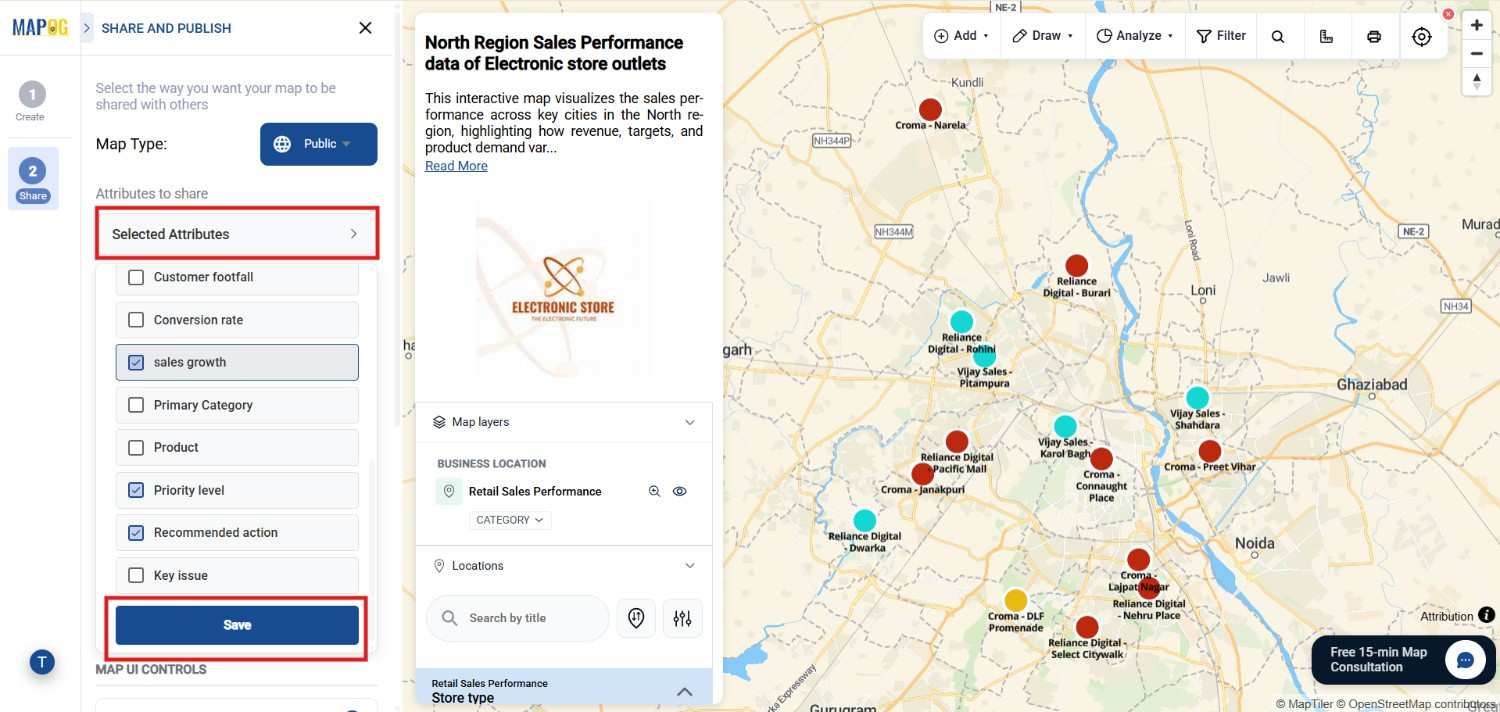
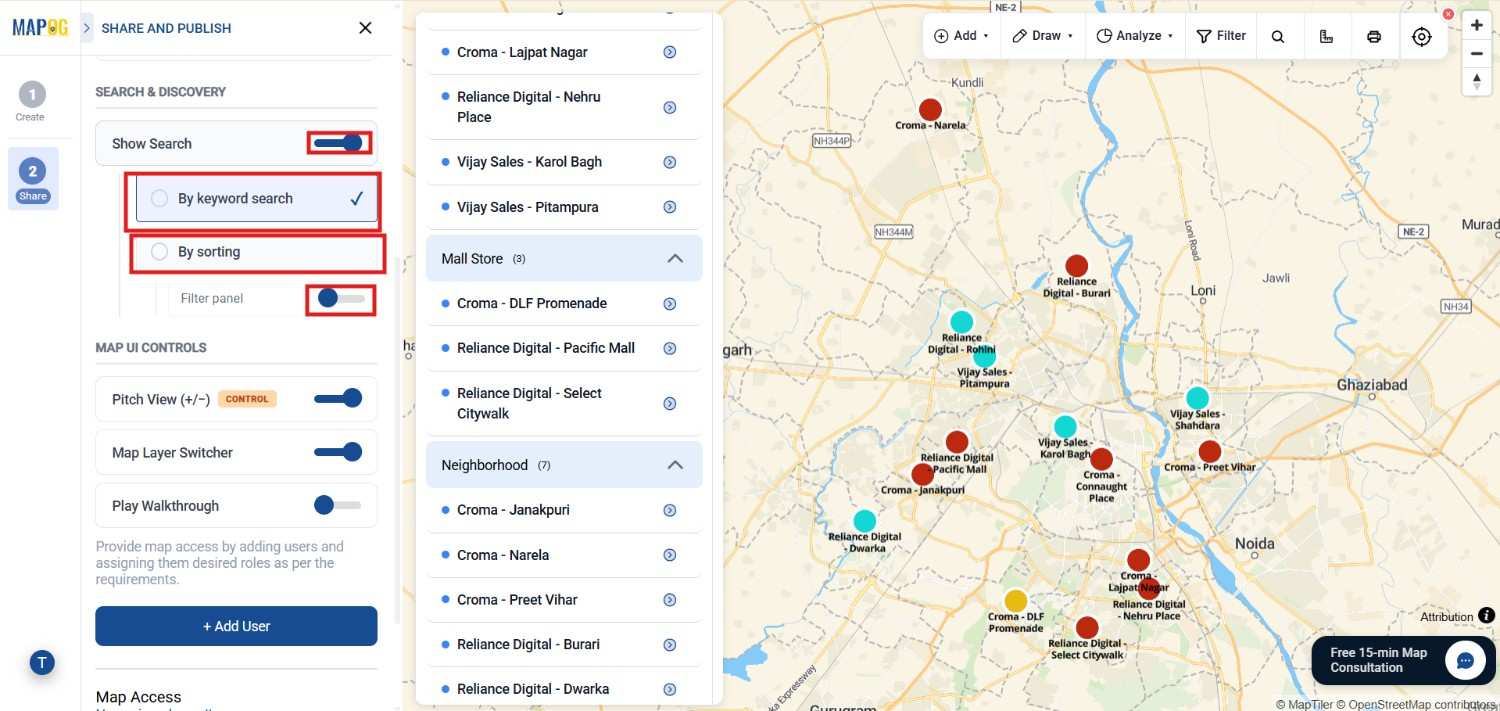
To begin with, Keyword Search allows users to quickly find locations by typing names or attributes. Instead of manually scanning the map, they can directly jump to relevant results.
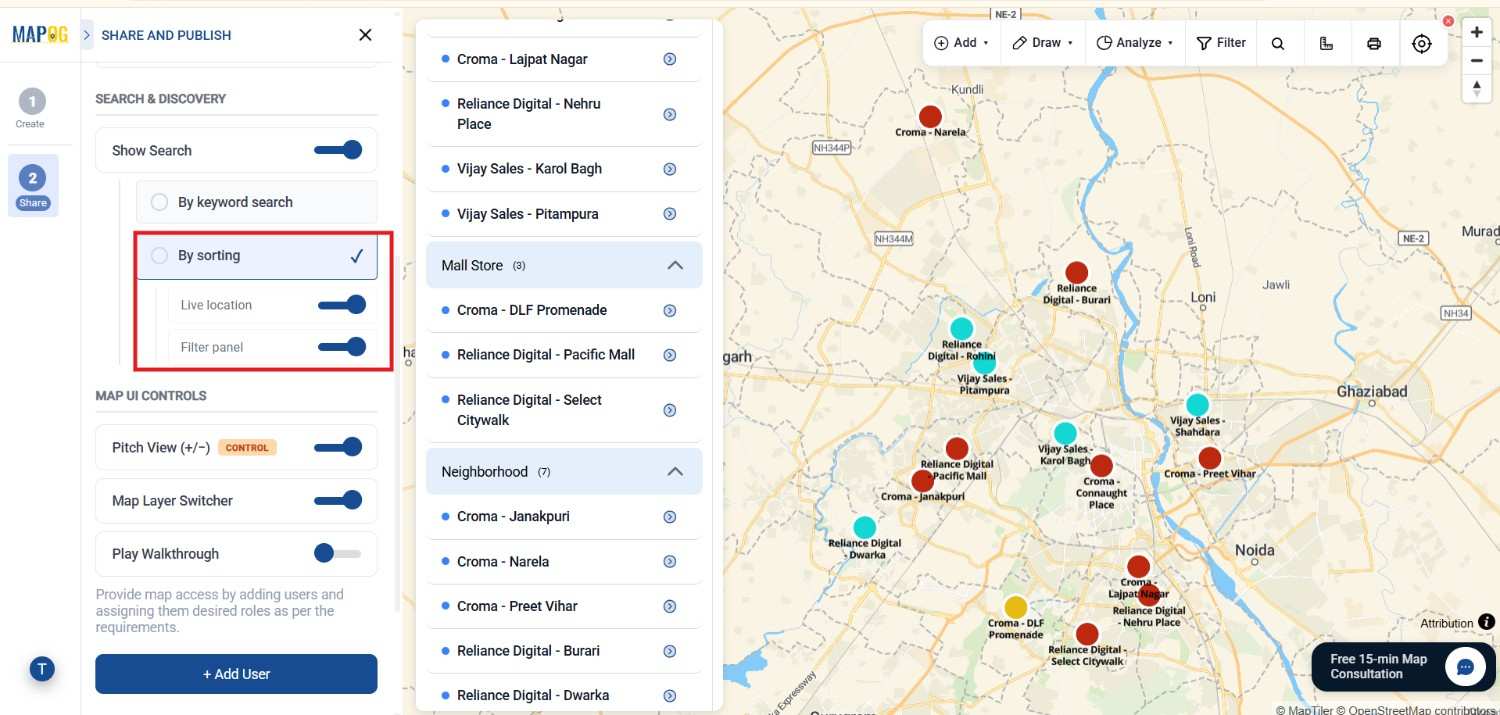
By Sorting organizes data by categories such as distance or type. The Live Location feature displays the user’s real-time position on the map, enhancing navigation by showing proximity. Additionally, the Filter Panel offers a structured interface for applying filters, facilitating the interpretation of large datasets.
Step 4- Enhance Interaction with Toolbox and Map Controls
Beyond search and filters, MAPOG provides several UI controls that improve how users interact with the map.
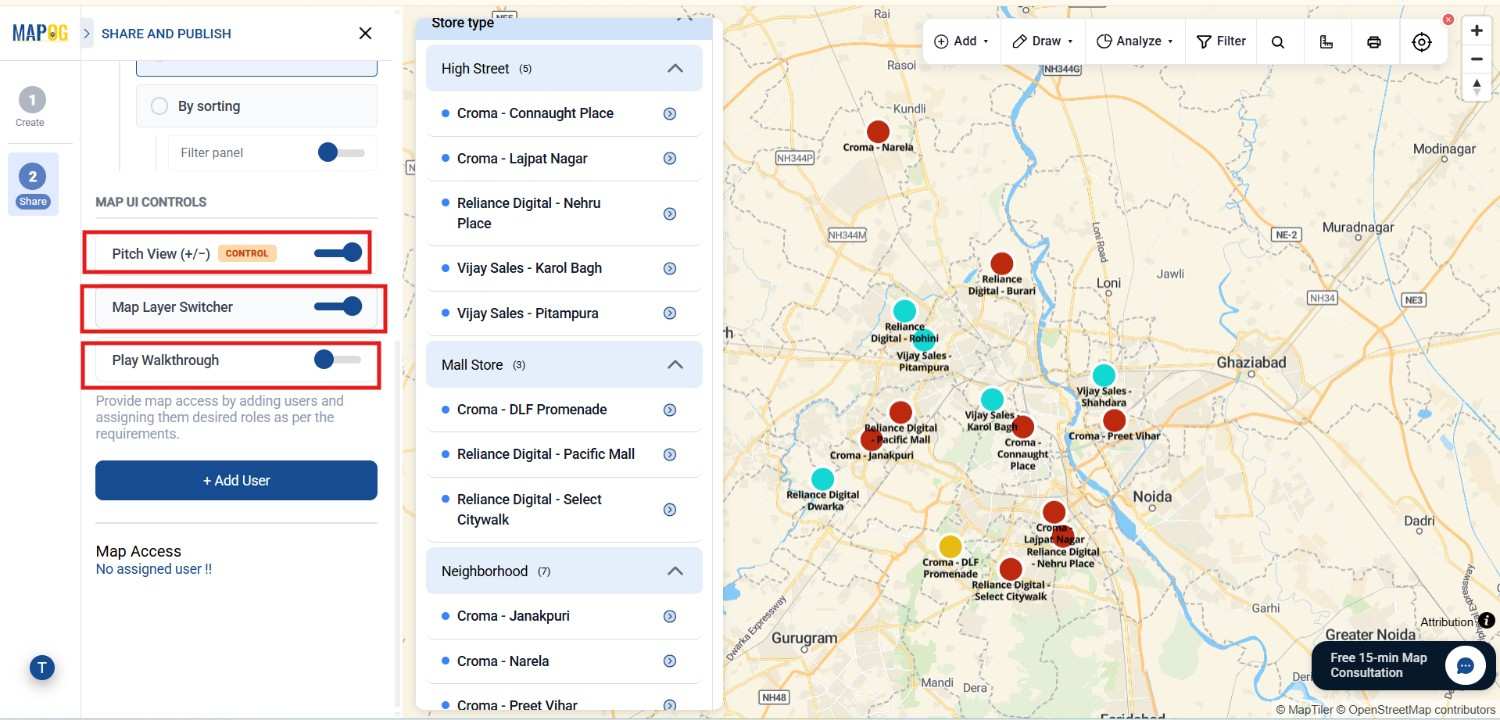
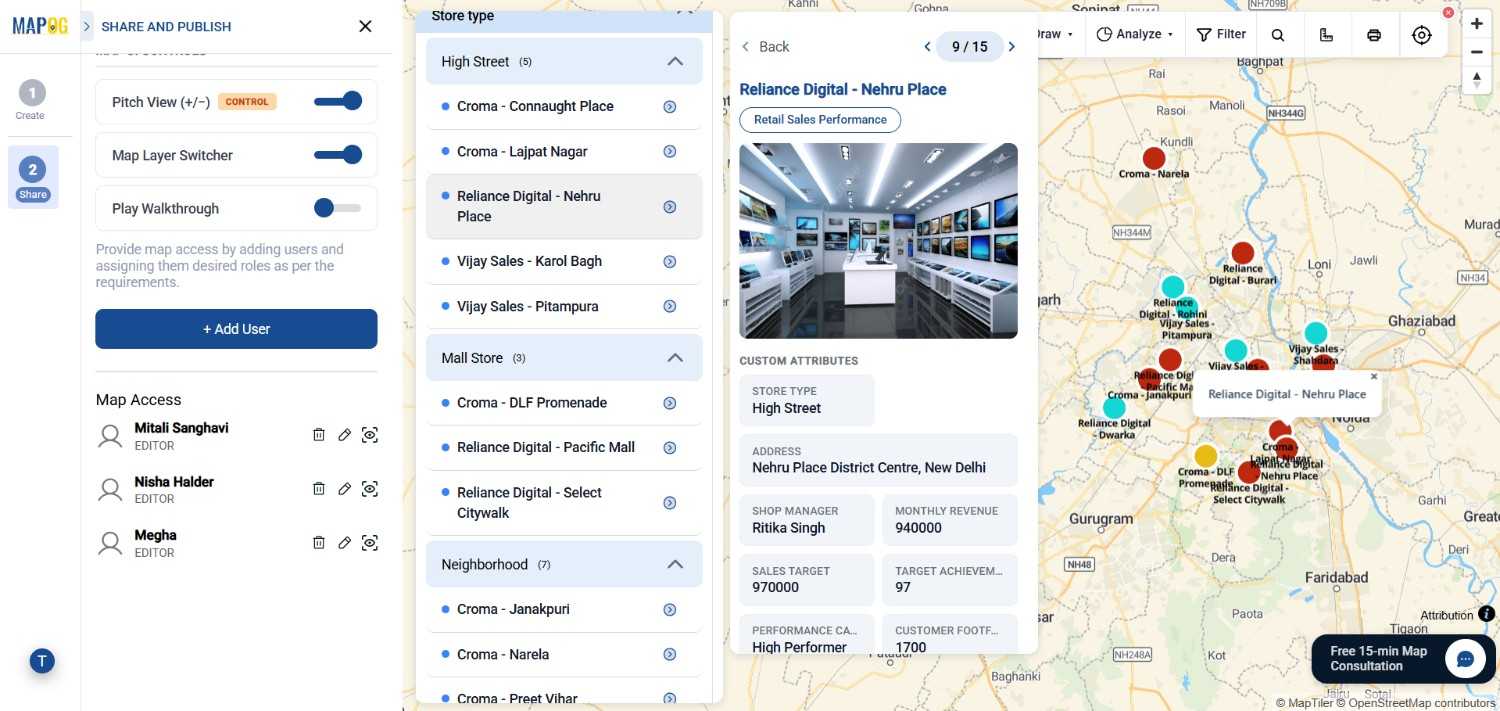
Pitch View (+/−) enhances user experience by allowing map tilting for a 3D-like perspective, particularly beneficial for viewing buildings or terrain. The Map Layer Switcher enables switching between various map styles, aiding in the comprehension of both visual and structural details.
In addition, the Play Walkthrough feature provides a guided navigation experience. Instead of manually clicking each point, users can view a smooth tour of the map. This is particularly useful for presentations or storytelling.
Step 5 -Share, Embed, and Collaborate
Once your map is fully configured, you can share it easily.
You can generate a Share Link and send it directly to users. This allows instant access without complicated steps.
Alternatively, you can use the Embed Map option to display your map on websites or dashboards. This is especially useful for businesses that want to showcase location data interactively.
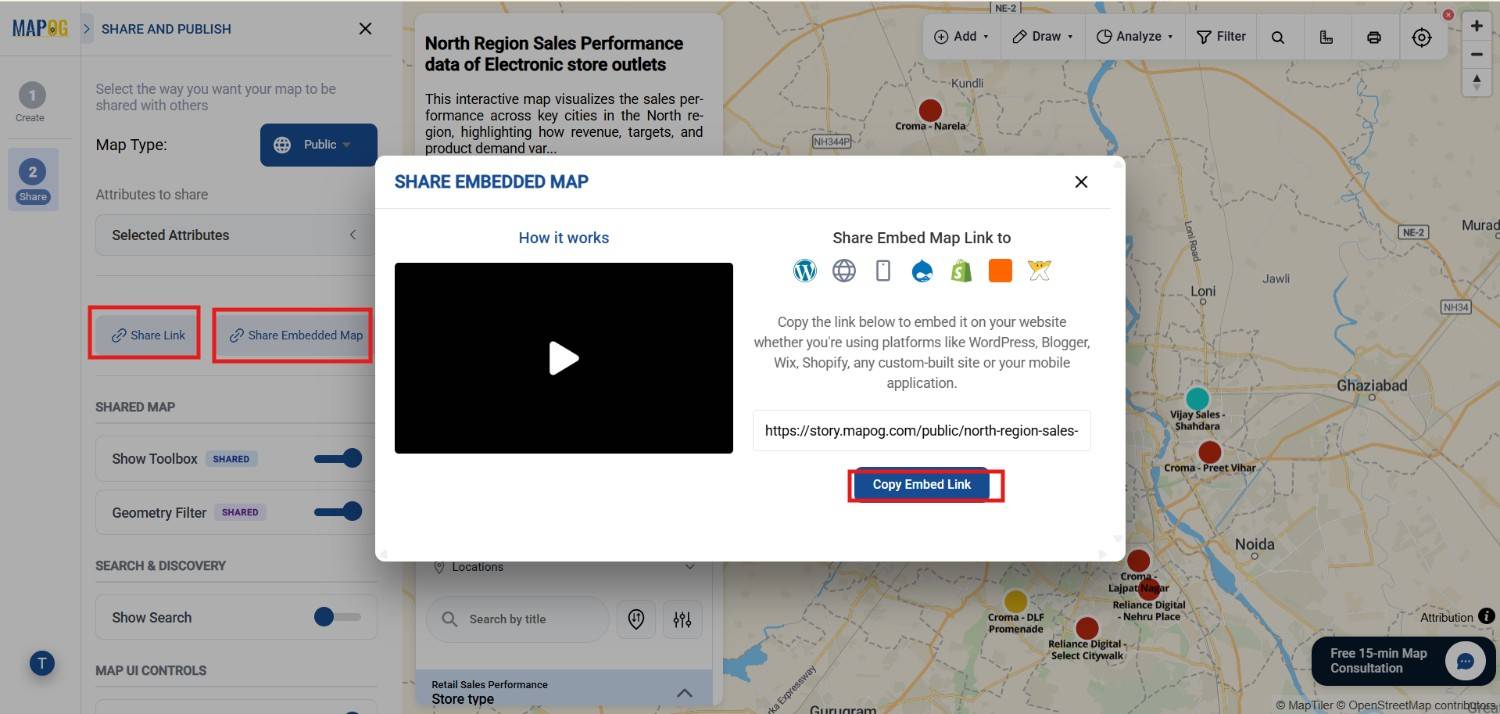
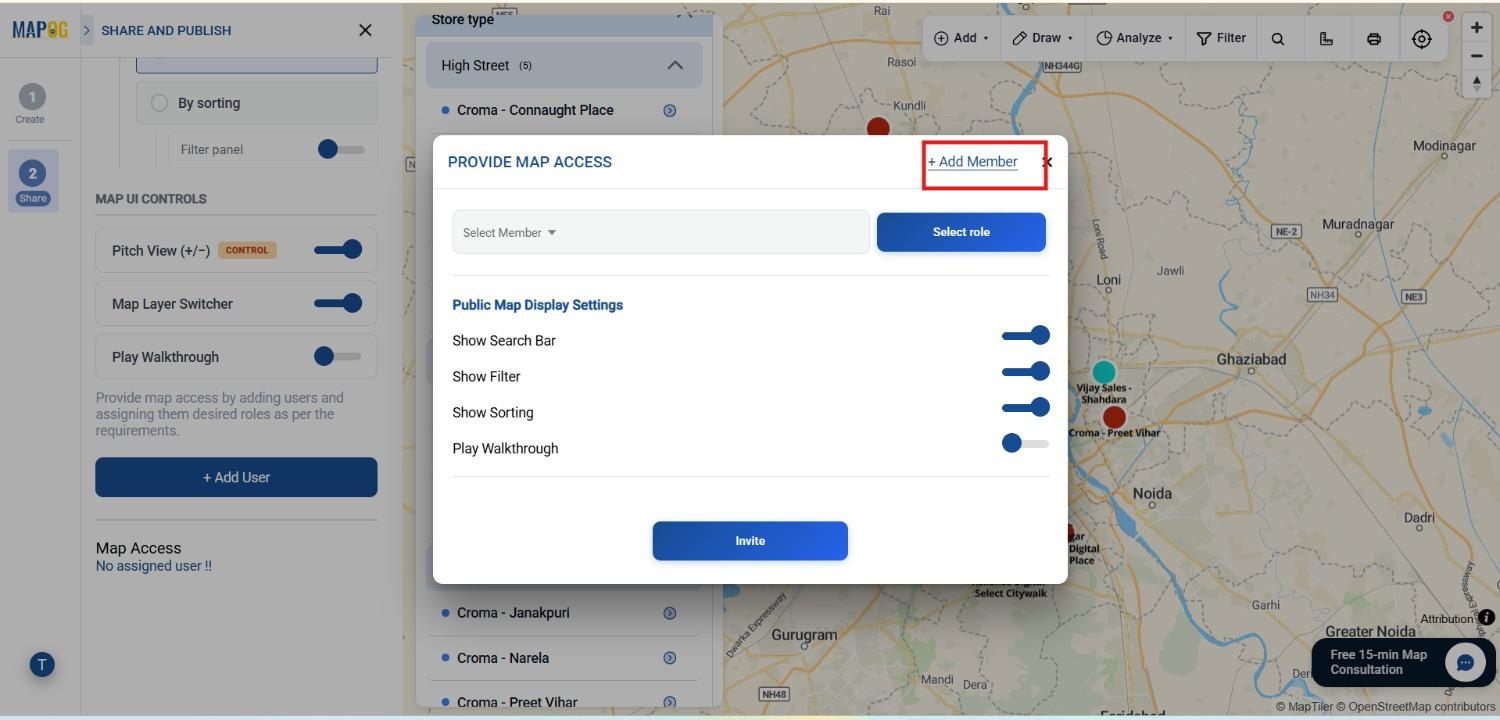
You can also Add Users and assign them roles. Click on Add user then add team members
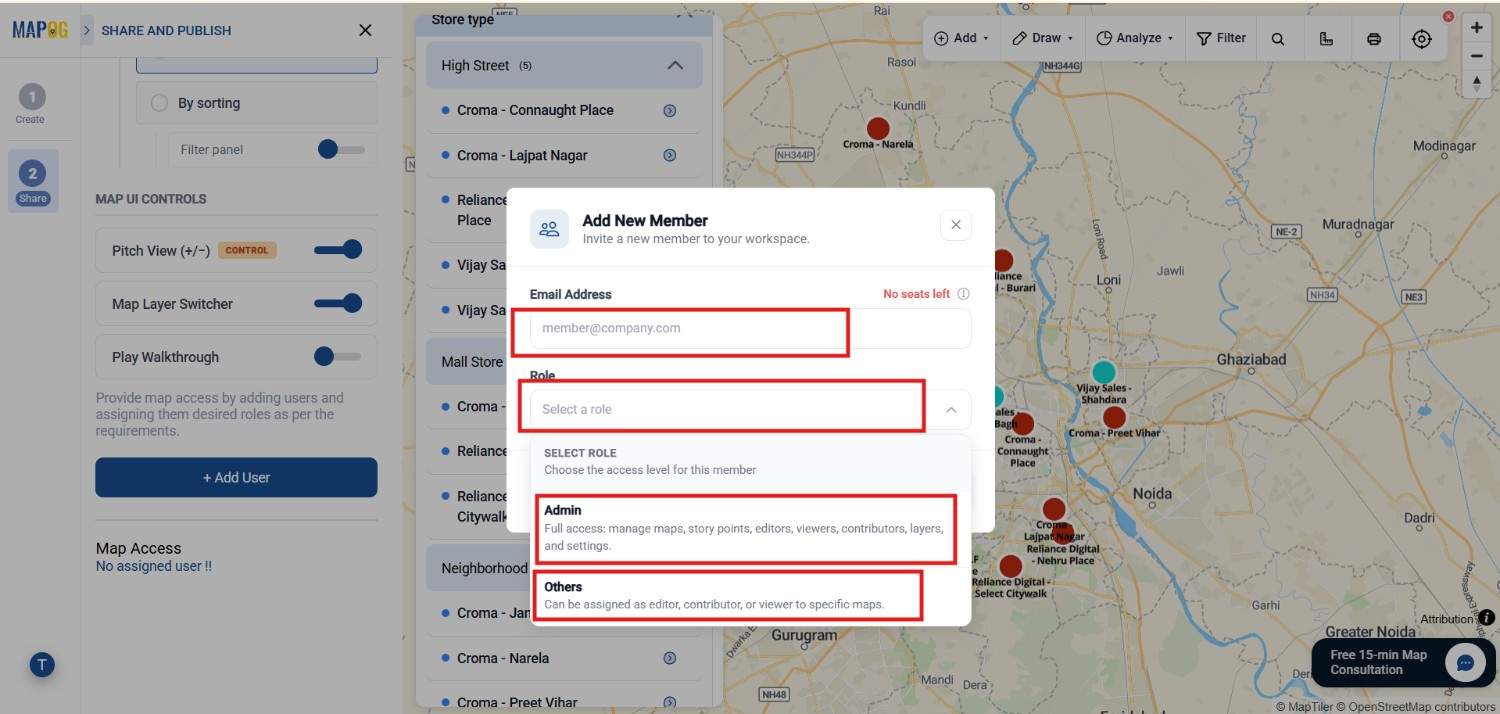
by adding their email id and select roles like admin for full access to map and its points or others for viewing or contributing . This ensures that team members can view or edit the map based on permissions.
Now add members and assign them role like editor for full acess to the map and for editing and viewer to view just assigned part and then click invite to work together on the map.
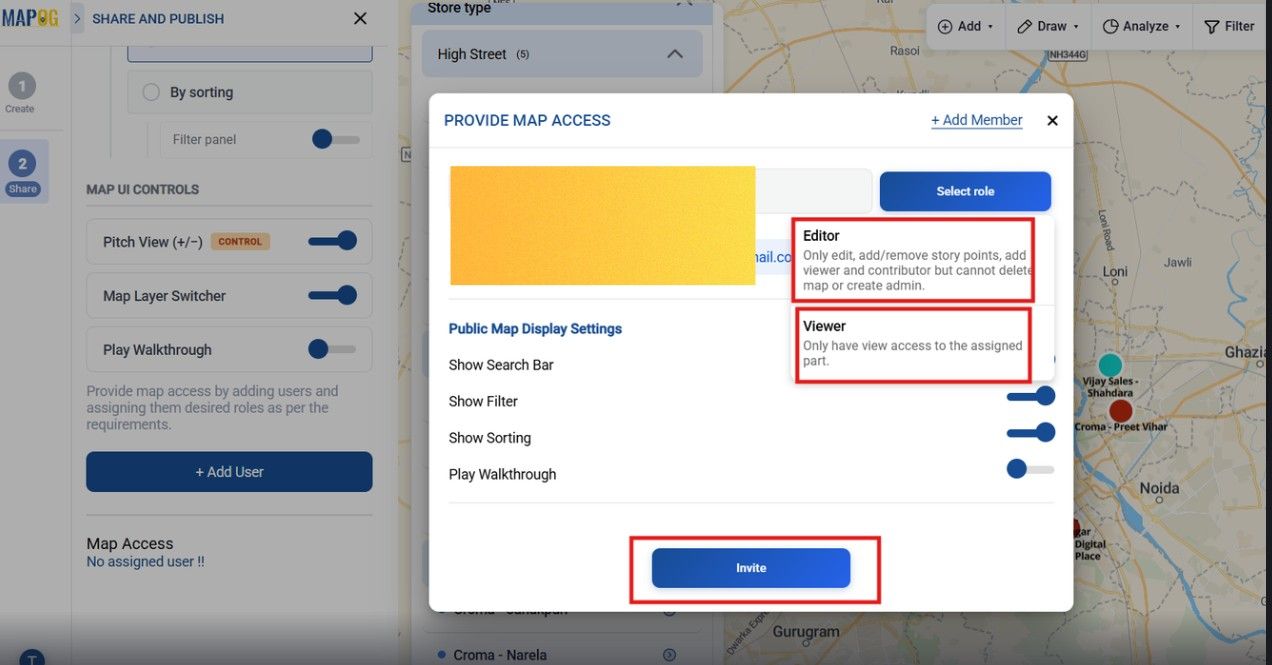
As a result, collaboration becomes smoother while maintaining control over the data.
Benefits of Using These Features
First, it enhances accessibility by making maps easy to share and open.
Second, it improves usability through search, filters, and structured navigation.
Additionally, it increases engagement by allowing users to interact with the map using tools and walkthroughs.
Conclusion
In today’s digital workflows, sharing a map is not just about visibility—it’s about usability and control. Therefore, combining public/private access with advanced interaction features makes a big difference.
With MAPOG, you can create maps that are not only easy to share but also intuitive to explore. Ultimately, this helps users understand data faster, improves collaboration, and delivers a more impactful mapping experience.
1 Comment