Efficient field surveys start with a clear plan, so you need a simple and accurate way to assign customer locations to field teams. When each member knows where to go, your operations move faster, data quality improves, and field time decreases. This structured approach strengthens tracking, balances workloads, and improves coverage. You can manage all of this even better using MAPOG.
Key Concepts for Assigning Customer Locations to Field Teams
Assigning customer locations to field teams gives each member a clear list of points organized by region, priority, or deadlines, so they know where to begin and how to move through tasks. Along with this, mobile data collection lets teams record survey details on their devices, keeping information accurate, immediate, and easy to track.
Benefits
- Faster Field Movement: Structured location assignments reduce travel time, so teams cover more ground and complete surveys sooner.
- Higher Data Accuracy: Mobile data collection improves clarity, reduces errors, and supports consistent reporting.
- Stronger Coordination: Real-time updates enhance visibility, allow quick adjustments, and keep teams aligned.
- Improved Survey Coverage: When you assign customer locations to field teams clearly, you avoid missed points and ensure full regional coverage.
Step-by-Step Process to Assign Locations to Field Teams
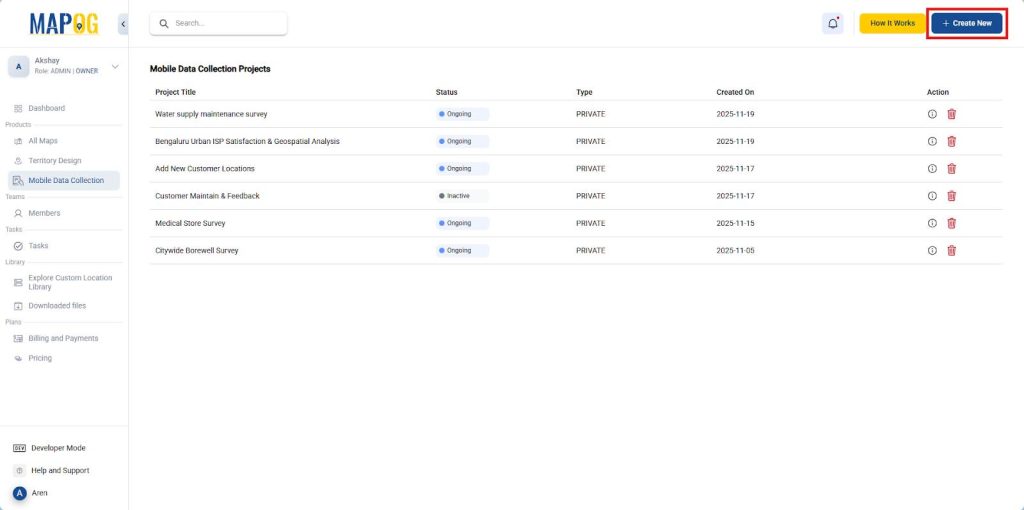
1. Start Your Project
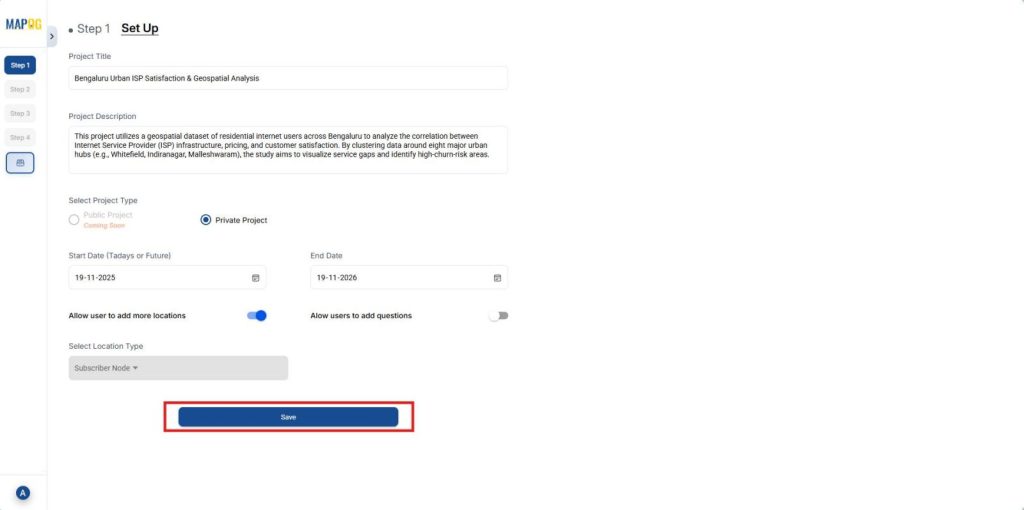
Head to MAPOG then go to Mobile Data Collection, click on “Create New” to set up your project, add a project title, description and fill out other details.
2. Create a custom location type
From the Select Location Type dropdown, click “Create New”, then “Add more custom template”. Give a title, choose a color and geometry type, and add attribute fields (e.g., Address, Rating).
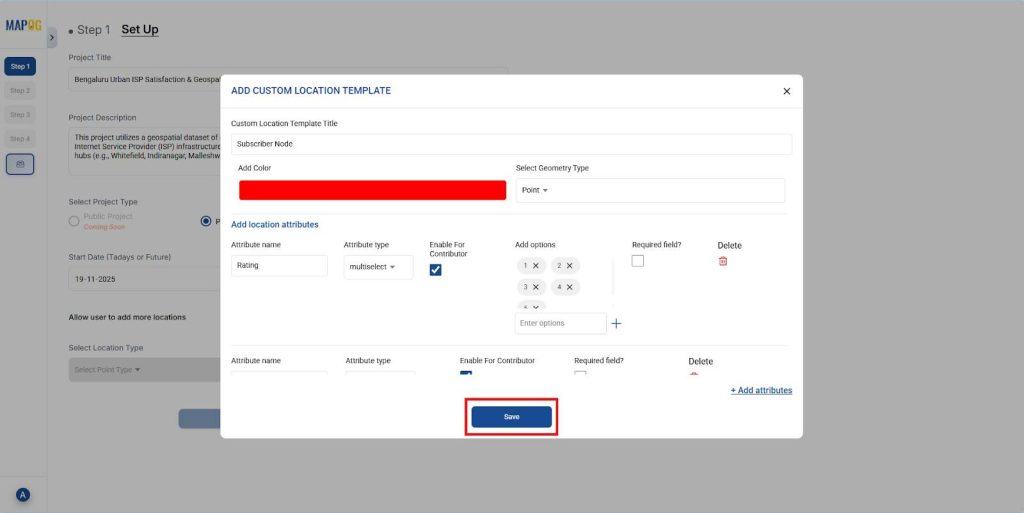
After that select the Location type you’ve just created and click on “Save”.
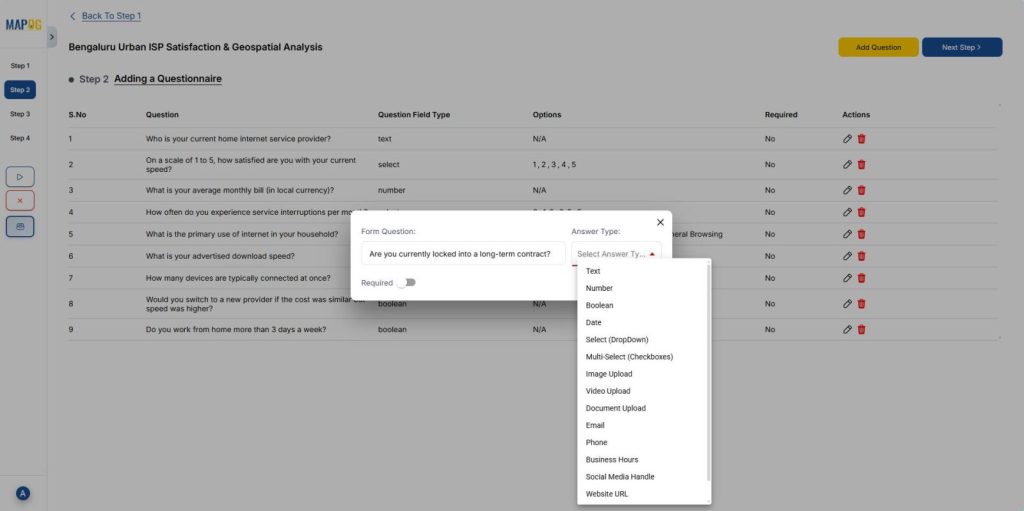
3. Add questions
In this step, add all survey questions one by one. Click “Add question”, type the question, choose an answer type, then click “Next step”.
4. Add customer locations
Then upload customer locations, select “Add new location by uploading CSV/ Excel”, and then upload your pre-existing customer location data csv file.
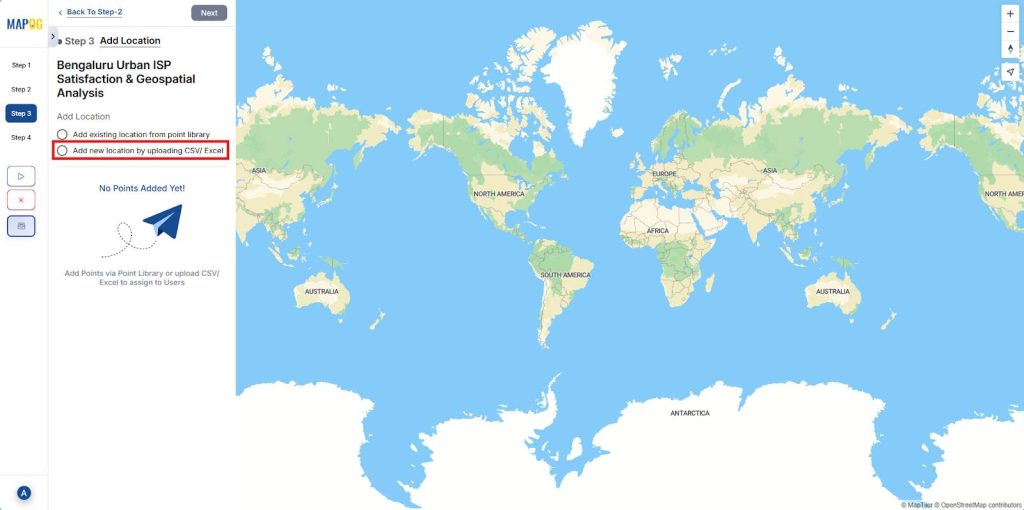
Then, match the excel columns to the attributes, match latitude and longitude for placement and click on “Submit”.

5. Add field team
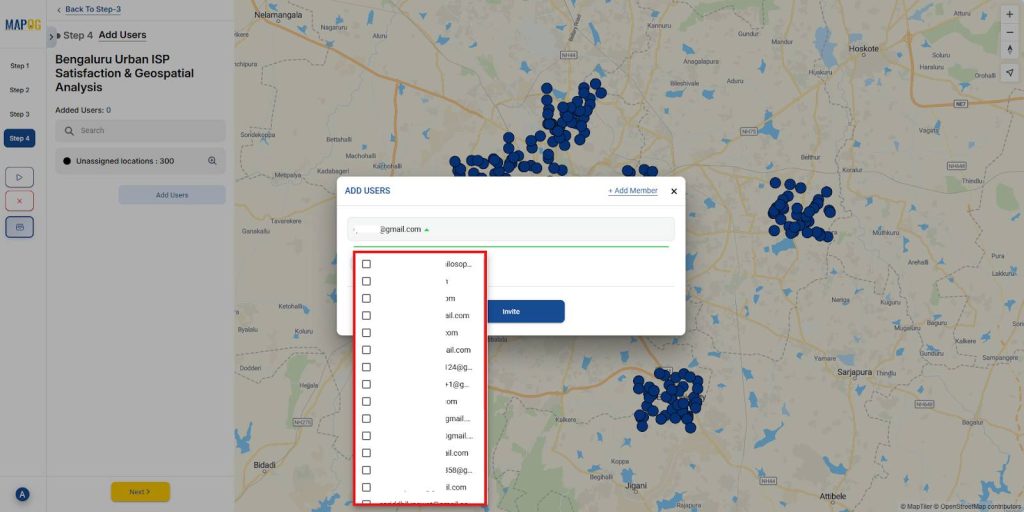
After that, click on “Add users”, then “Add member” then enter the user email, and choose a role (Admin or Other).
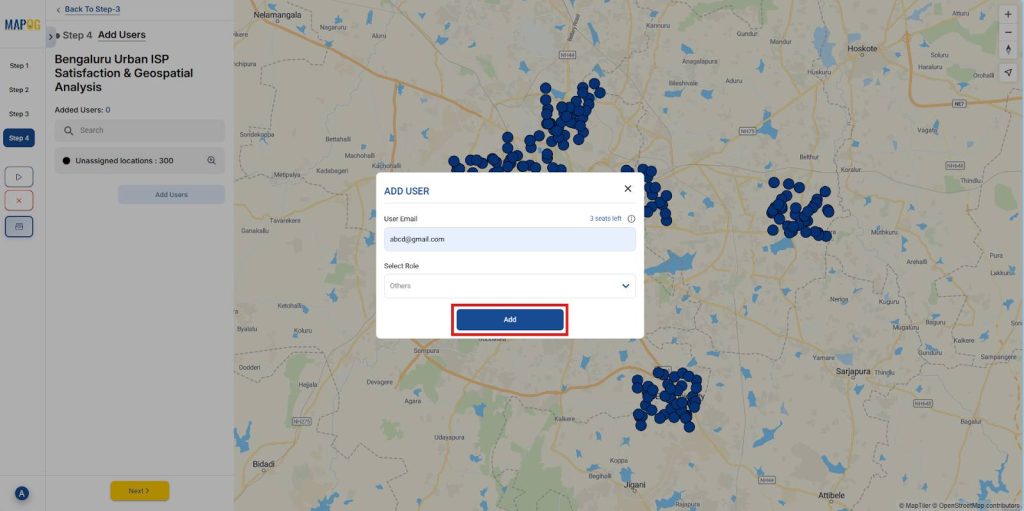
Then, select users from the list and click “Invite” to add them as contributors.
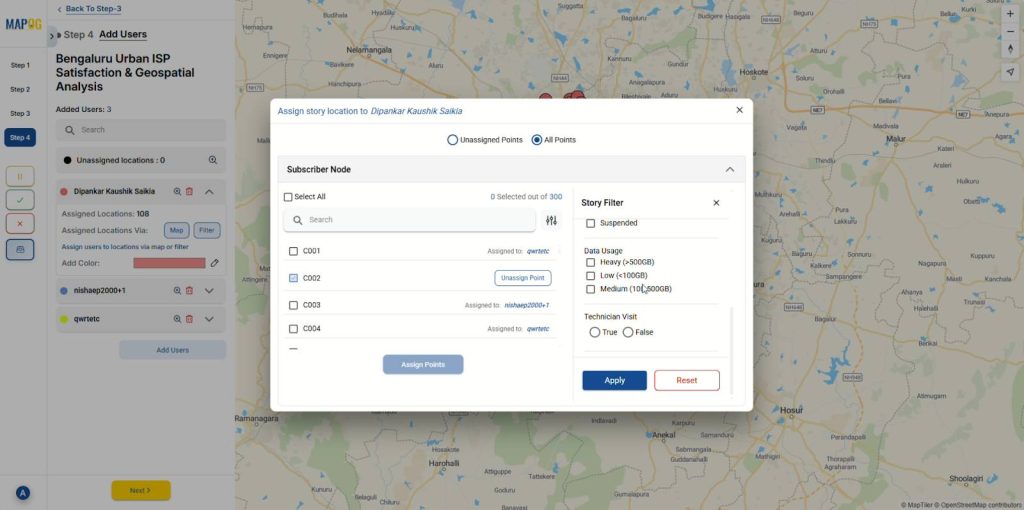
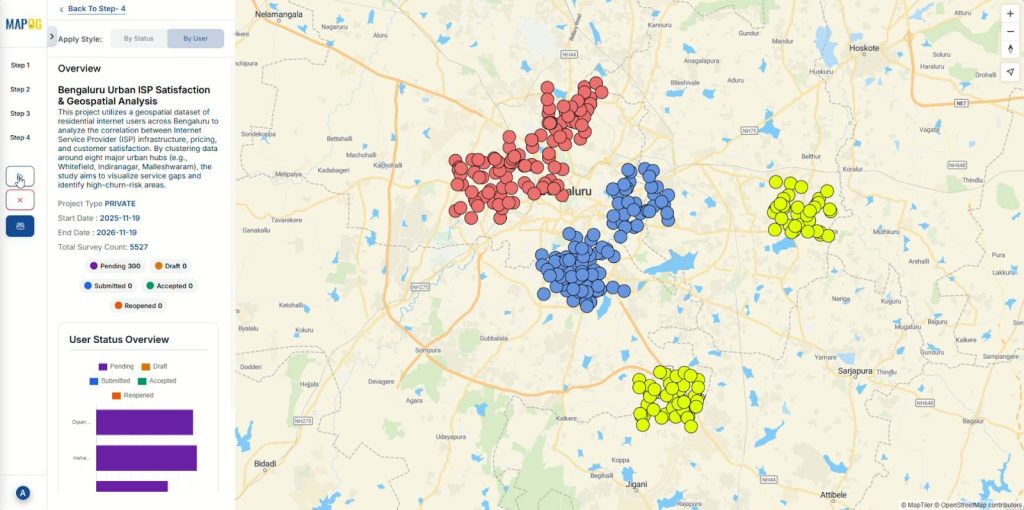
6. Assign Customer Locations to Field Teams
Then, click on the contributor’s name, select “Map”, draw a polygon around the points you want to assign to that specific contributor, and “Confirm”.
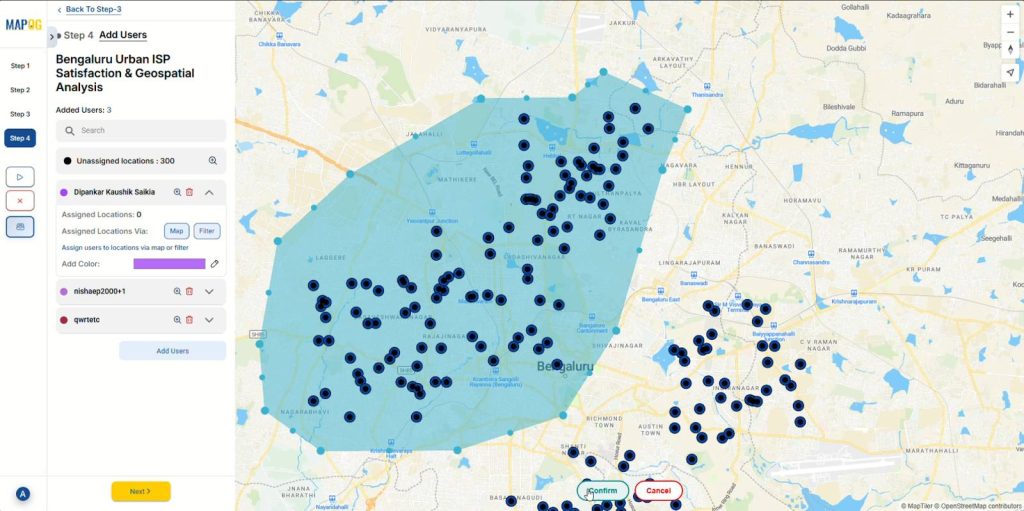
Alternatively, you can also use filters to assign locations from unassigned or all points.
7. Launch your survey
Finally, after assigning customer locations to each contributor, click on the “launch” button in the left panel.
8. Accessing Assigned Locations
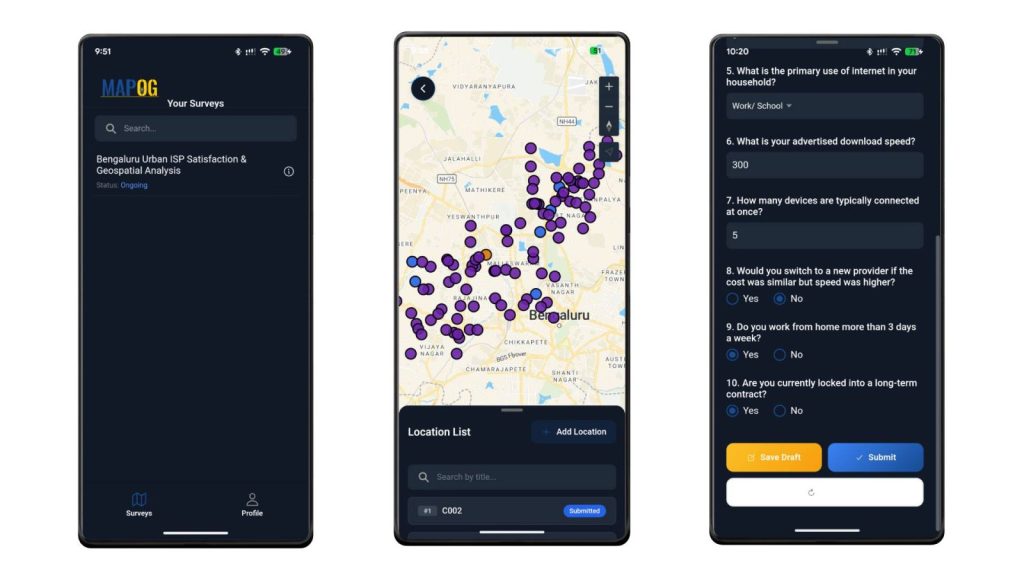
Assigned field teams log in to the MAPOG Contributor mobile app to view assigned locations and complete survey forms on-site.
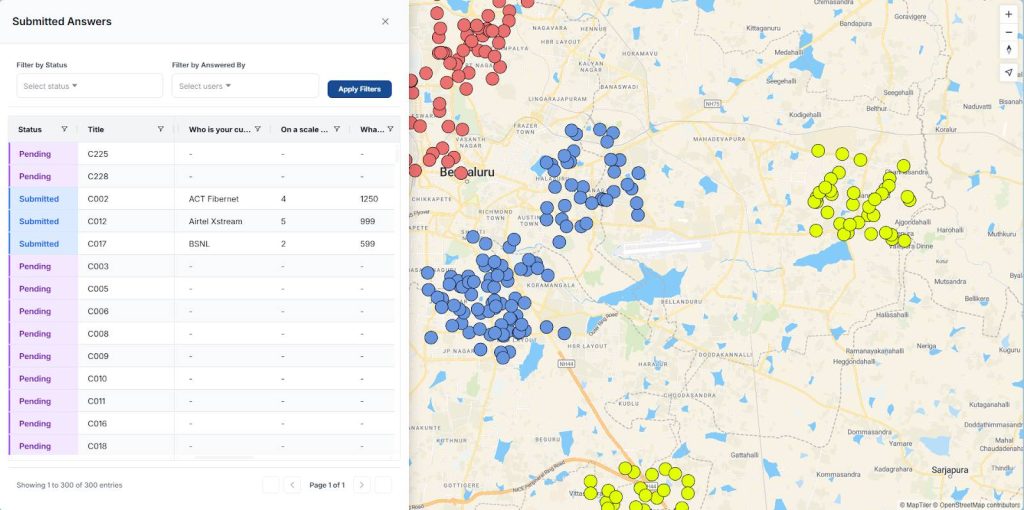
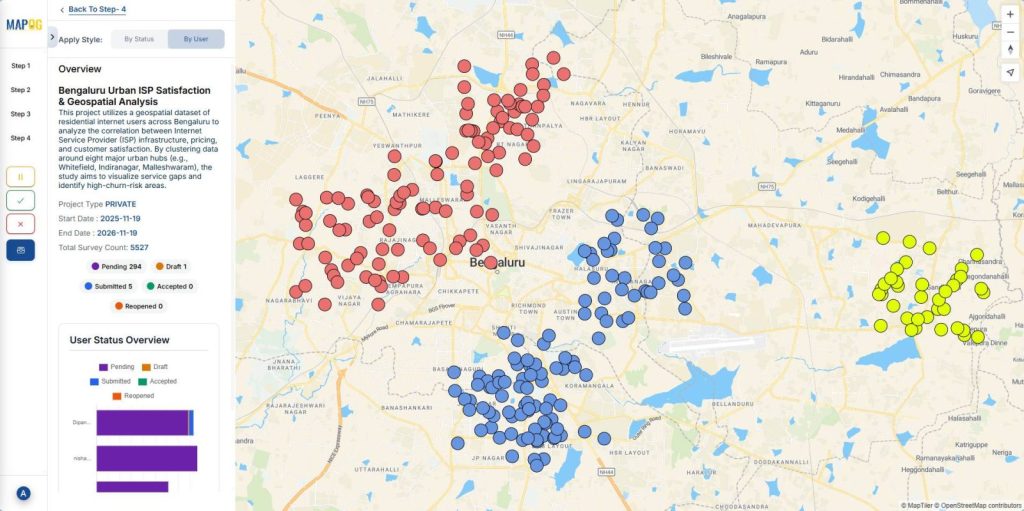
9. Review Project Overview
Check project details, survey counts, and status from the overview panel.
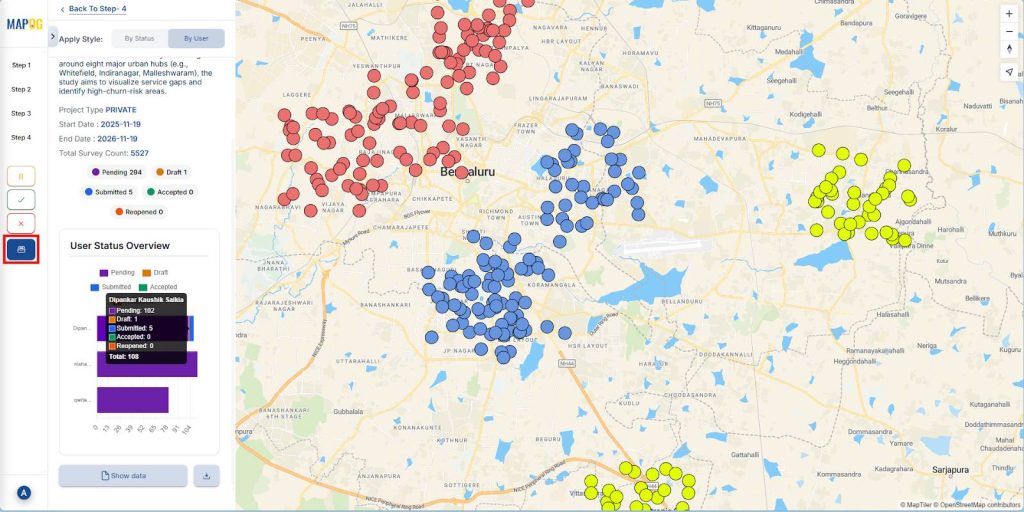
Open the “data table” to review submissions and apply filters as needed.
Industries and domain
This workflow is crucial across many sectors, including:
- Market Research: Teams reach customer clusters quickly and collect insights with greater precision.
- Telecom and Broadband Providers: Surveyors assess signal strength and feasibility across wide territories efficiently.
- Healthcare Outreach Programs: Field teams visit households and communities in sequence, improving service delivery.
Conclusion
A clear method to assign customer locations to field teams improves communication, strengthens survey execution, and boosts data accuracy across regions. When each worker knows their route and responsibilities, surveys become faster and easier to manage. MAPOG supports this workflow with mobile data collection tools that help teams work efficiently on the go.
Download the MAPOG contributor app from here: