Ever feel like your sales team is working hard but not necessarily in the right places? You’re not alone. Many businesses struggle to see exactly where their customers are and how effectively their sales reps are covering each region. A Customer coverage map helps you visualize where your customers are located, how well your team is covering each area and where new opportunities are hiding. With MAPOG, you can create such a map which will not only spot gaps in your sales coverage, reduce overlap between reps but also help you make smarter decisions about where to focus your efforts. In short, it is a simple yet powerful way to help your team work more efficiently and drive better results.
Key concept of a customer coverage map
The basic concept behind a customer coverage map is to cover all the areas where the customers are located. It is a visual tool which helps you locate your customers based on the data you collect and therefore helps the sales team to improve efficiency. The map will help you identify regions with maximum customers, the ones which are under-served and where new opportunities lie. In short, it’s like a snapshot of your customer base and sales efforts. It helps you make sure every area gets the right amount of attention. Therefore, you won’t miss out on potential business.
Step-by-step method of creating the map
Step 1 : Create the map
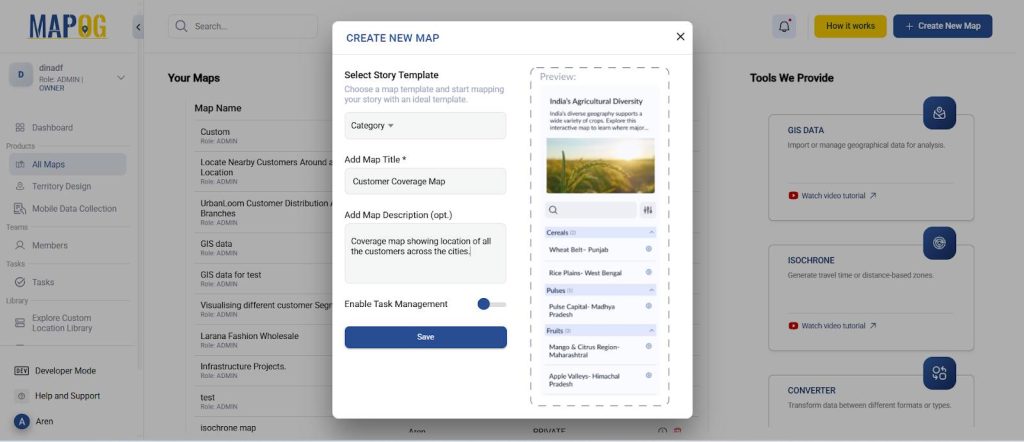
Go to MAPOG and create a new map. Select the story template as ‘Category’ and add story title and description and save.
Step 2 : Uploading your data and adding attributes
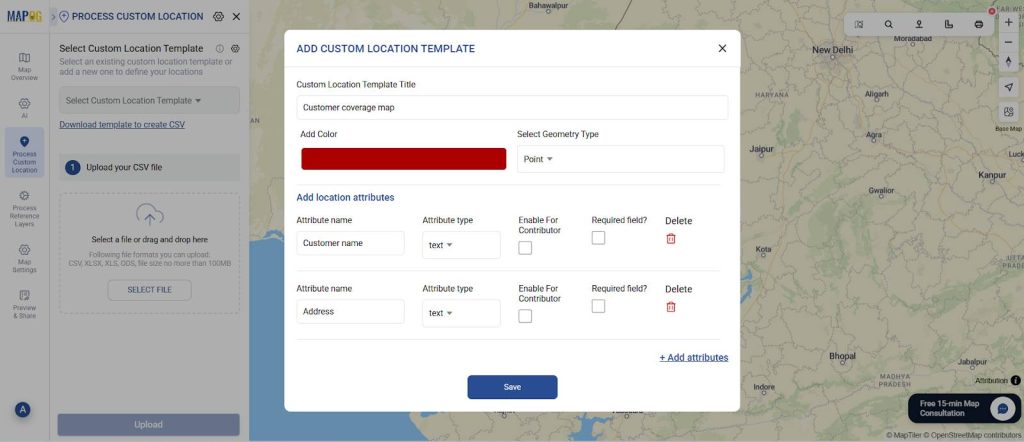
Now, go to process custom location and select add by uploading excel/CSV. Go to ‘Select Custom Location Template’ settings and add your custom location template along with necessary attributes like customer name, address, pin code, etc. Select the custom location template that you created and select your excel file with all the details and upload.
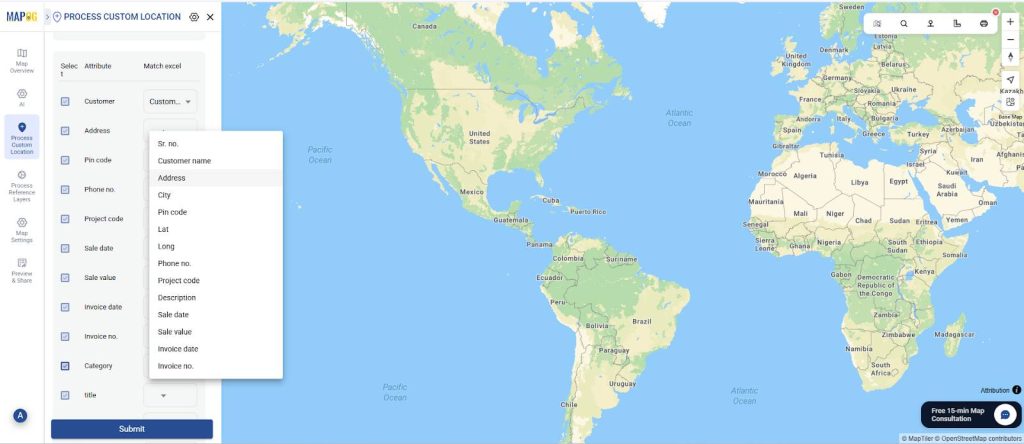
Now, match excel with the attributes including coordinates in location fields and submit. Your data will now come alive on the map.
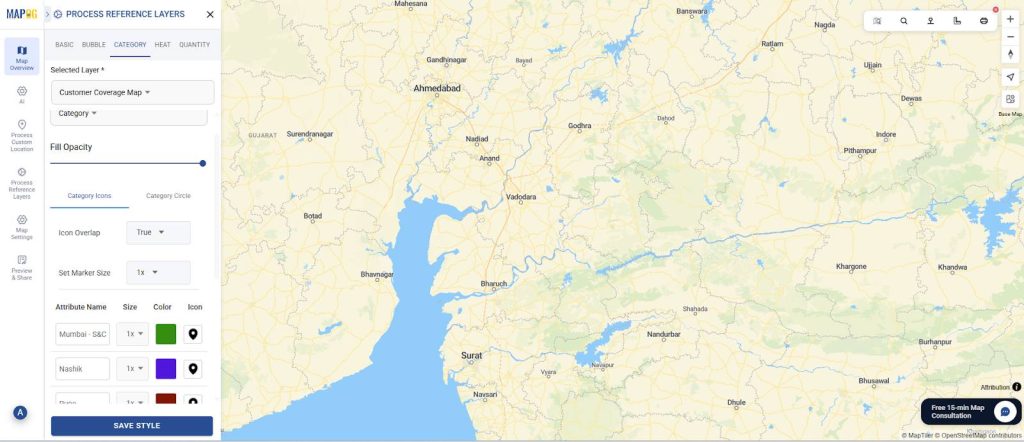
Step 3: Style the customer points by category
Next, style your customer points differently based on the city in which they are present. Go to ‘add style layer’ and style by category.
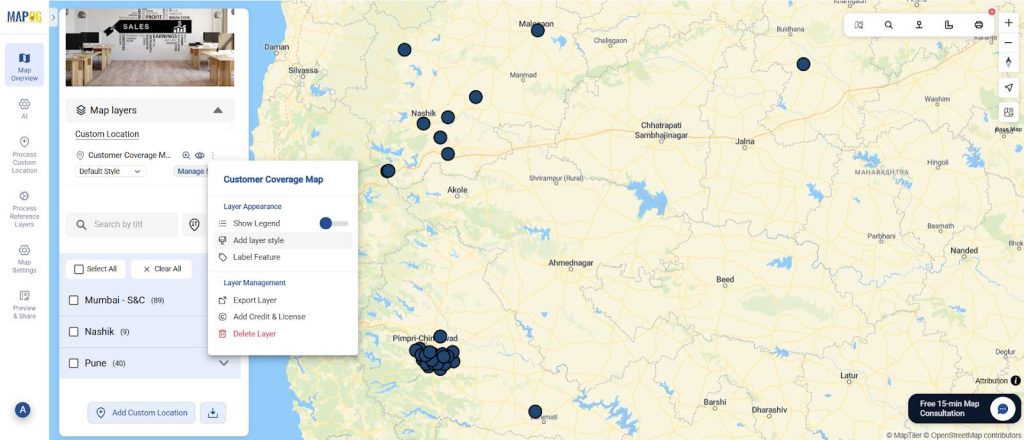
In the category style, choose the attribute you want to categorize on the basis of, your choice of colours and icons and press ‘save style’.
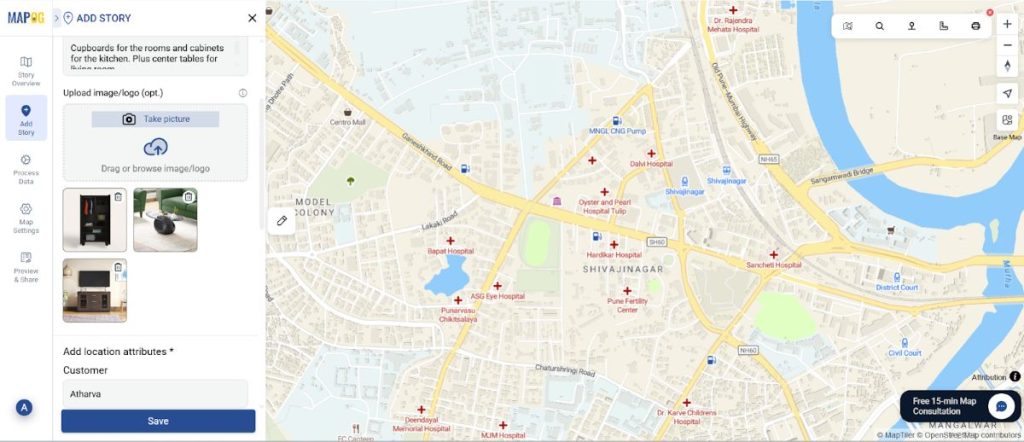
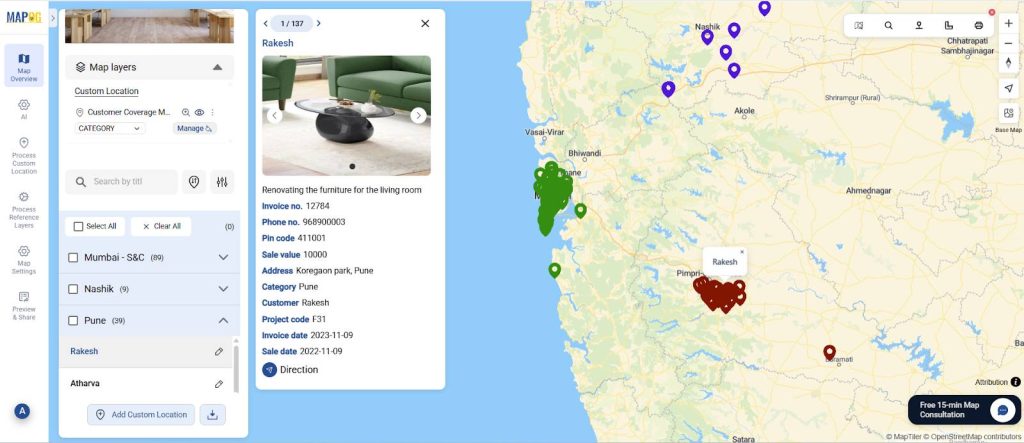
Step 4: Edit point details.
Also, you can edit each point detail and add the type of sale the customer gave or images for clarity.
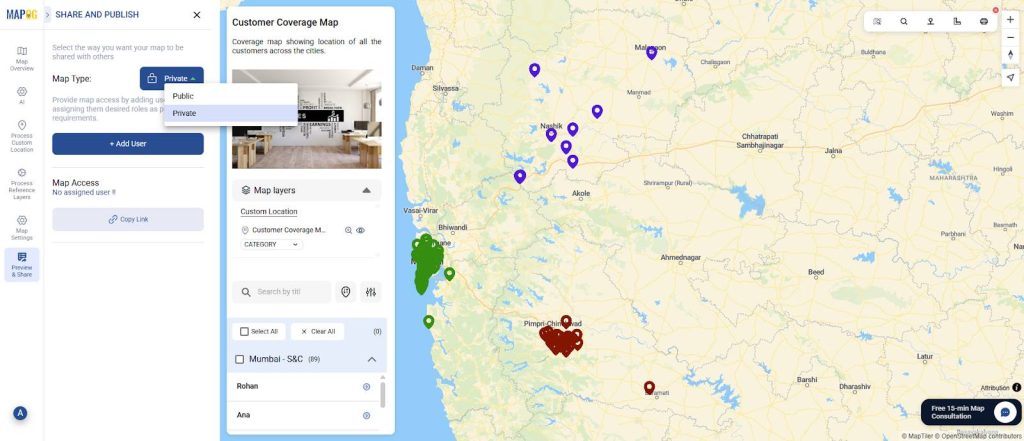
Step 5: Preview and share
Finally, once your map is complete, click “Preview and Share”. You can choose to keep your map private or share the link with your team.
Industrial use and benefits of the map
In industrial sectors, where sales territories often span large regions and customer relationships are key, this map can be a game changer. It helps businesses visualize where clients, distributors, and prospects are located therefore making it easier to plan visits, allocate sales reps, and manage territories efficiently. With this map, companies can identify areas with high demand, reduce overlap between sales teams, and ensure every key account gets proper attention. Thus, the result is better resource utilization, improved customer service, and more strategic decision-making that drives consistent grow.
Conclusion
Creating a Customer Coverage Map isn’t just about plotting points on a map but it’s about gaining valuable insights into how your business connects with customers. With MAPOG you can not only get a clear view of your market coverage, but you can also make smarter decisions, boost your team’s efficiency, and uncover new growth opportunities. Whether you’re managing a local sales team or overseeing operations across regions, a coverage map helps you stay organized, strategic, and one step ahead of the competition.