Franchise businesses often face challenges with customers finding nearby locations due to long text lists on websites. This can lead to frustration and lost opportunities. To address this, many brands are adopting interactive maps to clearly showcase all franchise locations. Customers can view stores visually, get directions, check services, and book appointments conveniently. MAPOG simplifies this by allowing businesses to upload an Excel file to automatically plot stores, ensuring a structured and user-friendly display of franchise locations.
Key Concept: Using Interactive Maps to Showcase All Franchise Locations
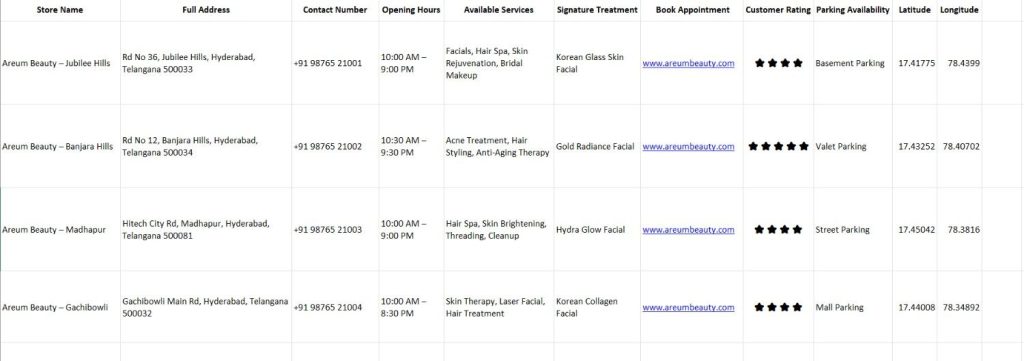
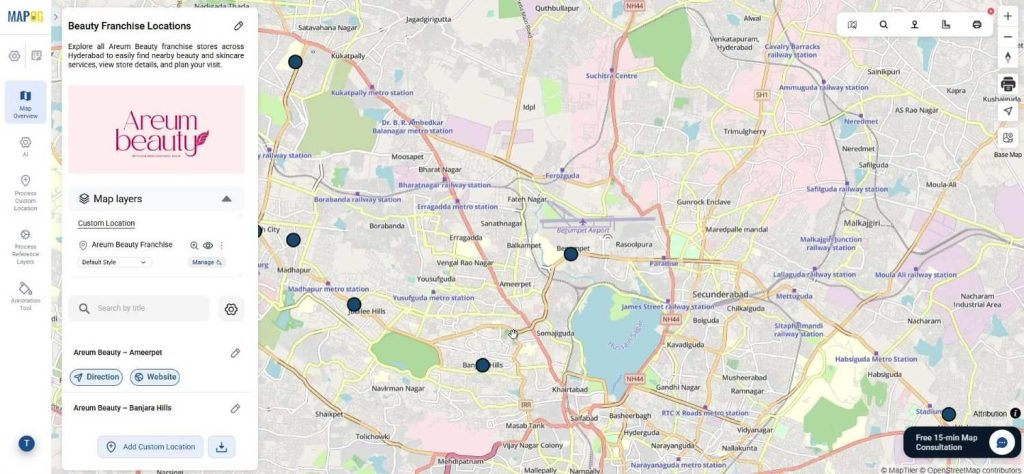
To create a franchise map, businesses must first organize data such as store names, addresses, services, contact numbers, and customer ratings in spreadsheets. This structured data can then be uploaded to MAPOG to visualize locations through latitude and longitude, allowing customers to view all franchise locations on a single map. For instance, a beauty franchise can utilize an interactive map to display store addresses, opening hours, and appointment booking options, enhancing customer accessibility and engagement.
Step-by-Step Process to Showcase All Franchise Locations with MAPOG
Step 1: Prepare the Franchise Location Data
First, collect all franchise location information in an Excel sheet. Typically, this includes store name, latitude, longitude, services offered, customer ratings, website links, and appointment booking links.
Step 2: Create a New Store Mapper Map
Next, open MAPOG and click Create New Map. Then choose the Store Mapper template, since businesses use it specifically to manage multiple branches. Afterward, provide a map name and description & click create to save the map.
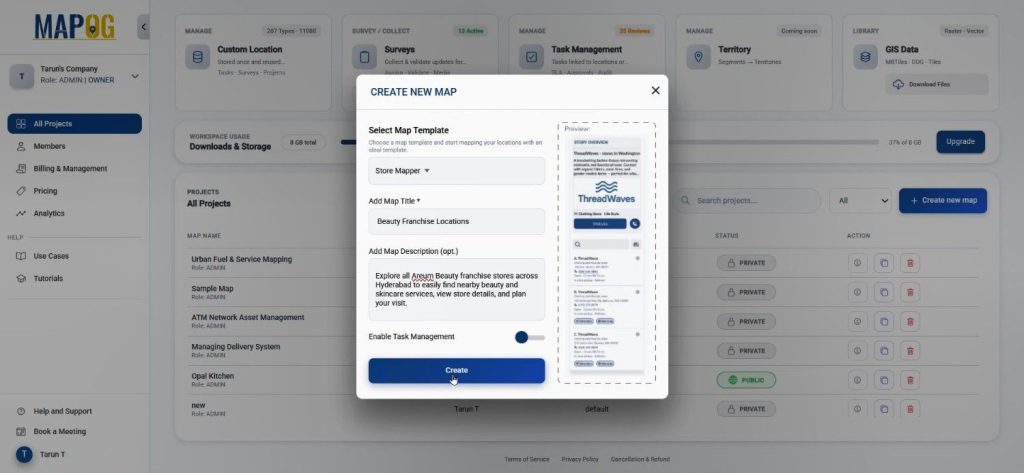
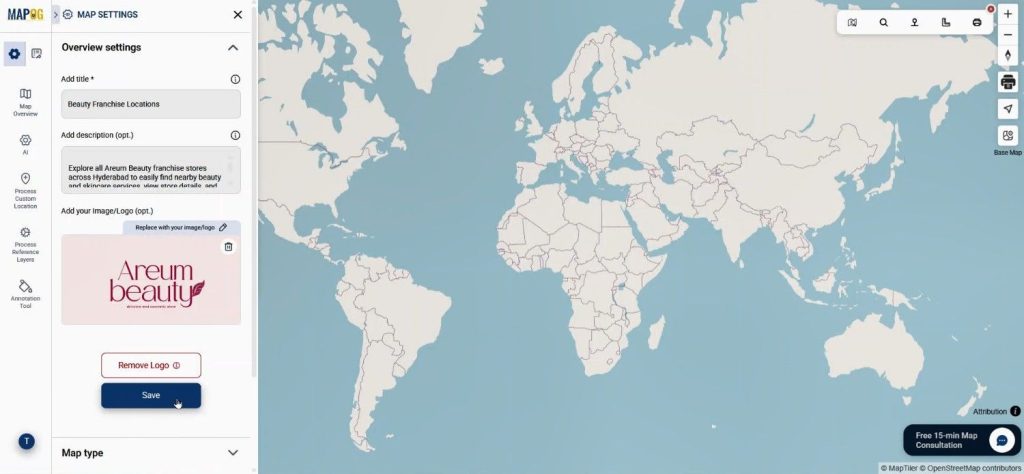
The platform will open the map interface, where you can update the company logo using the replace option.
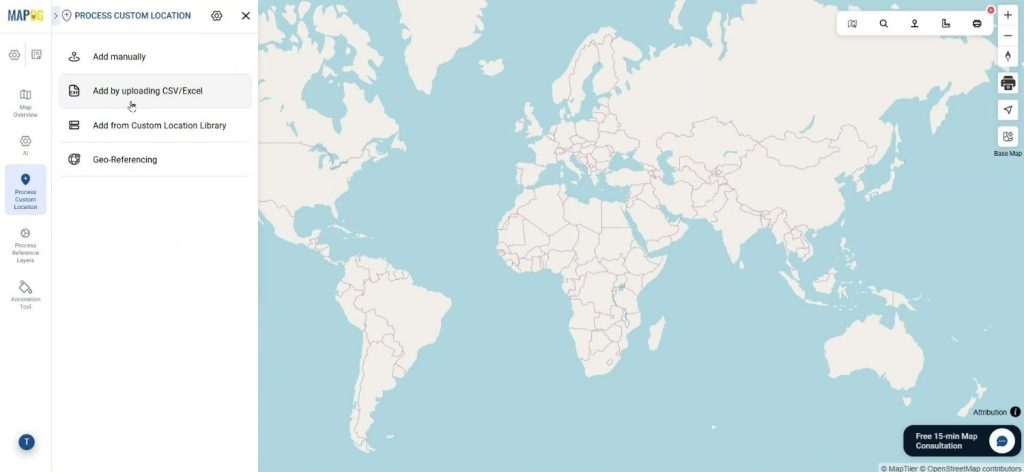
Step 3: Create a Custom Template for Franchise Data
After setting up the map, go to Process Custom Location & open Add by uploading CSV/Excel.
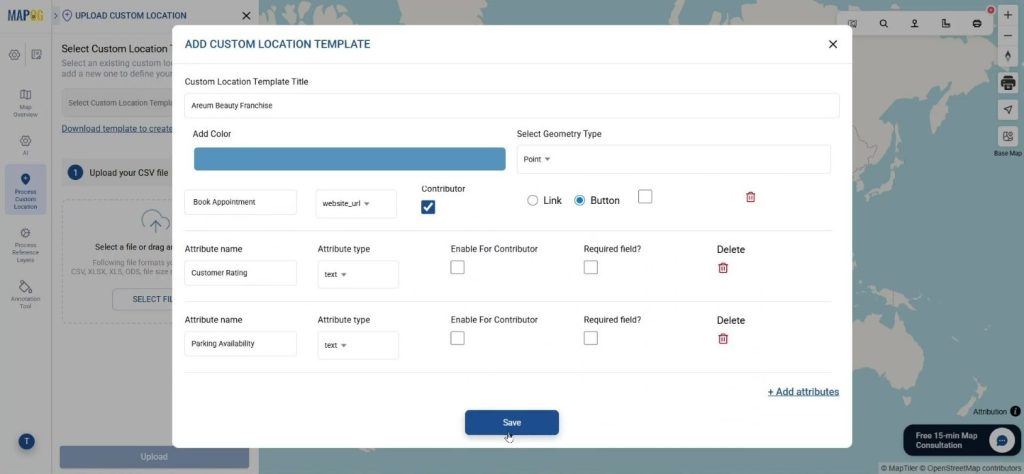
Open Select Custom Location Template Settings. Here, you can create a reusable template to store franchise details. Provide name, color & set geometry type as point. Add attributes such as store name, address, services offered in text, multiselect format. You can set the Book Appointment attribute as a website URL and display it as a button. Consequently, customers will be able to schedule appointments directly from the map. Additionally, you can enable contributors so franchise managers can update store information when needed. Lastly save the template.
Step 4: Upload the Excel File and Plot Franchise Locations
Select the template from drop down & upload the prepared excel file.

A Unique ID field should be selected to avoid duplicate entries.
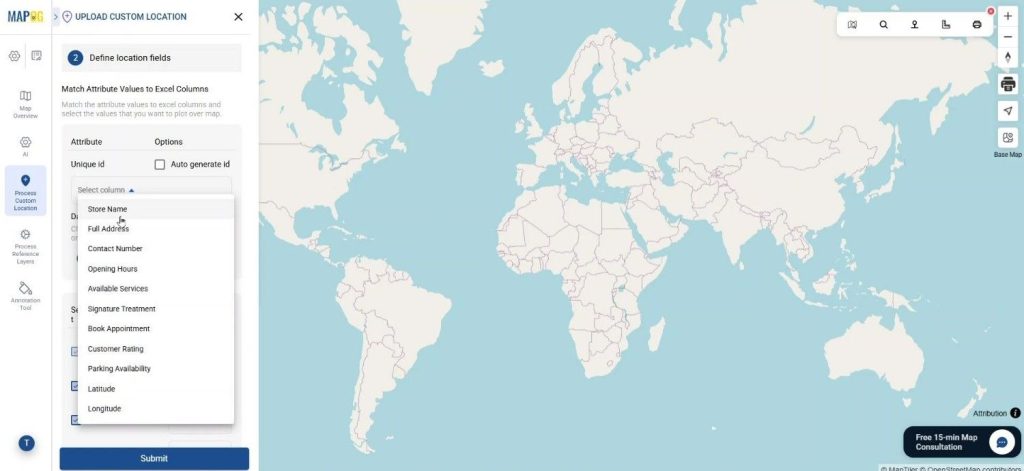
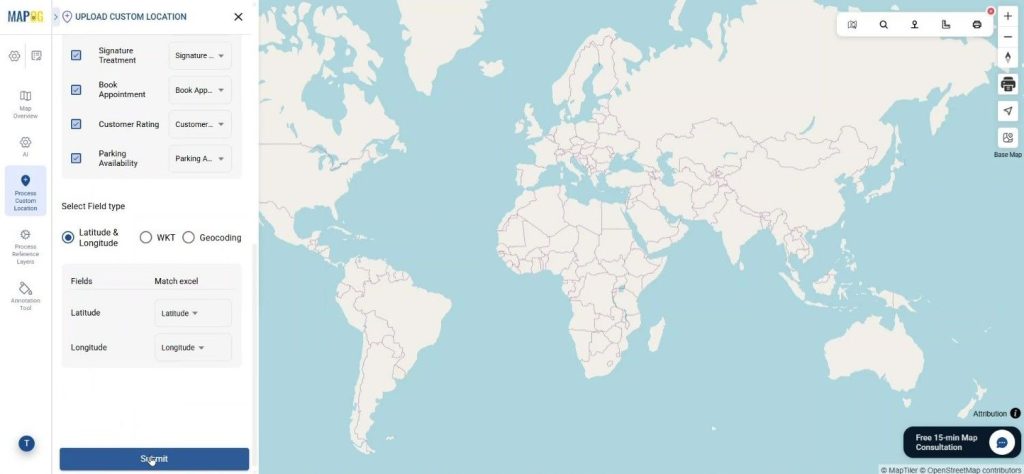
Match all attributes with columns & set field type as latitude & longitude & submit.
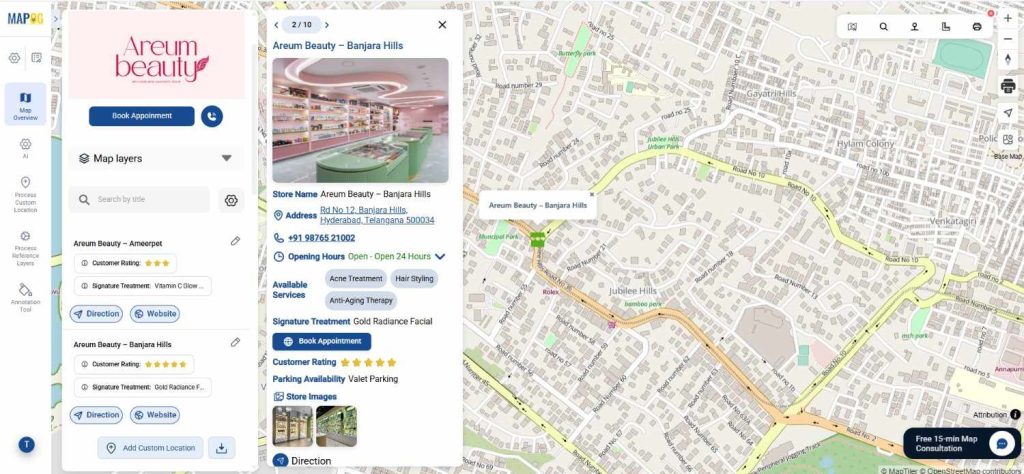
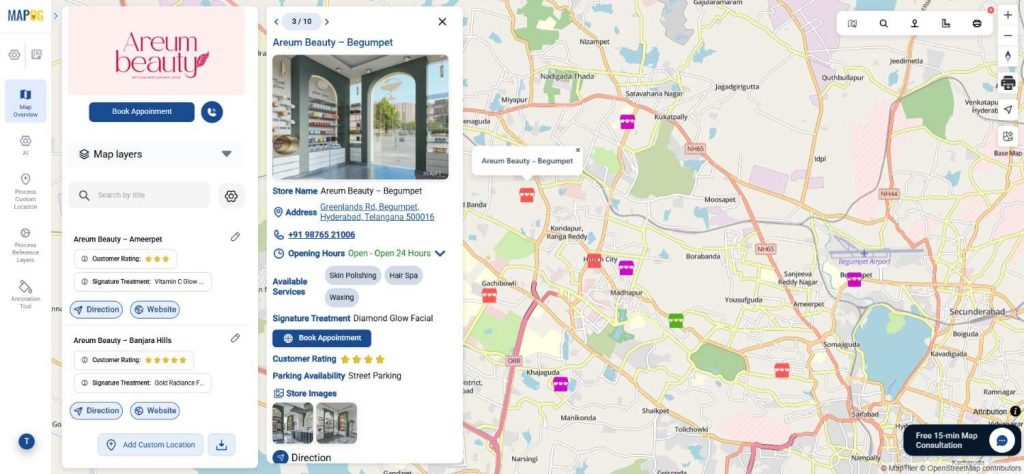
Once submitted, every store location will automatically appear on the map. They have get direction & website button embedded in location which will help to get exact address or the website from customers in just one click.
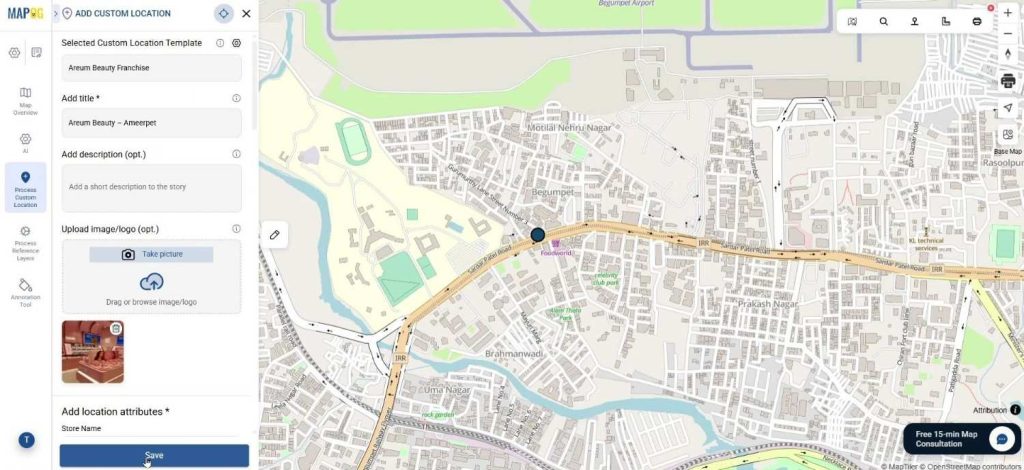
Step 5: Add Images, Business Hours, and Ratings
After the locations appear on the map, edit each location using edit custom location details.
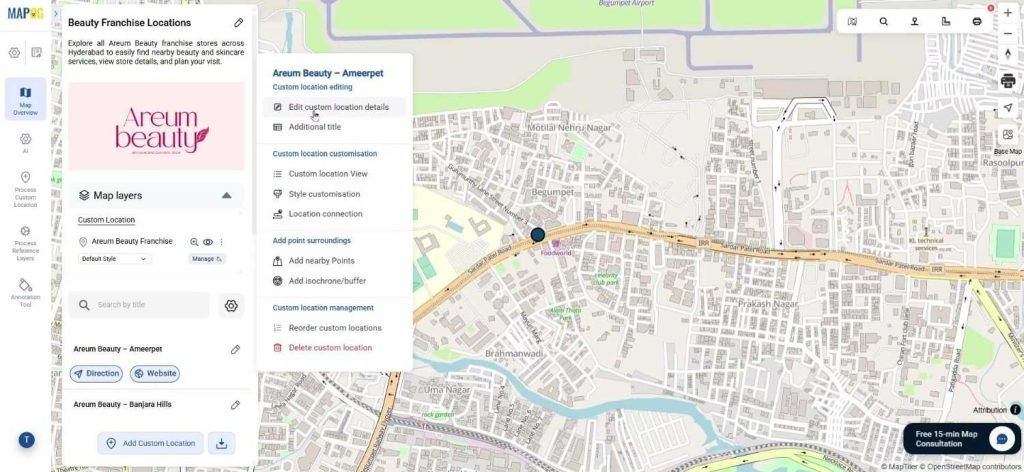
Businesses can upload store images, set business hours, and add additional information.
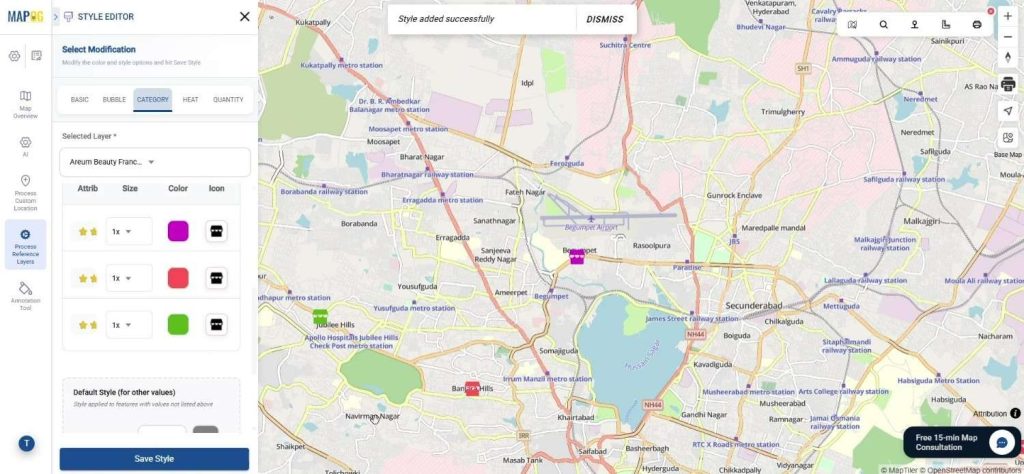
Furthermore, the Add Layer Style option allows companies to apply category styling based on attributes like customer ratings.
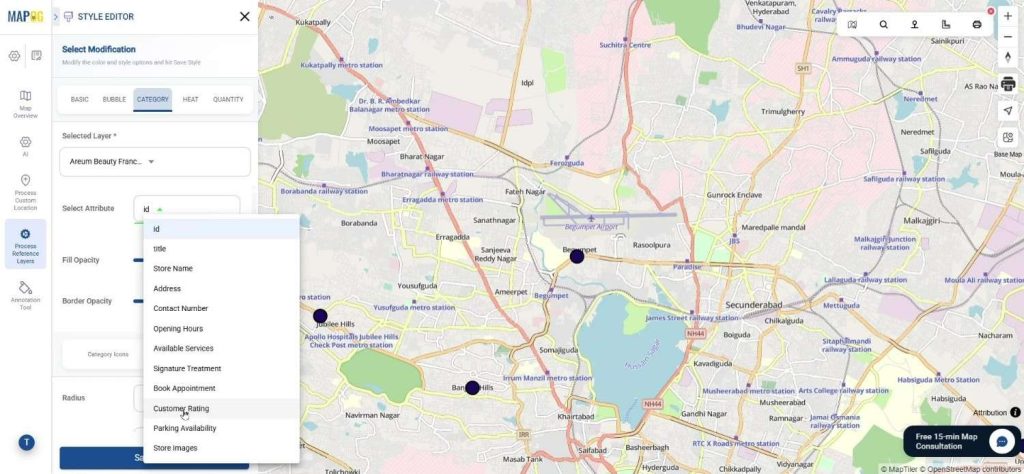
Different icons or colors can be assigned, which improves visibility. Consequently, customers can quickly identify top-rated stores while browsing the map.
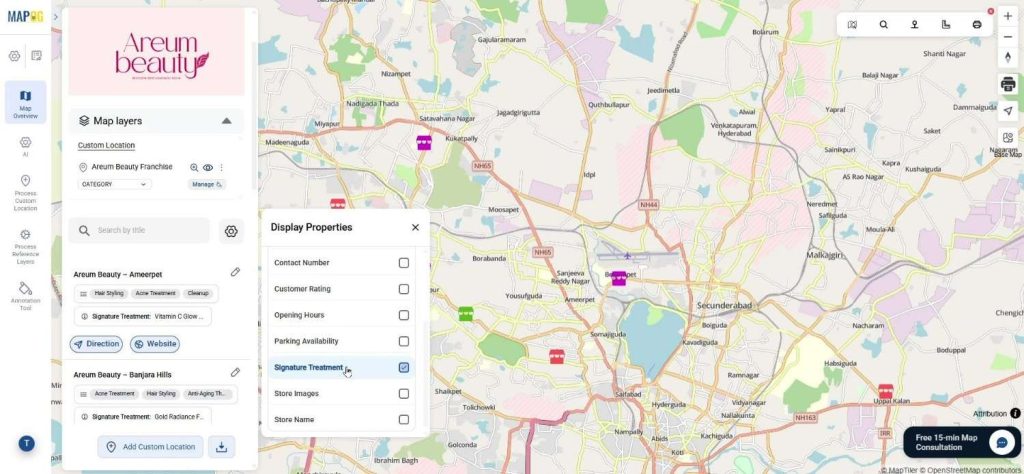
Step 6: Improve User Experience with Display Properties
Next, open the Display Properties feature. This allows businesses to choose which attributes should appear on the location panel. For example, businesses can display services, business hours, ratings, or appointment buttons. As a result, customers can instantly review important details without navigating away.
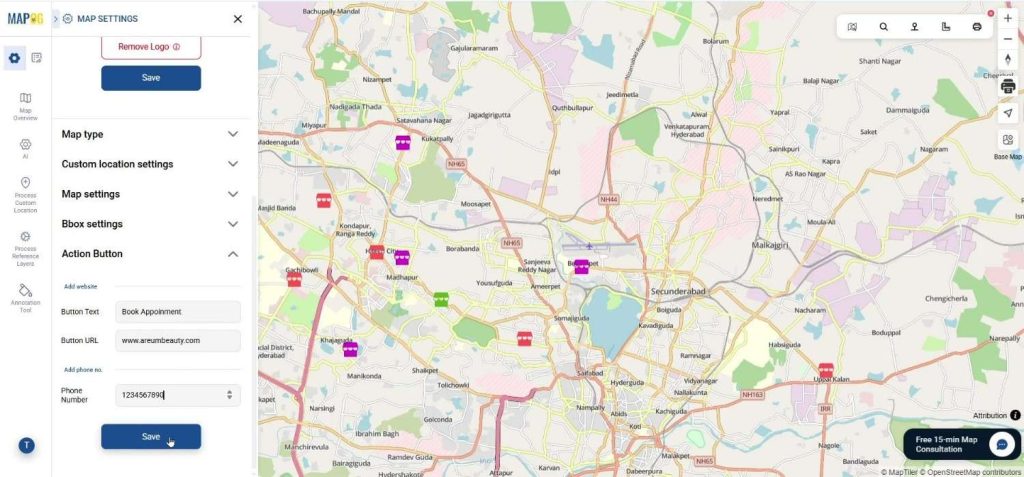
To improve customer engagement, open Map Settings and add action buttons such as Book Appointment and Call Now. Consequently, customers can either call the store or schedule an appointment directly from the map interface. This makes the map not just informative but also interactive.
Step 7: Share or Embed the Franchise Map
Finally, go to Preview and Share. The map can be made public or private depending on the business requirement.
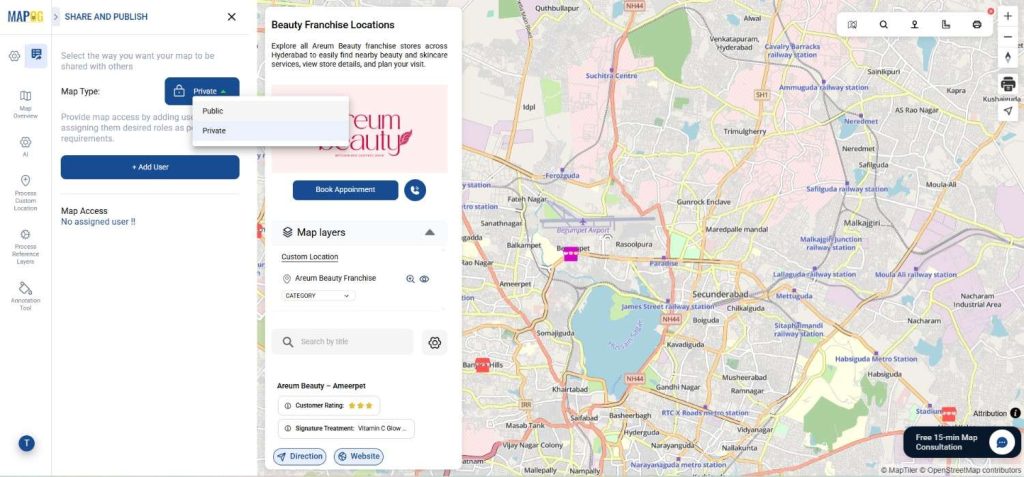
Businesses can share the link, embed the map on their website,
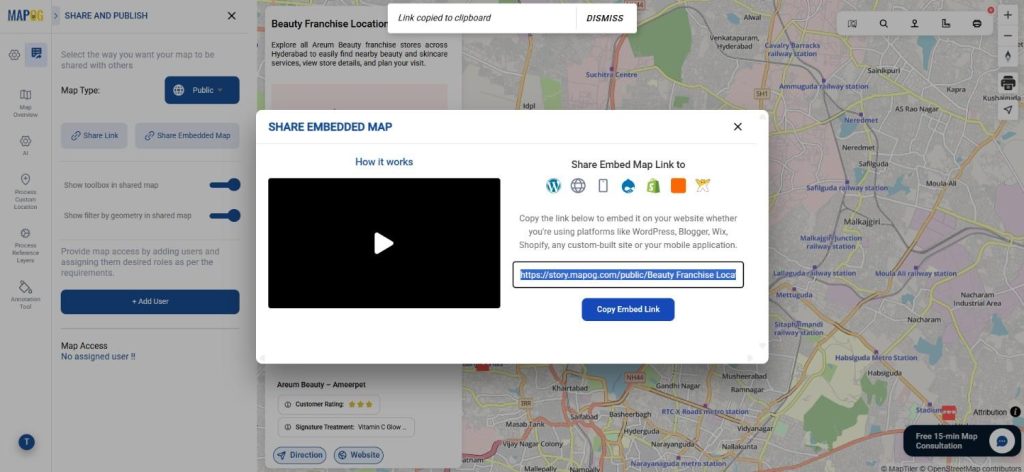
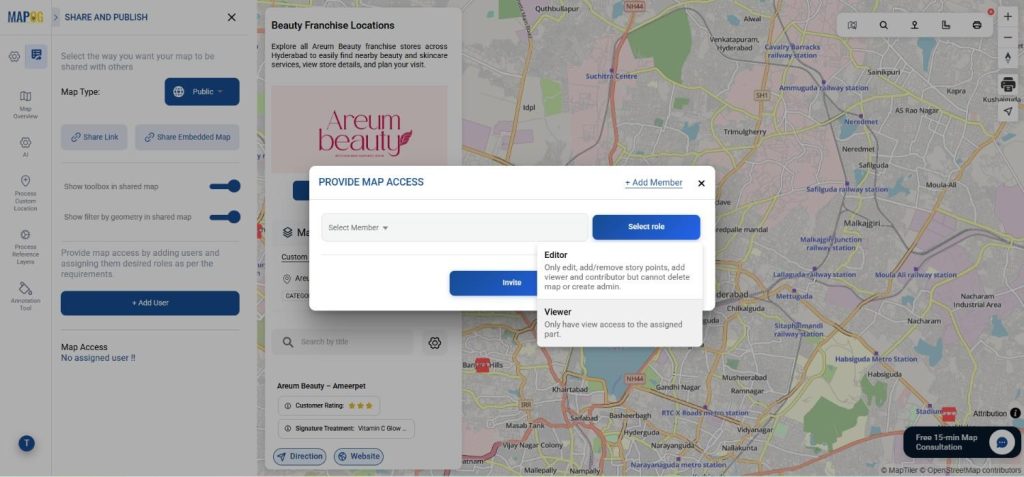
or invite team members to collaborate. As a result, teams can manage store data together while customers easily find nearby branches.
Industry Benefits of Mapping Farm Land Using Satellite Images
Many industries rely on multiple branch locations, so interactive maps are extremely useful.
Retail chains can display store locations along with promotions and opening hours. Healthcare franchises can help patients find nearby clinics quickly. Similarly, fitness brands can show gym locations with trainer availability and membership booking options.
Conclusion
Customers seek convenience in locating nearby stores, prompting businesses to utilize interactive mapping solutions rather than static location lists. MAPOG enables companies to upload franchise data, manage store details, and customize the user interface. By showcasing all franchise locations on an interactive map, businesses enhance customer engagement and streamline franchise management. Interactive maps can significantly impact how customers discover businesses.