Capture Drug Inspection Data efficiently is no longer optional—especially when inspections happen across multiple locations and teams. Today, field teams need a reliable way to collect store details, verify compliance, and upload photos in real time. With MAPOG’s Mobile Data Collection and the MAPOG Contributor App, we can plan drug inspections, assigned, captured, and reviewed on a live map. As a result, inspections stay accurate, traceable, and easy to manage.
Key Concept: Capture Drug Inspection Data with Location-Based Surveys
At its core, Capture Drug Inspection Data means linking inspection forms, photos, and status updates directly to real-world locations. Instead of scattered spreadsheets and messages, MAPOG brings everything into one structured survey mapped to drug store points. Consequently, we maintain data consistency while preserving flexibility for future inspections.
Step-by-Step Process to Capture Drug Inspection Data
Step 1: Prepare Store Records to Capture Drug Inspection Data
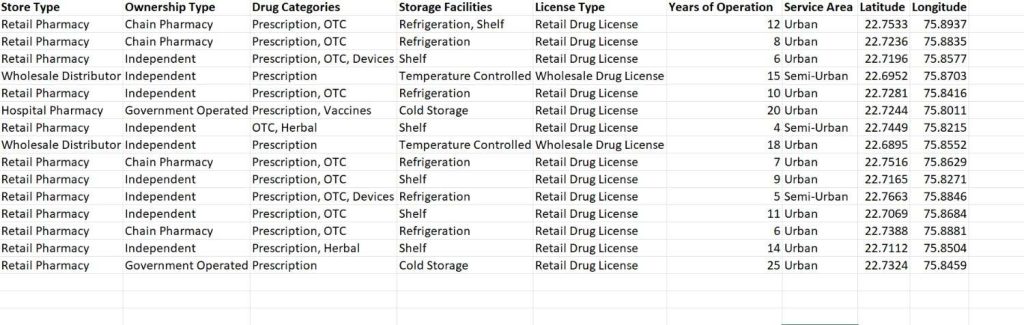
Before mapping begins, the inspection team collects all drug store details and stores them in an Excel or CSV file. Typically, this includes store name, address, license number, owner type, and coordinates. Once prepared, this file becomes the backbone to Capture Drug Inspection Data without duplication and with easy updates later.
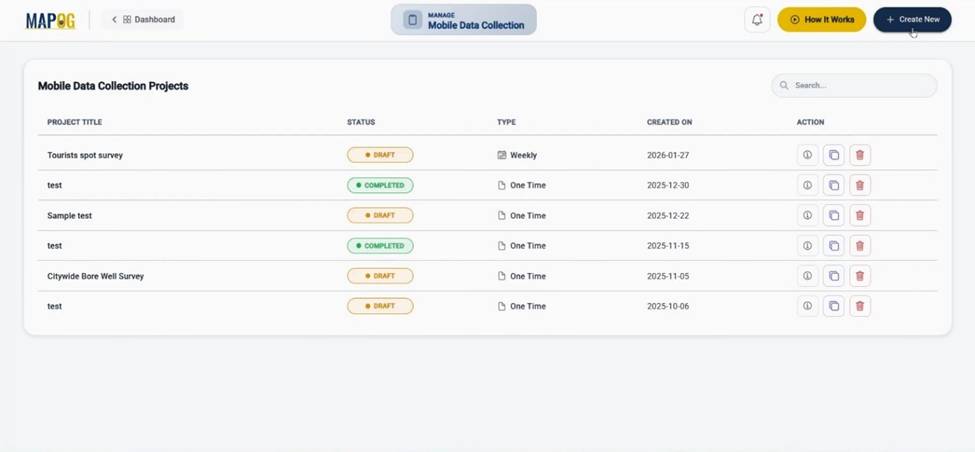
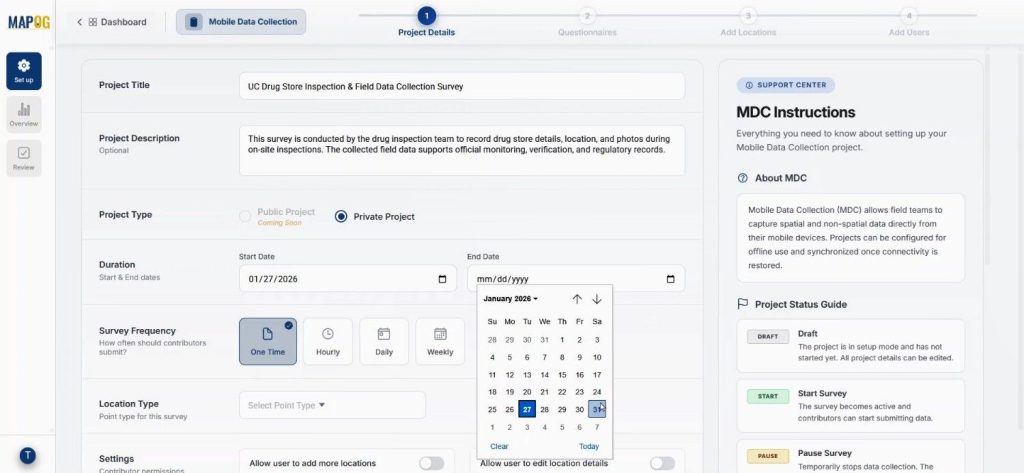
Step 2: Create a Mobile Survey to Capture Drug Inspection Data
From the MAPOG dashboard, the team selects the Survey option.
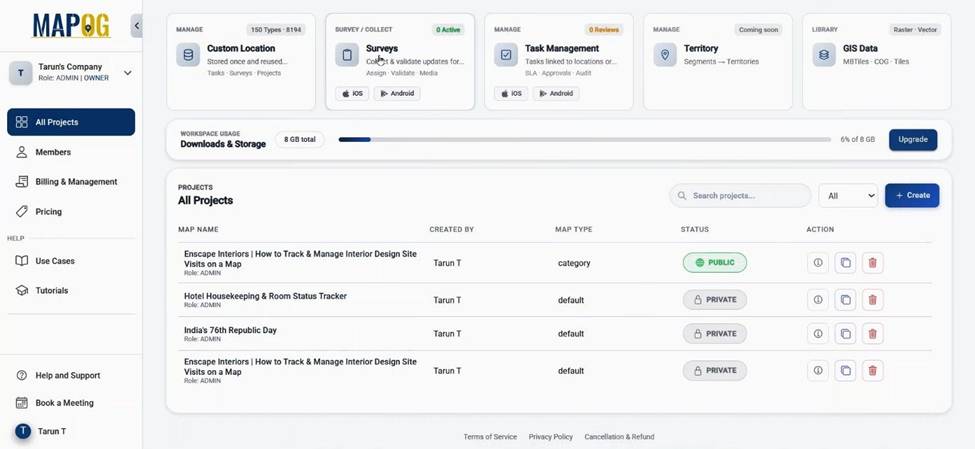
followed by Create New under Mobile Data Collection.
Next, the team defines a realistic survey name, description, project type, duration, and frequency. At this stage, the inspection feels operational, not theoretical, which helps teams adapt faster.
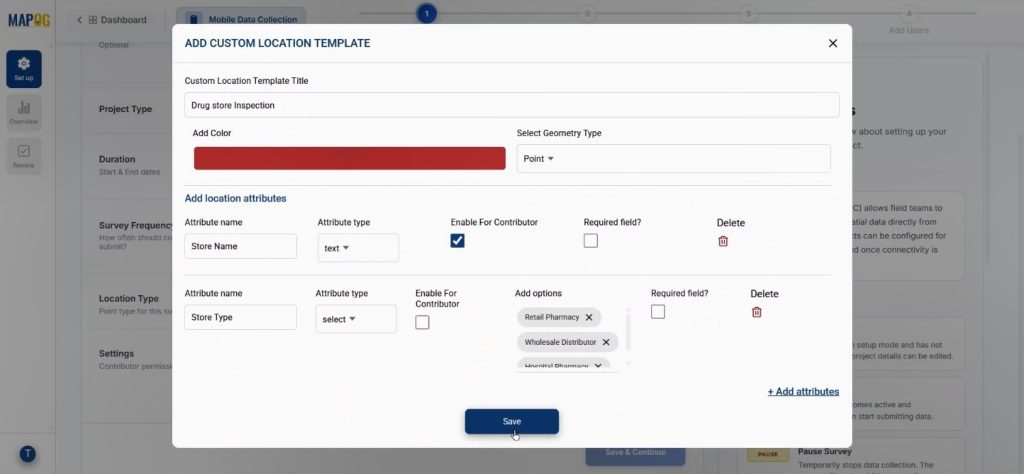
Step 3: Design Location Type for Drug Inspections
Then, the team creates a new point-based location type called Drug Inspection. Color and geometry are set, and the team adds inspection-specific attributes using select, multiselect, and text fields. Moreover, the team enables contributor access so inspectors can update data directly from the field. This reusable setup ensures Capture Drug Inspection Data remains standardized across projects.
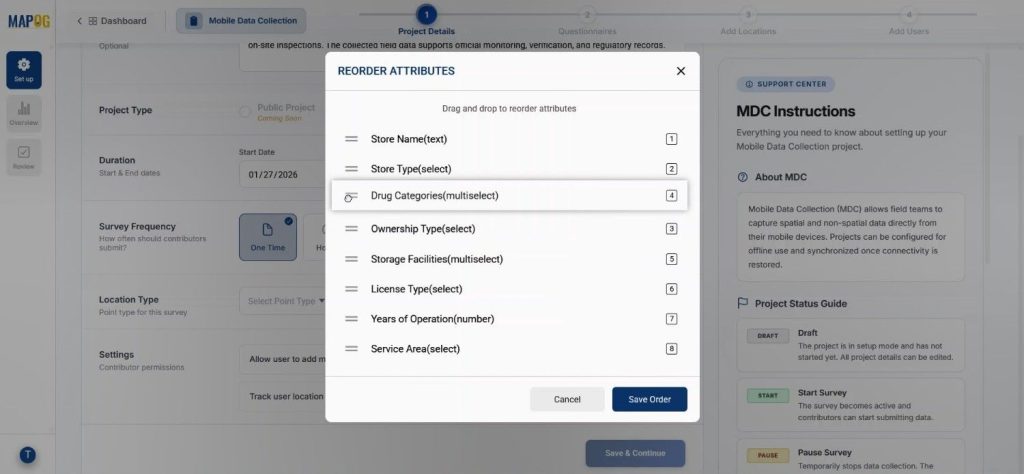
You can re-order the attributes after saving by dragging them up & down.
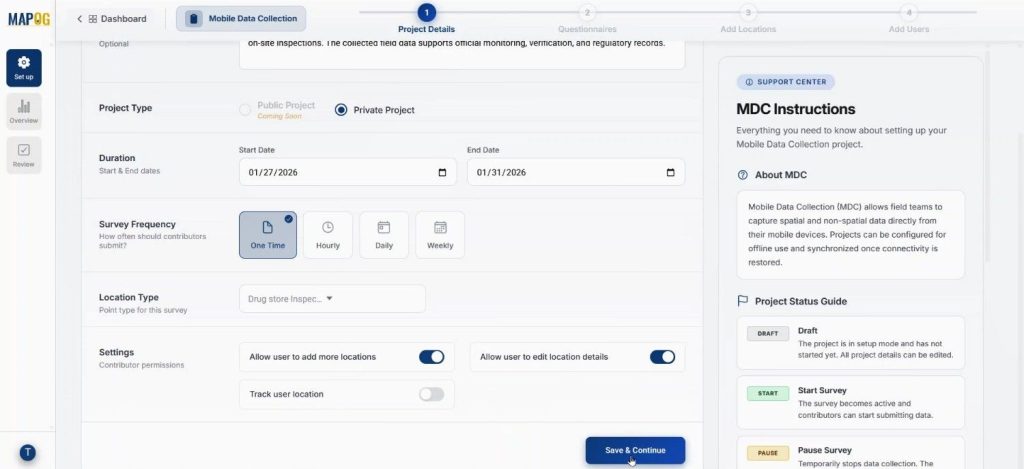
Next enable some contributor locations like users can add locations & edit location details. Lastly save & continue.
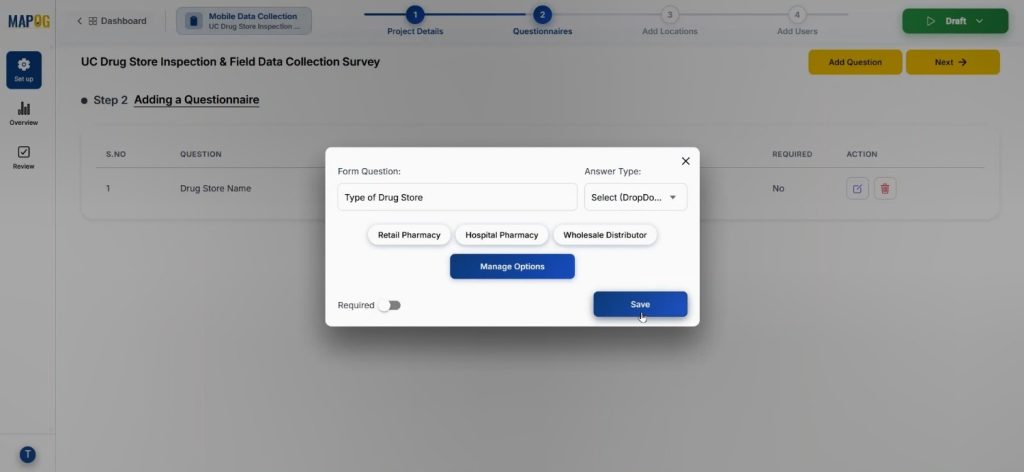
Step 4: Add Questions and Upload Locations
After that, the team adds survey questions using the Add question option, including compliance status, remarks, and image uploads.
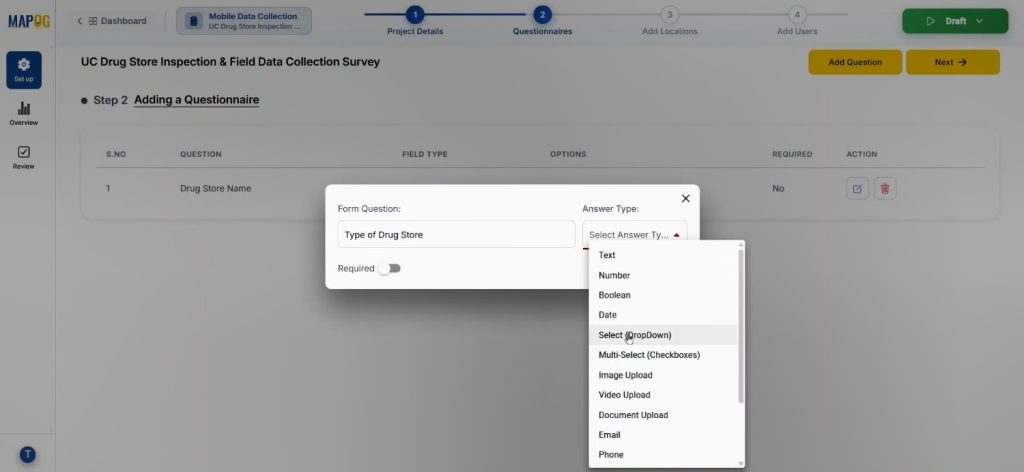
With the select & multiselect option we can add various kinds of answers & manage them properly.
Subsequently, the team uploads the prepared CSV or Excel file using the Add New Location by Uploading CSV/Excel option.
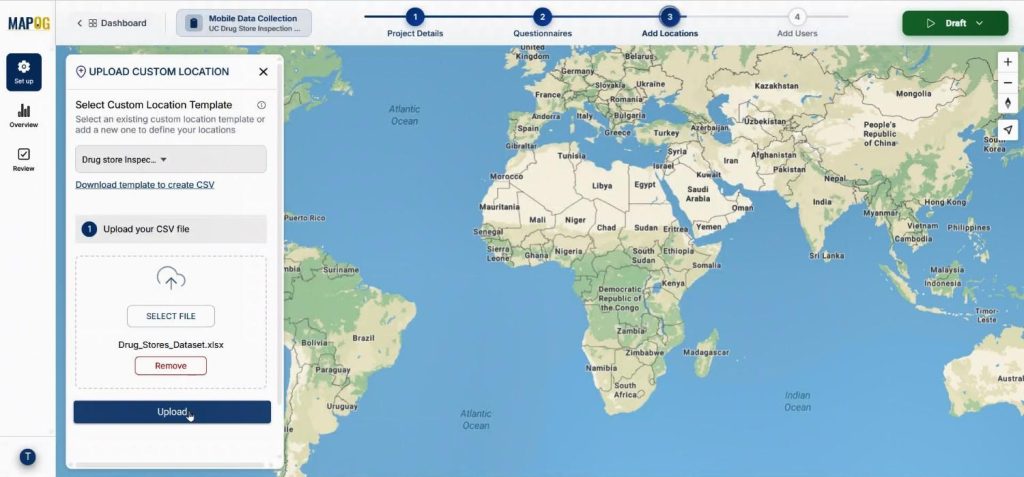
Additionally, the team assigns a unique ID to each store to avoid duplication and enable easy updates.

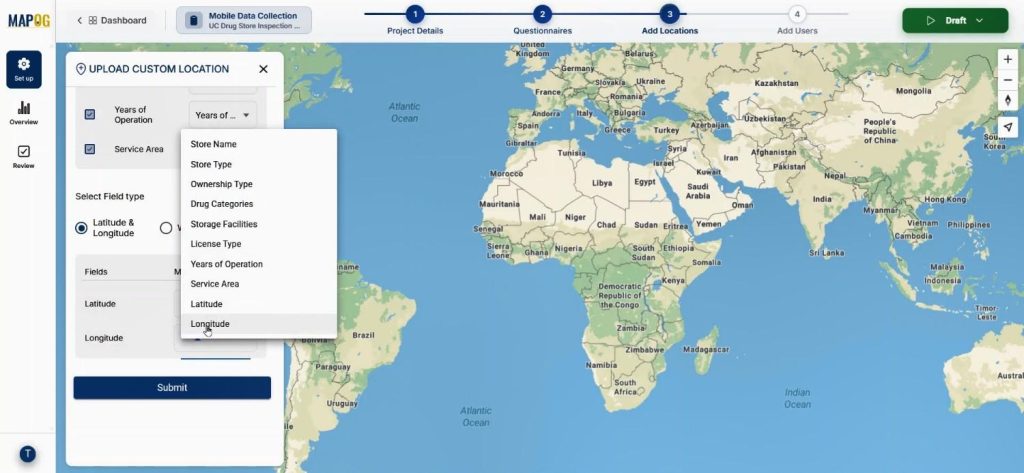
Then, the system matches attributes with columns and sets coordinates. As a result, MAPOG instantly plots points on the map, making it easier to capture drug inspection data visually.
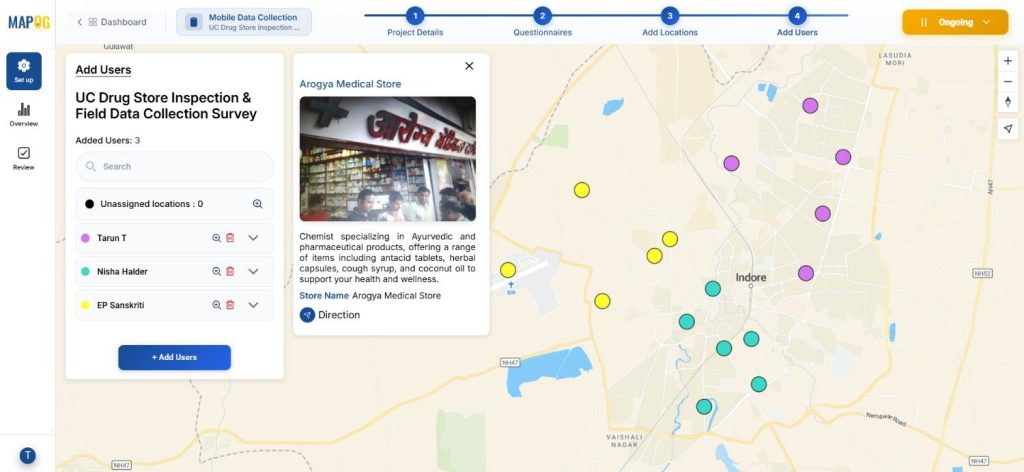
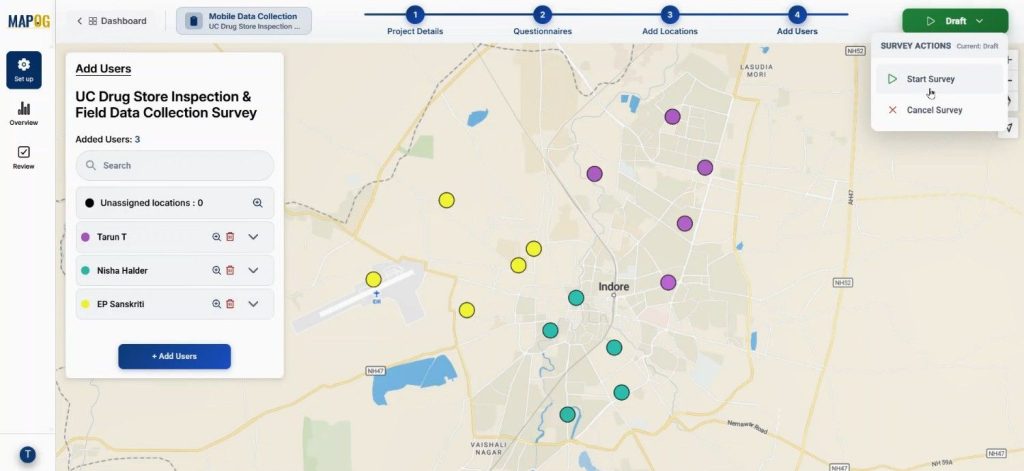
Step 5: Assign Inspectors and Launch the Survey
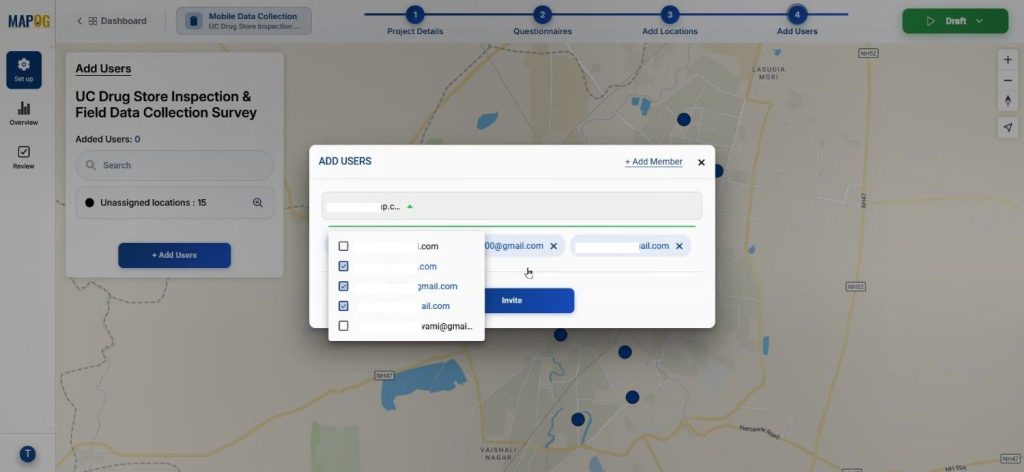
Now come to add user section. Meanwhile, the admin adds team members as admins or viewers using the Add Member option.
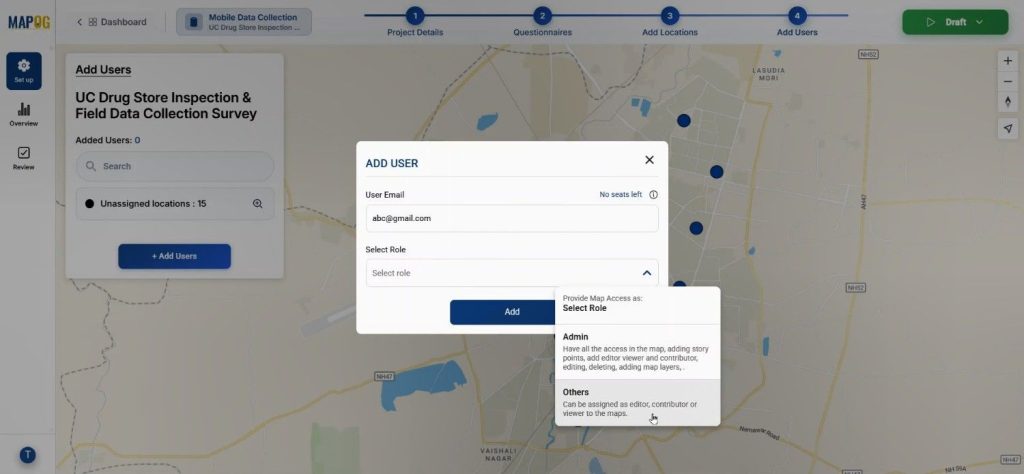
With select members we can easily invite users to participate in the survey.
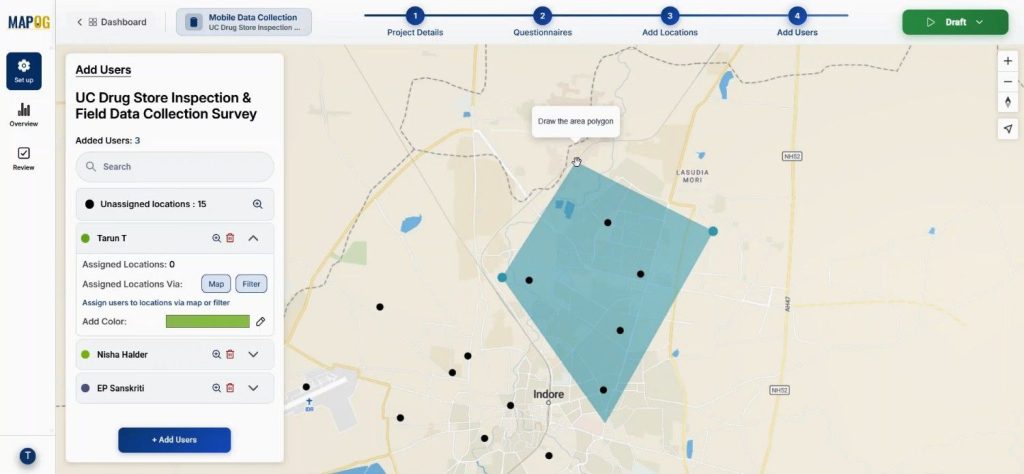
By clicking on the map option to draw polygon around points to allocate the specific points under the area to that assignee, you can set different colors also.
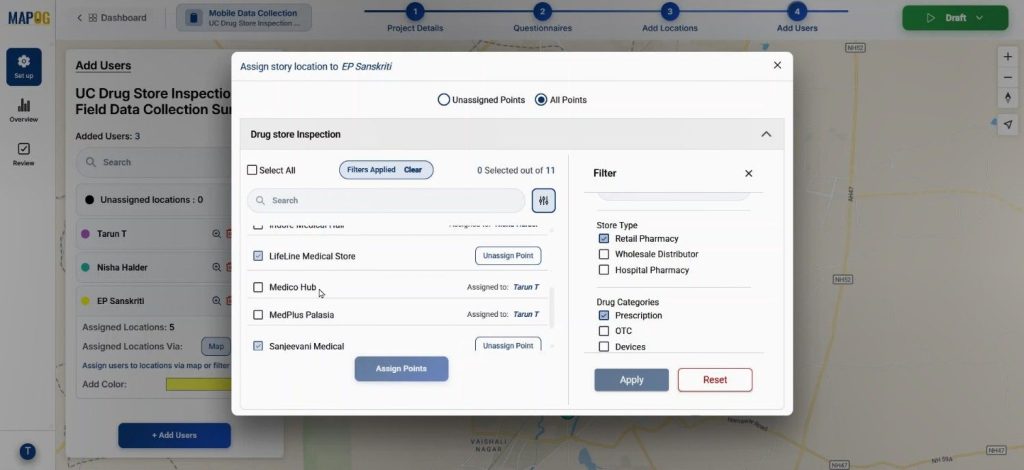
Using the filter option, we can assign points

We can segment points by attributes such as type, ownership, or category. Filtered results ensure us to focus on the information most relevant to them.
Once launched, assignees receive their mapped locations in the MAPOG Contributor App,
where they can add a new location by conforming it, then adding proper title, description & image to them.
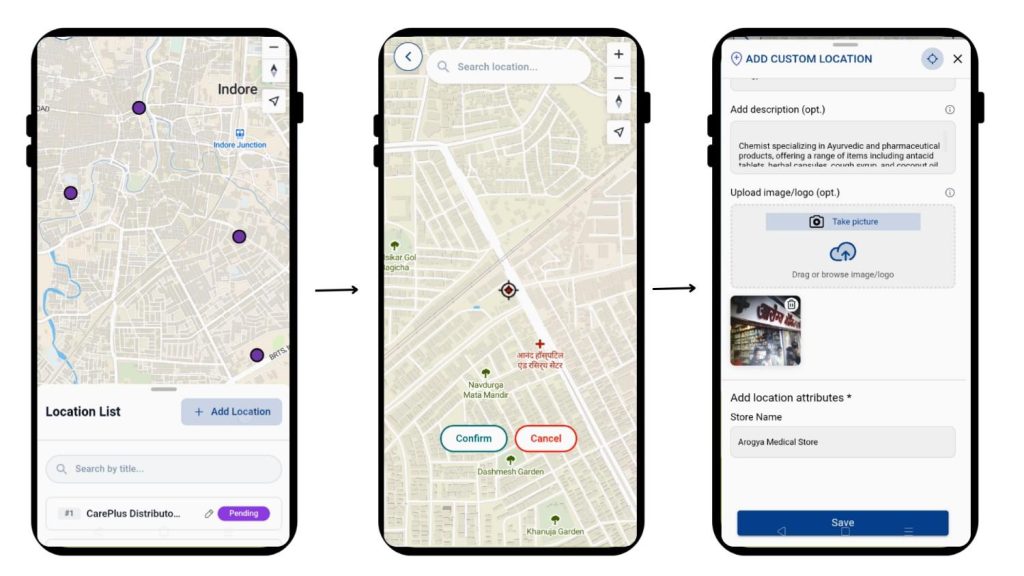
Then we can fill out surveys with collected information, upload photos, and submit or save drafts.

Step 6: Review The survey
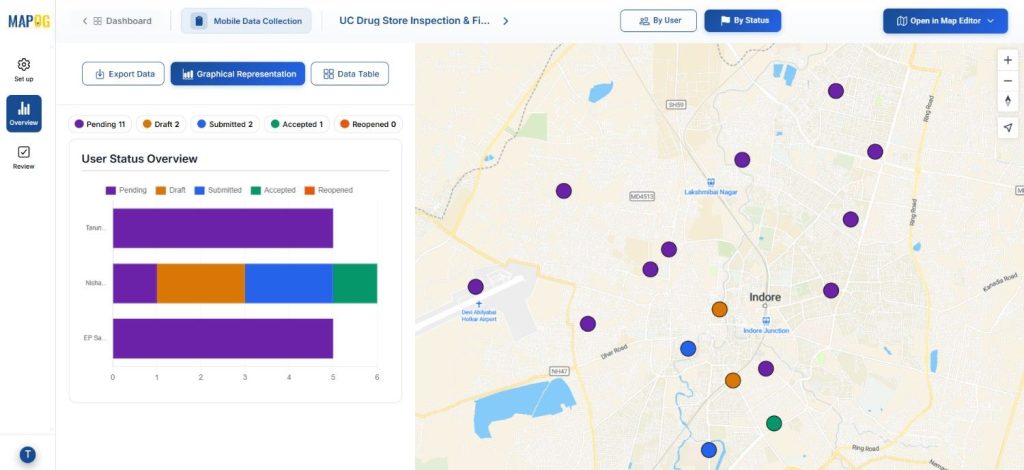
Back on the MAPOG overview, the admin views inspection statuses—submitted, pending, or saved as draft—based on status values.
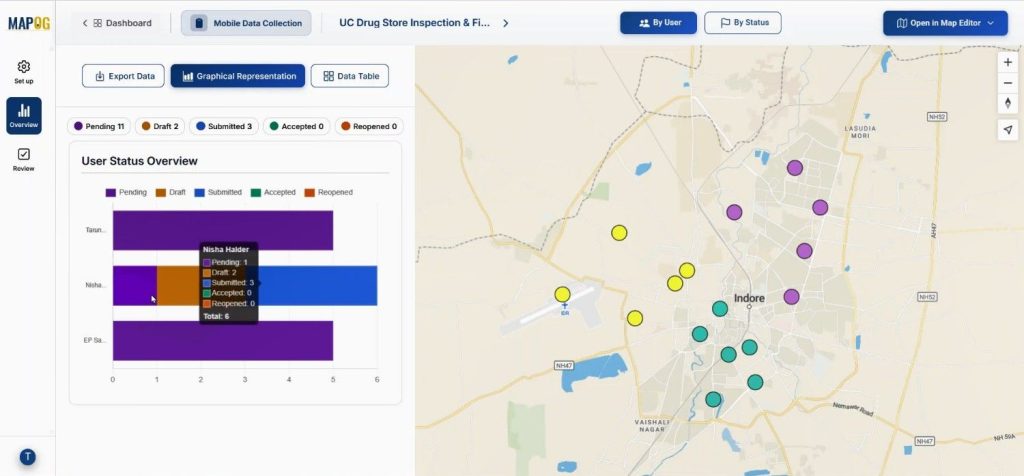
using the filter option, we can filter out locations by status & assignee.
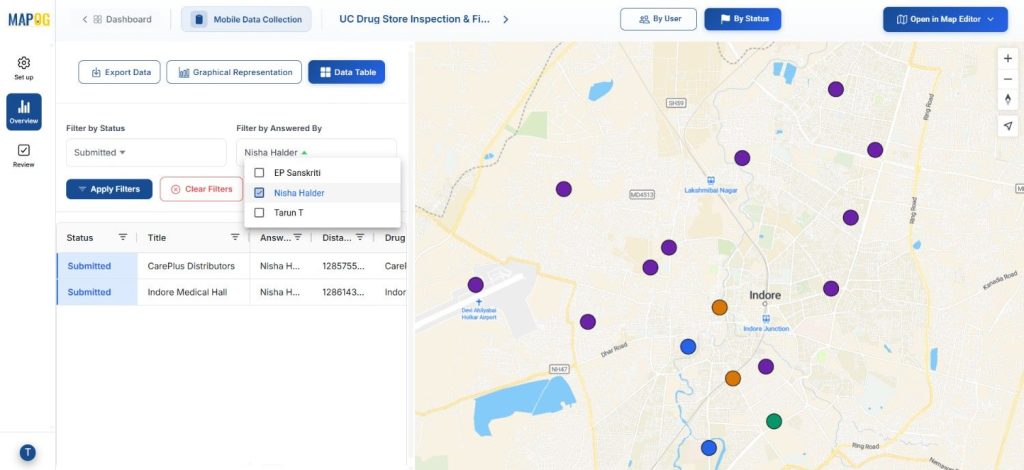
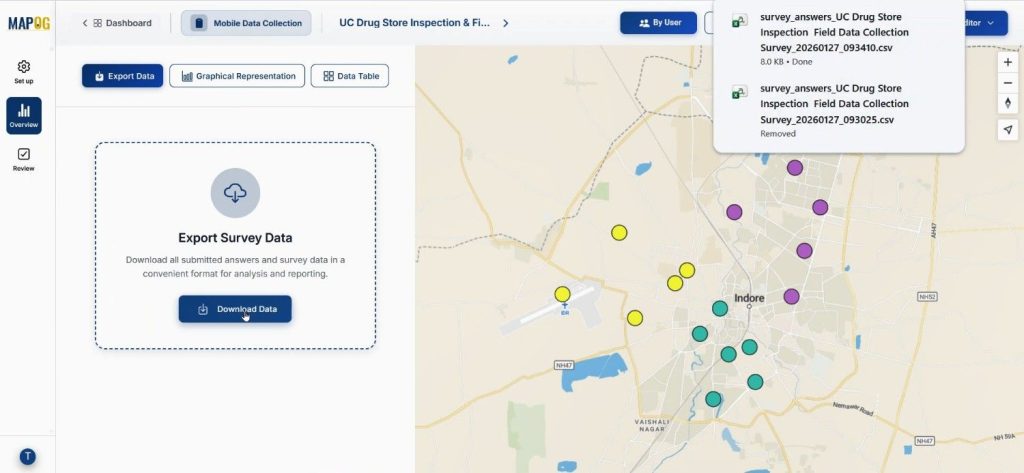
we can download the data using export data option, file would be downloaded as csv format.
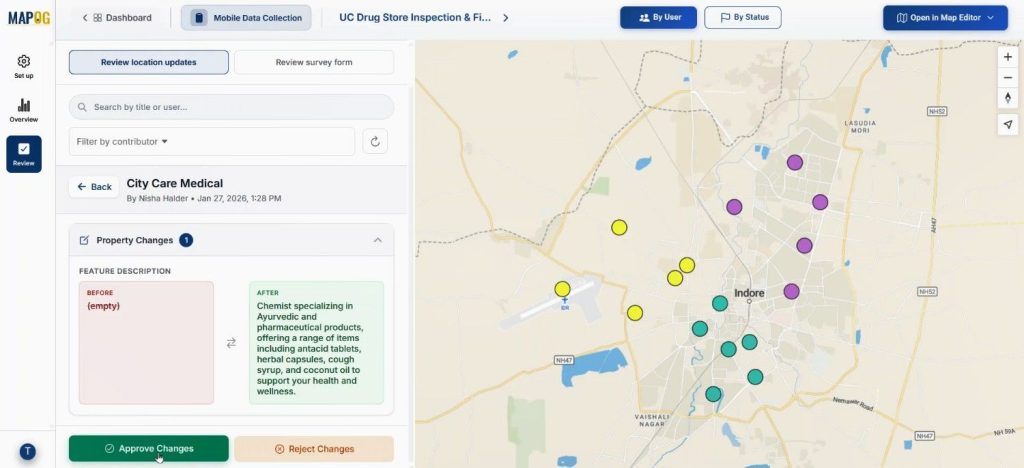
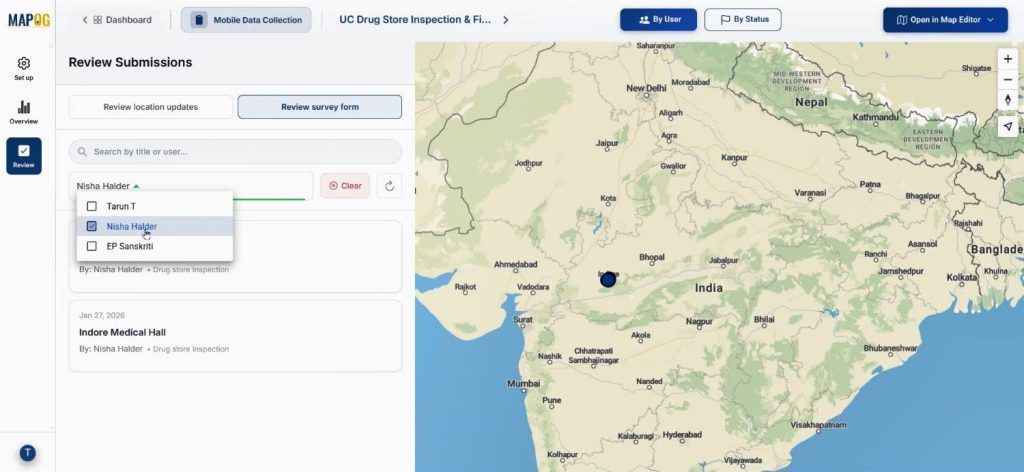
In the review section admin can review the location updates & approve or cancel changes.
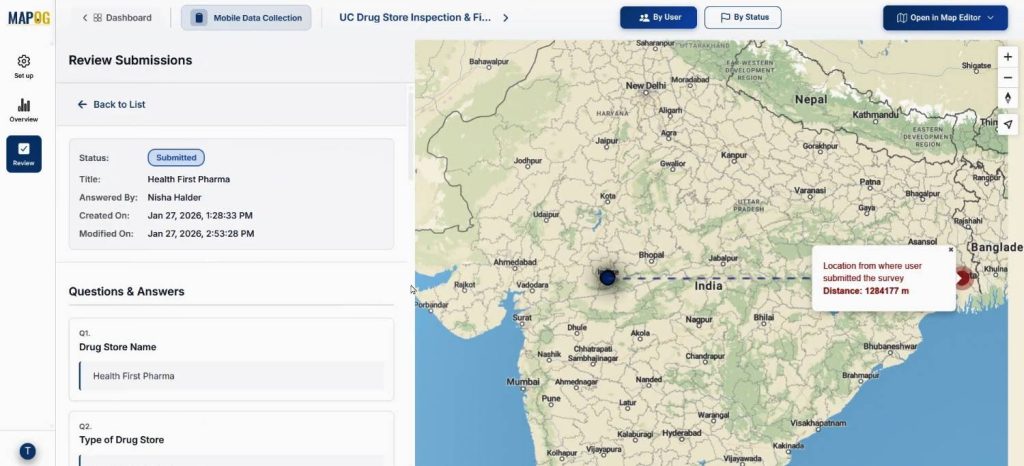
with the review submitted from we can view the submitted data.
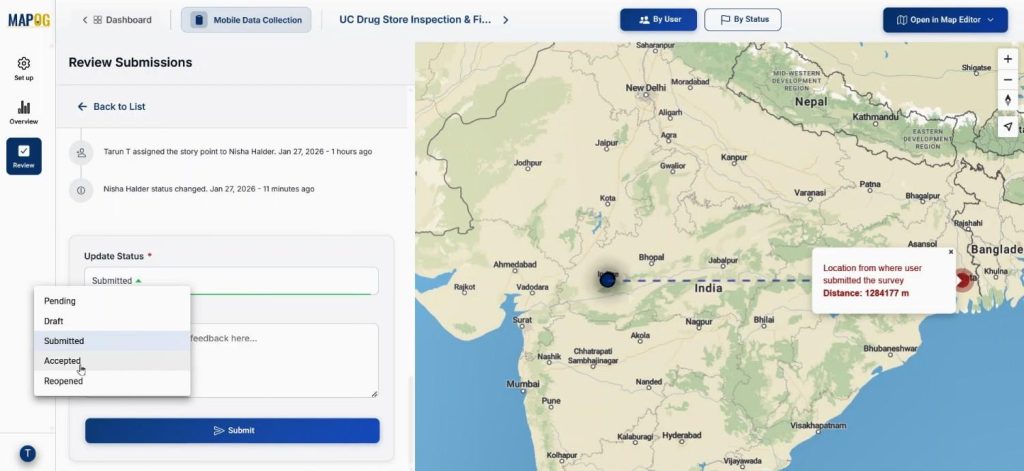
and also change the status from completed to accepted & we can filter the data as per assignee.
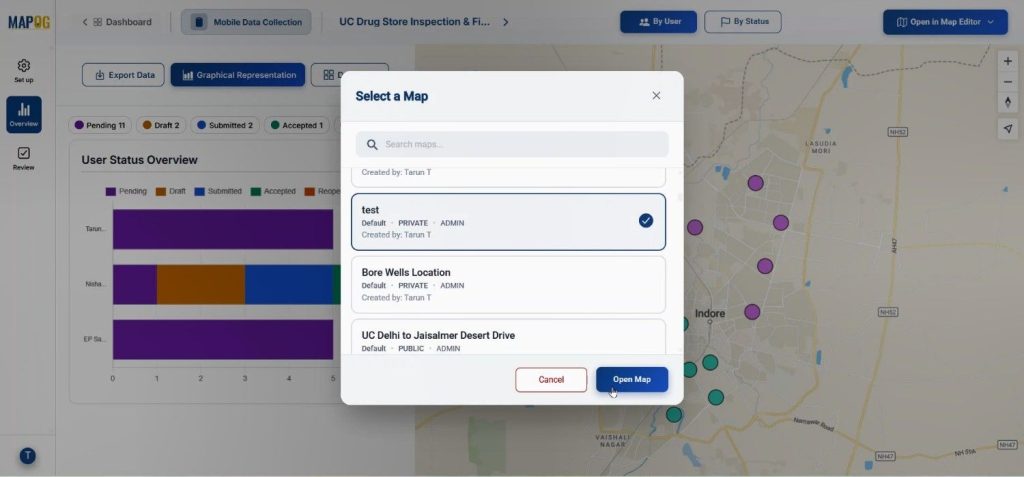
In the overview section the map can be opened in a new or existing map using the “open in map editor” section.
Industry Use & Benefits of Capture Drug Inspection Data
Health departments, regulatory bodies, and pharmacy chains benefit directly. Inspections become faster, photo evidence is preserved, and statuses like pending or submitted are visible instantly. Moreover, exported CSV reports simplify audits, while the review section allows approvals or rejections with full transparency.
Conclusion
When inspections move to the field, clarity matters. Capture Drug Inspection Data using MAPOG ensures every store, photo, and response is location-linked, reviewable, and export-ready. Ultimately, this approach reduces manual effort and improves inspection accuracy. Explore how map-based mobile surveys can enhance your inspection workflow.