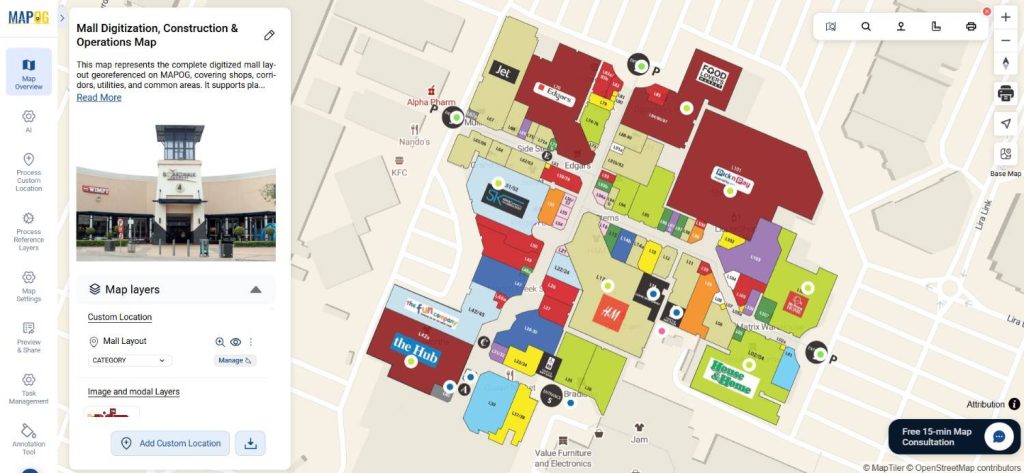
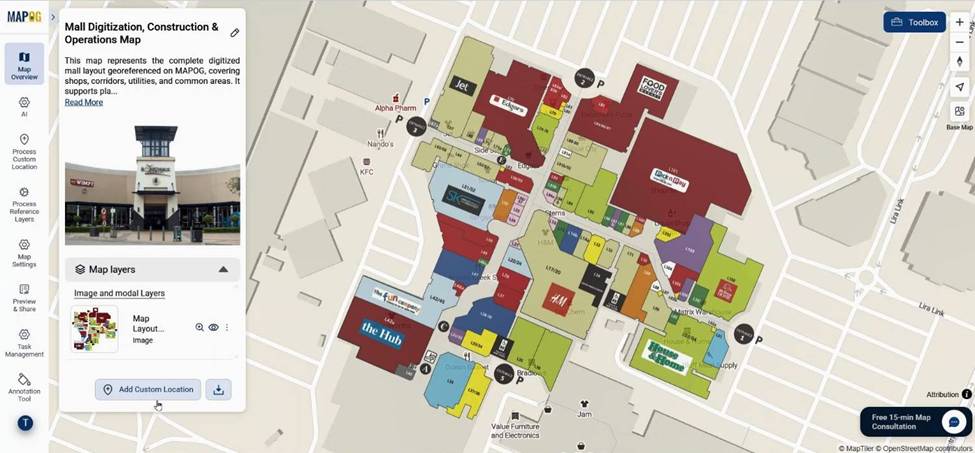
For constructors, real estate developers, architects, planners, and facility managers, digitizing a mall layout is no longer optional; it has become essential for modern mall planning and facility management. When you Digitize a mall layout using MAPOG, you centralize tasks, track updates, and back decisions with real-time location data. Instead of relying on printed blueprints or scattered spreadsheets, you can visualize, manage, and optimize the entire mall ecosystem in one place.
Moreover, when you Digitize a mall layout properly, you make planning smoother, improve construction coordination, and clearly assign maintenance tasks. As a result, you reduce delays and increase accountability.
Key Concept: Digitize a Mall Layout with Smart Task Control
Before you start mapping shops and corridors, it’s important to understand that Digitize a Mall Layout means combining spatial data with task workflows. MAPOG makes this possible through its Task Management system and MAPOG Contributor App, where field teams can update tasks in real time.
For example, imagine mapping each store unit and linking it with leasing status, electrical inspections, or interior finishing progress. Consequently, every department—from construction to operations—can track updates without confusion.
Step-by-Step Guide to Digitize a Mall Layout
Step 1: Set Up Task Management to Digitize a Mall Layout
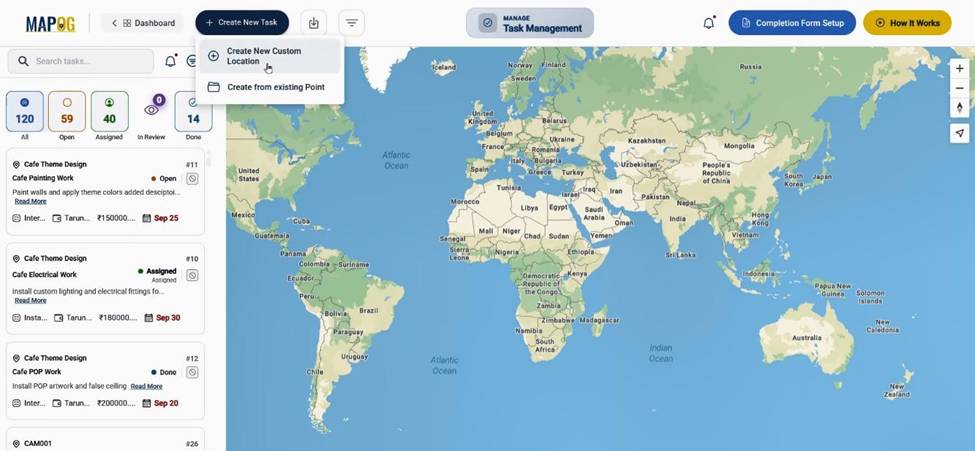
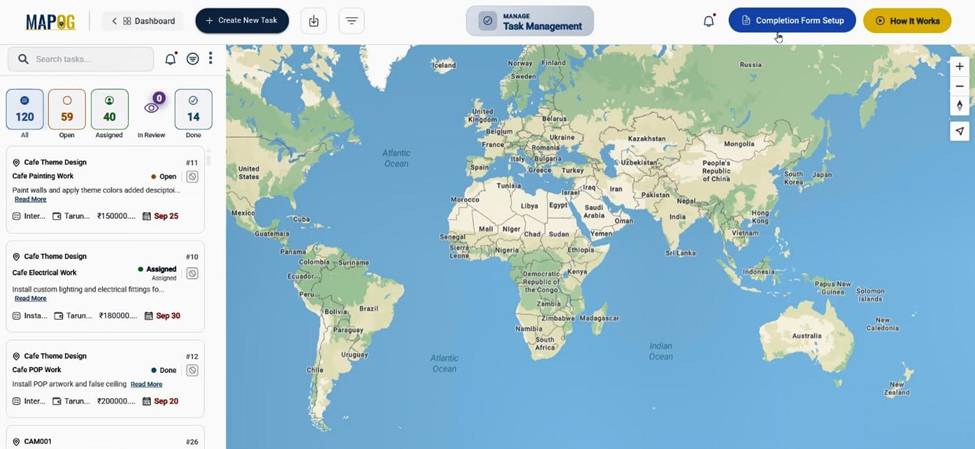
First, log in to the MAPOG dashboard and open Task Management. Here, you can control all mall-related tasks in one place.
Click Create New Task, then choose Create New Custom Location.
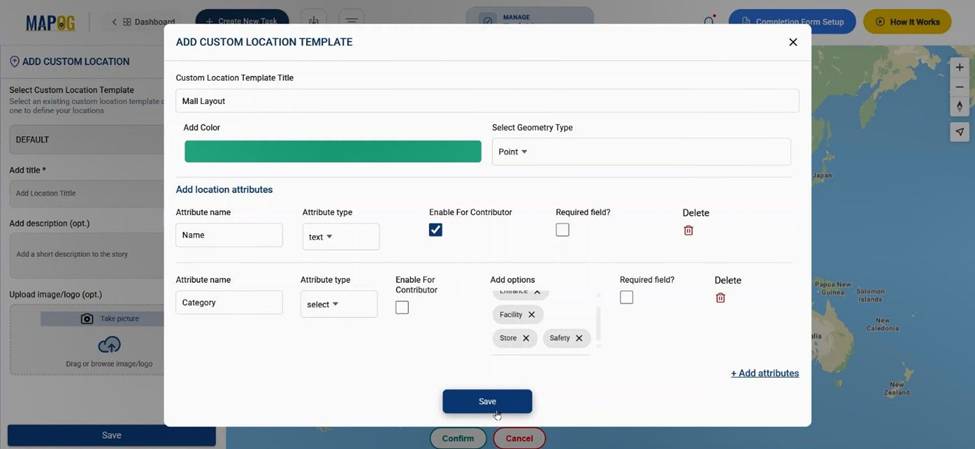
After that, select custom location settings and build a new template. Set the title, choose a color, and define the geometry type as Point. Then, add attributes such as text, select, and multiselect fields. This step ensures that your team documents quality verification properly when they complete tasks. This ensures data consistency while allowing flexibility.
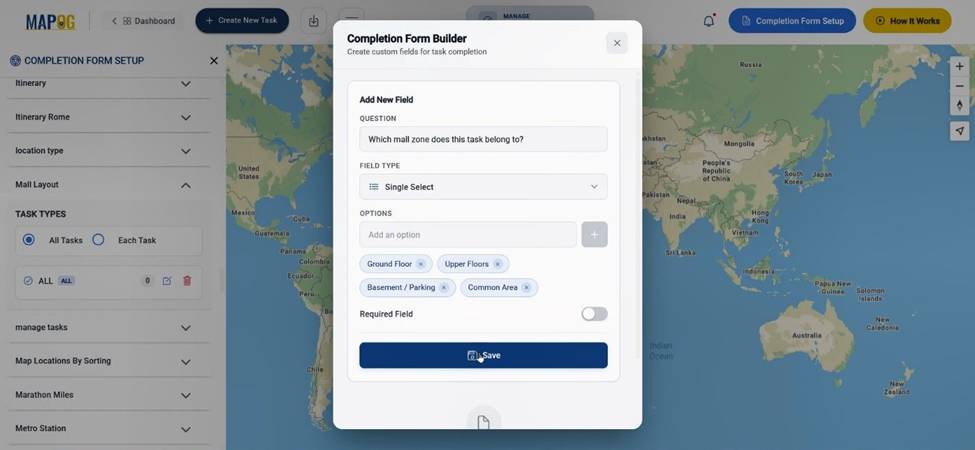
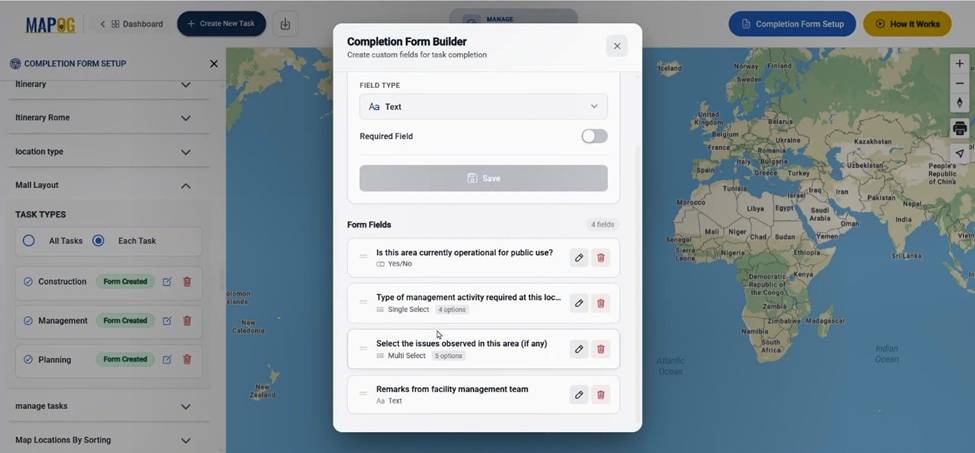
Step 2: Create Completion Forms for Quality Checks
Next, go to the completion form section. This step ensures that when tasks are completed, quality verification is documented properly.
Find your custom location template and create survey questions under each section using text, select, or multiselect options. Therefore, your team standardizes and tracks inspection processes digitally.
Step 3: Create and Configure the Map to Digitize a Mall Layout
After that, return to the dashboard and click “Create” to create a New Map. Select the Store Mapper story template, then add your title and description. Importantly, enable the Task Management option before saving.
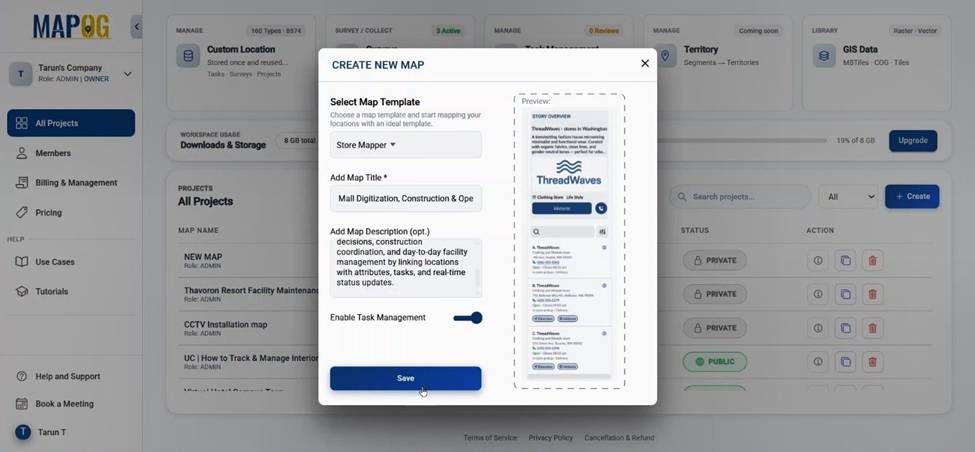
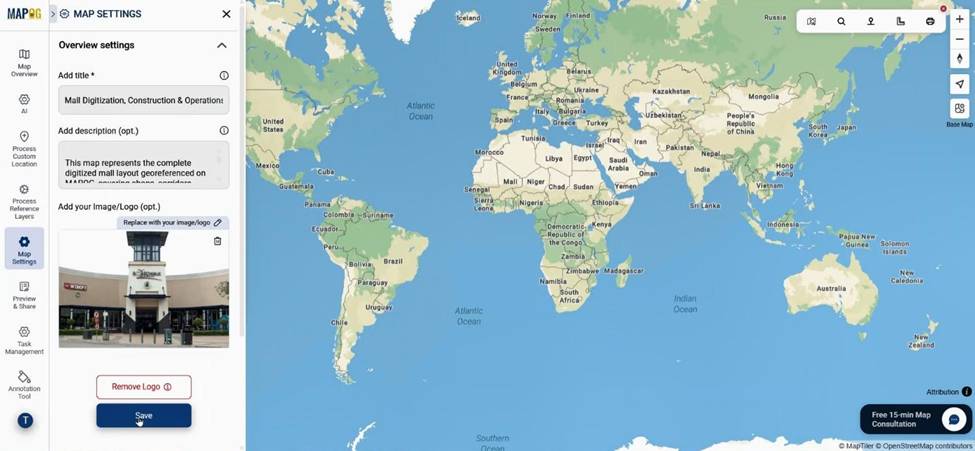
Inside the map interface, replace the MAPOG logo with the mall logo for branding.
Step 4: Georeference the Base Plan to Digitize a Mall Layout
Now, go to Process Custom Location and click Georeferencing.
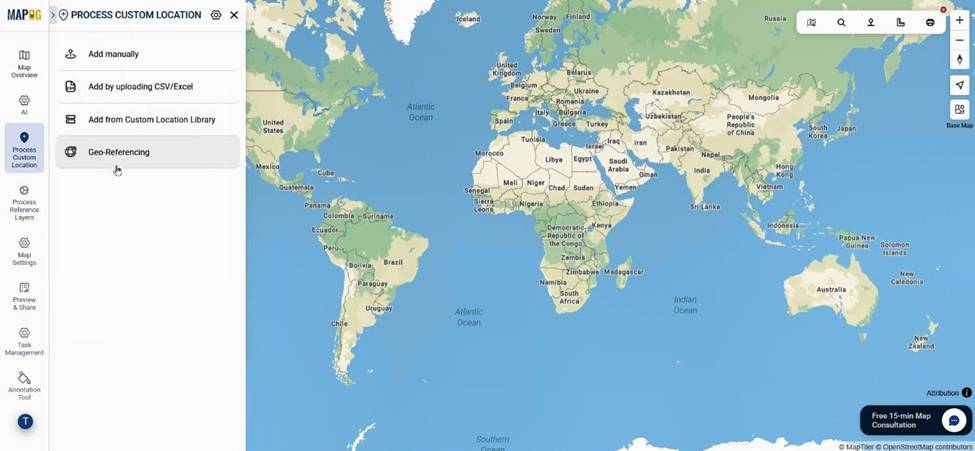
Upload the mall layout in PNG or JPG format.
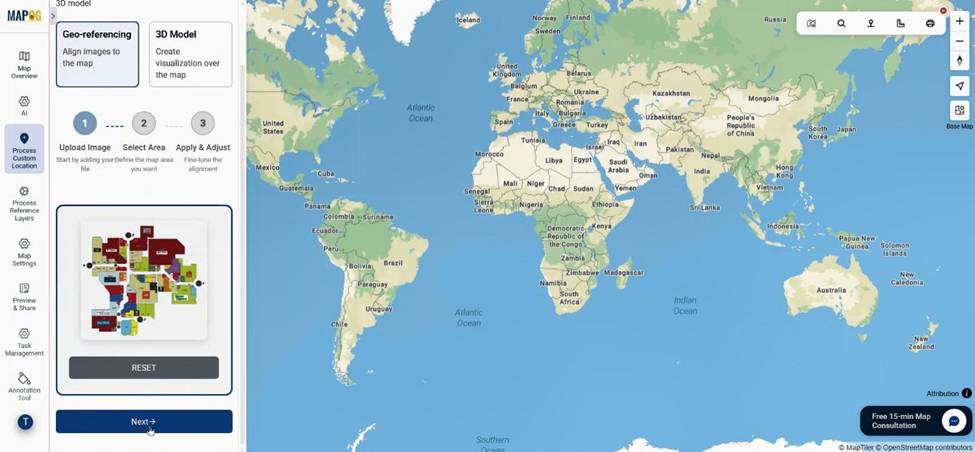
Using search by coordinates, locate the exact placement area. Rename the layout, select a drawing mode (4-point, square, or rectangle).
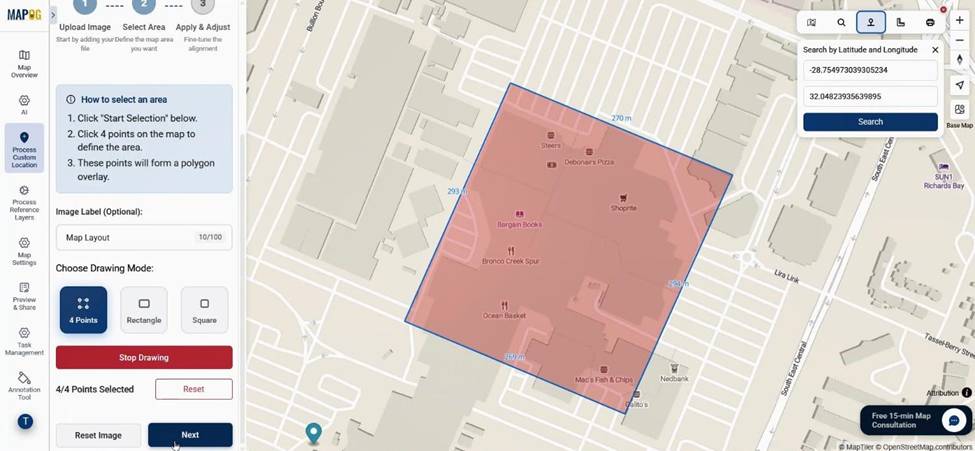
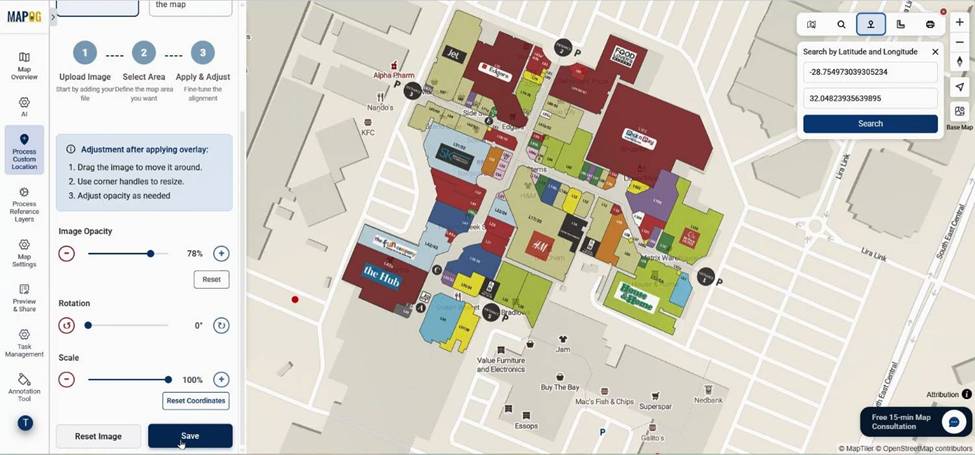
Adjust scale, opacity, and rotation to place the layout properly. Once satisfied, save the map. Because you place the layout accurately, you maintain spatial alignment and minimize errors.
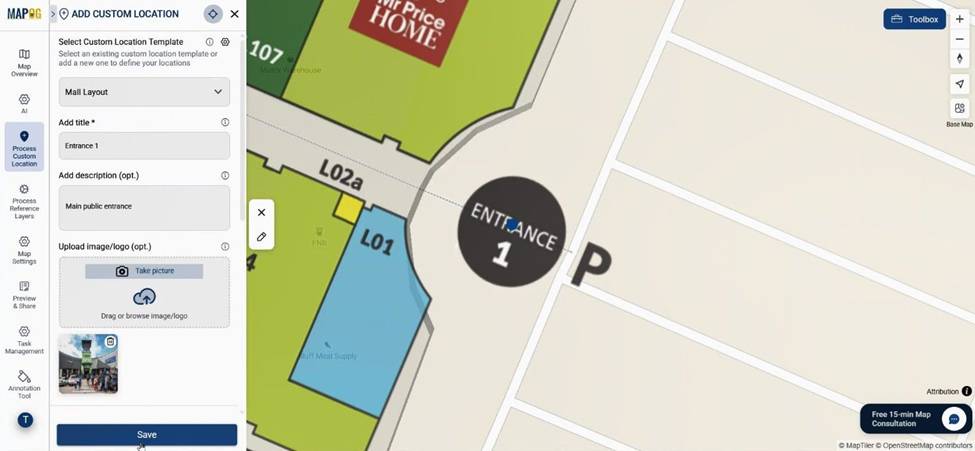
Step 5: Add Mall Locations and Assign Tasks
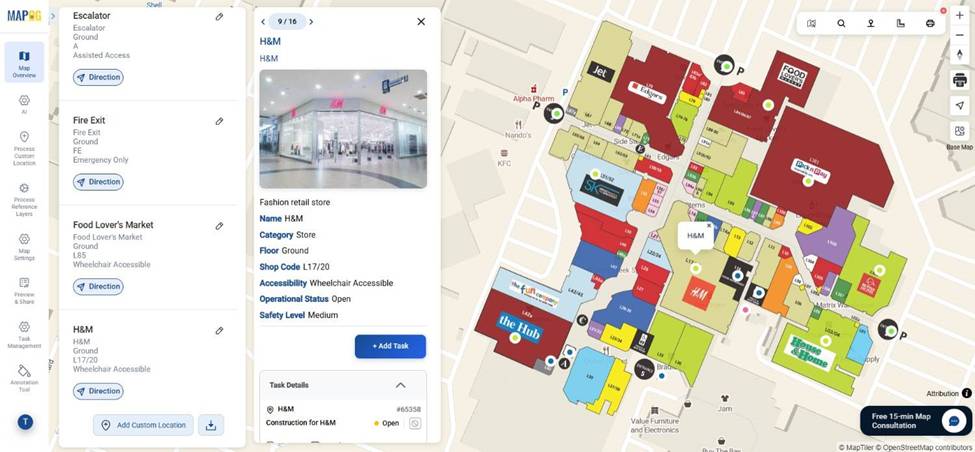
Next, manually plot shop units, corridors, utilities, and common areas using add custom location.
Select your custom location template, confirm the point.
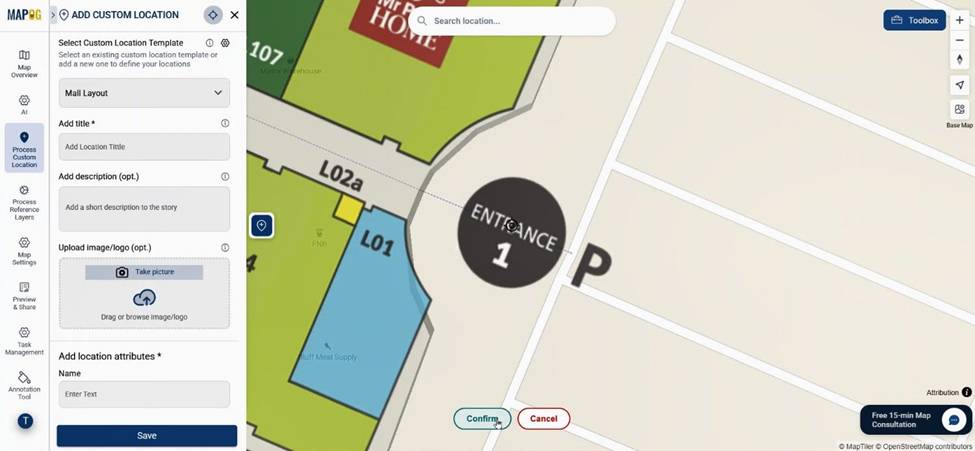
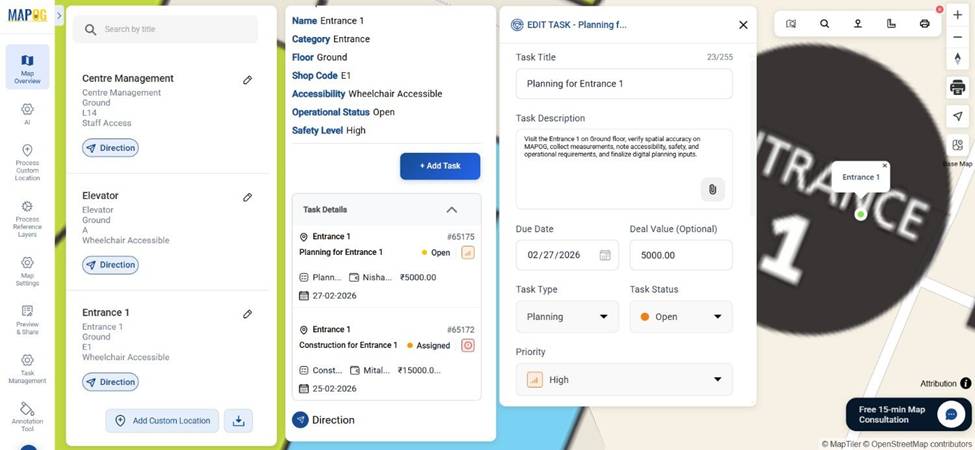
Add title, description, and images with all other details & save them. Repeat this process for all locations.
Using the custom location view, adjust proper zoom, rotate & pitch view to all locations.

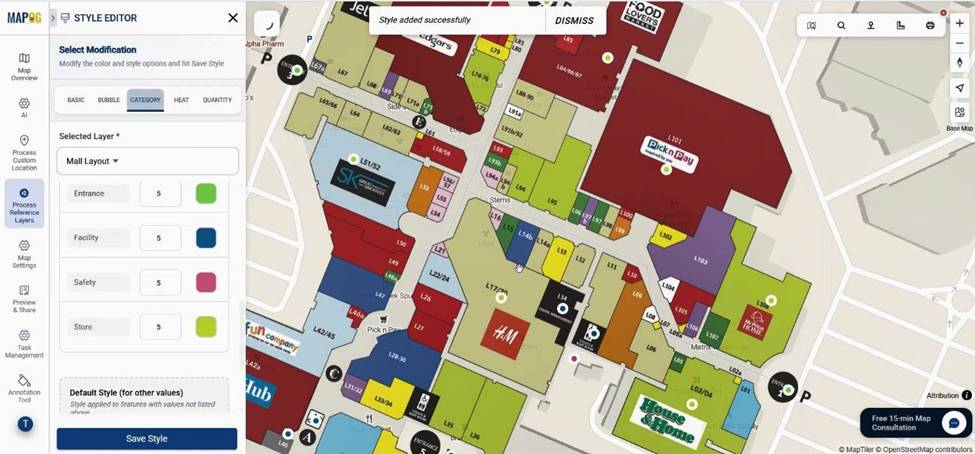
Now go to the add layer style of the mall layout layer & select category styling, select the attribute as category & provide colors to points & save. It helps with differentiation & visualization.
Then, click on any location and choose Add Task.
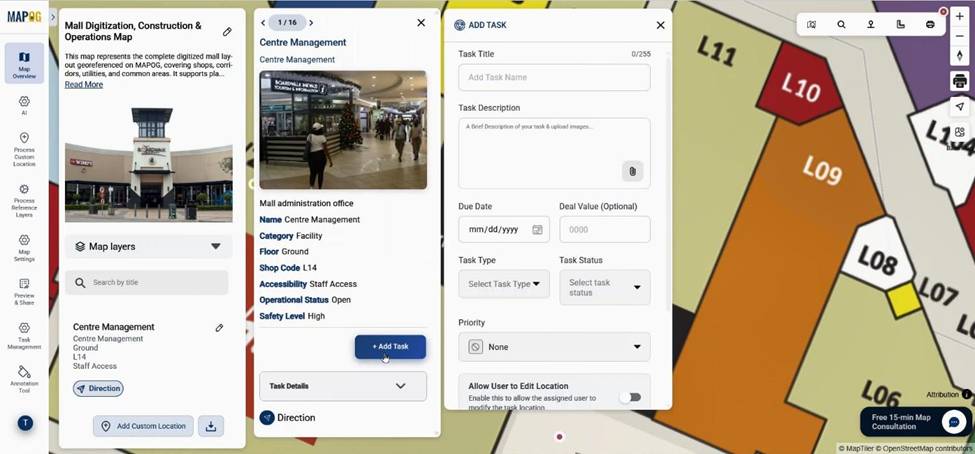
Enter task title, description, due date, deal value, priority, and task status. You can manage and attach new task types directly from here.
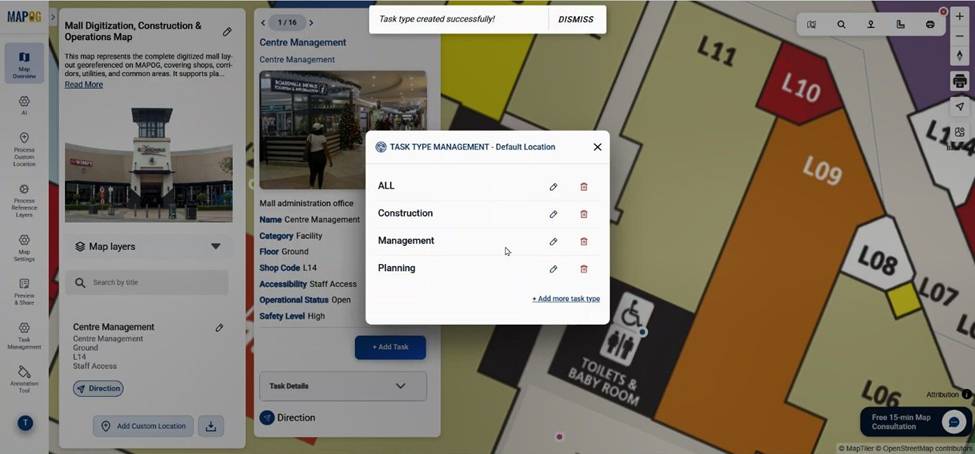
You can attach a different completion form for every task type present by task management section in the dashboard.
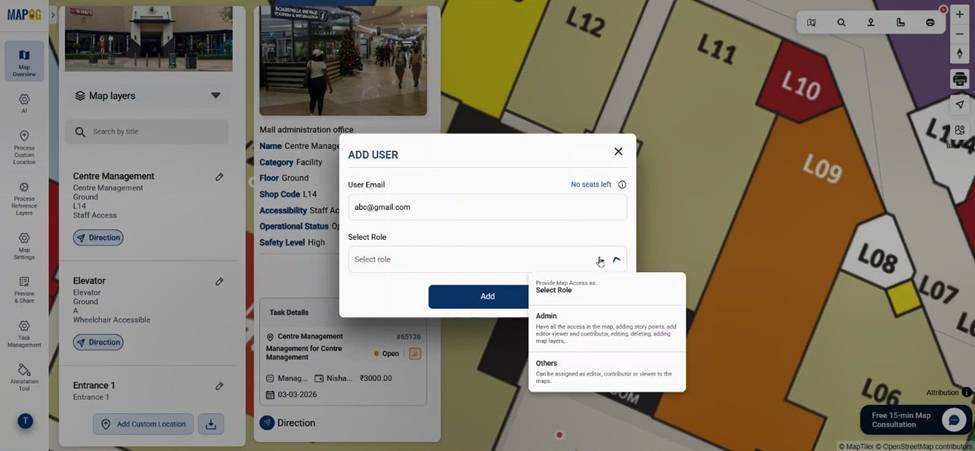
Team members can be added via email with defined roles such as admin or contributor.
Lastly select the assignee & save the task.
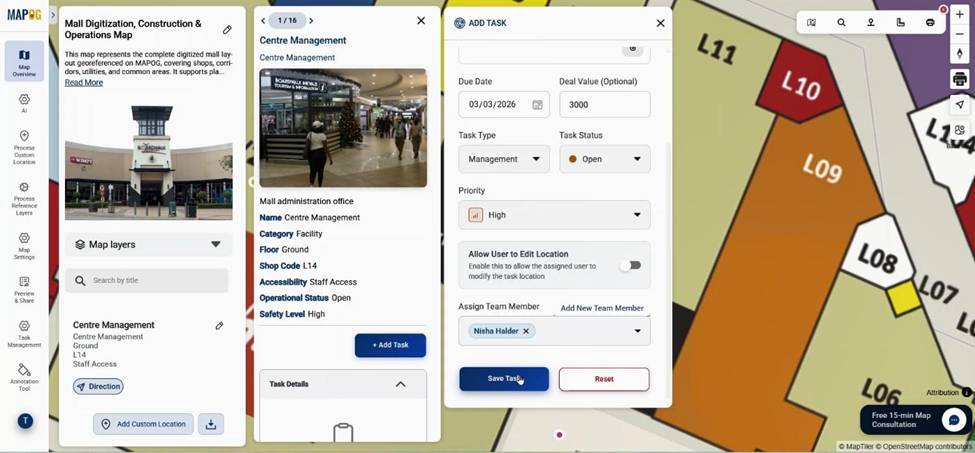
You can also assign multiple tasks to a single location.
Step 6: Monitor Updates via MAPOG Contributor App
Finally, open the MAPOG Contributor App. Assigned users can view & filter their tasks, update status, upload before-and-after images, and submit completion forms.
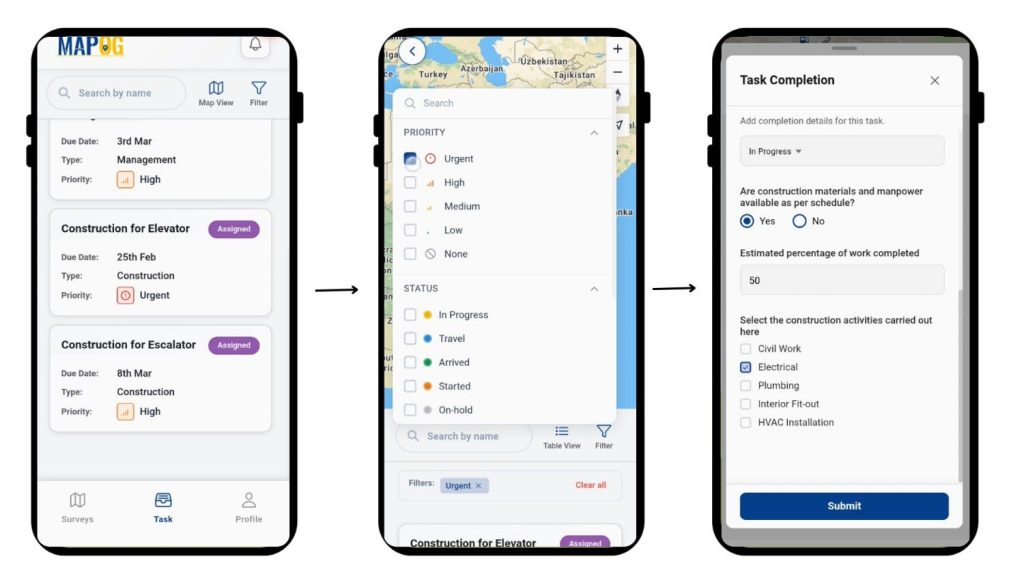
Meanwhile, all updates are reflected in the Task Management section, where tasks can be filtered by status, assignee, or task type. Consequently, transparency is maintained and workflow efficiency is improved.

Industry Benefits of Digitize a Mall Layout
When you Digitize a Mall Layout, planning data is centralized, construction tracking becomes visual, and facility management is simplified.
For example, a mall developer can overlay tenant categories with occupancy data to optimize leasing strategies. Similarly, maintenance teams can map electrical rooms and track inspection schedules without paperwork.
Furthermore, real-time updates from the MAPOG Contributor App ensure that site-level progress is visible instantly. Therefore, coordination between architects, contractors, and managers becomes seamless.
Conclusion
To Digitize a Mall Layout using MAPOG is to bring planning, construction, and management into a single smart workflow. Because spatial data and tasks are integrated, better decisions can be made faster.
If you’re managing a commercial property or planning a new mall project, consider how MAPOG’s Task Management and Contributor App can transform your workflow. Have you tried digitizing your layouts yet?