In many field-based workflows, teams treat on-site customer photos and documents collection as a crucial task. But capturing and organizing everything securely often turns messy. MAPOG, especially its Mobile Data Collection workflow, solves this by giving teams a smooth, structured, trackable, and safe way to handle customer documents on-site.
Key Concept: Why Customer Documents Onsite Matter
When teams manage customer documents on-site, they verify identities, record purchases, and store proofs for compliance or internal audits. They also track spending levels, visit histories, or service issues instantly. For example, sales teams visiting stores collect purchase bills, store photos, or identity documents, and MAPOG helps them manage it all in an organized flow.
Step-by-Step Process to Capture Customer Photos or Documents On-Site
Step 1: Setting Up the Customer Documents Onsite Project
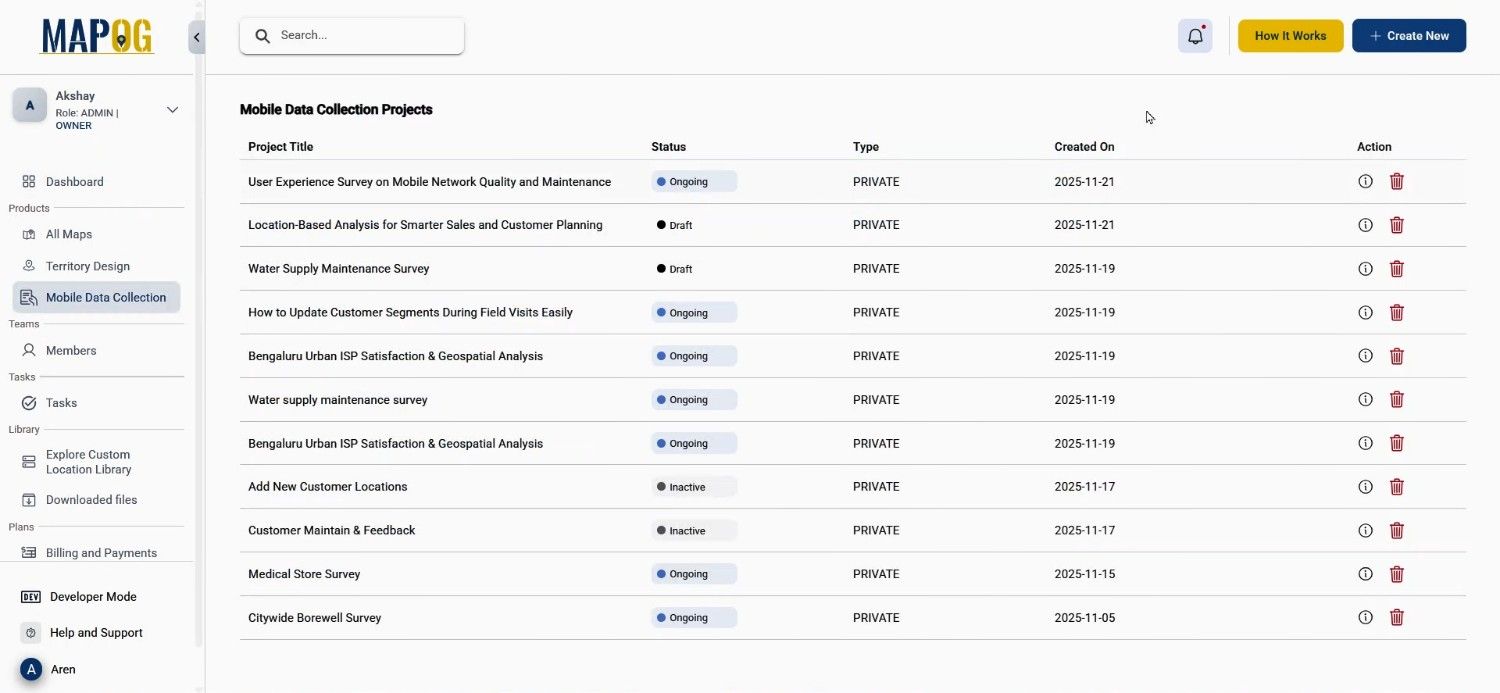
First, open the MAPOG, then you can go to Mobile Data Collection, select Create New.
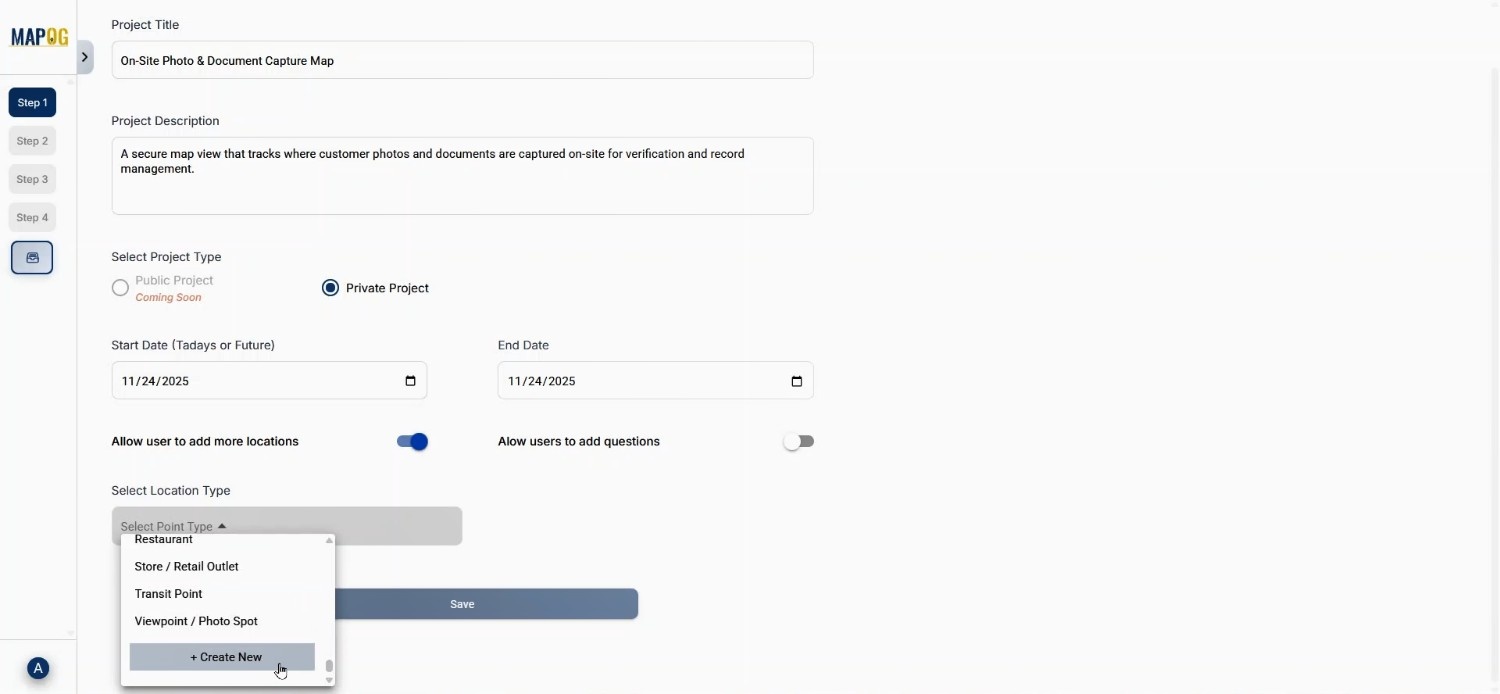
Enter a project title with a short description. Set the project type as private, and select the start and end dates. Allow adding more locations. Next, go to “Select Location Type” and choose Create New, then create a location type named Customer Identification.
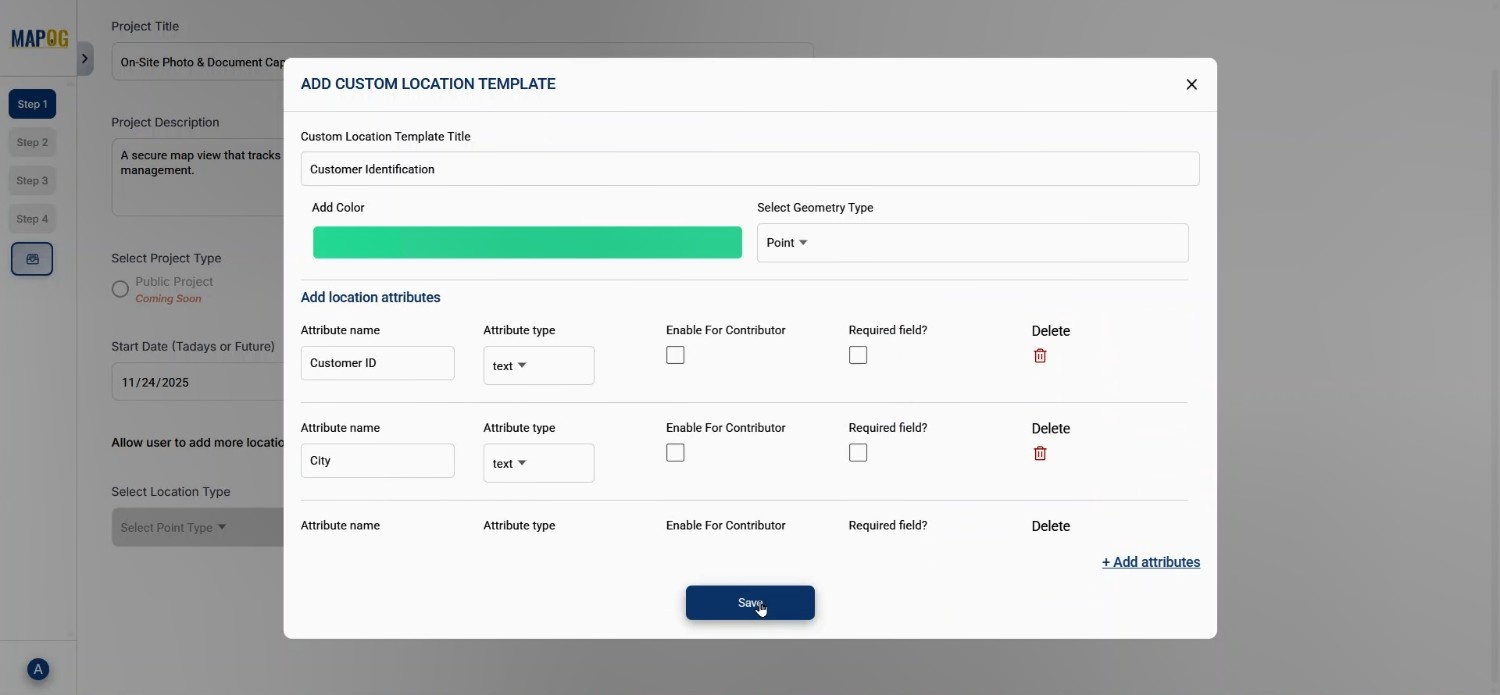
Step 2: Creating a Location Type for Customer Identification
Attributes such as purchase volume, spending level or sales volume can be added. This helps streamline the customer documents onsite process because each attribute connects to real-world field insights.
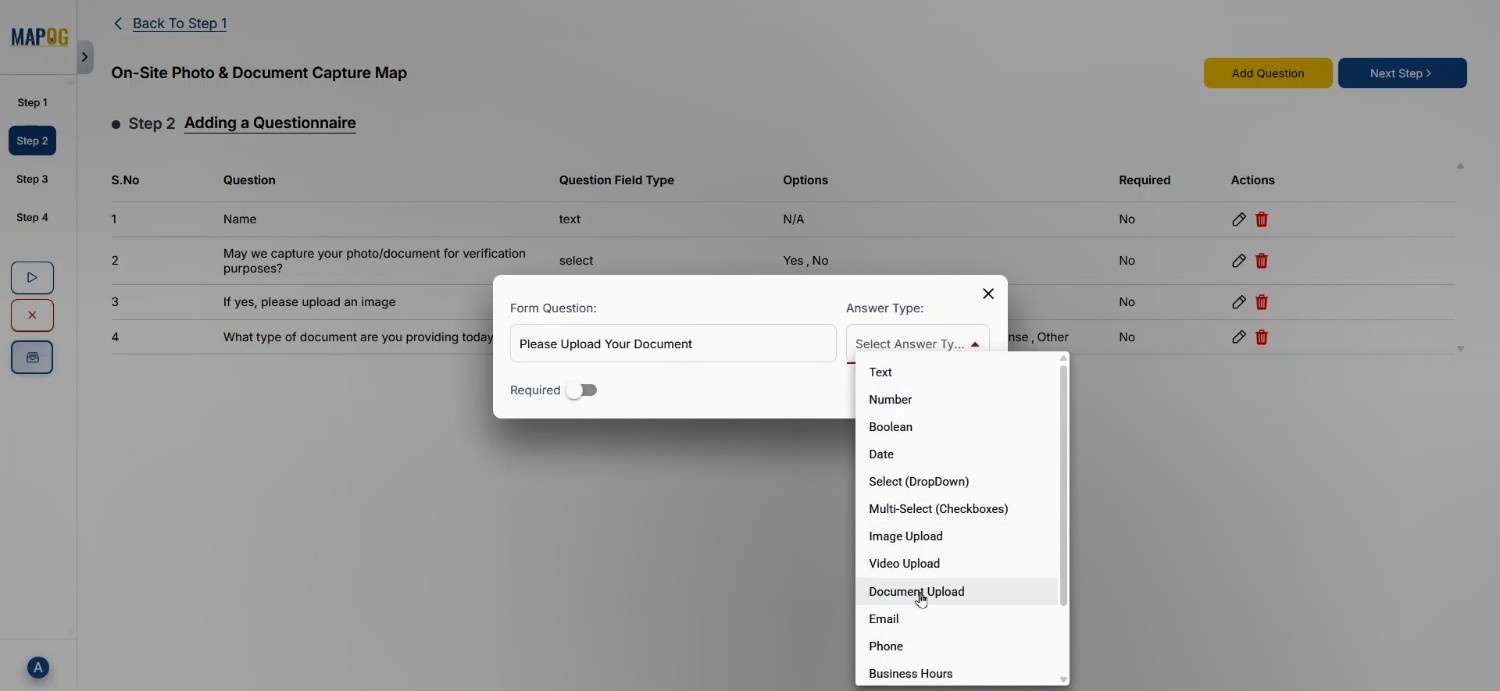
Step 3: Adding All Questions for Document Collection
After saving Step 1, Step 2 lets you add questions. Click on Add question, Here you can use text, number, image upload, and document upload as answer type.
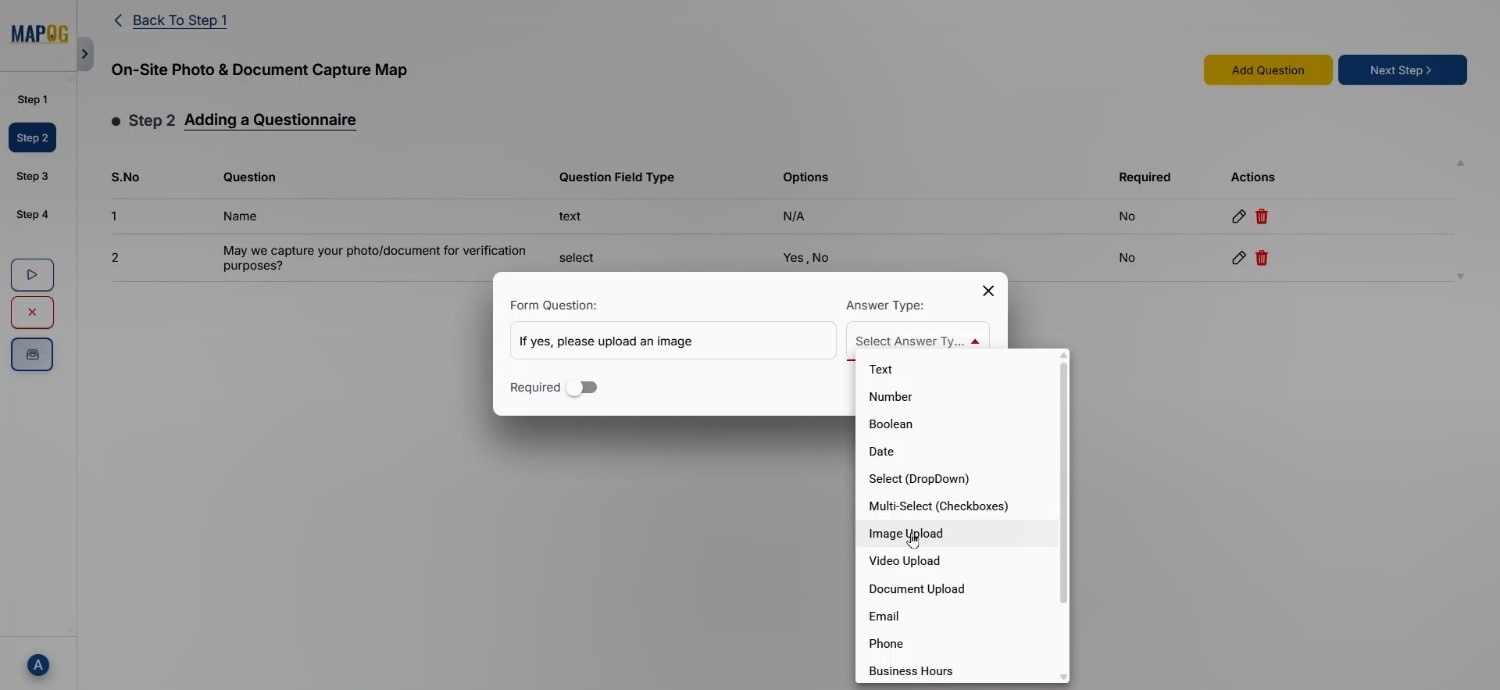
As users are often asked to upload identity photos or purchase proof, this becomes the heart of customer documents onsite data gathering.
Step 4: Adding Locations Using CSV/Excel Upload
Moving forward, Step 3 provides Add a new location by uploading CSV/Excel, which is extremely useful for large teams. You can upload your prepared sheet here.
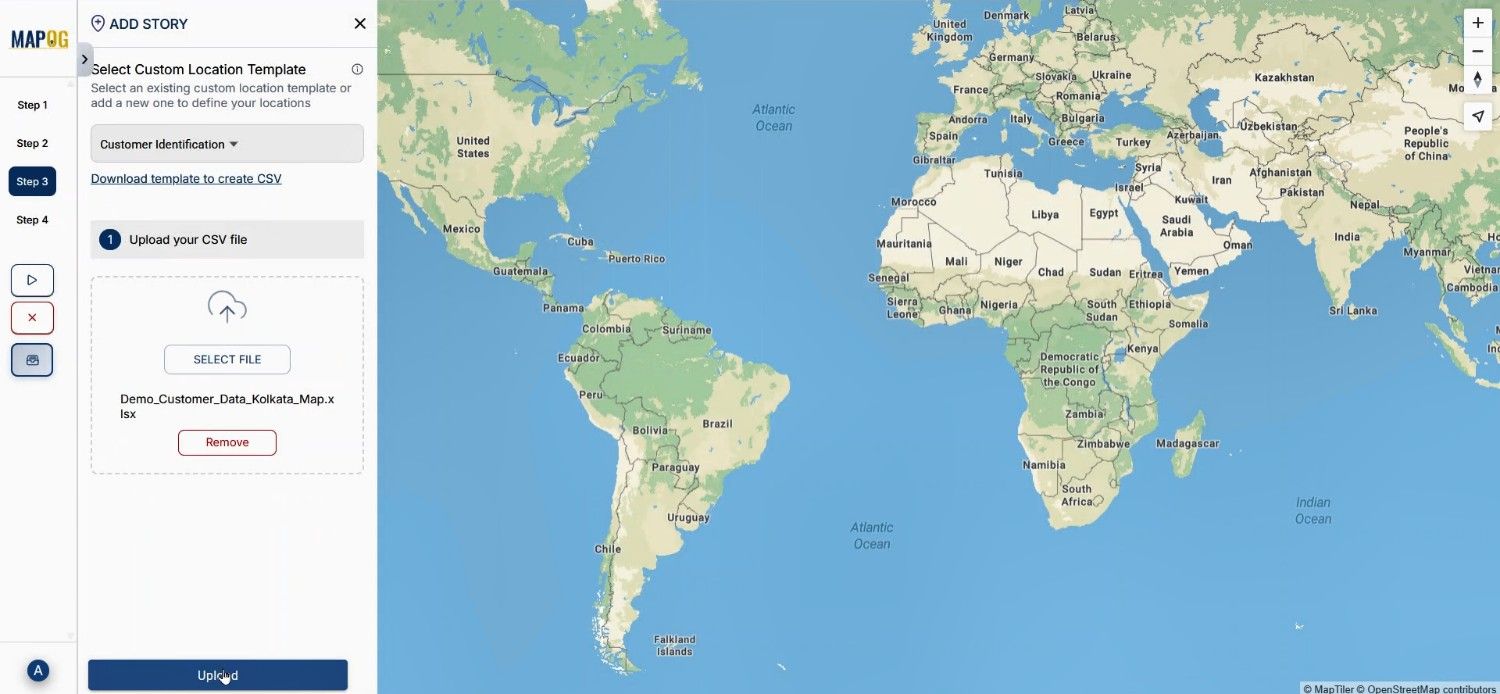
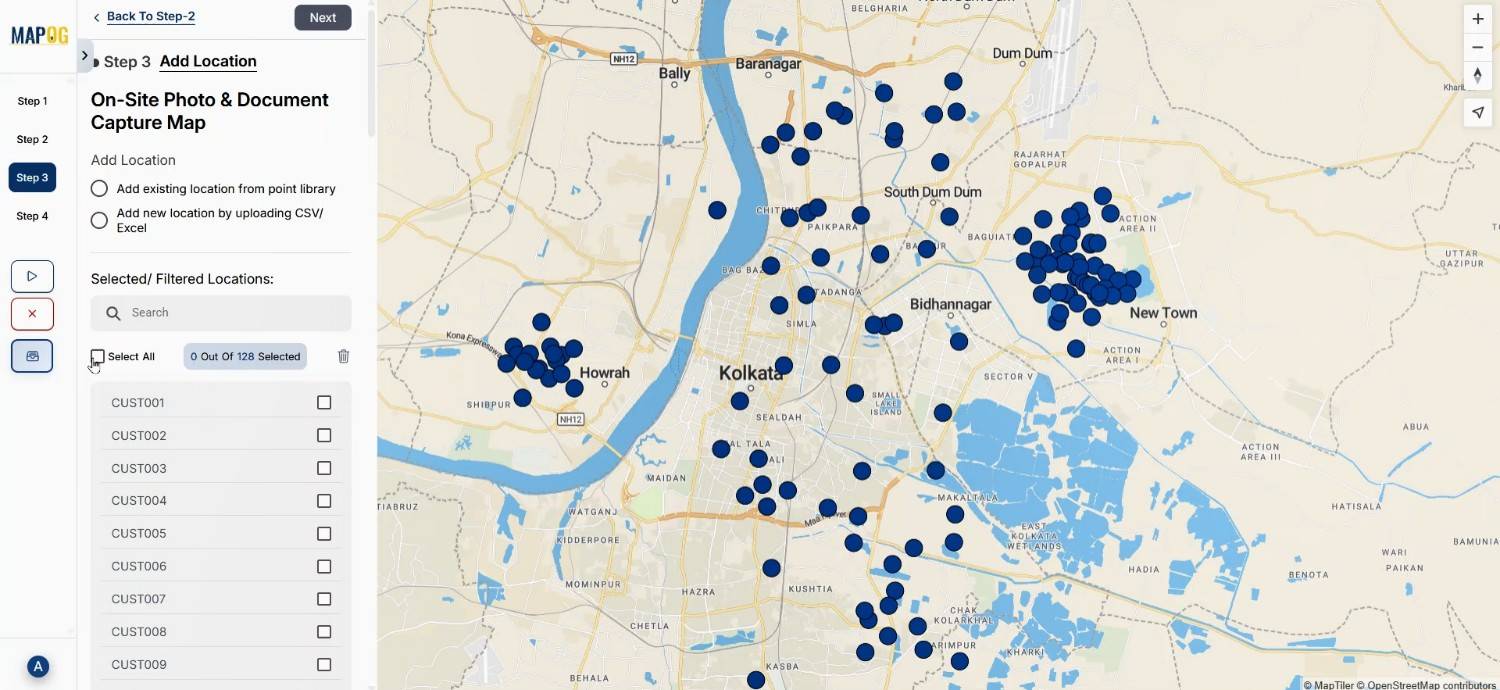
match attributes with column names, and MAPOG auto-plots the points.

This not only speeds up the customer documents onsite operations but also connects field points visually.
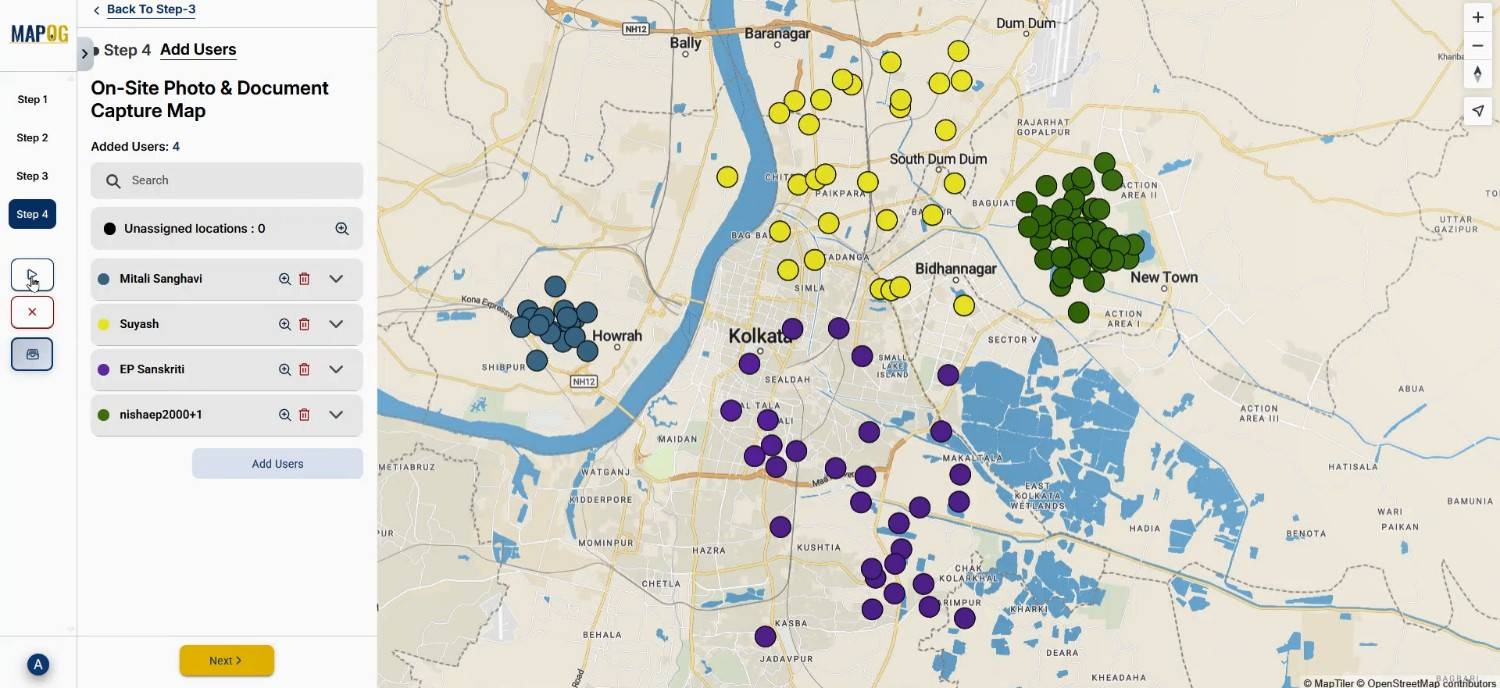
Step 5: Assigning Members and Mapping Work Areas
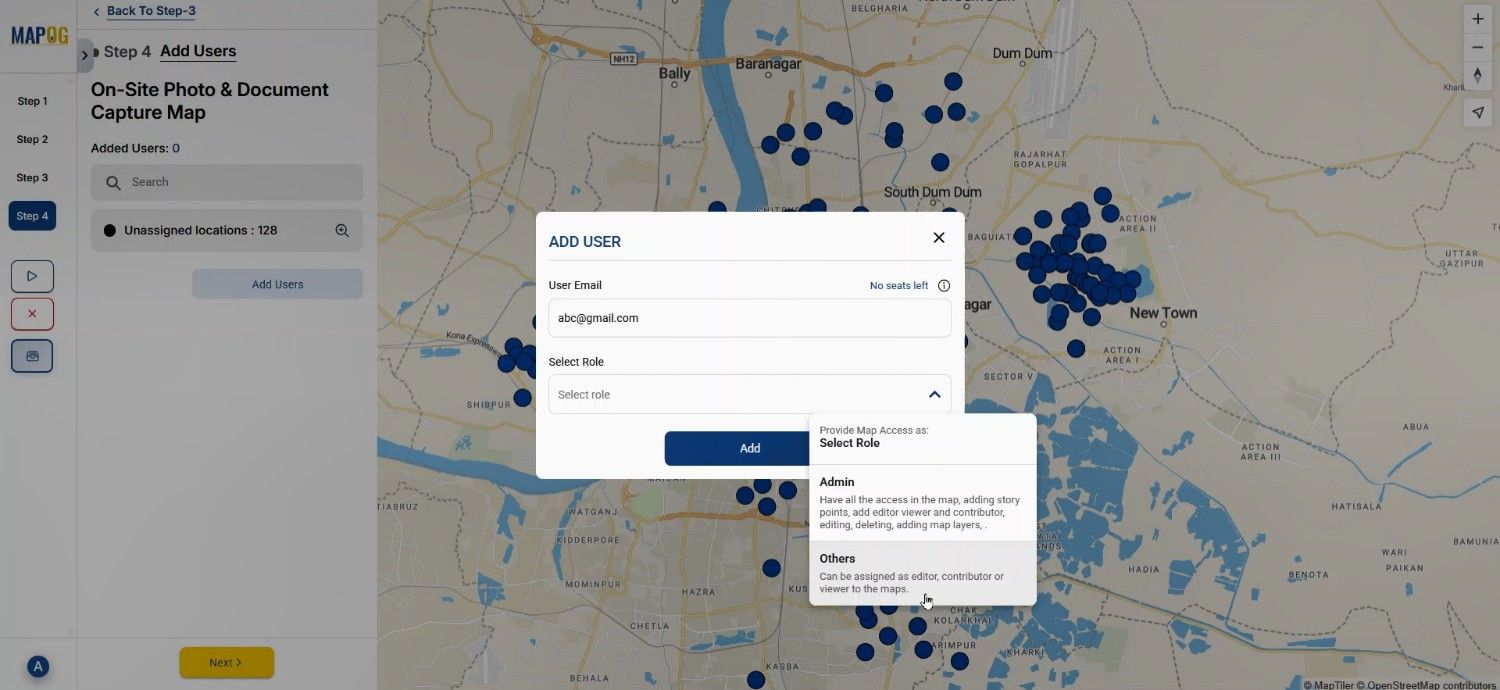
In Step 4, click “Add User,” then choose “Add Member,” insert their email, and assign roles like Admin or Contributor.
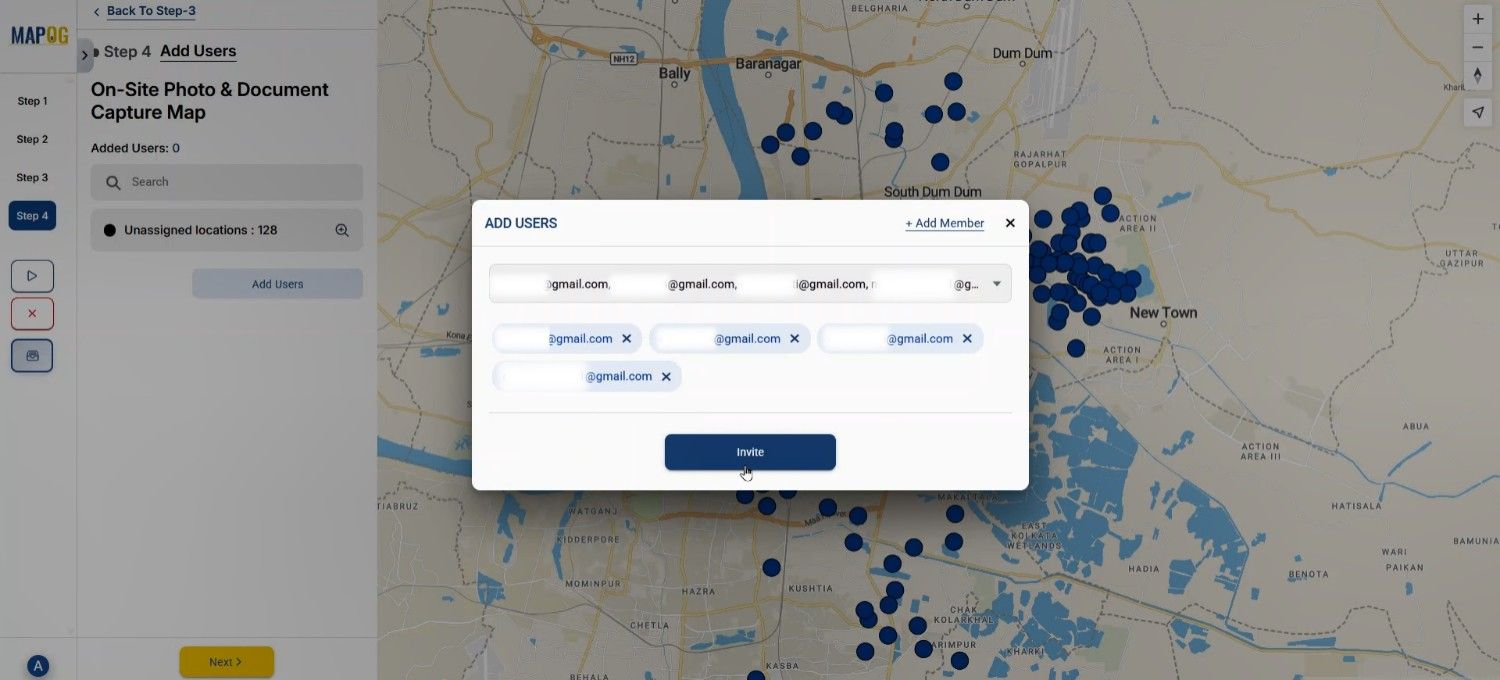
After adding the significant user you can come to add users again and select different members from the select member option & invite them to be a part of this survey.
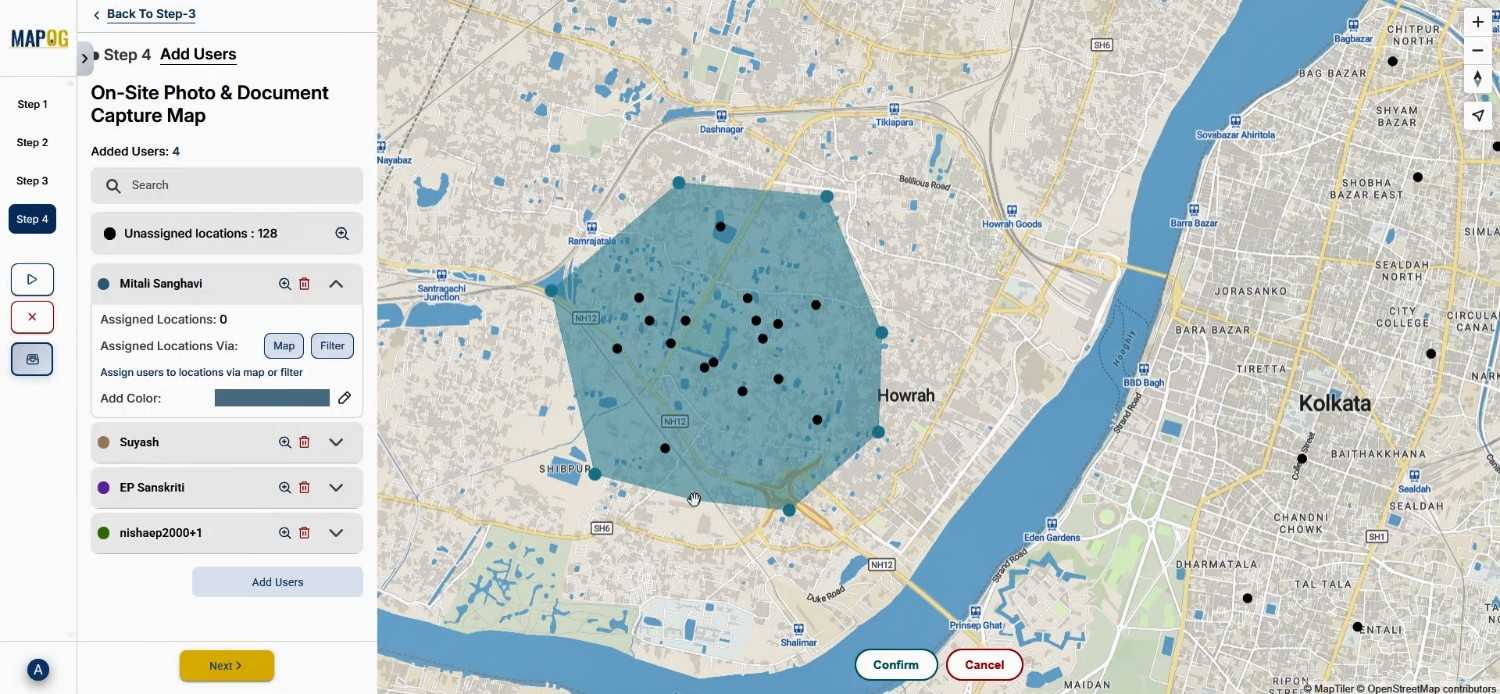
Later, open any member’s section and using the map option draw a polygon around the customer points; the points inside that polygon will be assigned to that member automatically.
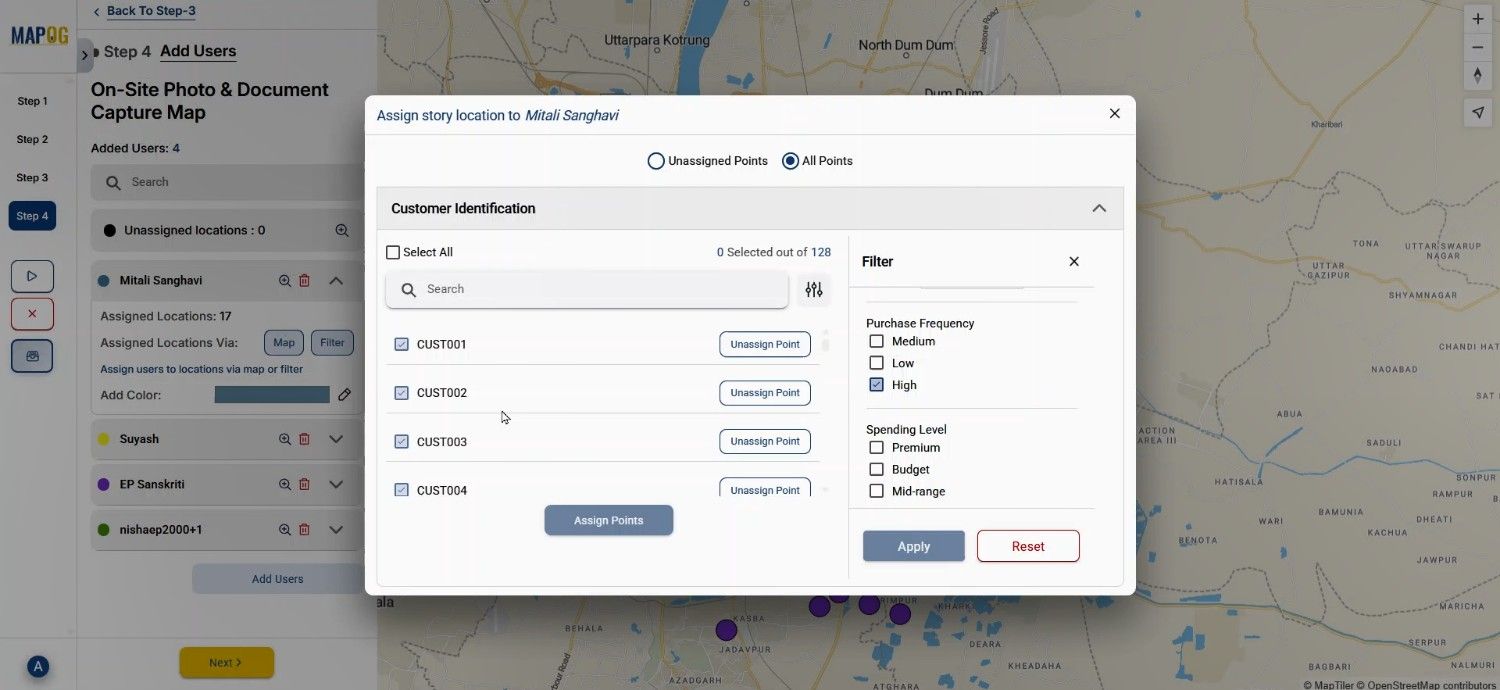
and filters can be applied to view customers by spending, or frequency. As a result, this helps teams visualize your customers efficiently in the field.
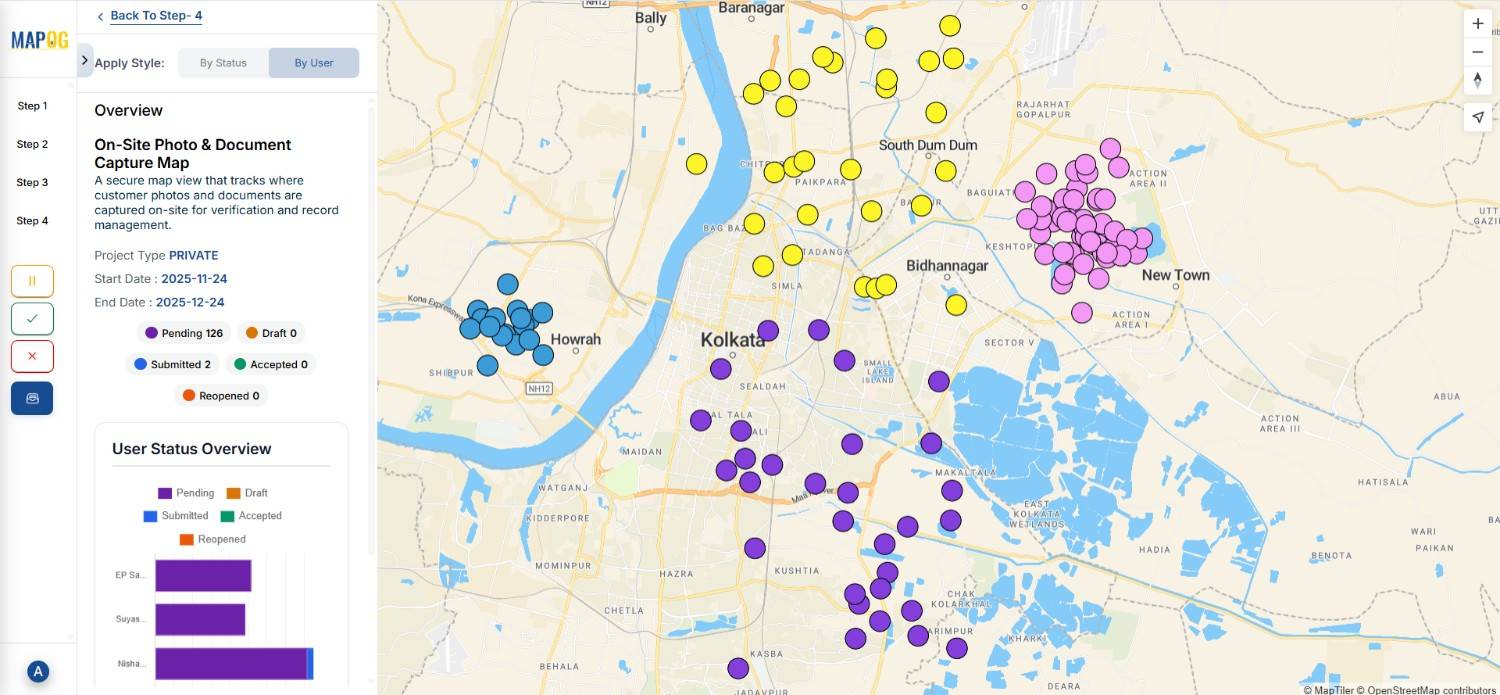
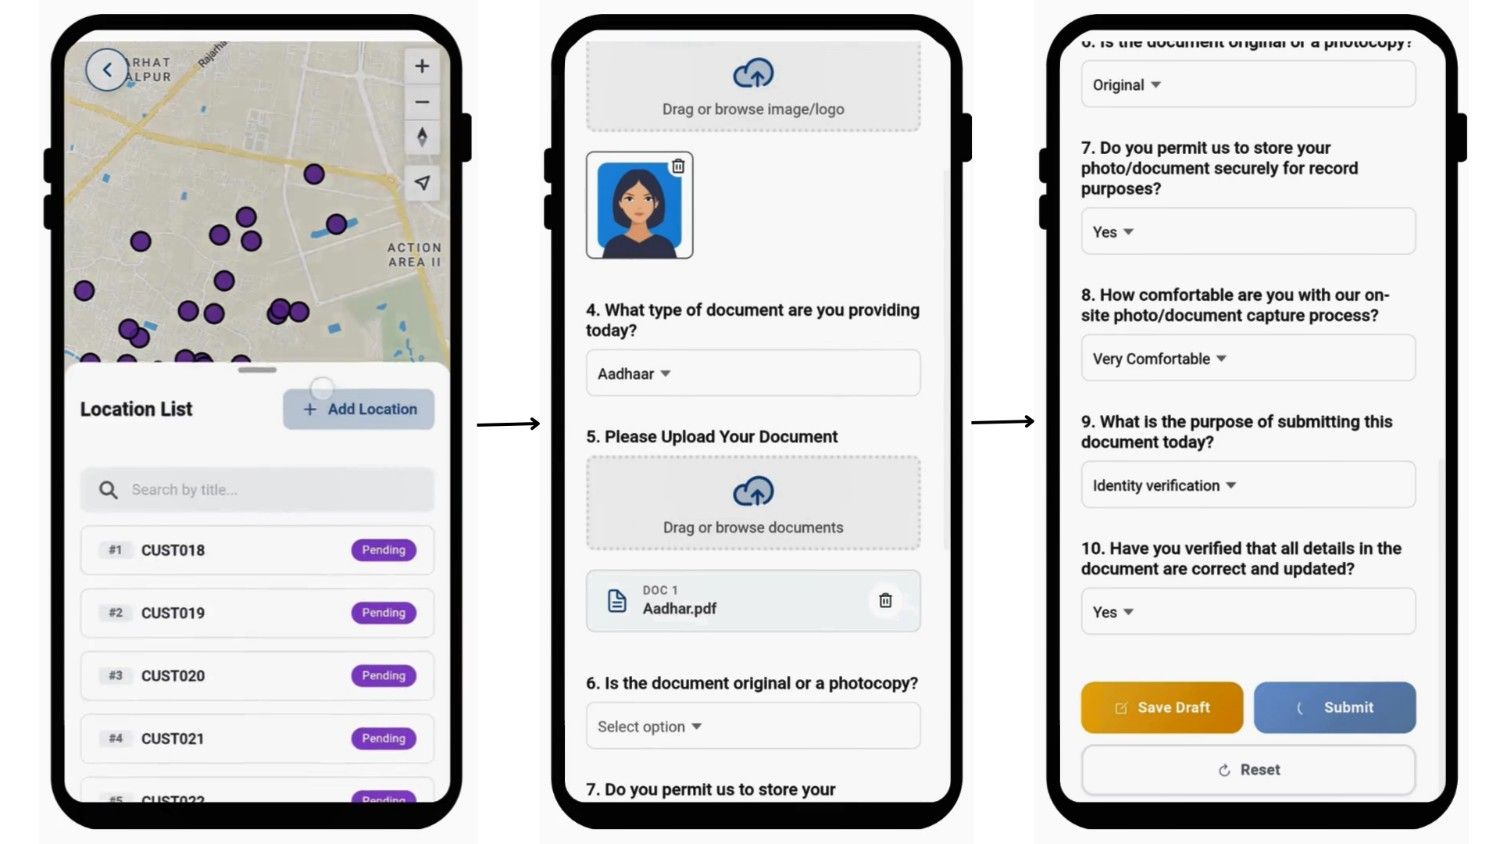
Step 6: Launching Survey & Monitoring Progress
Finally, launch the survey by clicking on the launch button.
The assigned members will receive customer points in the MAPOG Contributor App and can fill the survey on-site based on their experience. They can upload their images & documets easily. They can submit or keep drafts.
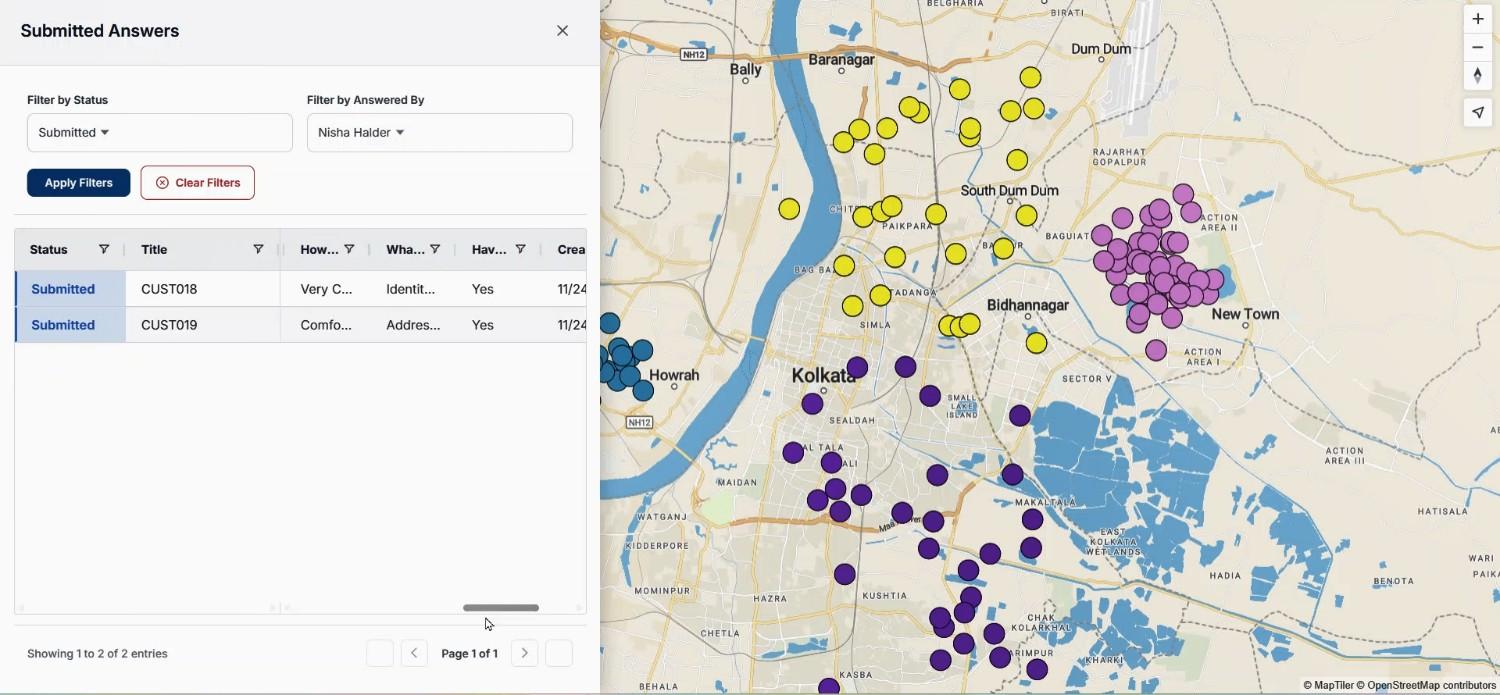
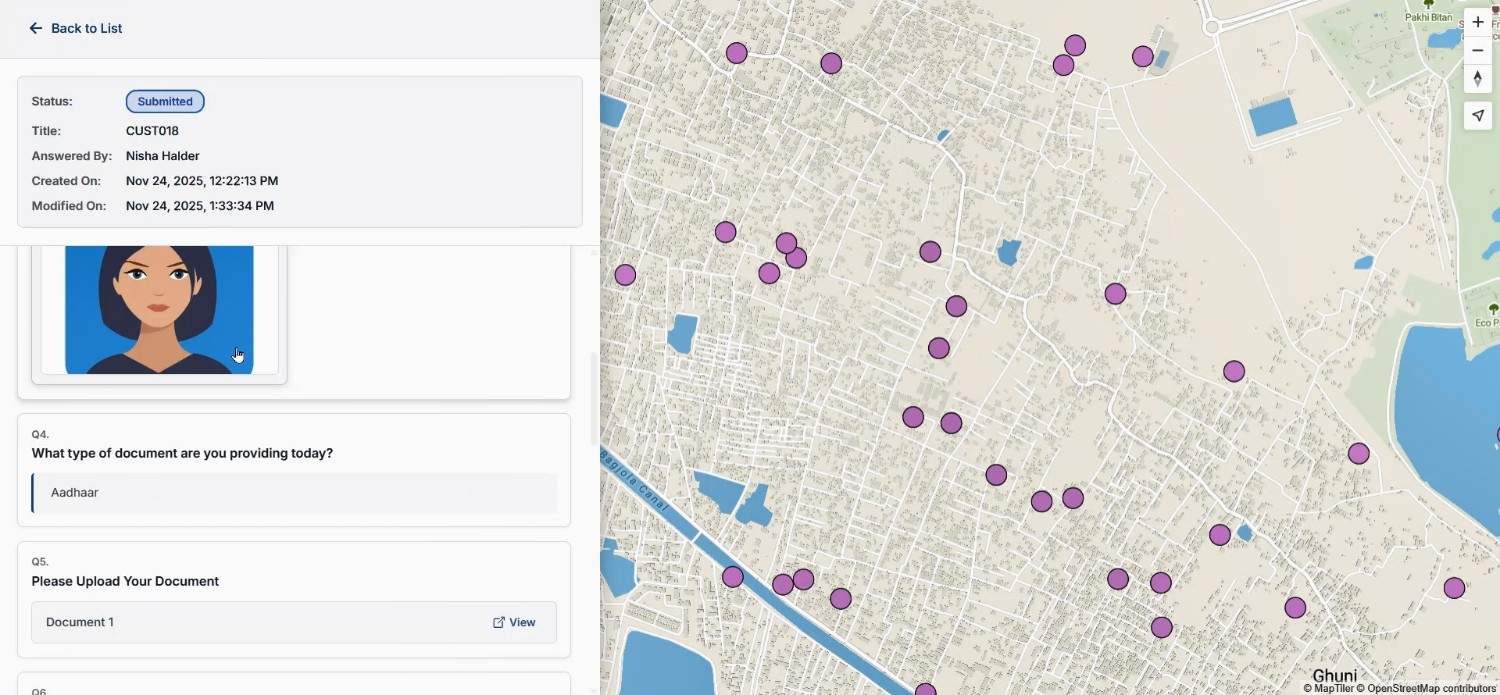
Using the “Show Data Overview” option, you can filter by user or status to track progress. Consequently, users can collect and upload customer photos & documents onsite securely.
Industry Use Cases & Benefits
Industries like retail, finance, insurance, telecom, and field-service teams frequently need structured on-site documentation. For instance, loan verification teams often capture ID images, signatures, address proof, or shop photos. With MAPOG, everything stays organized, securely stored, and easily filtered using spending level or purchase frequency. Additionally, managers can track submissions, drafts, or user performance from the overview panel.
Conclusion
Managing Customer Photos or Documents doesn’t have to be chaotic. By combining structured forms, visual mapping, user assignment, and real-time uploads, MAPOG simplifies on-site documentation for every team. Explore how such mapping-based workflows can enhance accuracy, security, and team coordination in your field operations.
You can also download the MAPOG Contributor App directly from the Play Store & Apple Store.