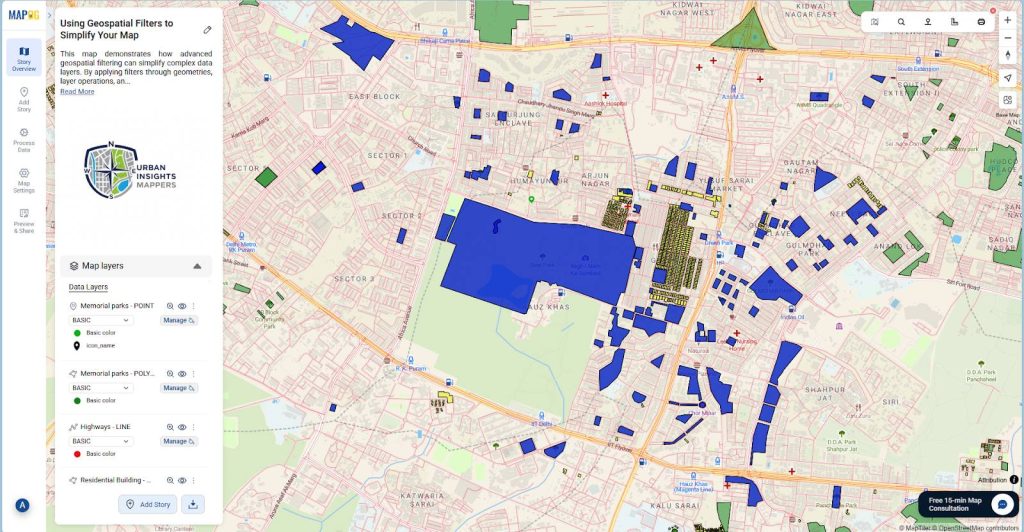
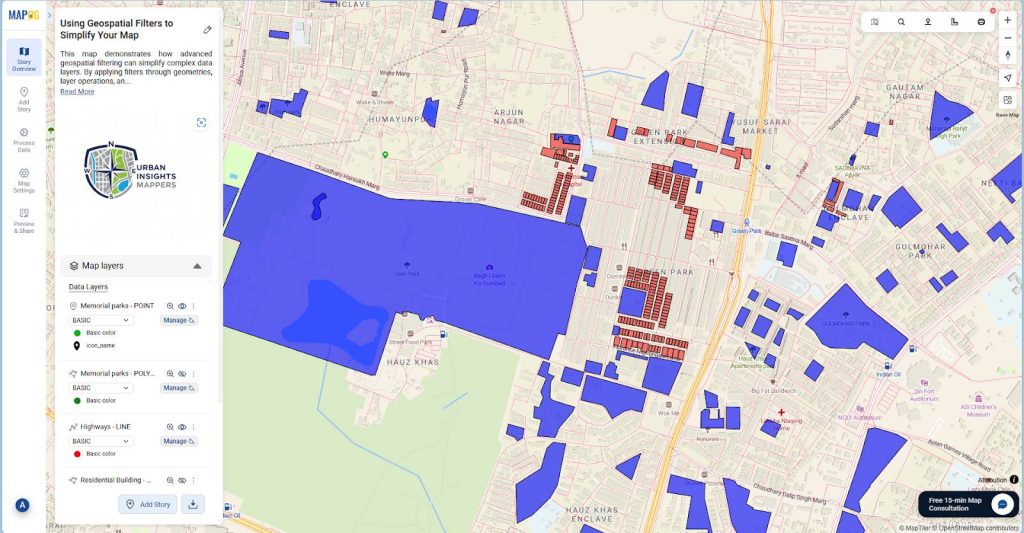
If your map feels crowded or confusing, you’re not alone. Many GIS projects start out clear but quickly become overwhelming as more layers and data are added. That’s where using geospatial filters to simplify your map can make all the difference. With MAPOG, which offers advanced filtering tools, this process becomes simple and accessible.
Key concept of using geospatial filters to simplify your map
The main concept behind using geospatial filters to simplify your map is to refine and organize the information displayed. Instead of cluttering the screen with every data point, filters allow you to narrow your focus, by area, type, or custom attribute.
Benefits include:
- Cleaner and more readable maps
- Faster analysis and visualization
- Smarter insights from filtered data
Step-by-Step process of using Geospatial filters to simplify your Map
In this guide, we’ll explore 3 types of geospatial filters that help simplify your map.
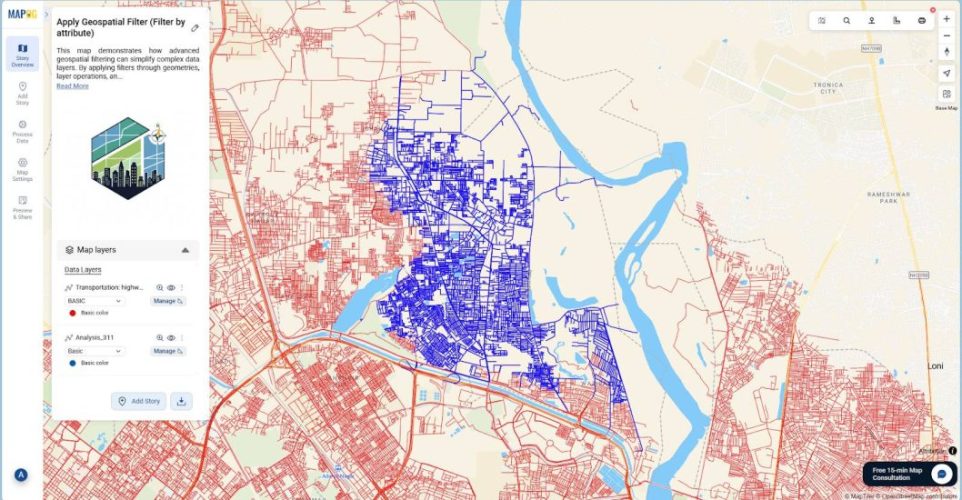
Filter by Geometries
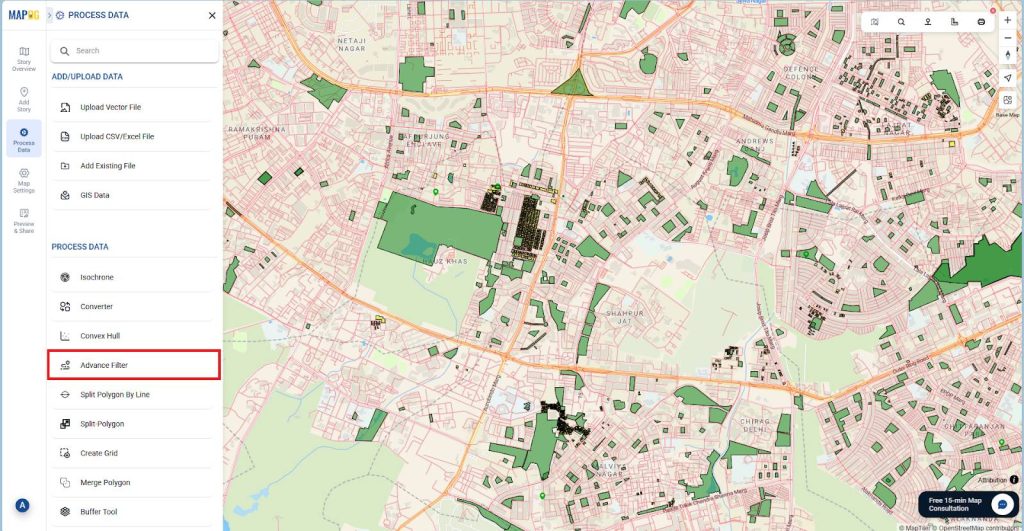
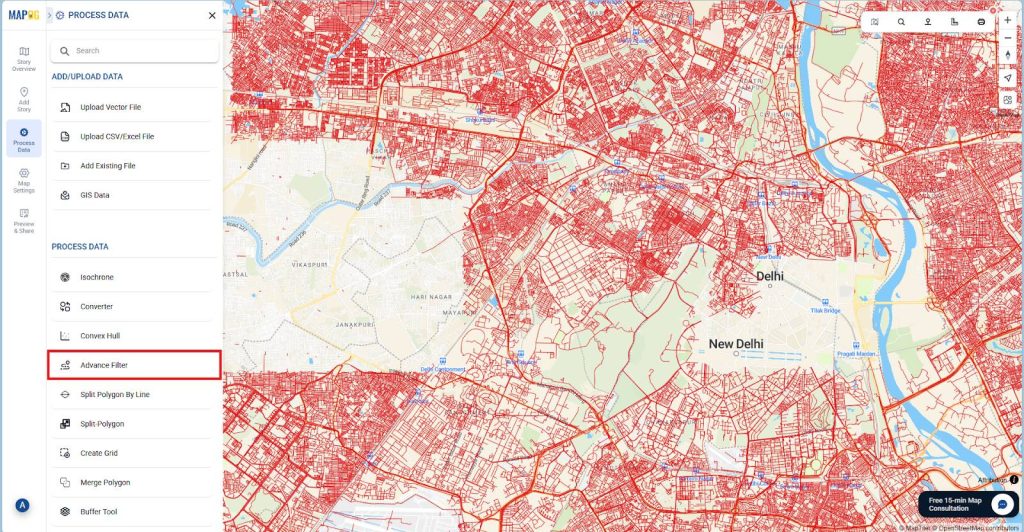
1. Go to MAPOG and create your map. To filter by geometries, click on process data, then open Advance filter.
2. From the “Select Target Layer Data” dropdown, choose your desired layer (e.g., Memorial Parks). Next, select the “Filter by Geometries” option and pick a tool (e.g., Rectangle).
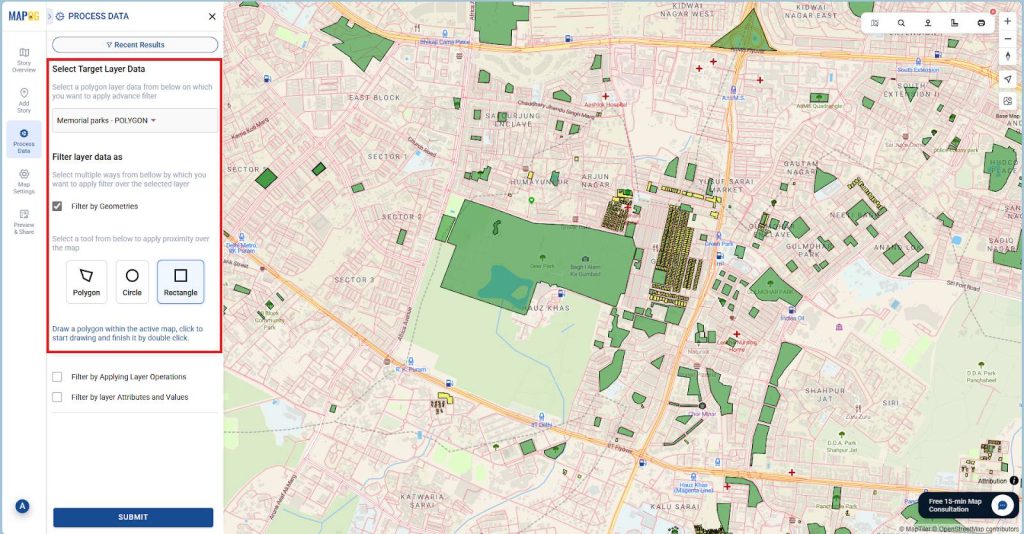
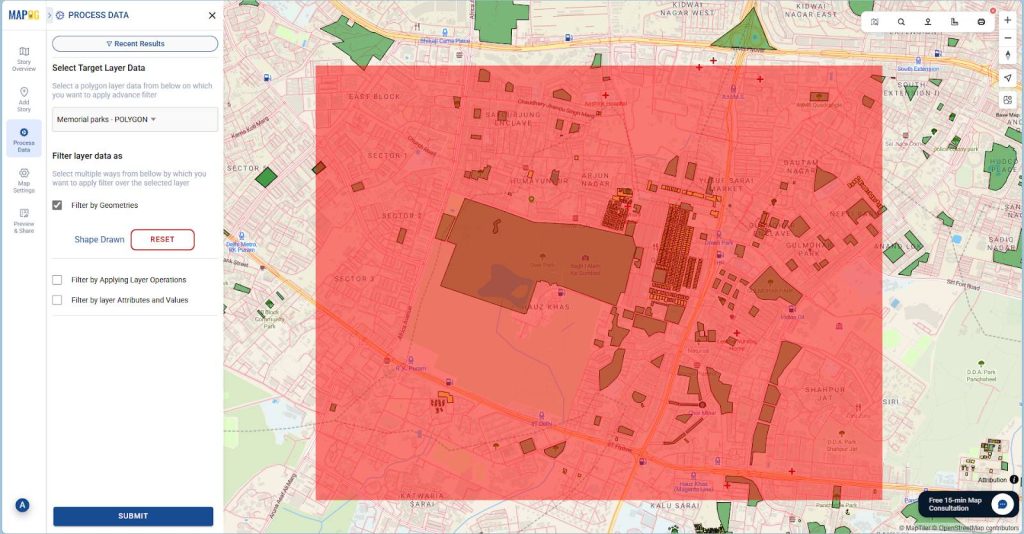
Then, draw a shape on the active map to define your area of interest, click to start drawing, and double-click to finish and submit.
3. Then you can just “Publish” the filtered result or optionally click on “Download” to export the data as CSV or Excel.
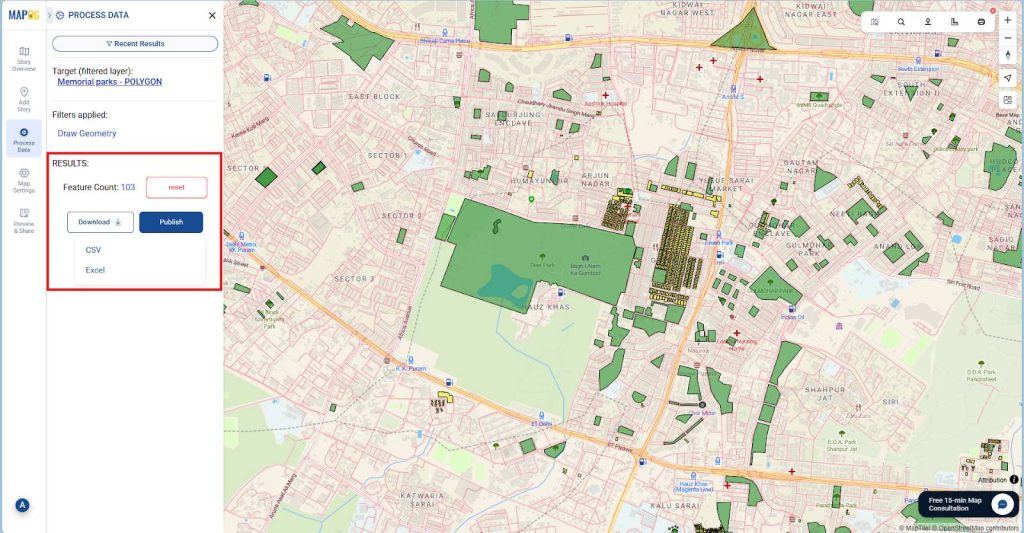
Then, click on “Publish” to instantly filter and display the Memorial Parks located within the selected boundary.
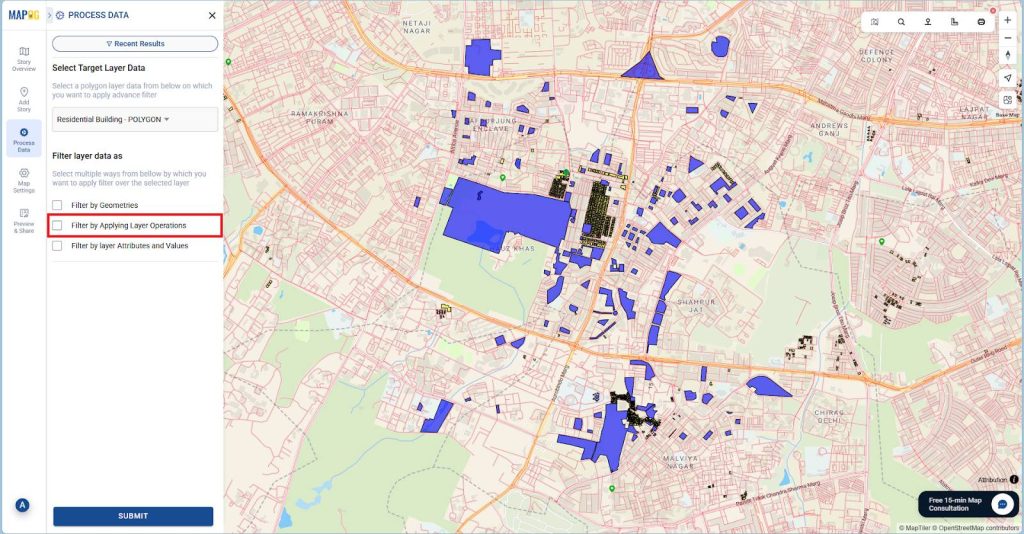
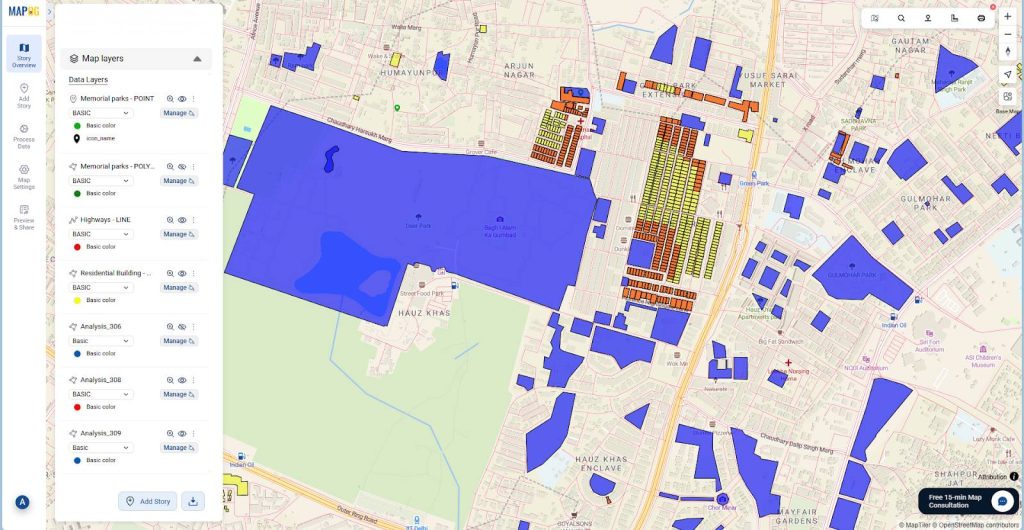
Filter by Applying Layer Operations
1. To filter by applying layer operations, Go to “Process data”. Then choose Advance filter option.

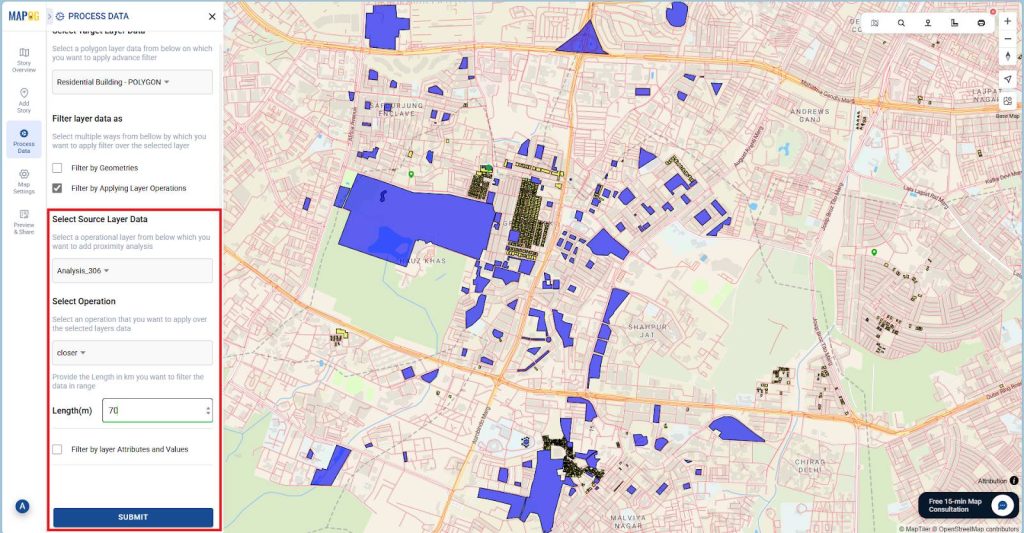
2. From the “Select Target Tayer Data” dropdown, select Residential Buildings as your target layer. Then, choose “Filter by Applying Layer Operations” and select Memorial Parks as the source layer.
3. Next, pick the “Closer” operation to identify all residential buildings located within a 70-meter radius of any memorial park, define the distance and “Submit“.
4. Then you can publish the filtered result and optionally download the data as CSV or Excel.
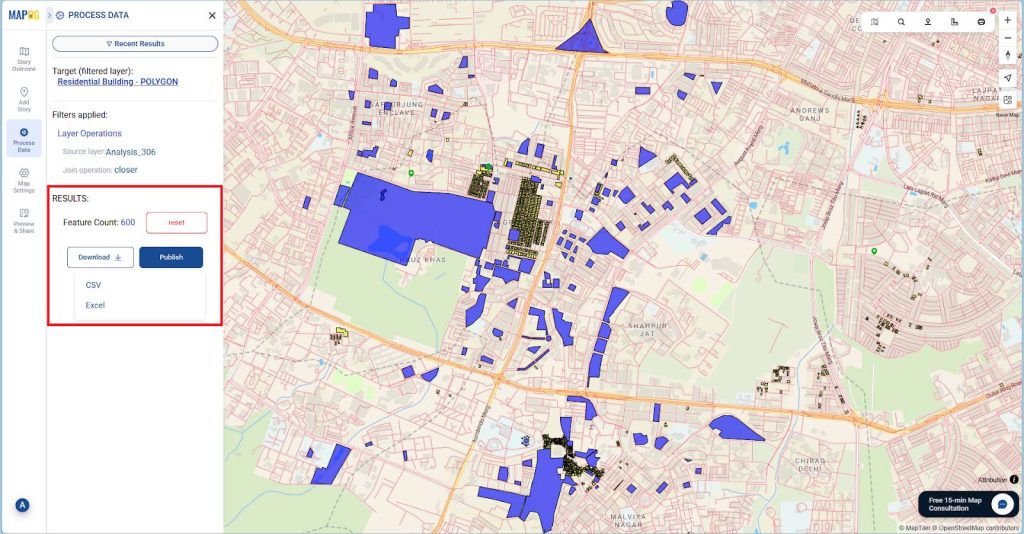
Then, click on “Publish” to add only those buildings that fall within the defined proximity as a new map layer.
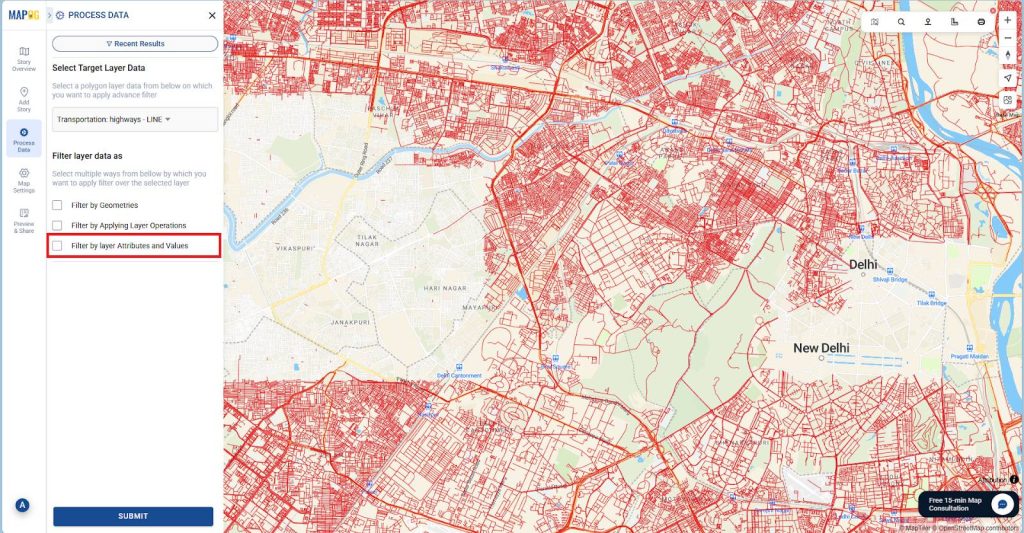
Filter by layer Attributes and Values
1. To apply filter by layer attributes and values, go to “Process Data” then go to “Advance filter”
2. From the Select Target Layer Data dropdown, choose your layer, for instance, Highway lines. Then select “Filter by Layer Attributes and Values.”
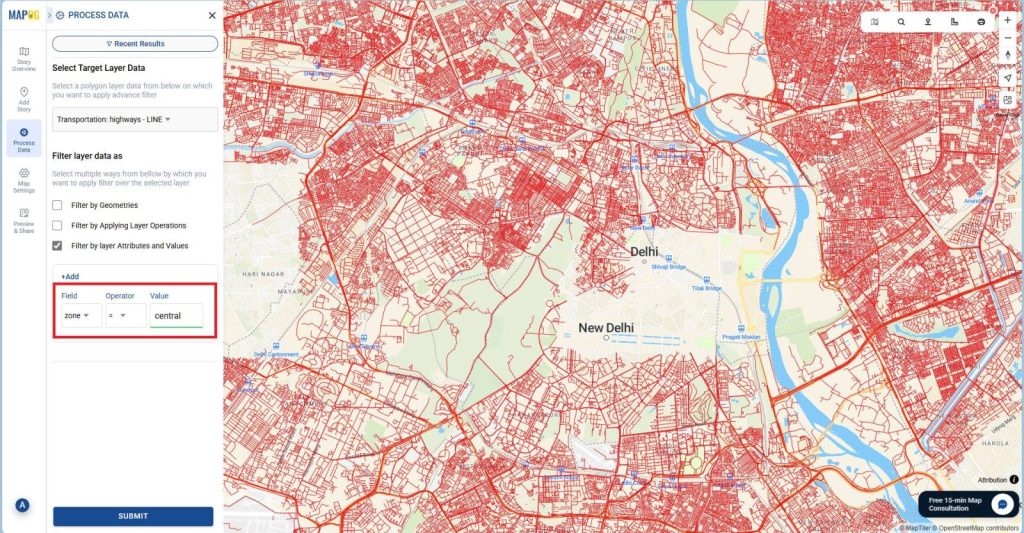
3. In the “Field” dropdown, pick the attribute you want to filter, such as Zone. From the “Operator” dropdown, choose = (equals), and in the “Value” box, type Central and Submit. This will filter and display only the highways located within the Central Zone.
4. Finally, review the Results panel. “Publish” to save the filtered result as a new layer or “Download” and choose CSV or Excel to export the data.
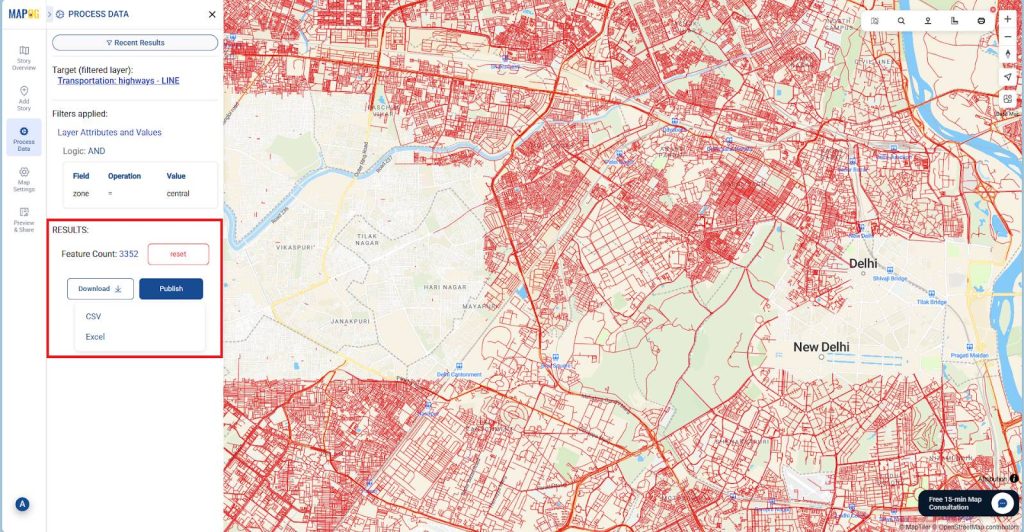
Simply, click on “Publish” to add the filtered result as a new layer.
Industries and domains: Using Geospatial Filters to Simplify Your Map
- Urban Planning: Analyze land use, infrastructure, and zoning efficiently.
- Real Estate: Highlight properties by price range, location, or development phase.
- Tourism: Map attractions, routes, and accommodations for better itineraries.
- Environmental Studies: Track regions affected by climate or ecological changes.
In every field, using geospatial filters helps transform cluttered maps into actionable insights.
Conclusion
In conclusion, using geospatial filters to simplify your map is one of the most effective ways to bring clarity to complex data. By refining what you see and focusing on key details, maps become cleaner, more dynamic, and far easier to share. Moreover, MAPOG simplifies this process with multiple advanced filtering options, such as geometry-based, attribute-based, and layer operations, making it straightforward for anyone to manage and analyze geospatial data.