In real estate, scattered property data makes comparison difficult and slows decisions. Property location with Nearby Amenities brings clarity by visualizing key data in one place. With MAPOG, developers can layer filters onto a property map to compare options, identify trends, and highlight the listings that matter most to buyers. This focused visualization enables faster decision-making, cleaner user experiences, and more efficient property discovery-ensuring every search feels intuitive, dynamic, and data-driven.
Key Concepts
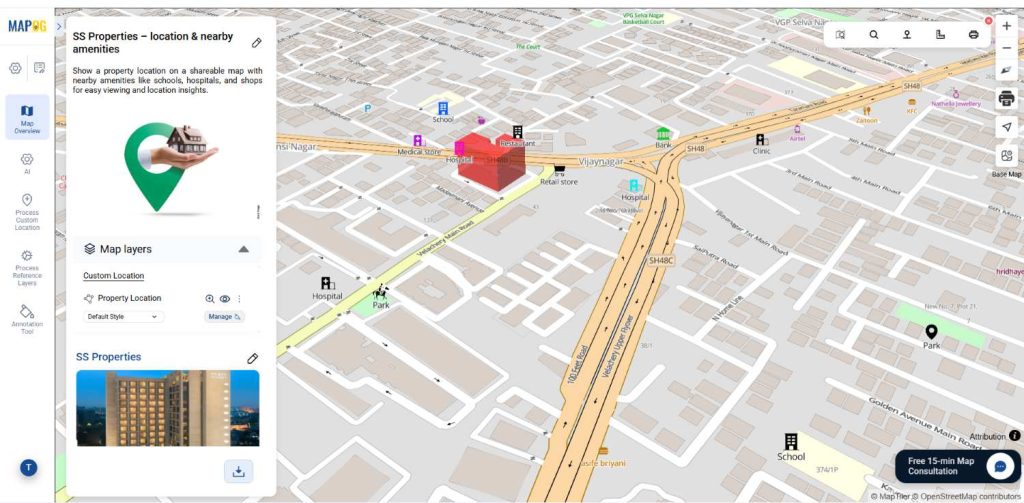
Showing a property with nearby amenities on a map adds more than a simple pin. Instead of separate searches, users can view schools, hospitals, transport, and shops in one place. Moreover, MAPOG links locations to nearby amenities for quick, clear insights. Each location can include details, categories, and quick access to nearby facilities, making the map a powerful tool for visualization, exploring convenience, accessibility, and lifestyle benefits tied to the property location.
Steps involves How to do Property Location with Nearby Amenities on a Shareable Map
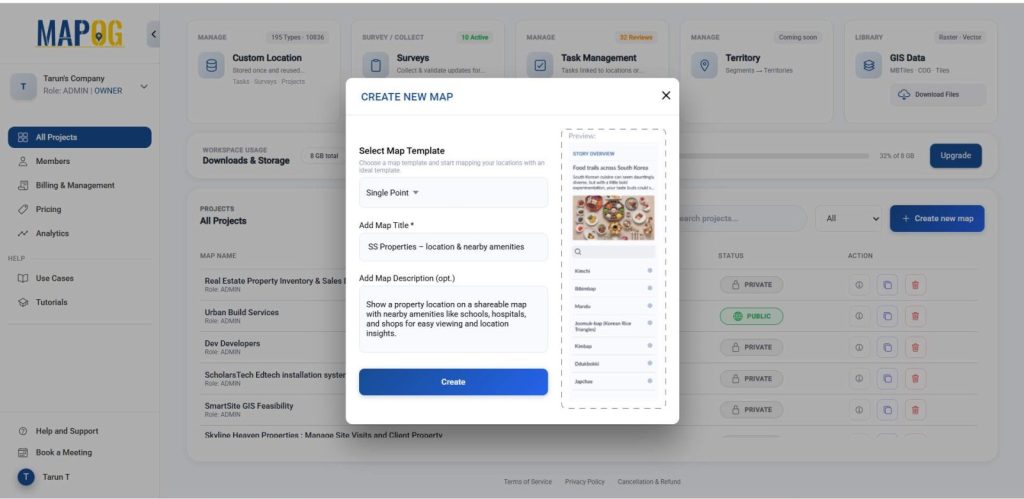
1. Create a new map
Go to MAPOG and click on Create New Map, enter a title and description, select the Single Point template to focus on a specific property location, and then click Create to initialize your project.
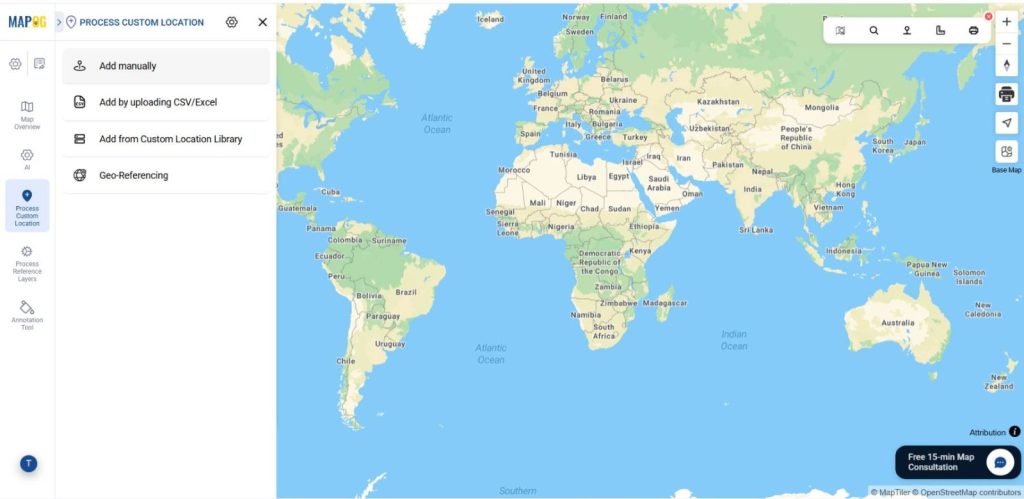
Step: 2 Add customer location template
Now go to Process custom location then select Add manually to add location on the map.
Then, open Select Custom Location Template, click Add More Custom Location Template.
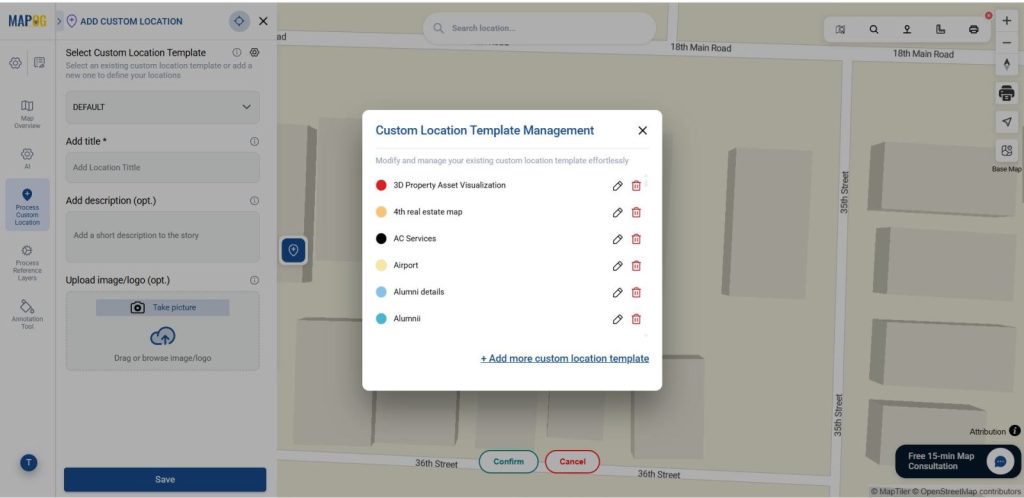
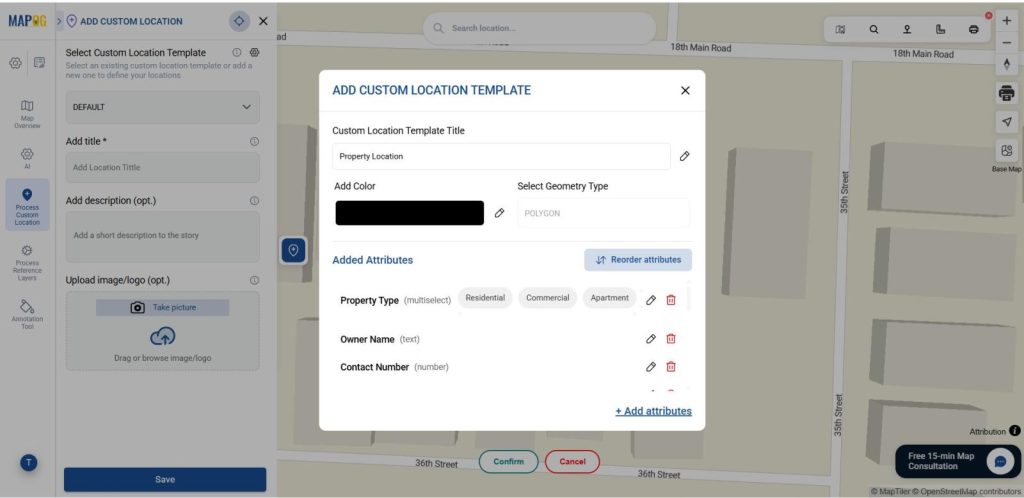
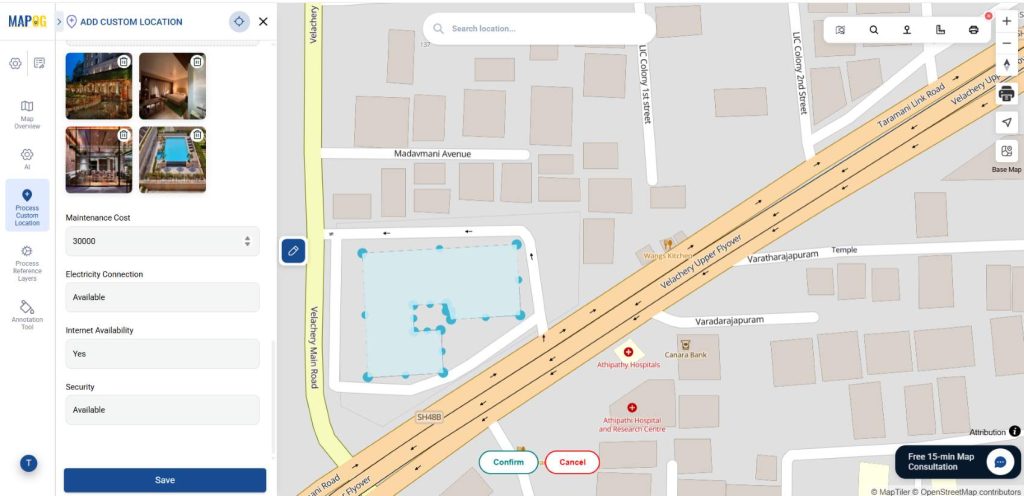
Open Select Custom Location Template → Add More Custom Location Template. Then it a title like Property Location, choose a color, and set geometry to Polygon. Then, add attributes like Shop Details, address, and photos using text, select, multiselect, and image types. This ensures consistency and reusability. Once done, proceed to upload.
Step: 3 Add custom location template
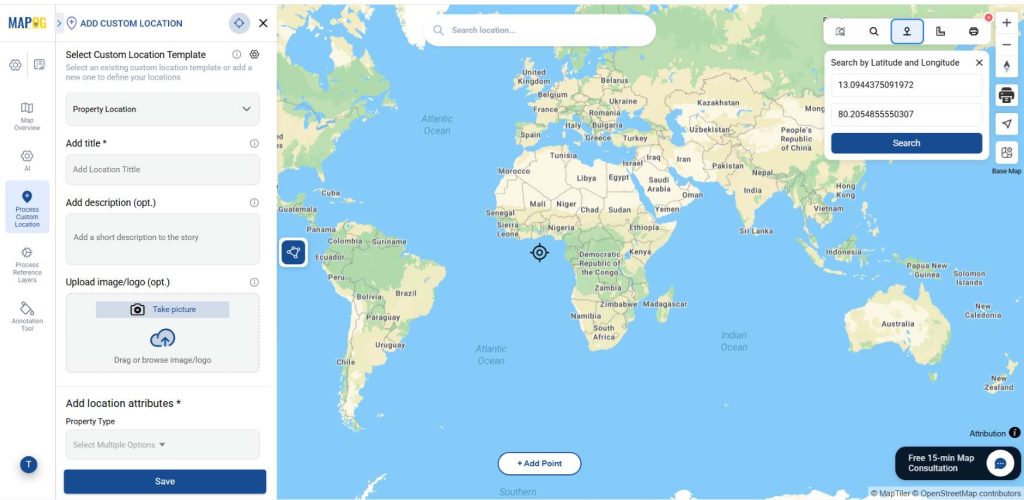
Once your template is ready, select it from the drop down. Then, search the excat location which you want to draw a polygon by using the search by latitude and longitude option.
Then carefully click around its perimeter using the add point option. Every time a vertex is clicked, MAPOG automatically creates a straight line connecting them. After drawing it conform it to save the polygon.
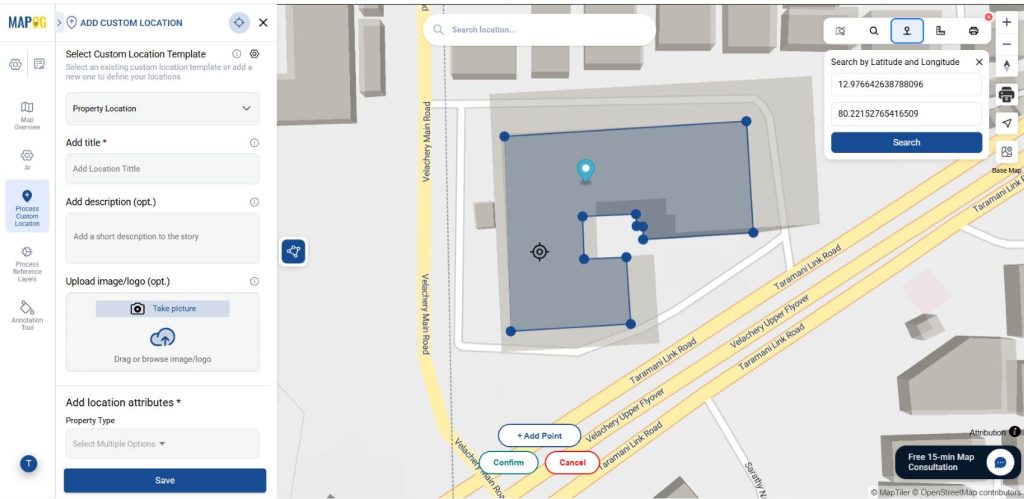
Then give the title for your polygon, write a short description about it, and upload a suitable image and fill required attributes. Now you have created a polygon.
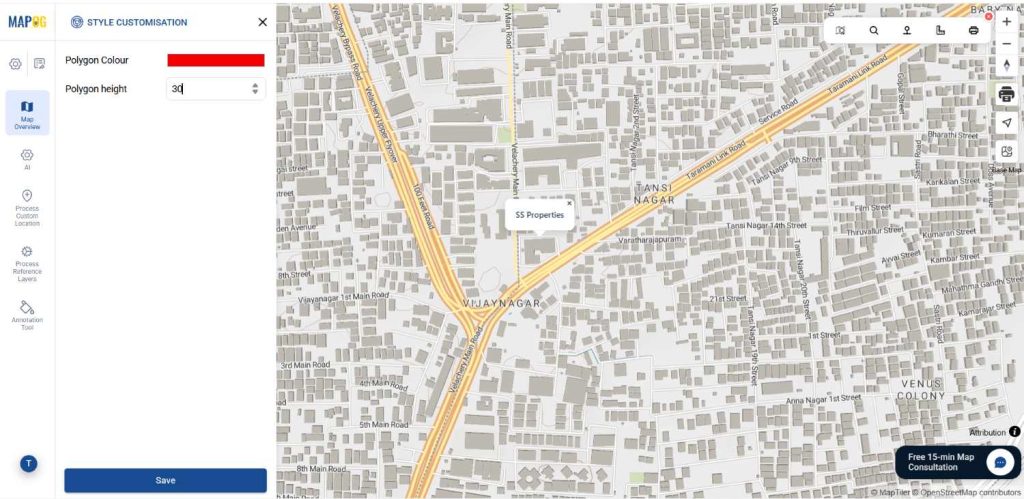
4. Customize Points for Visual Appeal
Provide a suitable color and give a proper height for your building polygon using Style customization.
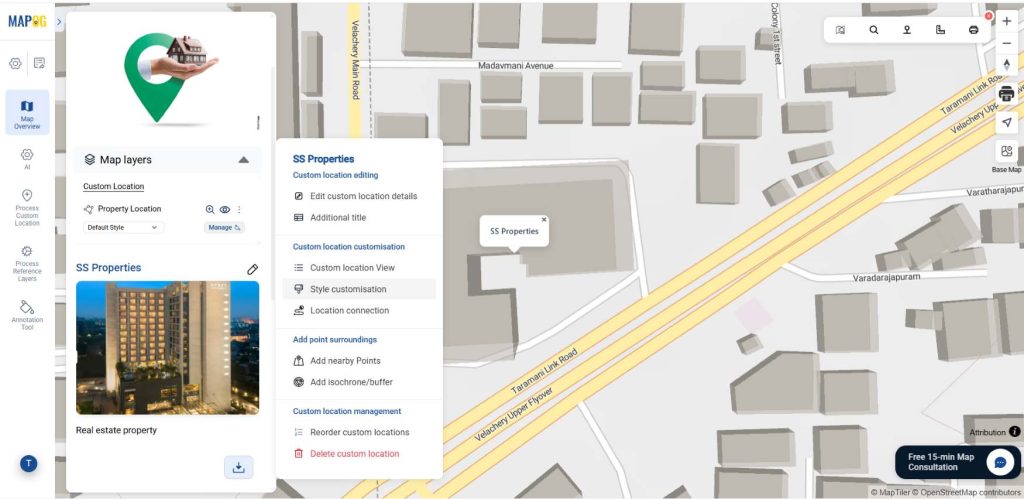
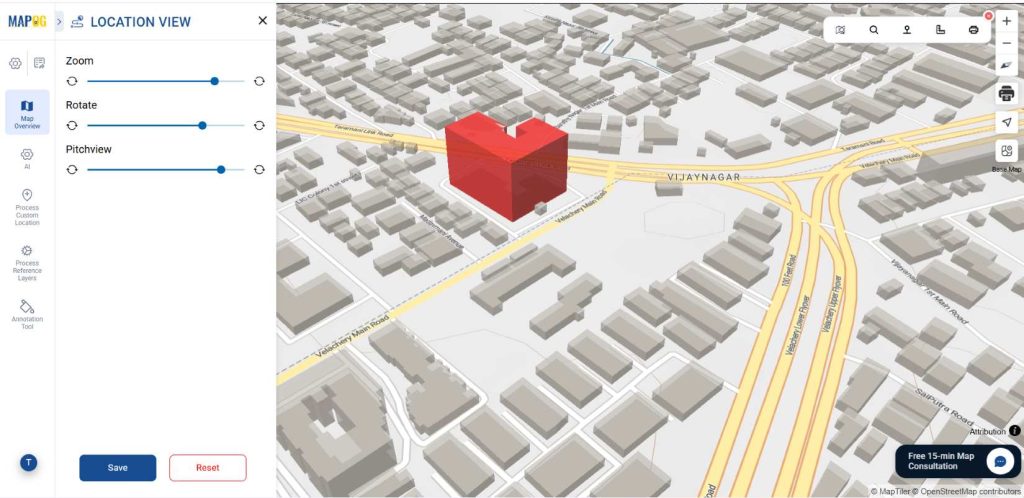
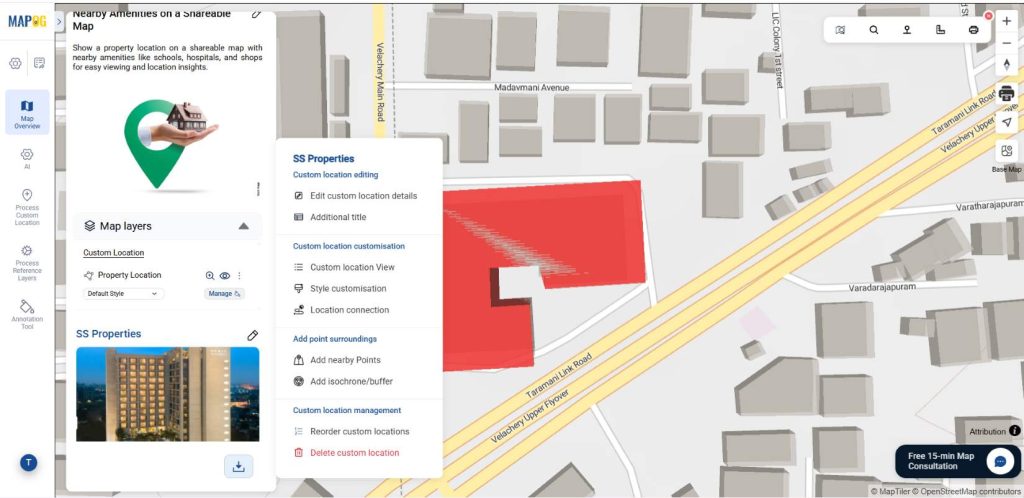
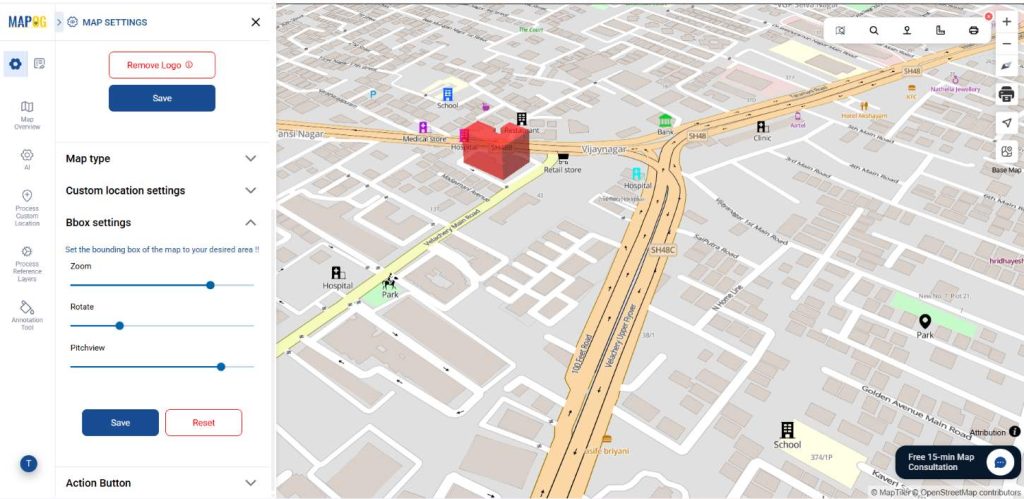
Then, go to the Custom Location View, where you can control how the building polygon is displayed using zoom, rotate, and pitch for a more interactive and detailed map perspective.
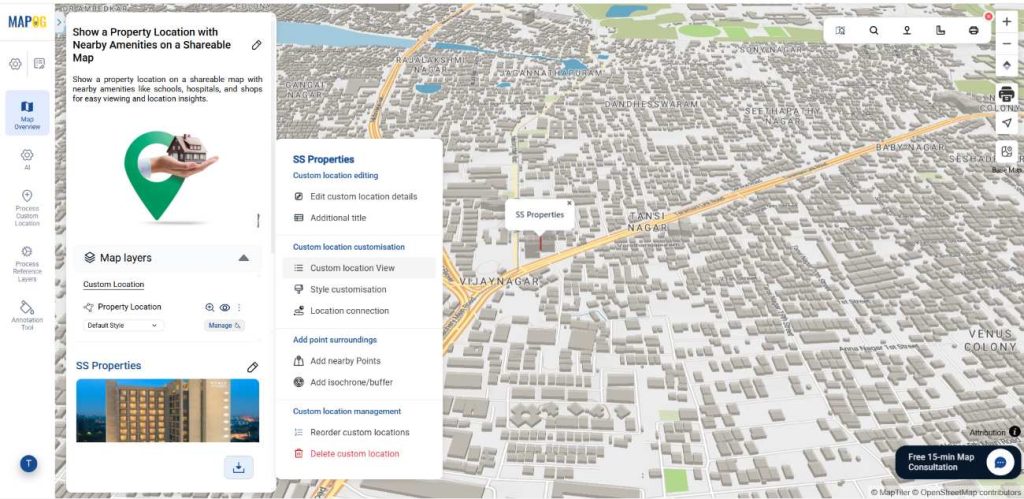
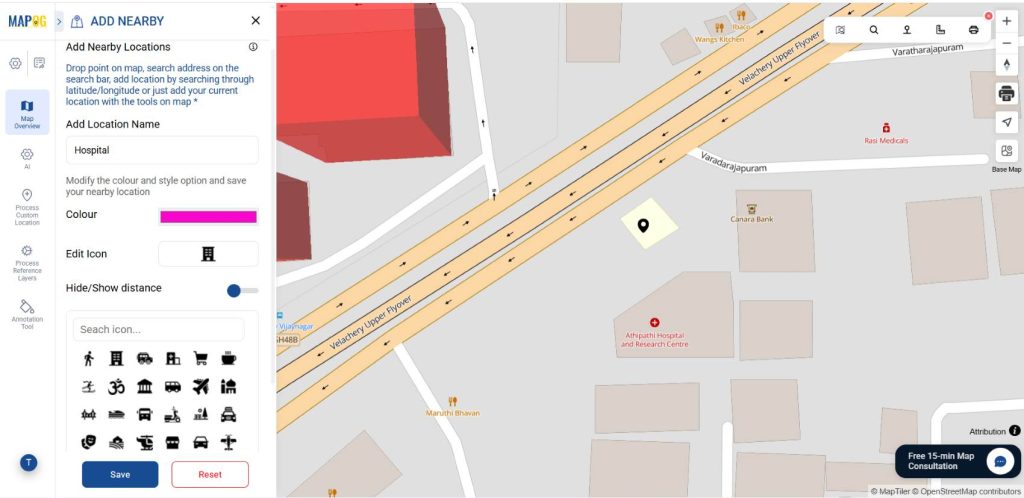
5: Add nearby point
Go to the Add nearby points option, there you can add nearby amenities such as schools, cafes, parks, hospitals, and transit stations.
To plot nearby amenities, identify nearby places manually or for precise location use coordinates, confirm their locations, add a name and use the edit icon to update details like icon, color.
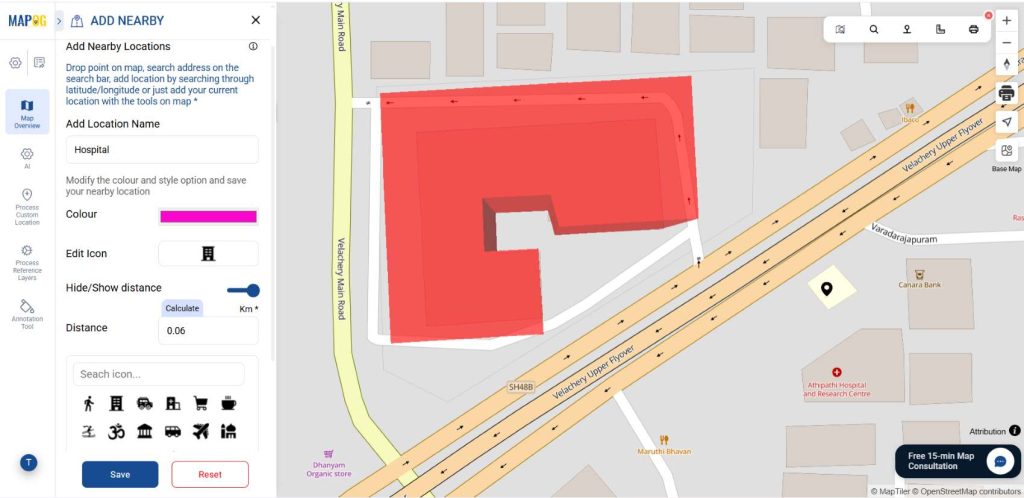
To display distance, enable the “Hide/Show Distance” option. Then, click “Calculate” to automatically show the distance in kilometers from your selected location.
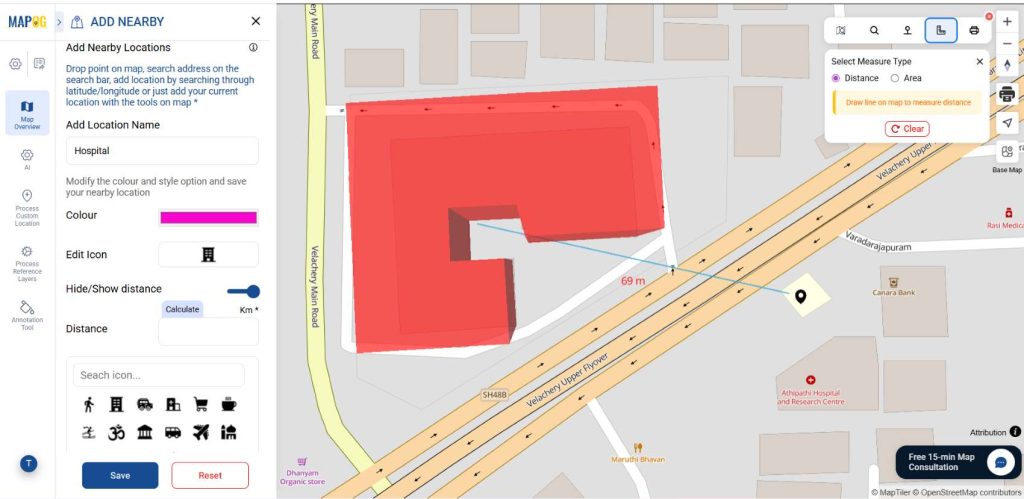
You can measure it using the “Measure Distance” tool also – simply select it, draw a line from your property to the nearby amenities, and the distance will be shown automatically. Provide the distance & then click “Save” to store the point on the map.
This way you can add several amenities with icons & distance from your desired location.
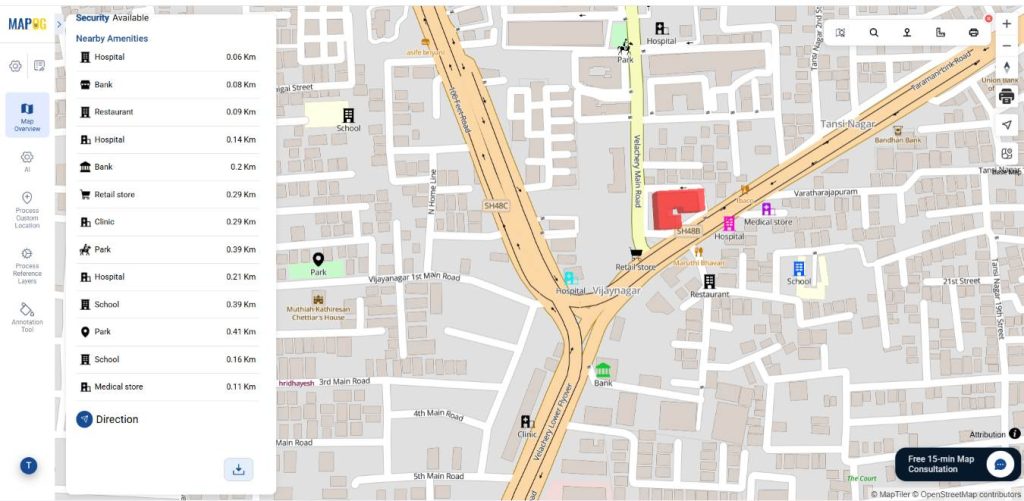
Now, go to the map setting then click on the Bbox settings, where you can control how the building polygon along with amenities is displayed using zoom, rotate, and pitch for a more interactive and detailed map perspective.
5: Preview & Share
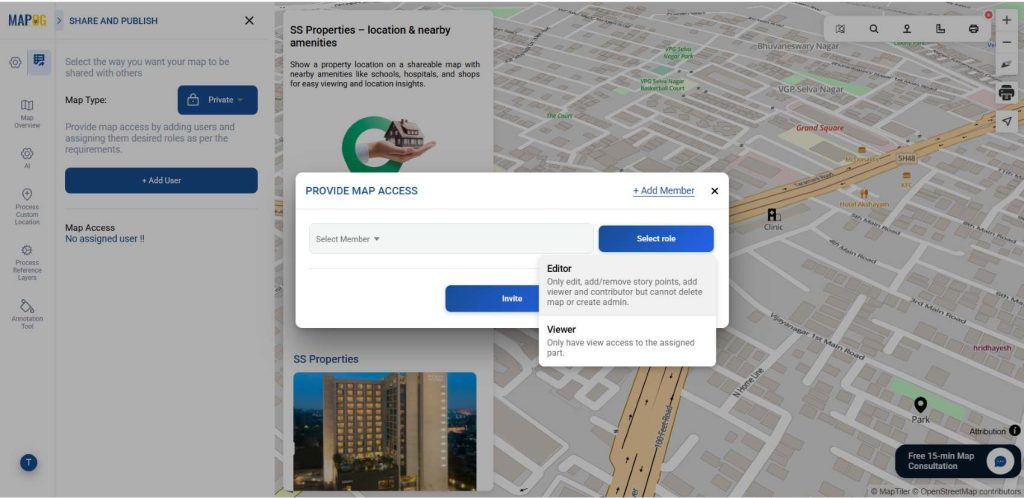
Once the map is done go to the preview & share option. With the add user option you can invite for collaboration assigning them different roles. The editor can edit content, manage points, add users; no delete/admin rights. Viewer can view-only access.
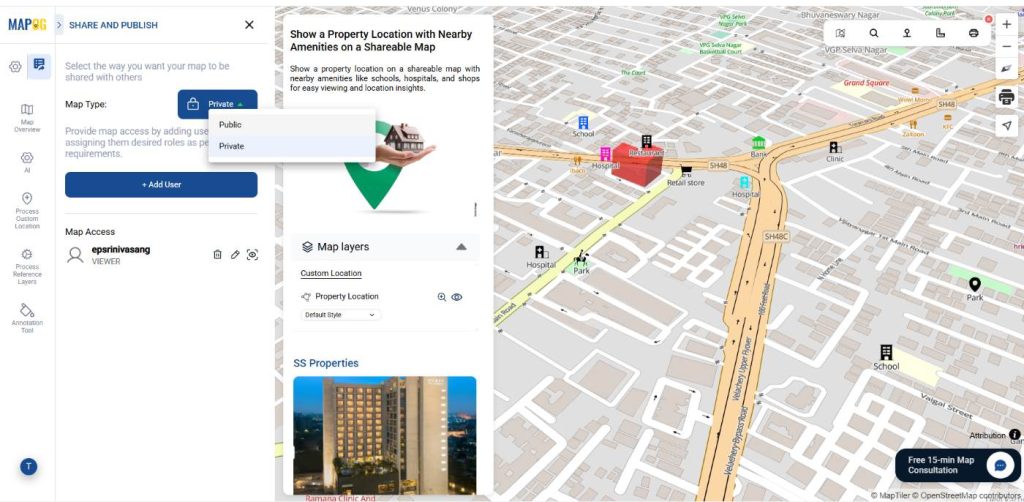
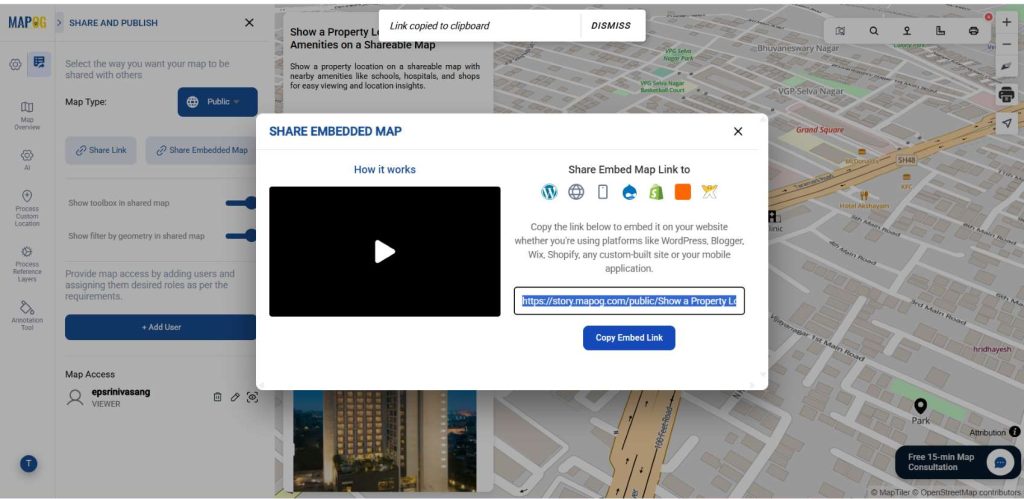
Then, set your map from private to public to enable the share option.
Then, click the share link option. Users mainly use it to directly share via email, chat, or social media, allowing others to view and interact with the map on MAPOG.
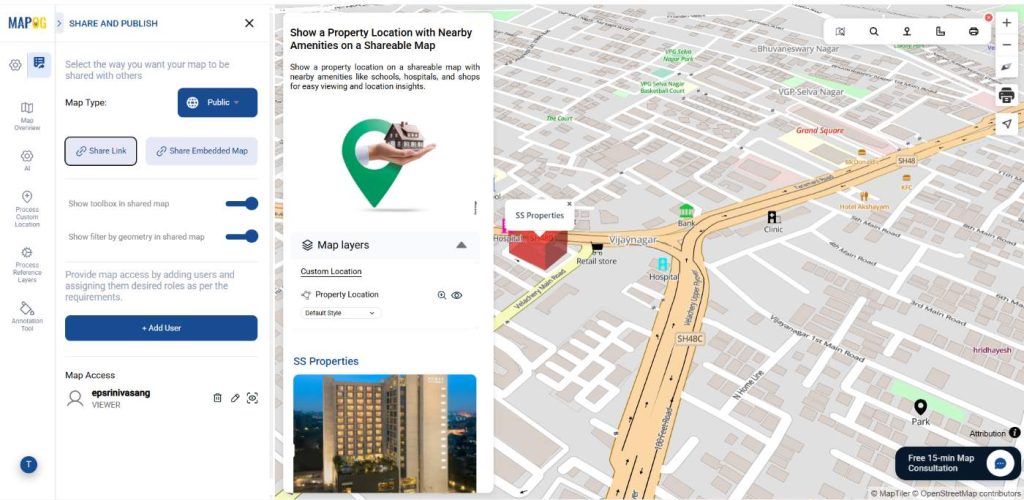
Then, click Share Embed Link, copy the generated link, and share links on websites. Users primarily use the Embed Map option to display maps on external websites or web pages.
Applications of Property Location with Nearby Amenities
Real estate developers highlight nearby amenities to enhance listings. Buyers and investors assess proximity to key places. Agents share interactive maps for clarity, and marketing teams showcase neighborhood advantages visually.
Conclusion
Displaying property locations alongside nearby amenities on a shareable map transforms property browsing into a richer and more informed experience. With MAPOG, these interactive maps can be easily shared with clients, teams, or potential buyers, ensuring everyone views the same location insights in real time.