If you’re planning to expand your food chain or track multiple branches across cities, then learning how to map a franchise business with smart filters is a true breakthrough. By doing so, you can visualize store data on an interactive platform, which in turn helps you easily organize locations, services, and customer insights. Whether you’re managing a coffee chain or a burger outlet, creating a structured map can therefore improve operations and boost visibility.
Key Concept: Why You Should Map a Franchise Business
Often, franchise owners struggle with managing multiple locations, services, and customer preferences. However, when you map a franchise business or retail, you turn this complexity into clarity. With MAPOG, it becomes simple to add categories, service types, and even custom details like ratings or popular dishes—all within one visual space. Consequently, this becomes especially useful when deciding expansion strategies or understanding high-performing branches.
Step-by-Step: How to Map a Franchise Business with Filters for Location & Services
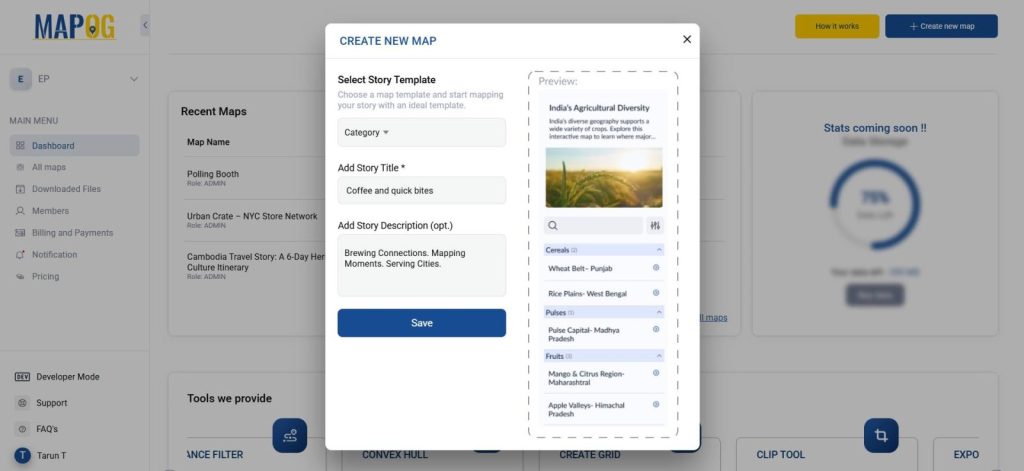
1. Start Your Franchise Map Story
Head to MAPOG and click Create new map. Choose the Category story template, then give your map a compelling title and description. Hit Save.
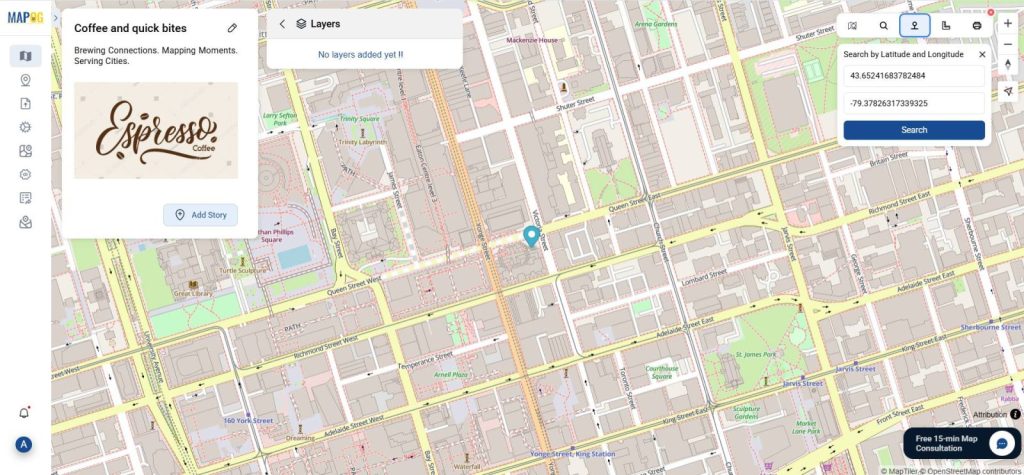
2. Add Franchise Coordinates
To begin, click the Toolbox, then select Latitude & Longitude, and enter the exact coordinates of your franchise location. This step anchors your business on the map.
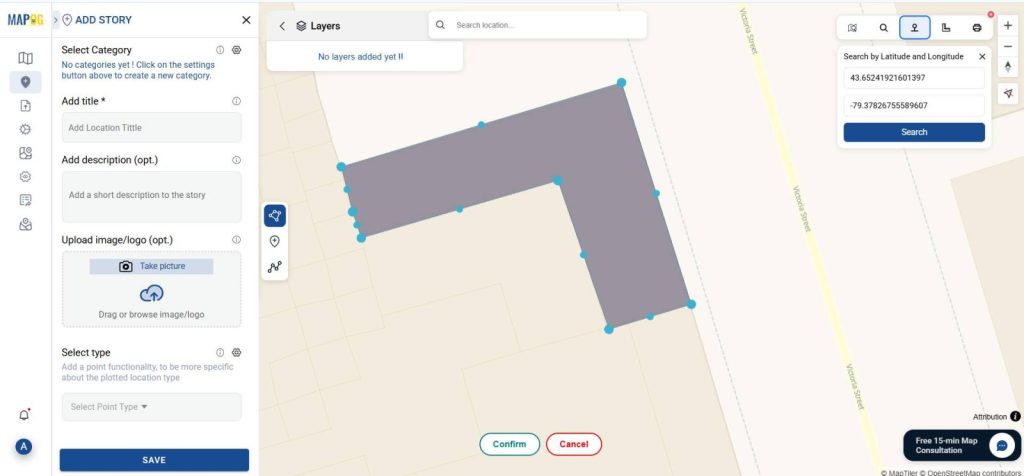
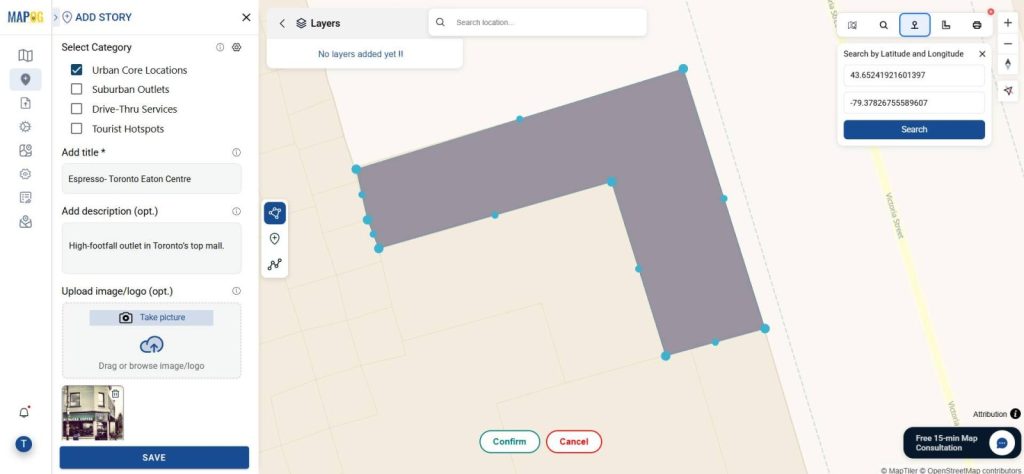
3. Draw Location Boundaries
Next, under Add Story → Add Manually, select Add Polygon. Then, draw a polygon around each franchise location to clearly define its physical area.
4. Categorize Your Properties
Go to Select Category > Settings and create four new categories:
- Urban Core Locations
- Suburban Outlets
- Drive-Thru Services
- Tourist Hotspots
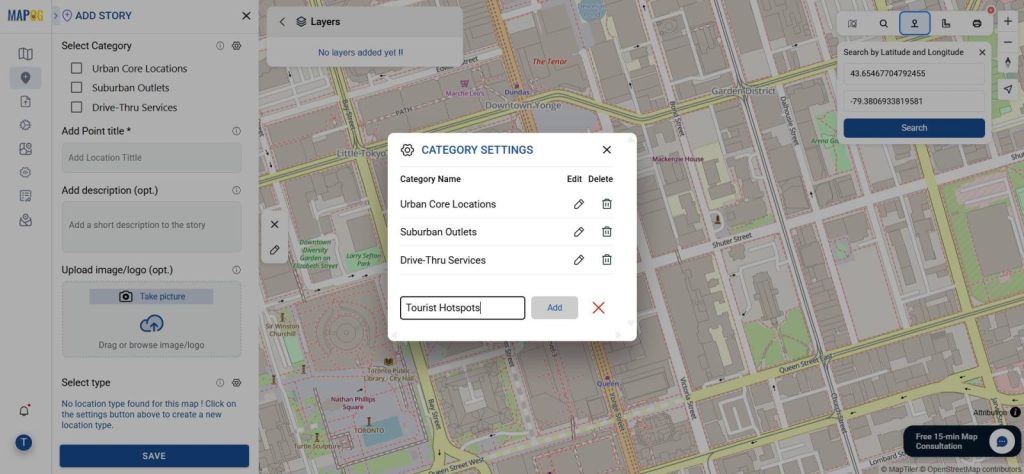
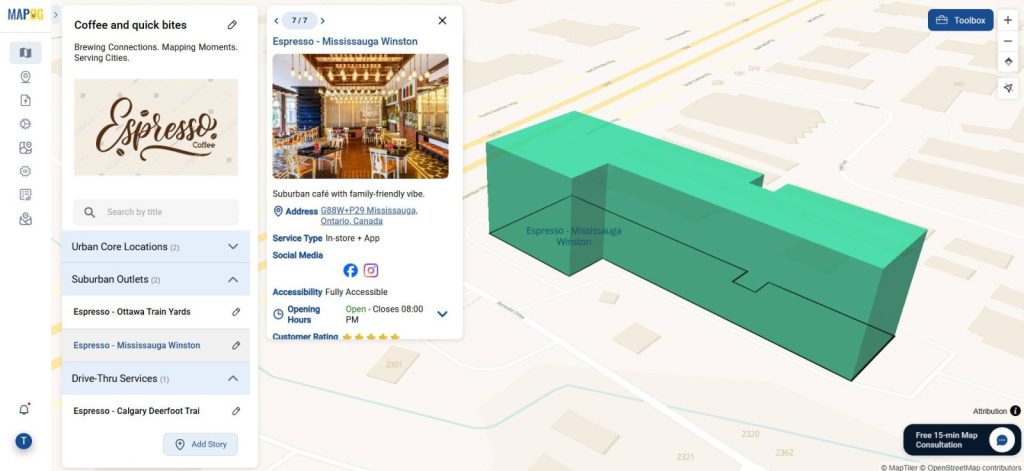
Afterward, tag each polygon with the most suitable category. In addition, don’t forget to add titles, images, and short descriptions of each outlet to enhance clarity.
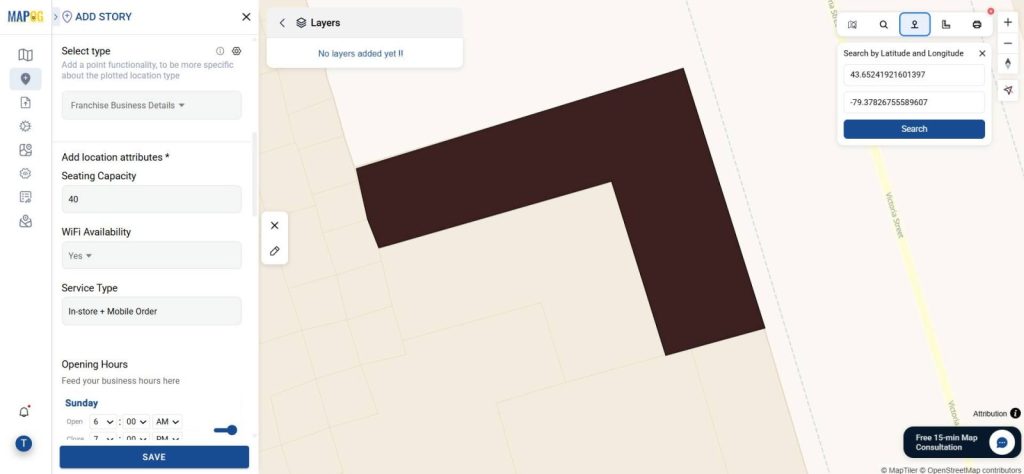
5. Add Custom Attributes
Moving on, in Select Polygon Type > Settings, you’ll find a tab titled Franchise Business Management. Here, click on Add More Location Type and define useful attributes such as Sitting capacity, Accessibility, Business hours, Popular dishes, Ratings & Reviews, and more.
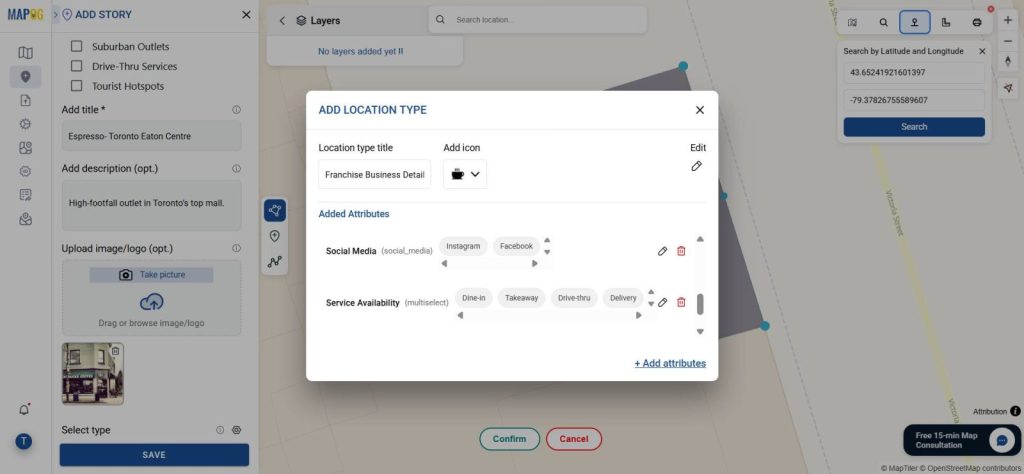
After creating them, input the data for each location and save.
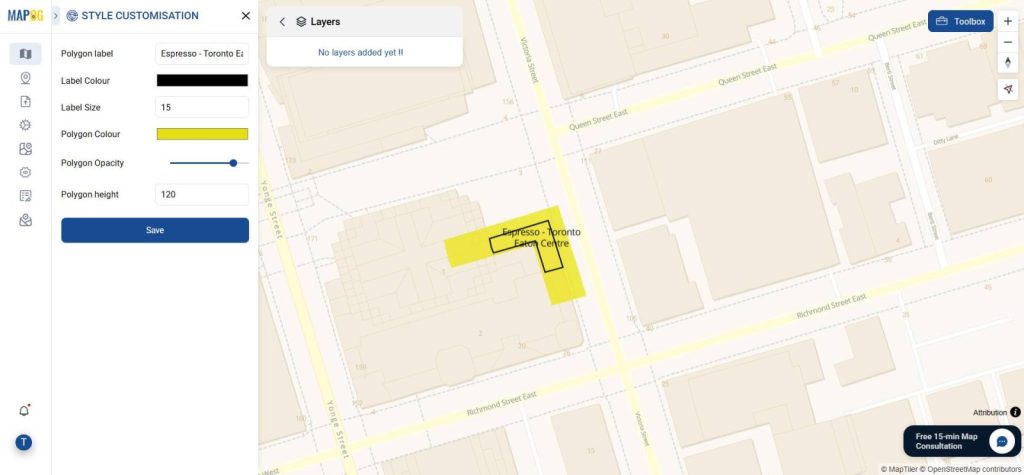
6. Customize Franchise Locations
Furthermore, enhance map visuals by customizing label names, size, height, and color for each food outlet with point Customization. This makes it easier for users to quickly identify branches based on type or popularity.
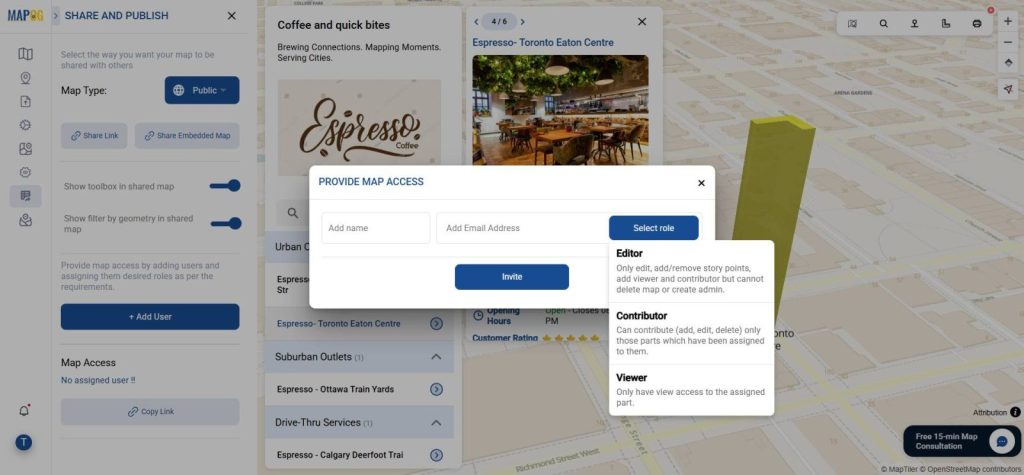
7. Preview and Share
Once done, use the Preview and Share option in MAPOG to make the map public. Consequently, you can share it with your team, partners, or customers, allowing them to explore and interact with the data-rich visual.
Industry Relevance & Benefits of mapping a franchise business
In fact, many global food chains map a franchise business this way to track performance, spot high-demand zones, and tailor services. As a result, MAPOG enables managers to filter by customer ratings, accessibility, or location type—making decision-making much faster and data-driven.
When you map a franchise business:
- Helps identify underperforming areas needing support,
- Assists investors and partners in spotting growth patterns,
- And ensures every outlet is accounted for in your strategic planning.
Conclusion
Ultimately, franchise management isn’t just about opening outlets—it’s about making smarter, data-backed decisions. When done right, mapping a franchise business using visual layers, filters, and custom attributes allows you to not only understand your footprint better—but also control it. As a result, MAPOG offers just the right mix of structure and creativity to bring your franchise story alive.