When field teams visit customer sites, capturing observations and service details at each location transforms visits into documentation. Ability to add notes and important information to customer locations from the field keeps data accurate, operations transparent, and teams aligned without delays of manual reporting. However MAPOG make this seamless, enabling field workers to update records, add attributes, and attach visual context in real time.
Key concept: Adding Notes and Important Information to Customer Locations
Adding notes to customer locations from the field means capturing information directly at service sites. Specifically, field workers document equipment status, customer feedback, maintenance needs, and site conditions immediately after tasks. Therefore, when technicians add notes and important information to customer records on-site, they eliminate transcription errors and ensure nothing critical is lost to memory lapses.
Benefits
- Real-Time Visibility: Managers gain insight into field activities without waiting for reports, enabling faster responses.
- Improved Data Accuracy: Capturing information at the source removes errors from paper forms and reduces forgotten details.
- Enhanced Team Coordination: Instant synchronization means updates made by one member immediately appear across the organization’s view, strengthening accountability.
Step-by-Step Process to Adding Notes and Important Information to Customer Locations
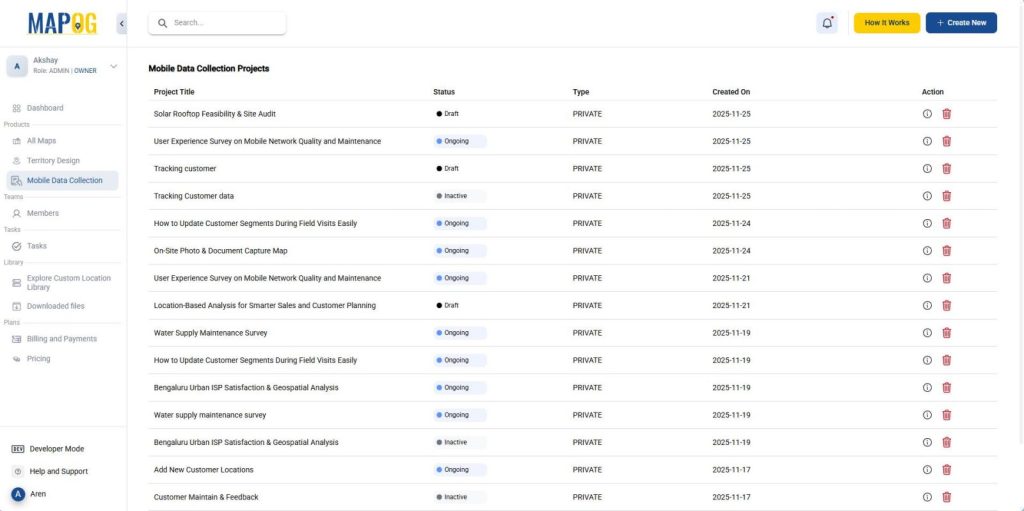
1. Setting up a New Project
First, log on to MAPOG, then go to “Mobile Data Collection“ and create a new project.
Next, add your project title and description, then make it a private project and set the start and end dates. Additionally, toggle “Allow user to add more locations” and “Allow users to add questions” if needed. Subsequently, go to select location type, create a custom location type, select it, and save the project.
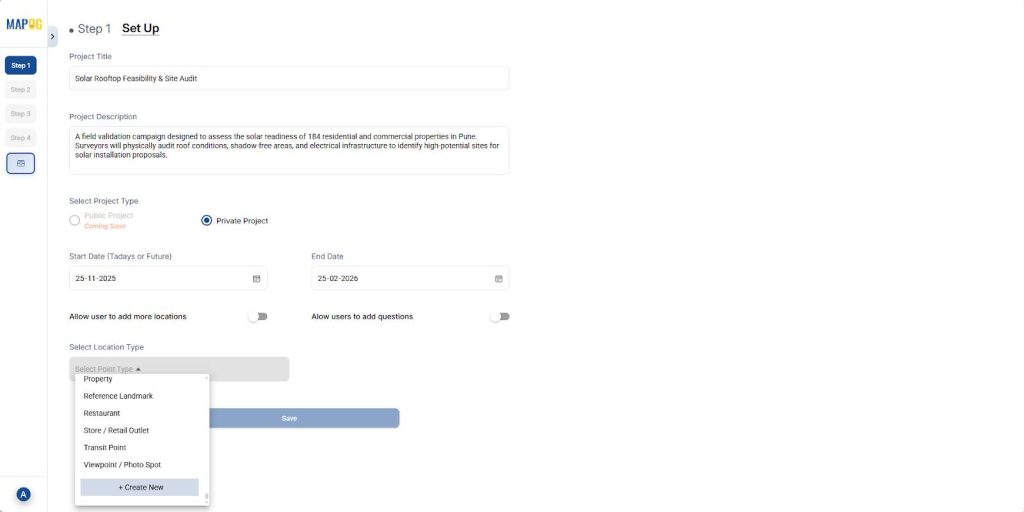
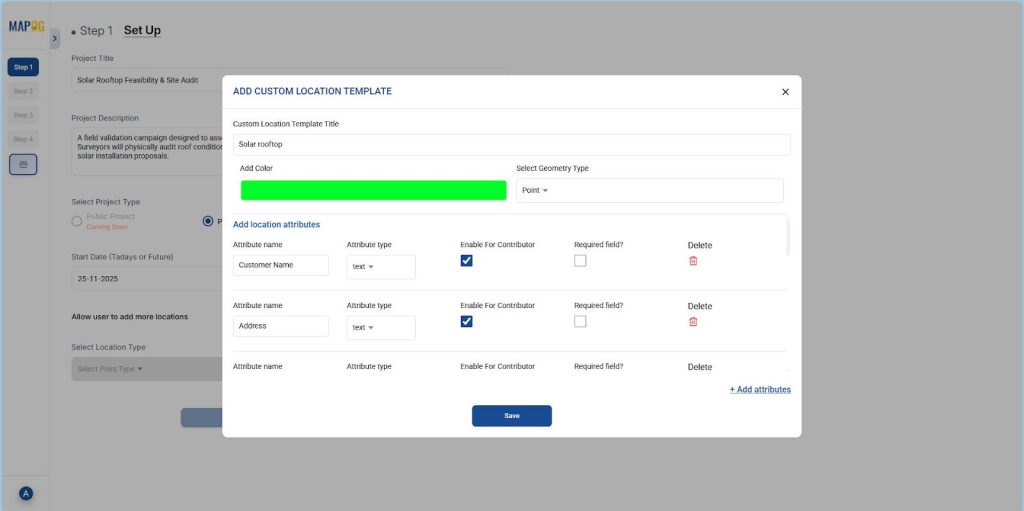
2. Create a New location Type
To create a new location type, use the “Create New” option from the dropdown, then select “Add more custom location template” and give it a title. Following this, set color, pick the geometry type (e.g., point), add attribute fields, and save.
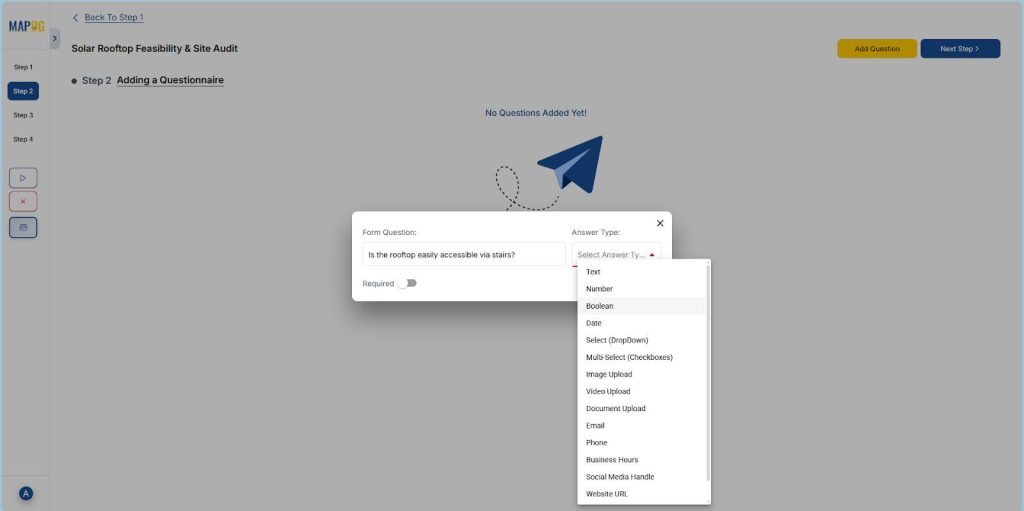
3. Add survey Questions
Moving forward, click on “Add question“. Meanwhile, add all survey questions, selecting answer types like Boolean, Select, Multi-select, or Image upload.
4. Plot Customer locations
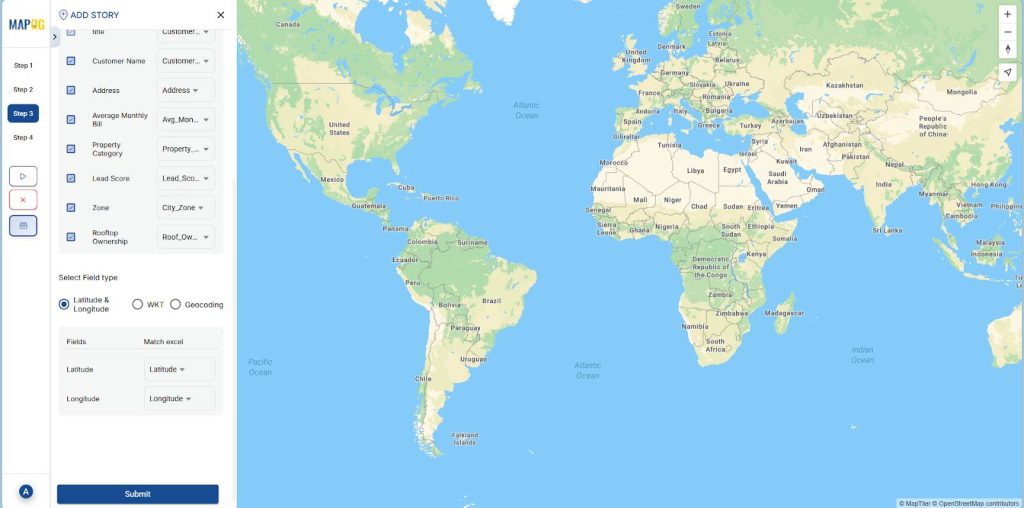
In the next step, select “Add a new location by uploading CSV/Excel“, then upload your customer location file.
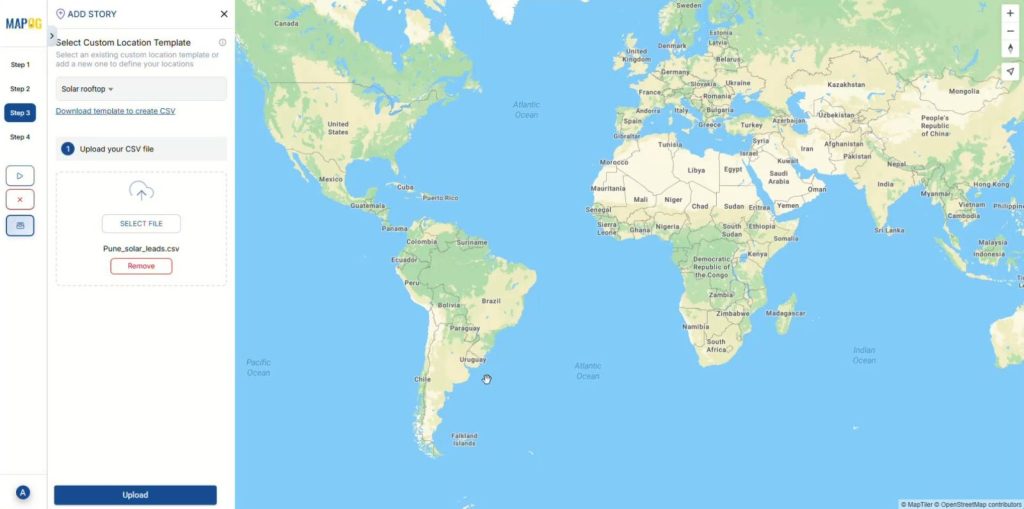
Then, after uploading, match all the attributes with Excel columns and select coordinates for placement.
5. Add contributors
Now, go to “Add User“, then click “Add member“, enter the email and assign a role either Admin or Others.
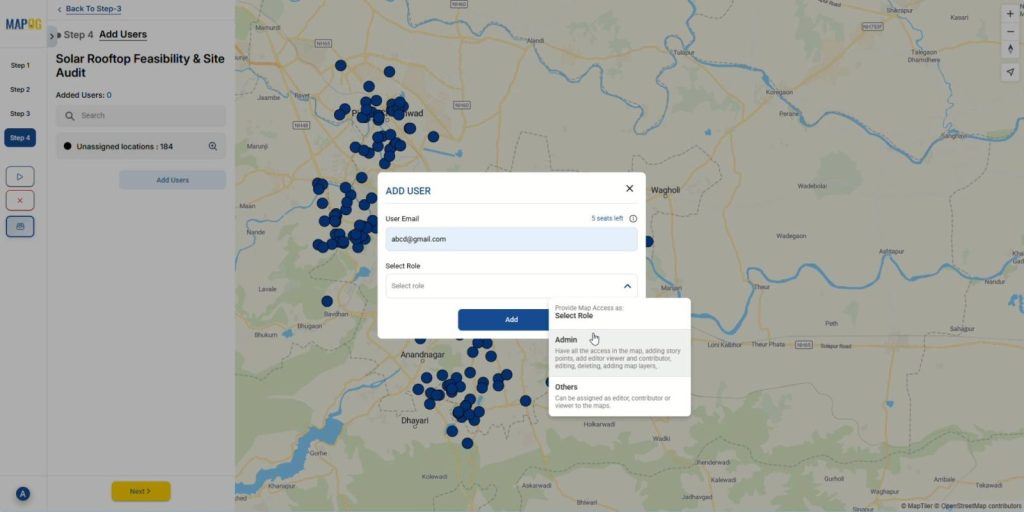
Following that, select the added users from the “Select Member” dropdown and click on “Invite” to add them as contributors.

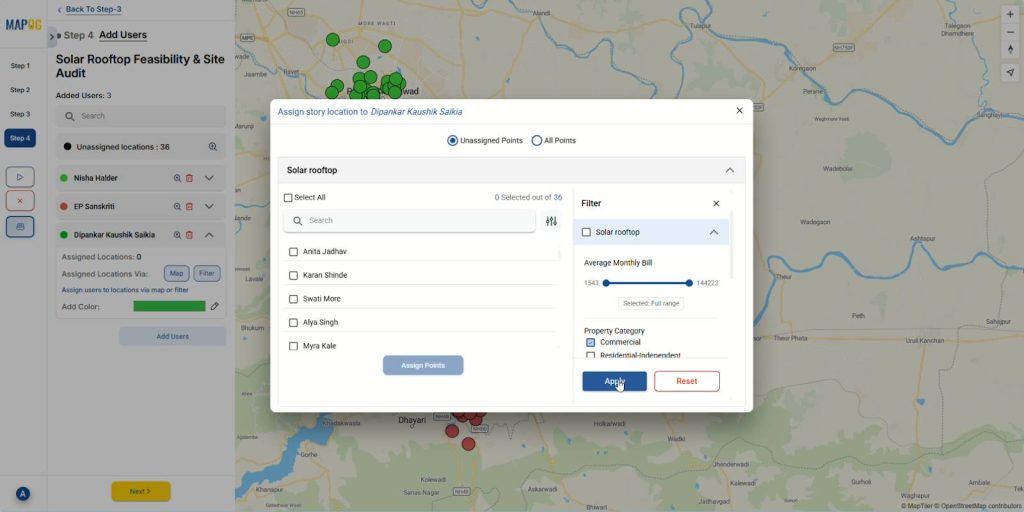
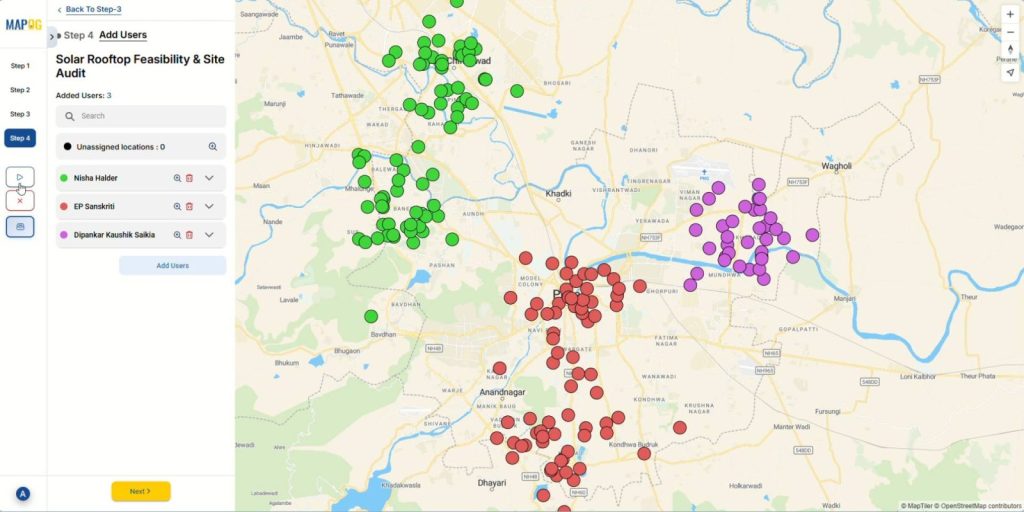
After adding contributors, click on any contributor and select the map option to draw a polygon around customer locations to assign to that specific contributor.
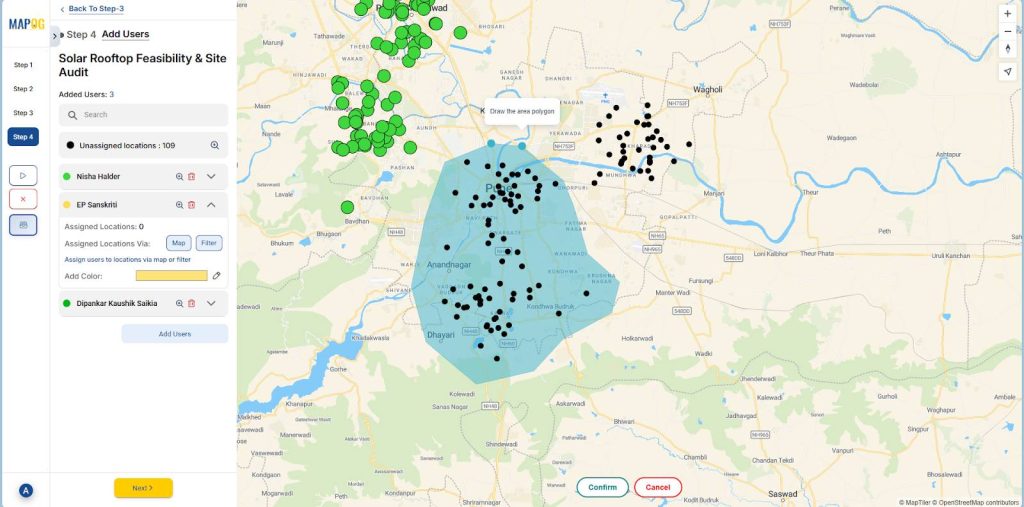
Moreover, to make location assignment more dynamic, there is an option to filter location points based on different attributes and assign them to contributors.
6. Launching the survey
Once you’ve assigned contributors, click on the launch button to start your project.
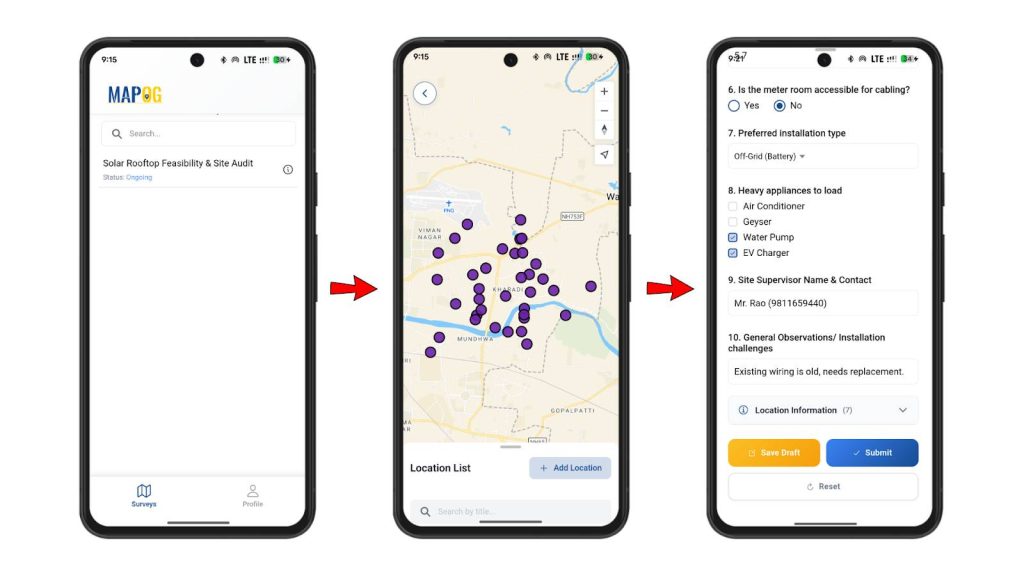
The assigned contributors can then access their designated locations from the MAPOG Contributor App and fill in all the notes and information directly from the field.
7. Review and monitoring
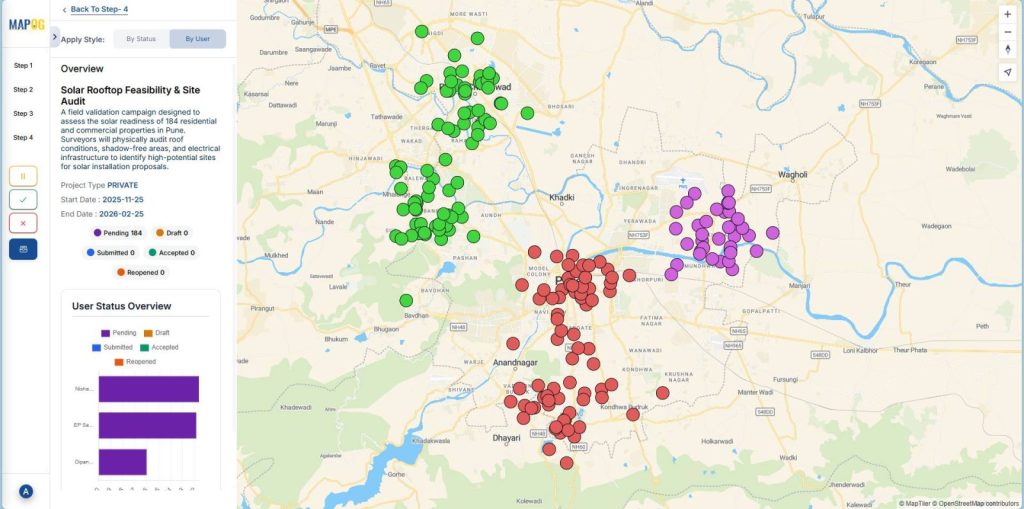
Finally, back in the platform, the overview panel allows you to monitor progress and data collected by contributors in real-time.

Industries and Domains Benefiting
- Telecommunications and IT Services: Tracks infrastructure, installation details, and manages repairs.
- Healthcare and Medical Equipment: Maintains records and manages compliance.
- Manufacturing and Production: Schedules preventive maintenance, monitors equipment, and reduces downtime.
Conclusion
The ability to add notes and important information to customer locations from the field transforms static records into living documentation reflecting conditions for smarter decisions. With tools like MAPOG, businesses move beyond outdated processes into real-time collaboration that improves service quality, strengthens team coordination, and keeps every customer touchpoint documented.