Whether you are managing a business network, tracking customer locations, or simply organizing site visits, adding contact details and notes directly on the map can make your workflow far more efficient.
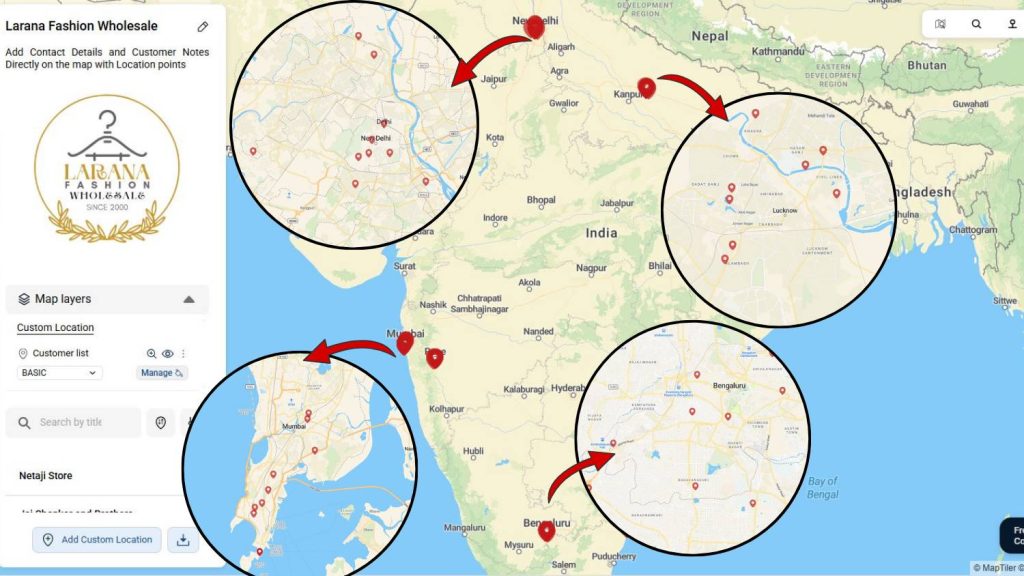
Traditional GIS platforms can be complex, but MAPOG allows users not only to visualize data but also to attach real-world data to each location point. By linking contact details and customer notes to specific location points on a map, MAPOG transforms an ordinary map into an interactive, data-rich workspace. It helps you not only see where your clients or projects are located but also store context-rich details, making your map a powerful tool for location-based insights.
Key Concepts
Instead of keeping customer information scattered across spreadsheets or notes, you can centralize data on a map. Each location point on MAPOG serves as a digital anchor for key details such as customer name, phone number, email address, service details, and any other requirements. This turns your data into an interactive workspace and a smart dashboard. Therefore, you can instantly locate customers and view all related notes on one dynamic map dashboard.
How to Add Customer Details and Notes on a Map
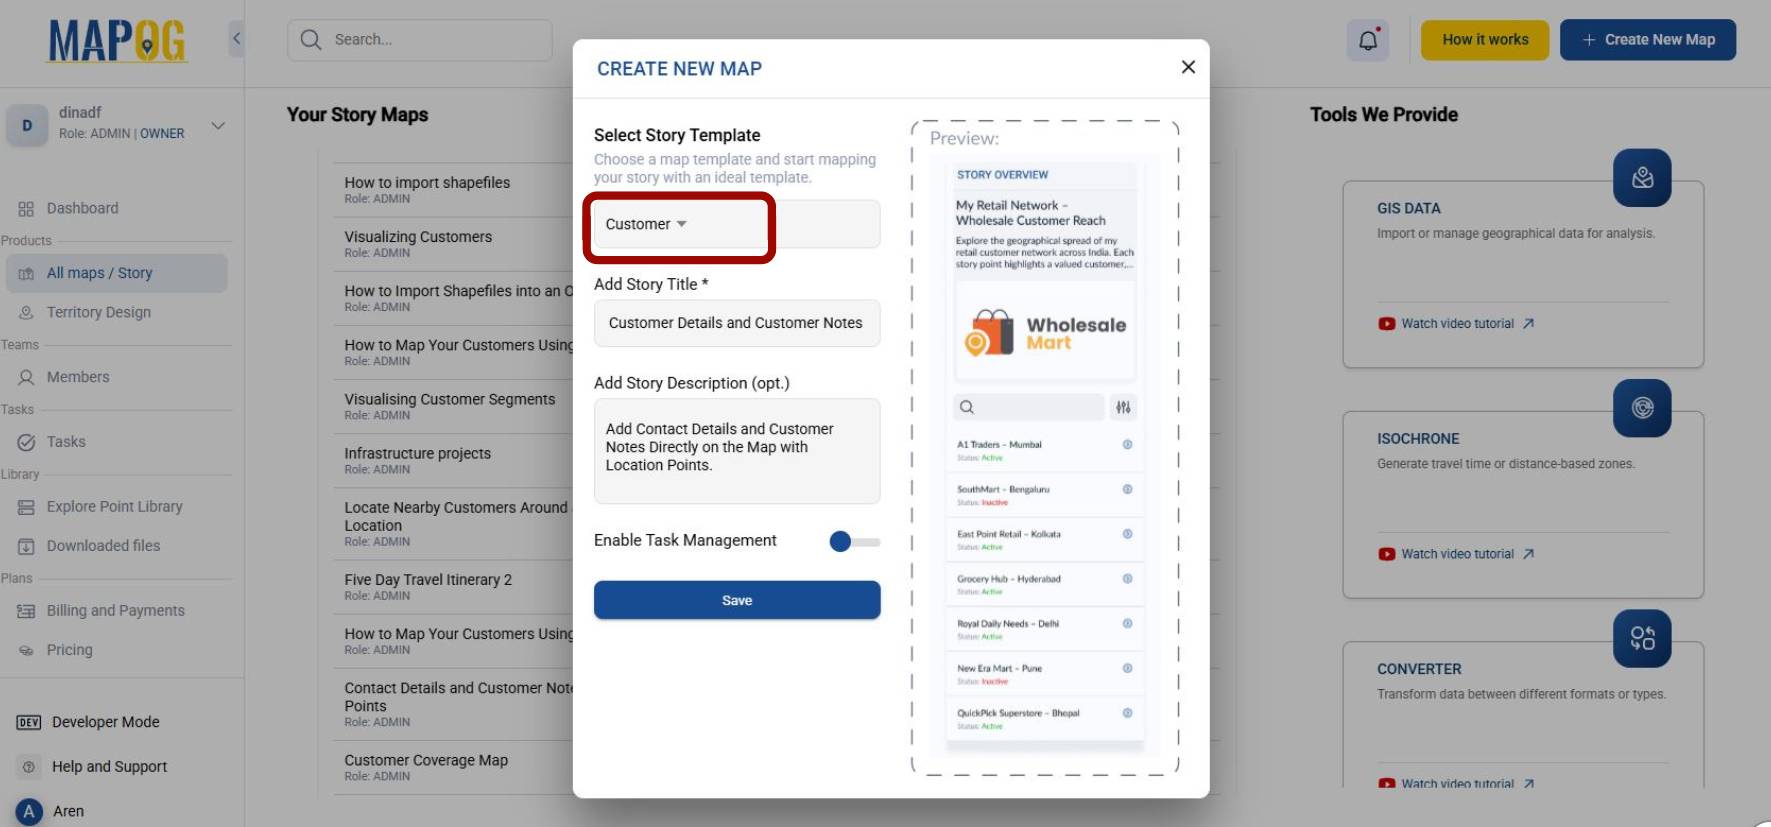
Step 1: Getting started
Go to MAPOG, click on Create New Map to get started. Select the customer in the story template and add your project Title and a short Description.
Step 2: Add New Story
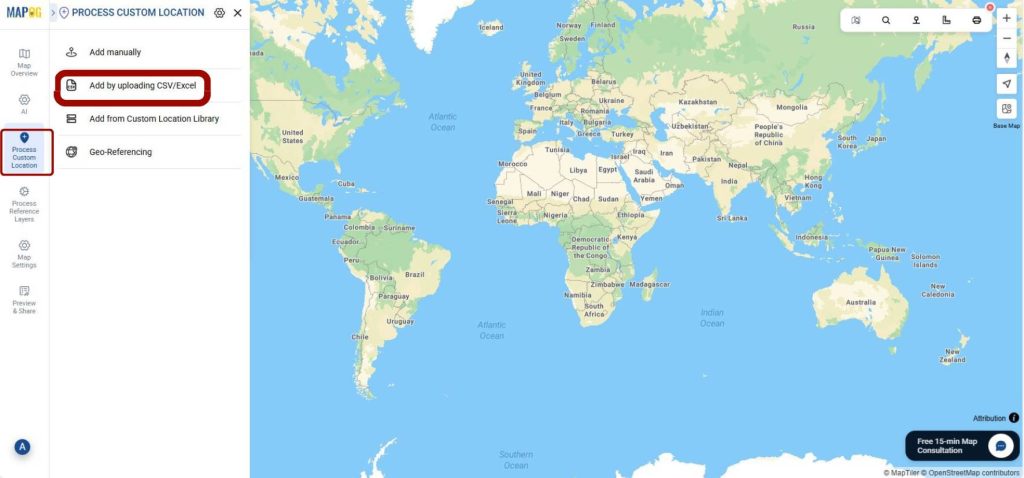
Go to Process Custom Locations and select add by uploading CSV/Excel and select file to upload your file.
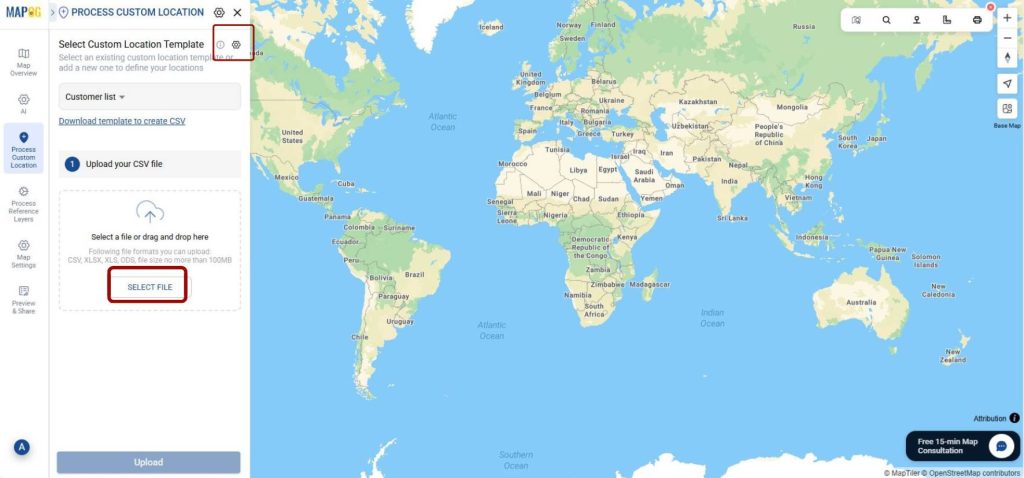
Click on Select Custom Location Template and add Location Type Title, Add color and select your Feature Type as point. Click on +Add Attributes to add important fields such as address, email, and phone number. While adding the attribute, you can select between the given attribute types-text, phone number, date, email, business hour, etc.
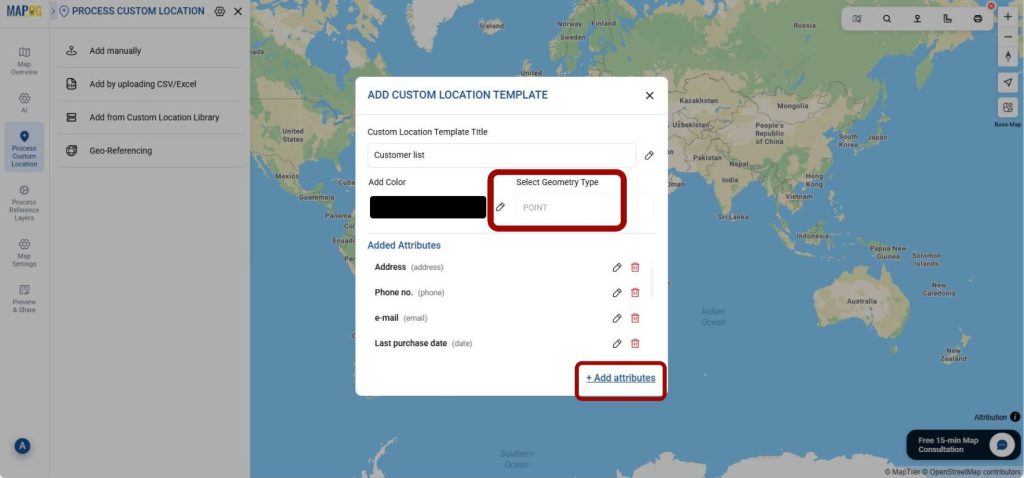
In the same way, you can also add fields related to purchase date, delivery frequency, assigned agent, product type, loyalty tier or feedback rating. All these fields will create a detailed database of the customer.
Step 3: Upload Contact Details and Customer Data on the Map
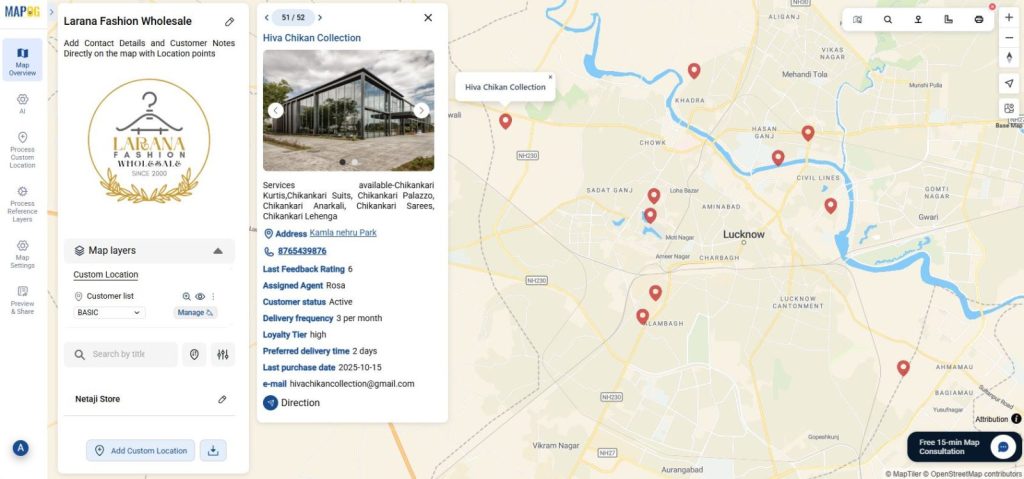
Select your custom location type from the drop-down menu and upload your file. Now match the attributes with the map fields. Also, make sure to match the Latitude and Longitude so that the location can be accurately displayed on the map.

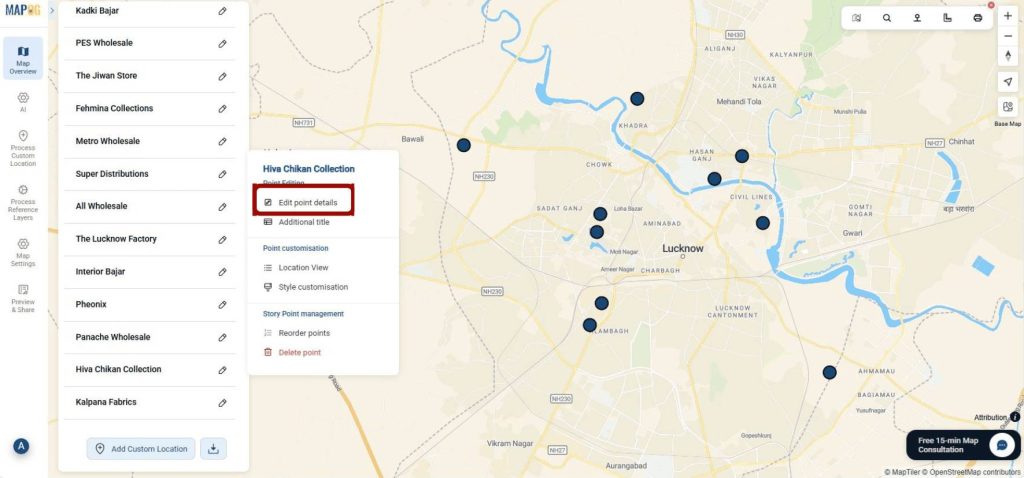
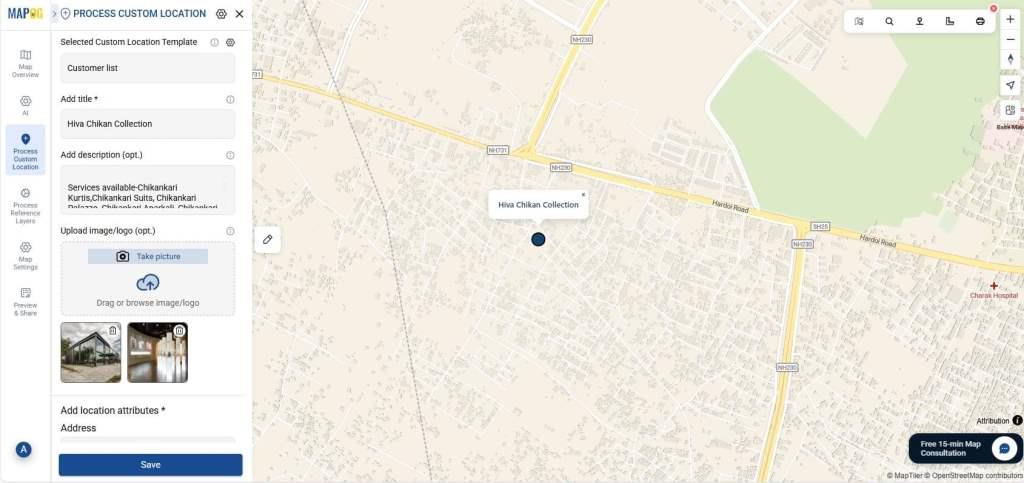
These points can also be edited using the edit point details option.
In addition to the defined photos, you can also upload photos of the site or shop.
Step 4: Customize your data
Go to Customer list and click on Add Layer Style to customize the icons.
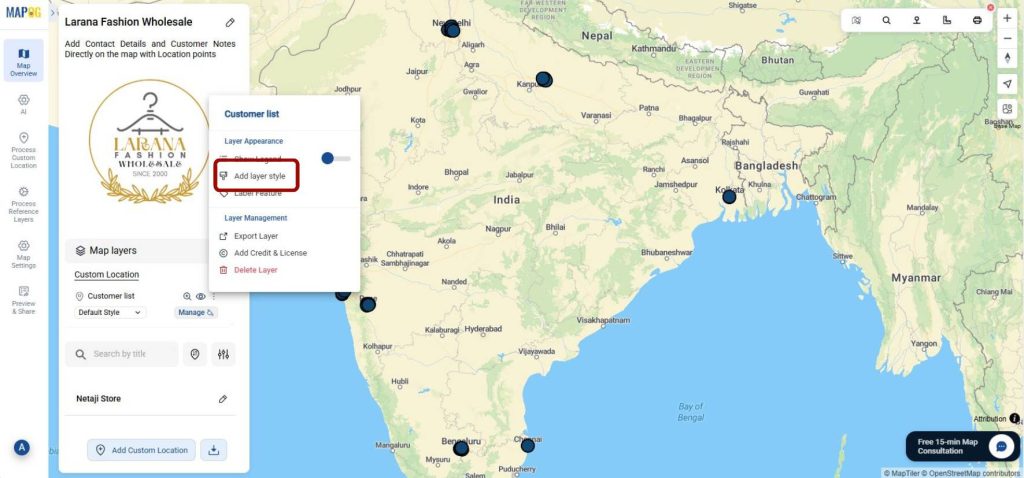
Select a suitable icon from the window.
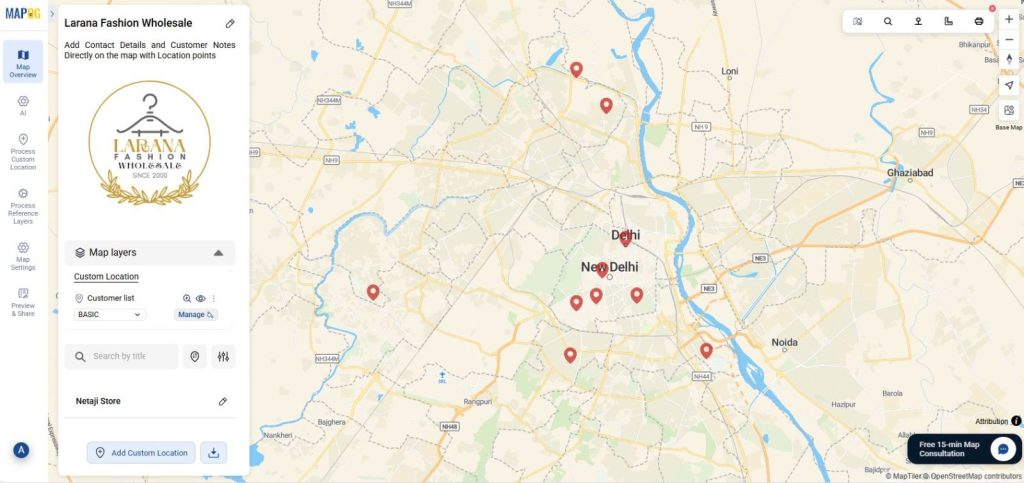
Furthermore, you can also change the color and opacity of the icon. As a result, you can now easily identify all the locations on the map.
How Adding Contact Details and Customer Data Directly on the Map Helps You
Collect, organize, and visualize information across locations by using this practical and time-saving tool. Retail and delivery services can manage client addresses, update delivery status, or log special customer requests on the go. Public Service Departments, like utilities or municipal planners, benefit from mapping complaints, service points, and maintenance notes visually. In real estate, professionals can instantly mark property locations, buyer or seller notes, and track visits.
Conclusion: From Map to Insight
The ability to add contact details, customer details, and notes directly on the map transforms how businesses and professionals manage spatial data. With MAPOG, users go beyond traditional mapping and create dynamic, interactive systems that integrate customer data, analytics, and location in one view.
Whether you are tracking field operations, managing sales territories, or maintaining site records, make the process seamless by connecting every point on the map with meaningful information. In short, transform how you organize visualize on your location-based data and turn your map into actionable, insight-driven tools.
More from MAPOG:
- Safari Itinerary on Map: Explore Wildlife Destinations Visually
- Track Task Progress on a Map Dashboard (Completed vs Pending)
- How to Choose the Perfect Retail Shop Location Using Isochrone Maps – Boost Foot Traffic & Sales
- How to Map and Share Retail Store Locations for Your Franchise?
- How to Upload and Visualize CSV Data on a Map