A Story Map of Monuments using MAPOG transforms how we explore cultural heritage. Instead of static lists, it offers a visual journey through India’s architectural legacy—organized by district or state.
Whether you’re promoting tourism, documenting history, or supporting heritage conservation, a story Map of Monuments using MAPOG brings depth and context that traditional formats can’t match. Like the Greatest Inventions Across the World – A Story on the Map, these visual narratives make information engaging and accessible.
As seen in Embedding Maps Boosts Website Engagement: Real Estate Agents, maps also enhance user interaction online. With MAPOG, building a Story Map of Monuments is easy—even without GIS skills.
Understanding the Key Concept: Story Map of Monuments
A Story Map of Monuments using MAPOG turns each monument into more than just a point on a map—it becomes a curated story, enriched with images, background, architecture details, and visitor insights. The goal? To make India’s rich heritage easier to explore, understand, and appreciate. Similar to how ancient learning sites are visualized in Journey Through India’s Ancient Gurukulas, this approach blends history and geography to offer an engaging perspective on cultural legacies.
Why it matters:
- Tourism Planning: Spot clusters of monuments to plan regional travel routes.
- Conservation Priorities: Highlight neglected or underrepresented sites for restoration focus.
- Cultural Education: Learn about dynasties, design styles, and history in a visual, interactive format.
Once shown on a map, this layered storytelling is far more engaging than spreadsheets or static text.
“Mapping India’s Heritage: A Story Map of Monuments using MAPOG” invites users on a visual journey across India’s architectural wonders—from ancient temples to colonial forts. Powered by MAPOG’s interactive platform, this experience reveals not only where monuments are, but what they mean—making heritage exploration immersive, educational, and intuitive.
Step-by-Step: How to Create a Story Map of Monuments Using MAPOG
Step 1: Create Your Map Project to Create a Story Map of Monuments
Start by logging into your MAPOG account. If you’re new, registration takes just a minute and is completely free.
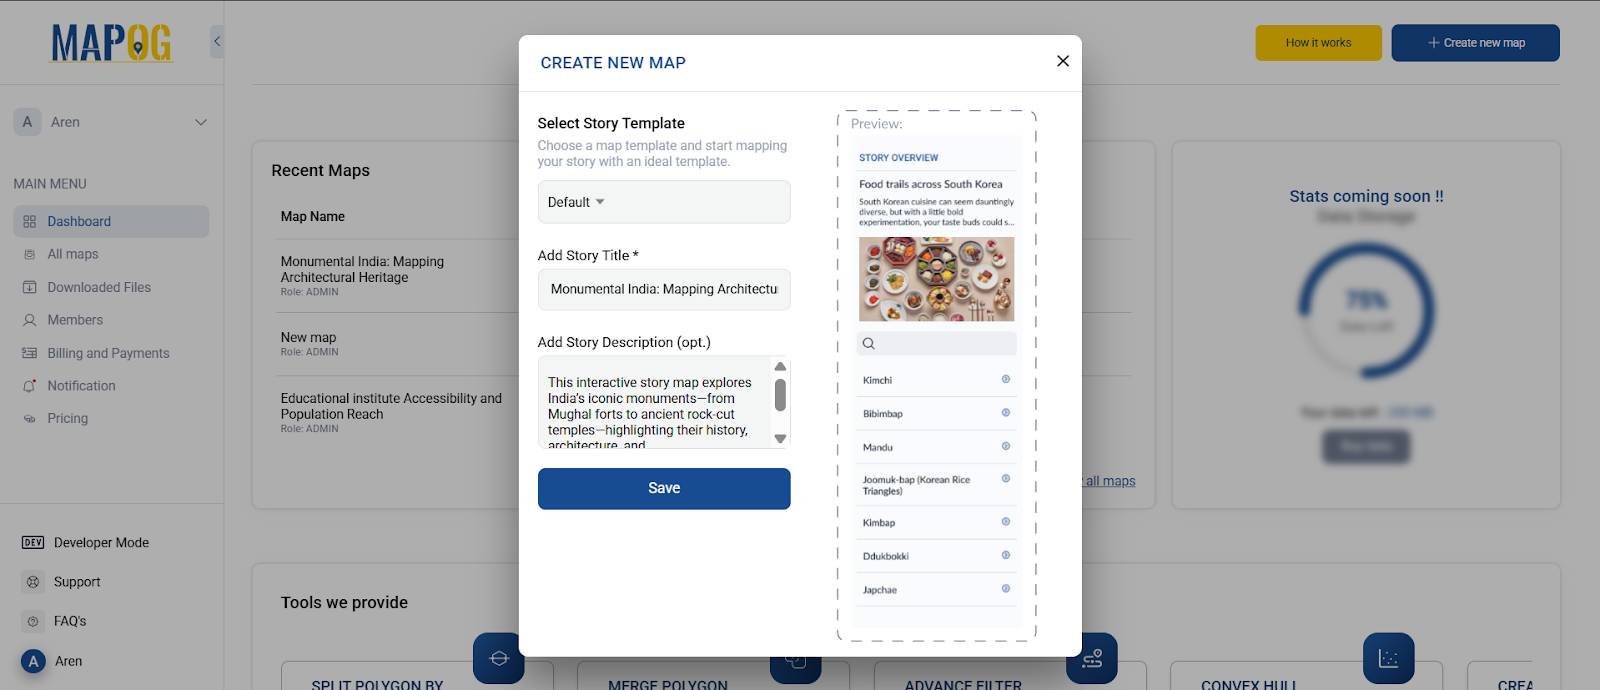
From your dashboard, click on “Create New Map.” Give your project a title like:
“Monumental India: Mapping Architectural Heritage”
Write a short, engaging description
Hit Save to create your base map.
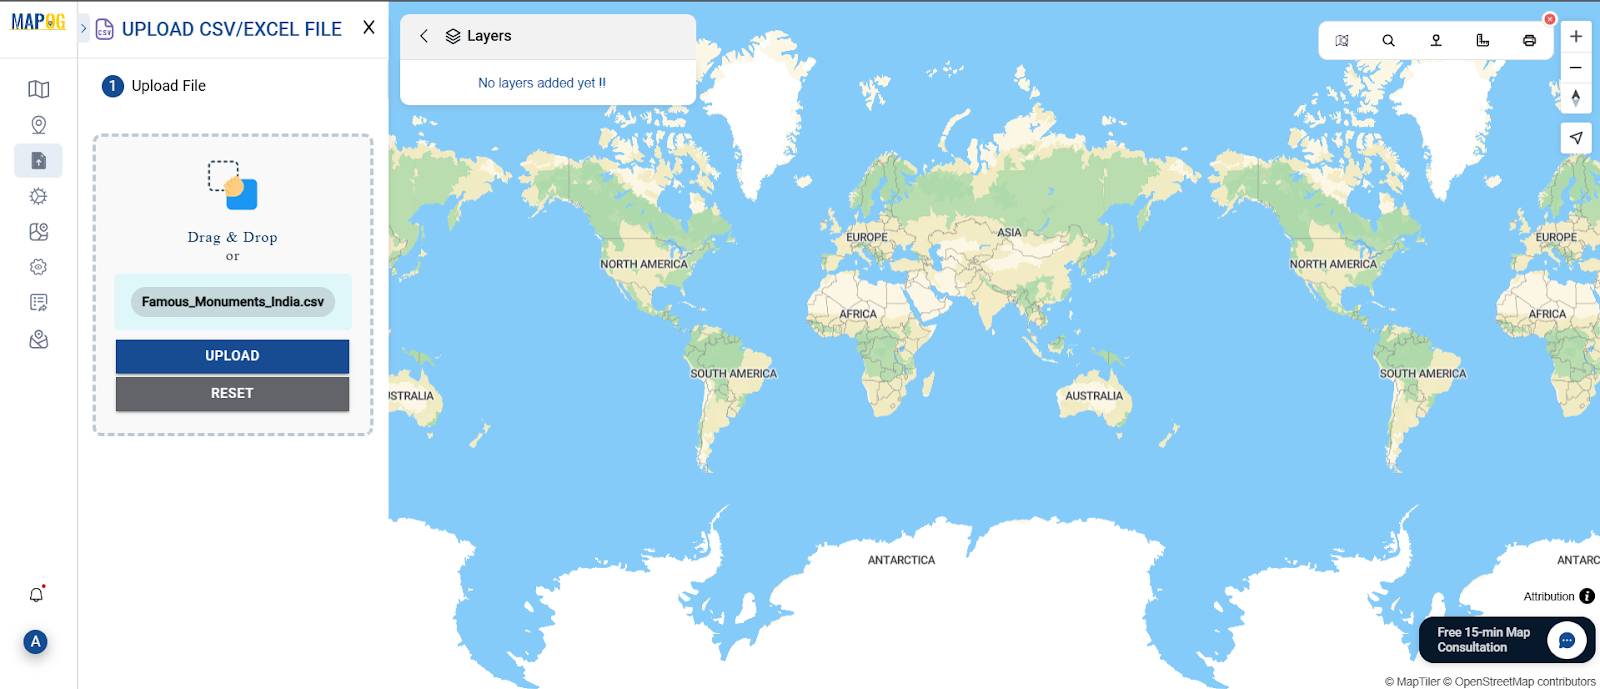
Step 1A: Upload a CSV of Monument Locations (Optional)
If you already have a CSV file with monument names, coordinates, and details:
- Go to “Add Upload Data” on the left panel
- From the four available options, choose “Upload CSV/Excel File”
- Upload your CSV (ensure it has Name, Latitude, Longitude, and optional columns like Description, Image URL, etc.)
- Ensure that Latitude and Longitude are placed in dedicated columns and clearly labeled. This allows you to accurately geolocate each city when you publish the layer.
This saves time if you’re working with pre-collected data. You can then customize or enhance these points manually.
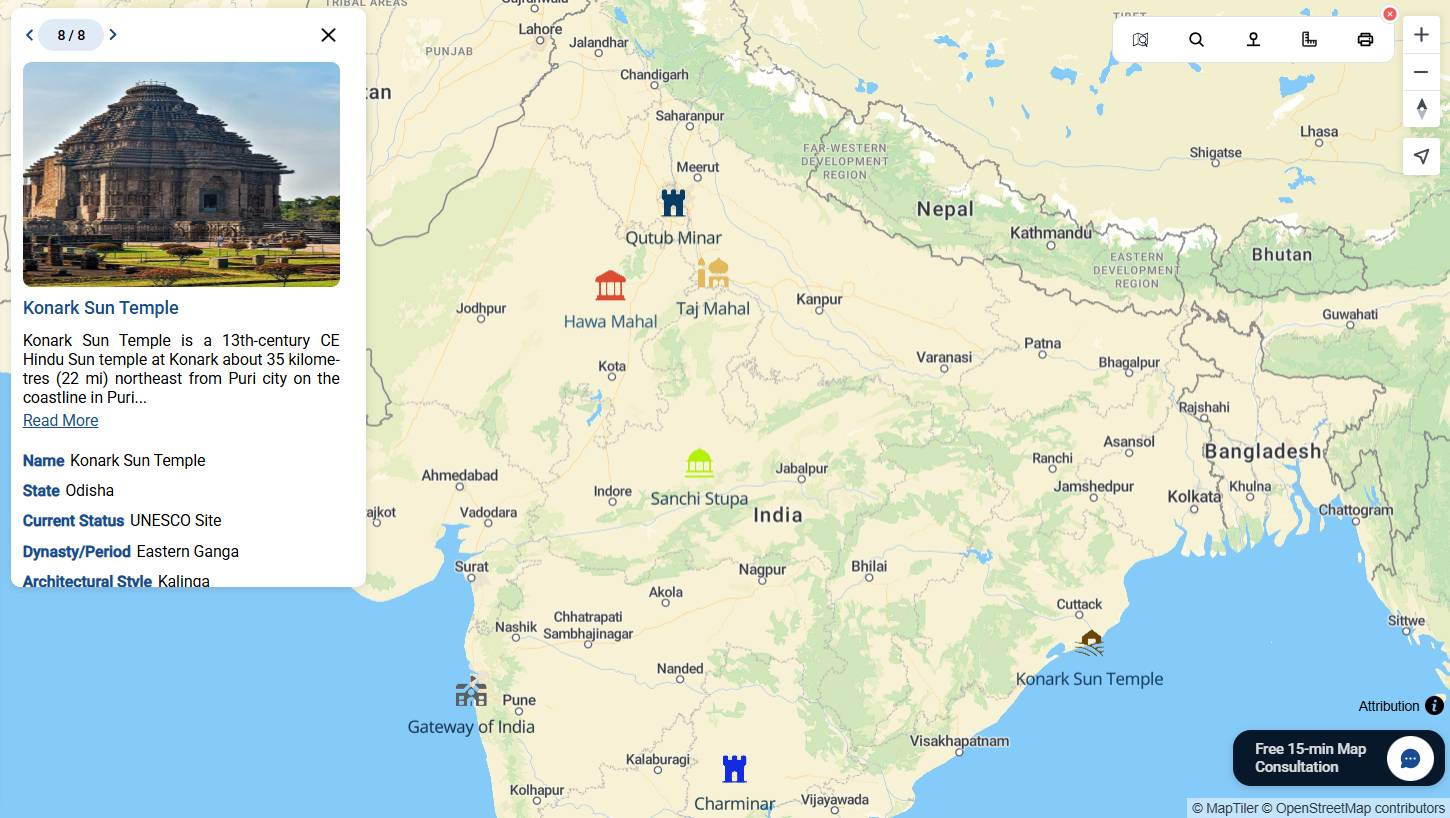
Step 2: Add Monument Points Manually
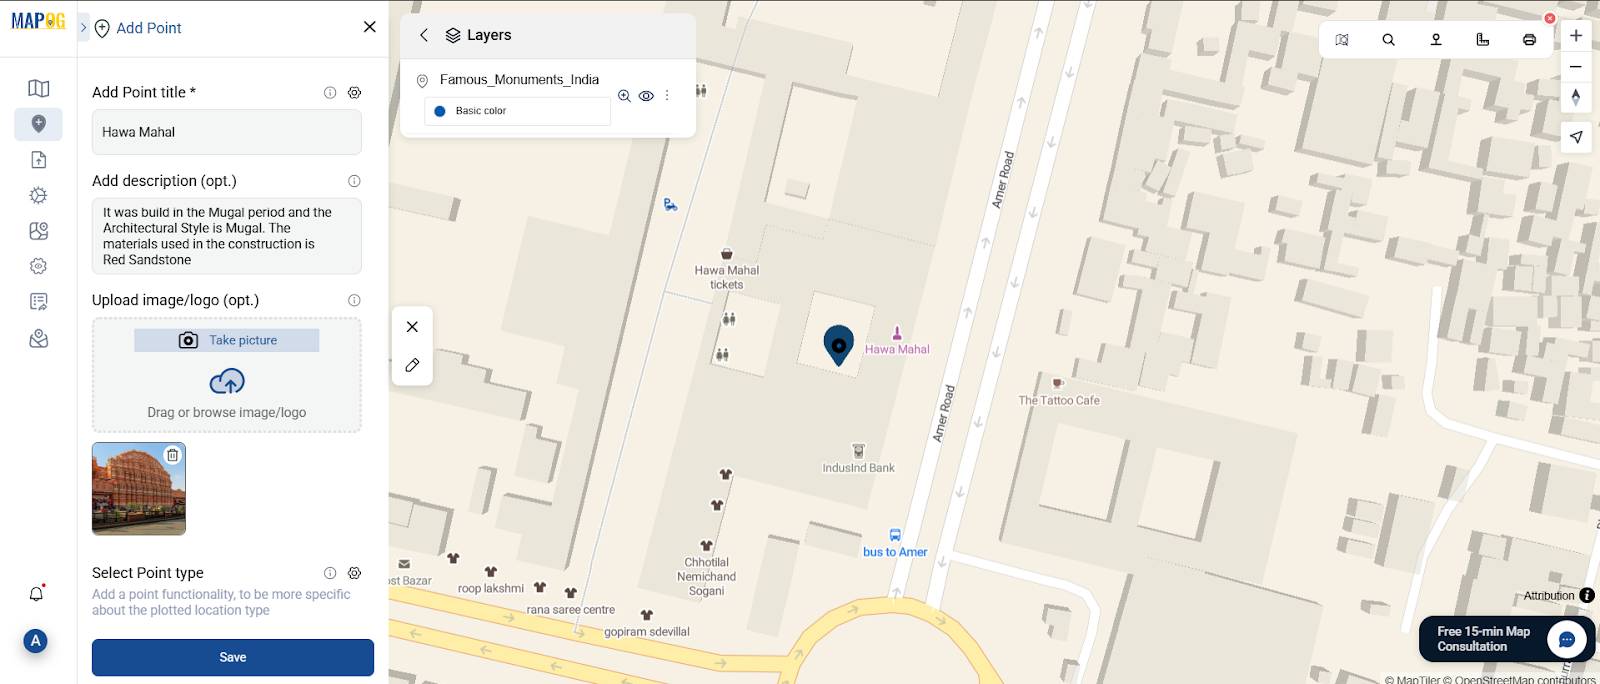
From the left panel, click “Add Story” → “Add Point Manually.”
Search for each monument by name and place it accurately on the map. For every point, include:
- A clear Title
- A short Description highlighting its history or architecture
- A relevant Image for visual context
Each pin becomes a digital monument card.
Step 3: Create Monument Types to Organize Your Map
To make your map easier to read, categorize your monuments:
- Go to “Location Type Management”
- Add new types like Monuments, etc.
- Assign icons to differentiate them visually
This helps users quickly identify the kind of heritage each monument represents.

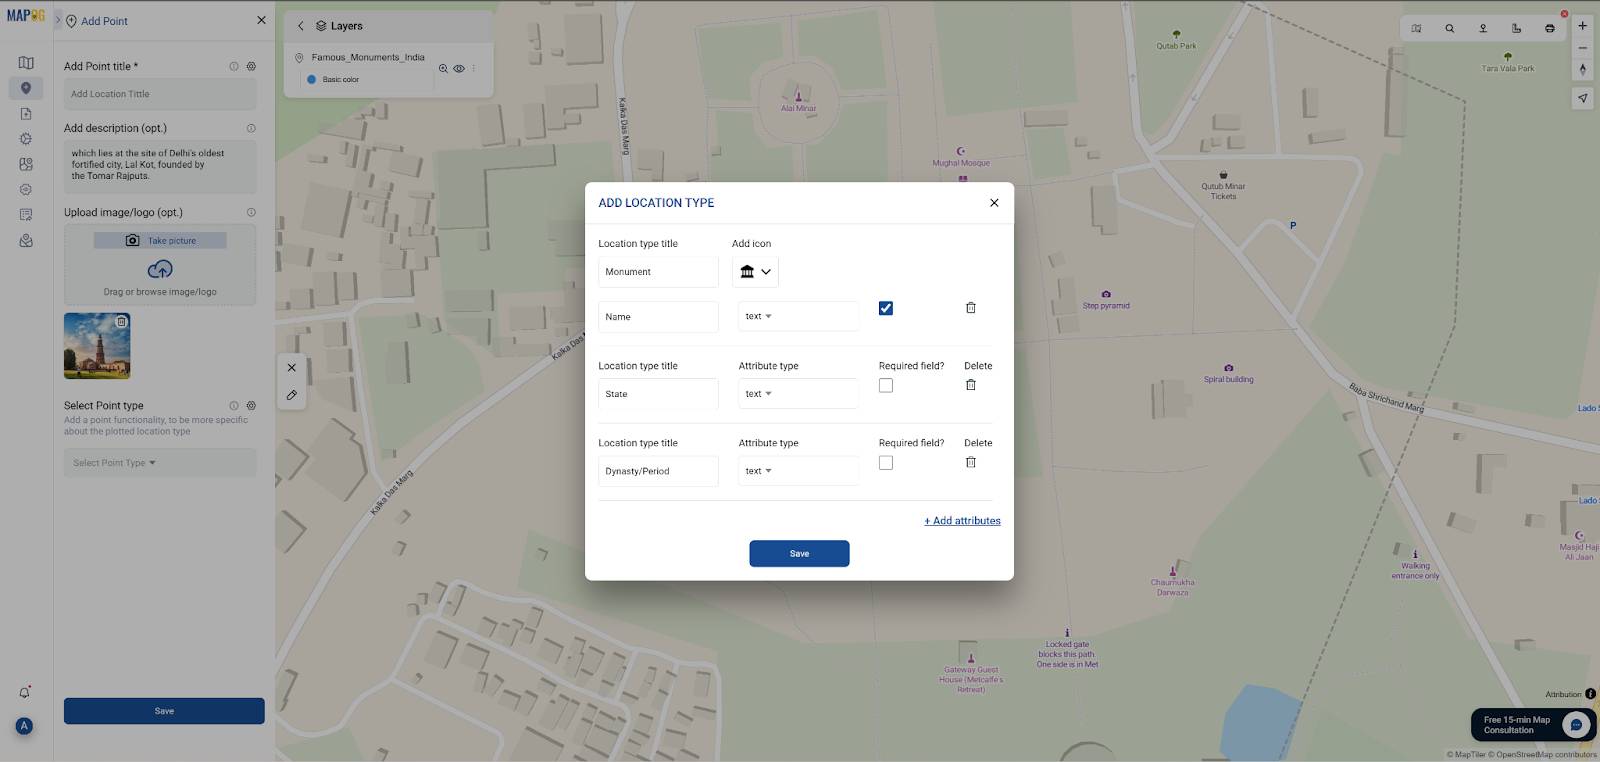
Step 4: Add Custom Attributes for Each Monument
To add depth to your map, define custom fields using MAPOG’s attribute editor.
Recommended attributes for monument mapping:
- Dynasty / Period (e.g., Maurya, Mughal, Colonial)
- Architectural Style (e.g., Dravidian, Indo-Islamic, Gothic)
- Material Used (e.g., Sandstone, Marble)
- Current Status (e.g., Preserved, Under Restoration, UNESCO Site)
Define these once in the settings, and fill them in as you add each monument.
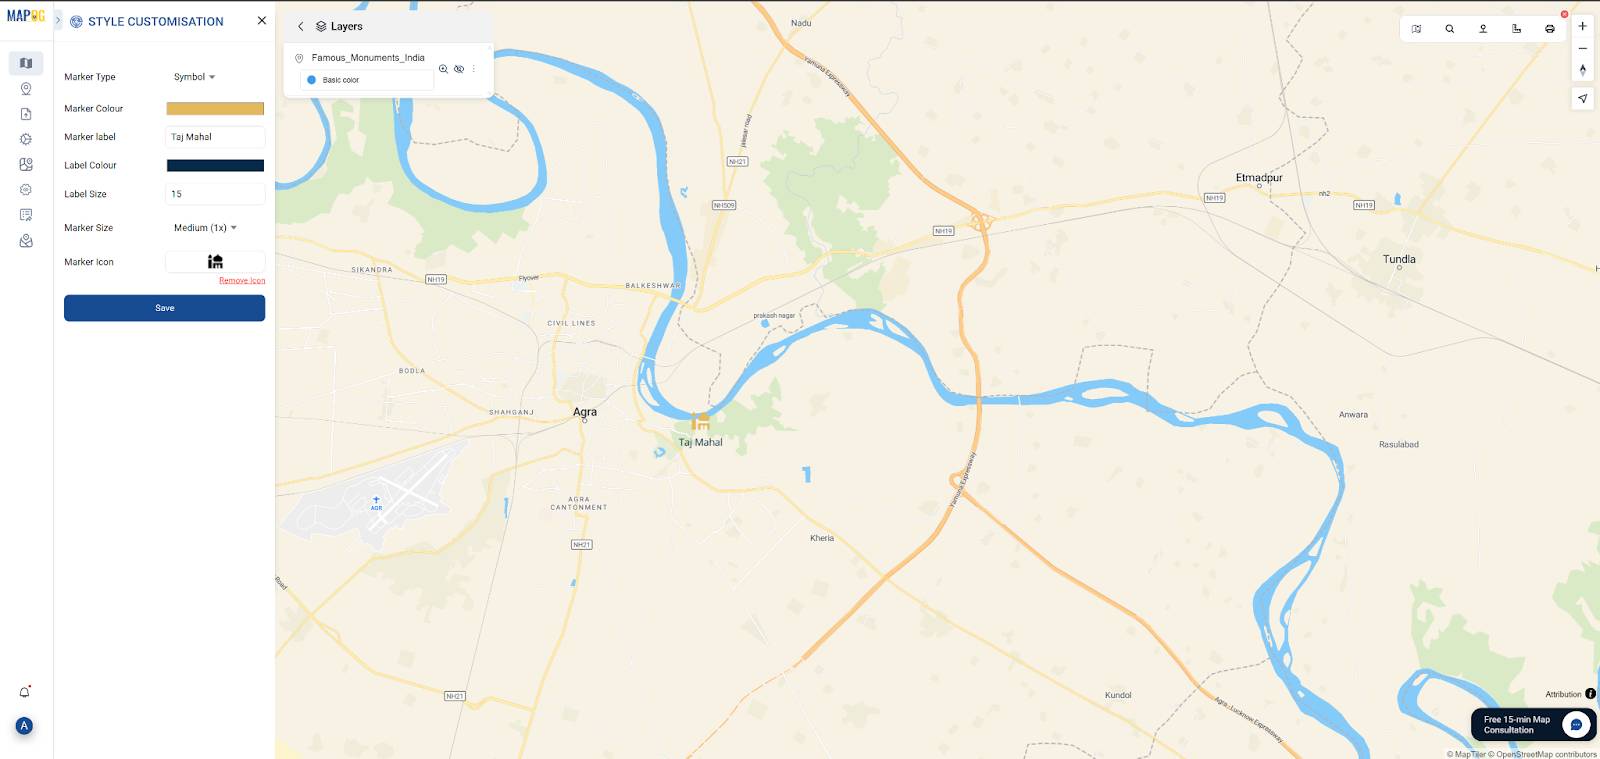
Step 5: Style Your Map for Better Visual Appeal
Click on any point and use “Point Customization” to style icons, change label visibility, and use color codes that match your categories. You can also:
- Reorder monuments thematically or historically
- Zoom to a region or show all at once
This turns your map into a visually guided tour.
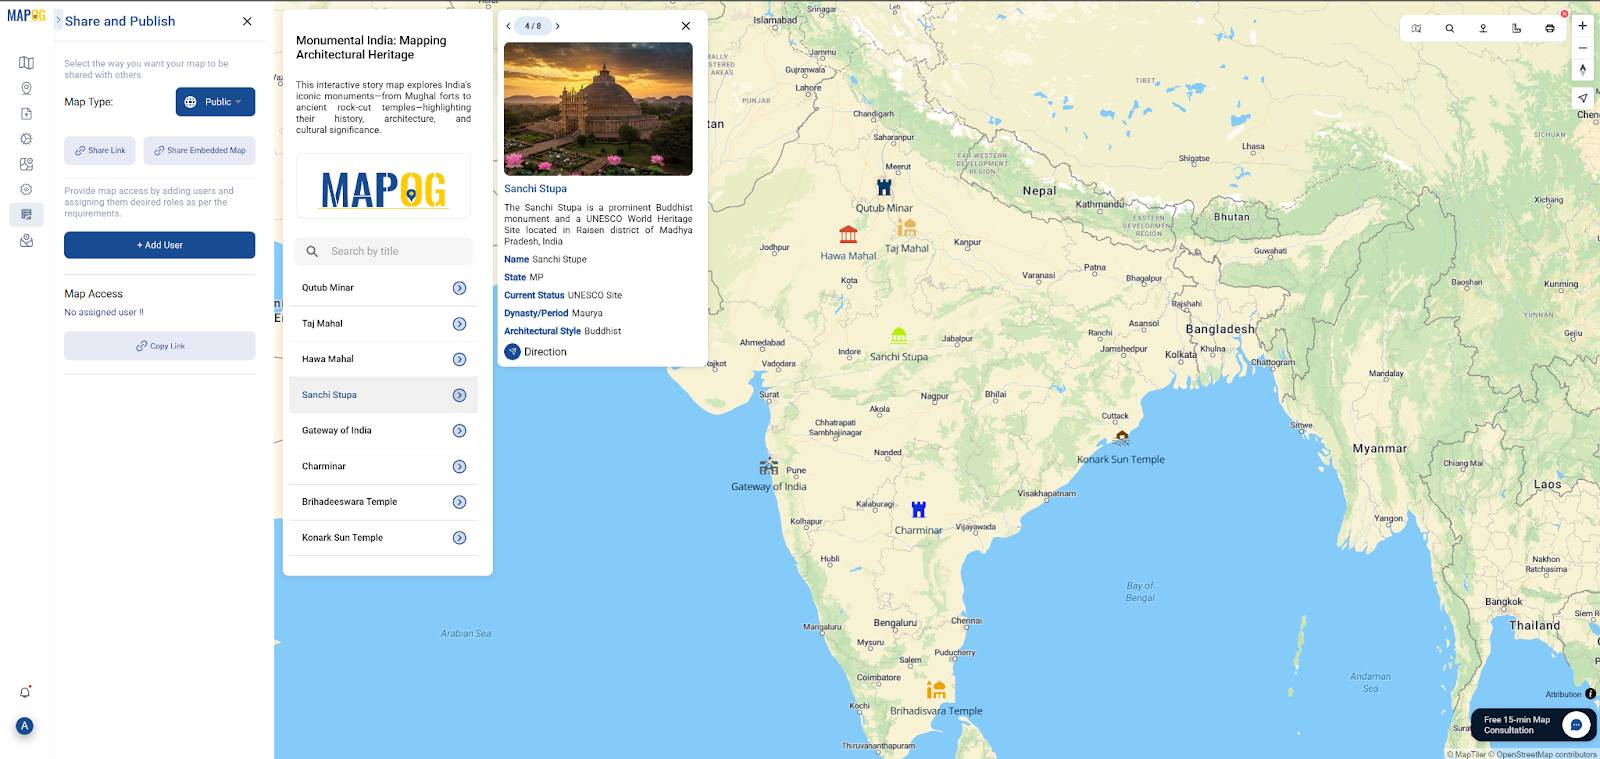
Step 6: Publish and Share Your Story Map of Monuments
Once you’re satisfied, click “Publish and Share.”
You’ll get:
- A public link to share on social media, email, or documents
- An embed code to paste directly into any Website
Whether you’re showcasing heritage in a school project or creating an interactive section for a tourism website, your story map is now ready to impress!
Industry Use & Benefits to Create Story Map of Monuments
Why is a monument story map so powerful? Because it transforms static heritage lists into immersive, location-based experiences. Real-world use cases include:
- Tourism Boards: Promoting cultural circuits with visual storytelling.
- Educators & Students: Teaching history and architecture interactively.
- Researchers & Conservationists: Documenting and analyzing heritage distribution and threats.
With MAPOG’s user-friendly interface and media-rich storytelling tools, even non-GIS users can create compelling maps that showcase India’s rich architectural legacy across regions.
Conclusion: Map, Tell, and Share Monumental Stories
Creating a story map of monuments isn’t just about mapping locations—it’s about narrating heritage, evoking curiosity, and enabling exploration. With MAPOG, you can easily build, customize, and publish your map to share cultural knowledge and connect people to the stories behind India’s most iconic sites.