In today’s real estate market, basic listings no longer impress buyers. Instead, they want interactive, visual experiences that show both the property and its surroundings. To meet this demand, interactive property map real estate highlight nearby amenities such as parks, schools, and metro stations. As a result, buyers gain a deeper understanding of the property’s value and location context.
Thanks to the MAPOG a no-code platform, real estate professionals can now easily create dynamic maps without the need for technical skills. This, in turn, makes it simple to showcase properties while also boosting engagement.
Key concept : An Interactive Property Map
An interactive property map effectively showcases various types of real estate listings including apartments and commercial spaces by using polygons. Additionally, MAPOG takes this experience further through features such as Category Map, Location Type Management, and Story View, which together help you present listings in a clear, engaging, and informative visual format.
StepbyStep Guide to Build an Interactive Property Map in MAPOG
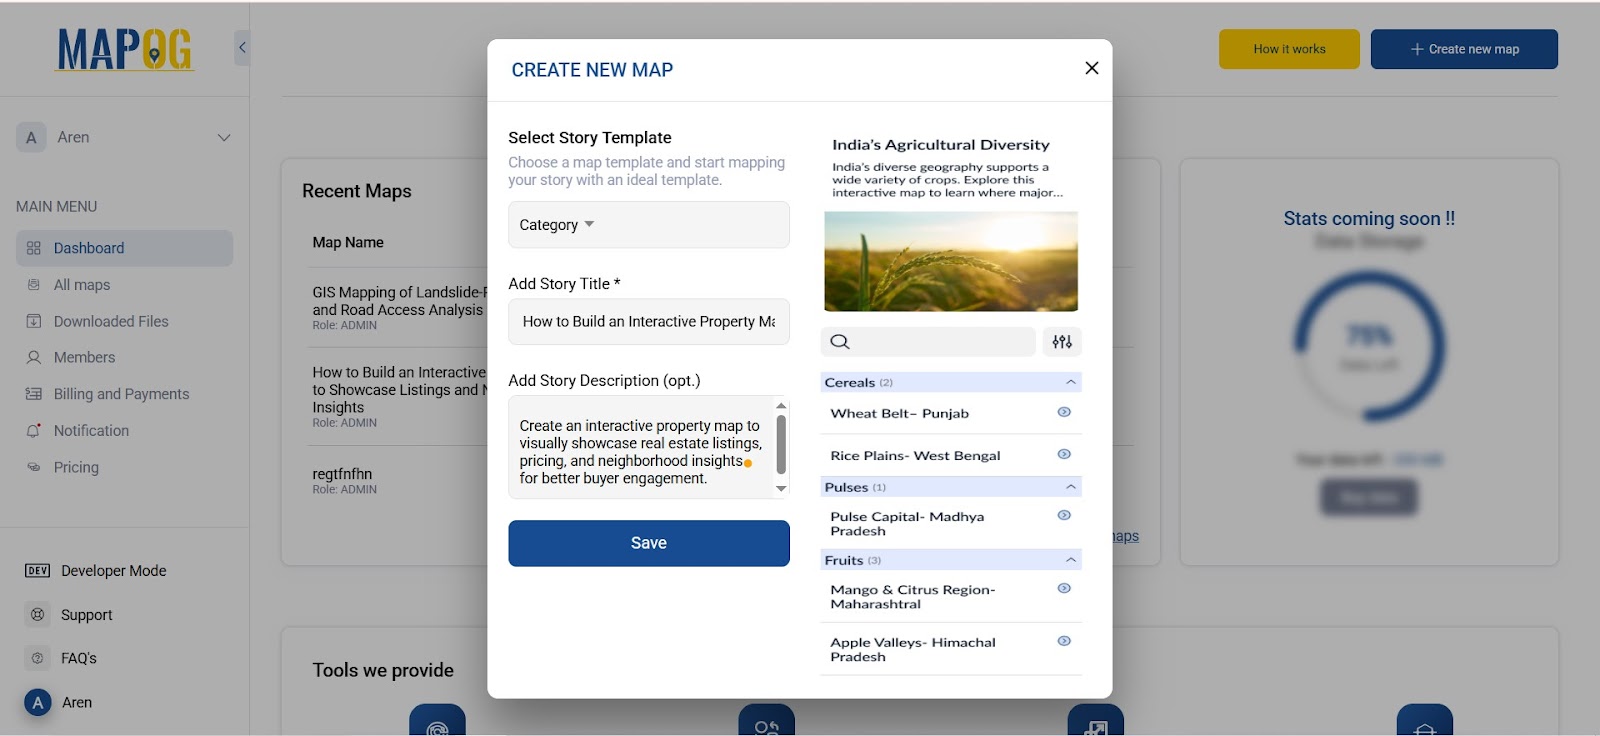
Step 1: Create a New Interactive Property Map Real Estate Template
Begin by going to MAPOG and clicking on “Create New Map.” Select “Category Map” as your template. Give your map a descriptive title and add a short description. Save the map to begin.
Step 2: Search the Area, Select Category, and Create a Polygon
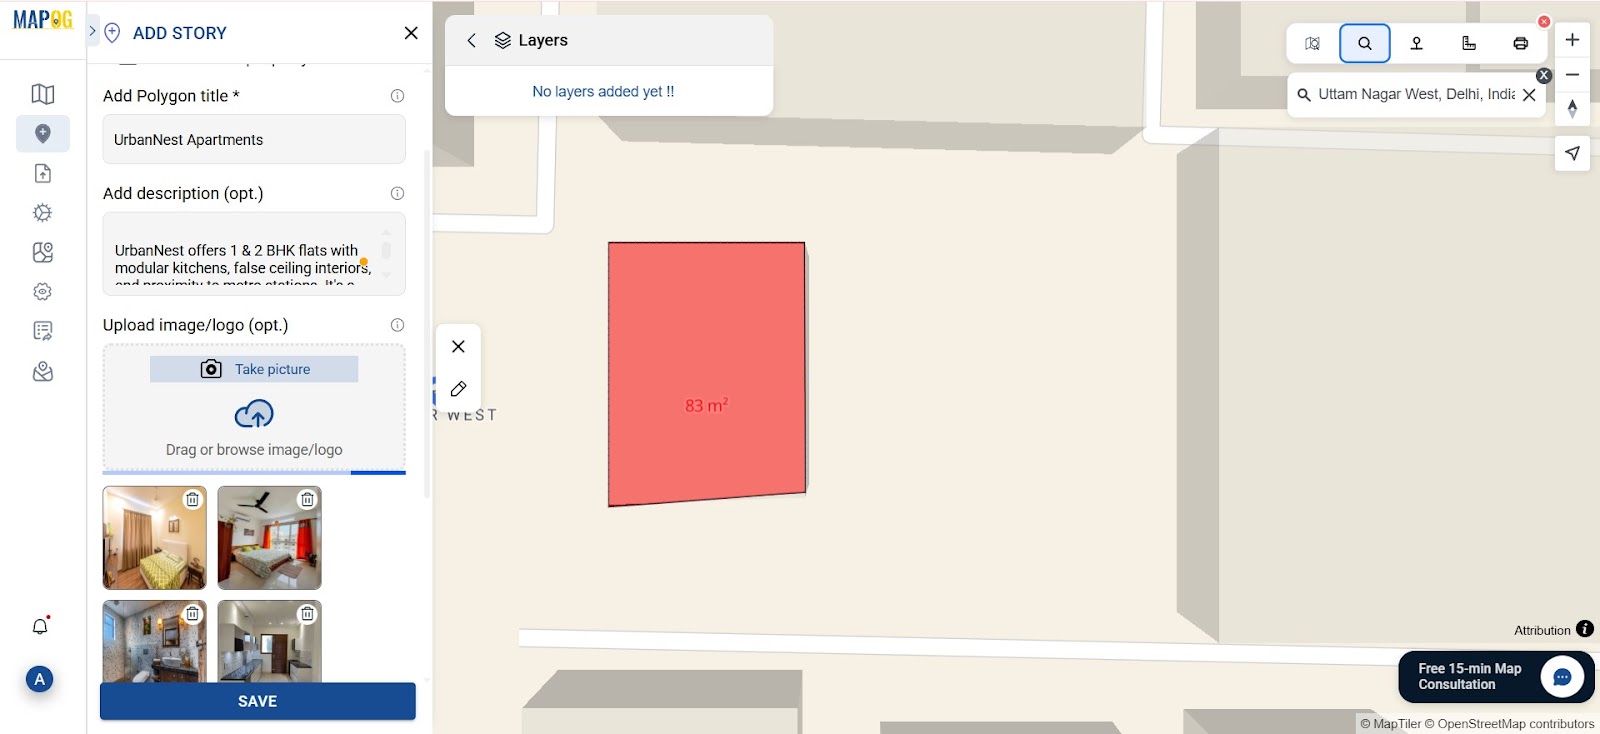
Next, click on Add Story and search for the city from the search bar, and use the drawing tool to outline the property’s boundary as a polygon. Then click Settings Button of select category then add the categories like apartment, villa, commercial property
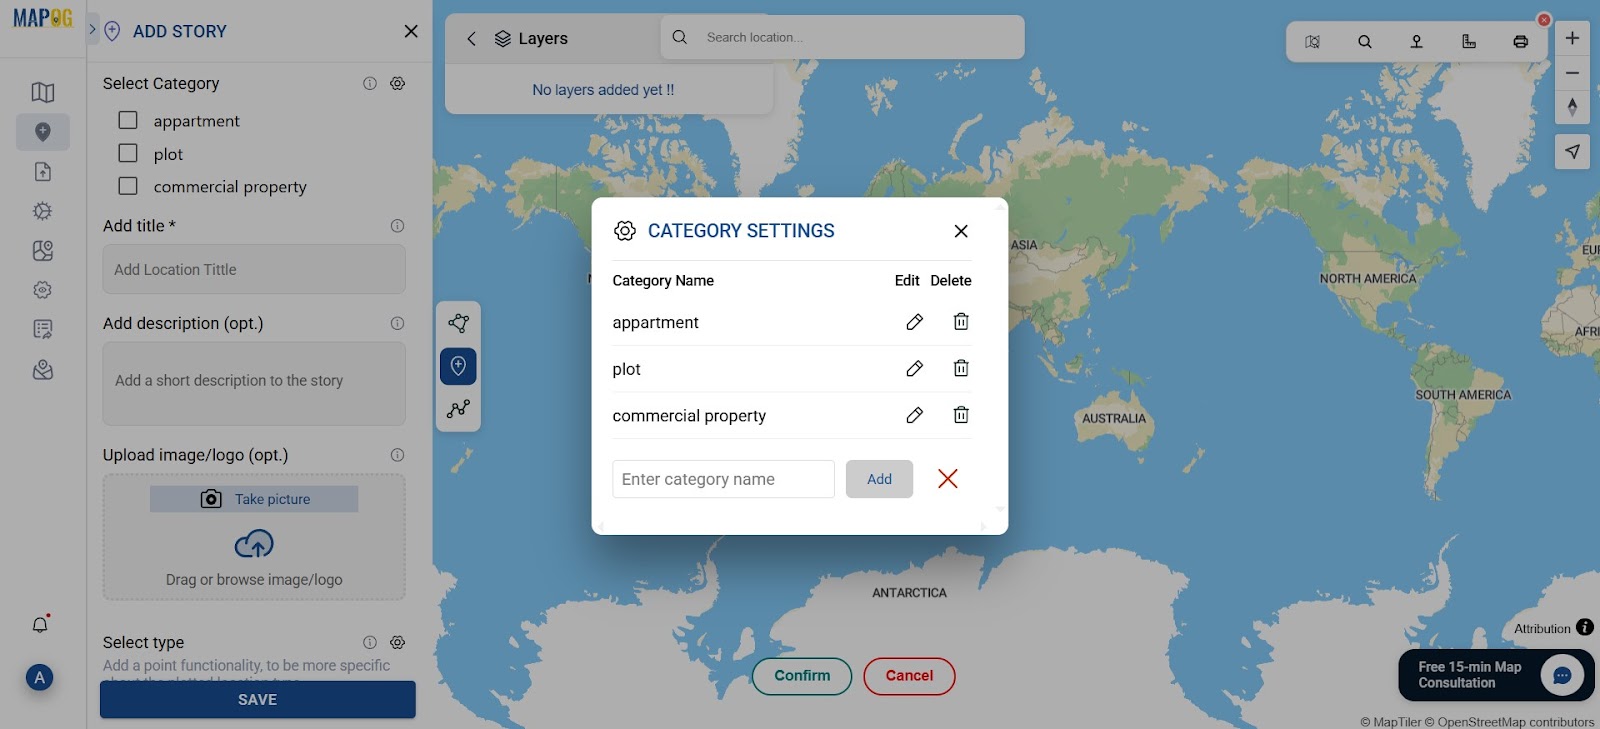
select the relevant property category, Apartment, Villa and fill in the title, description, and upload photos for a more engaging listing.
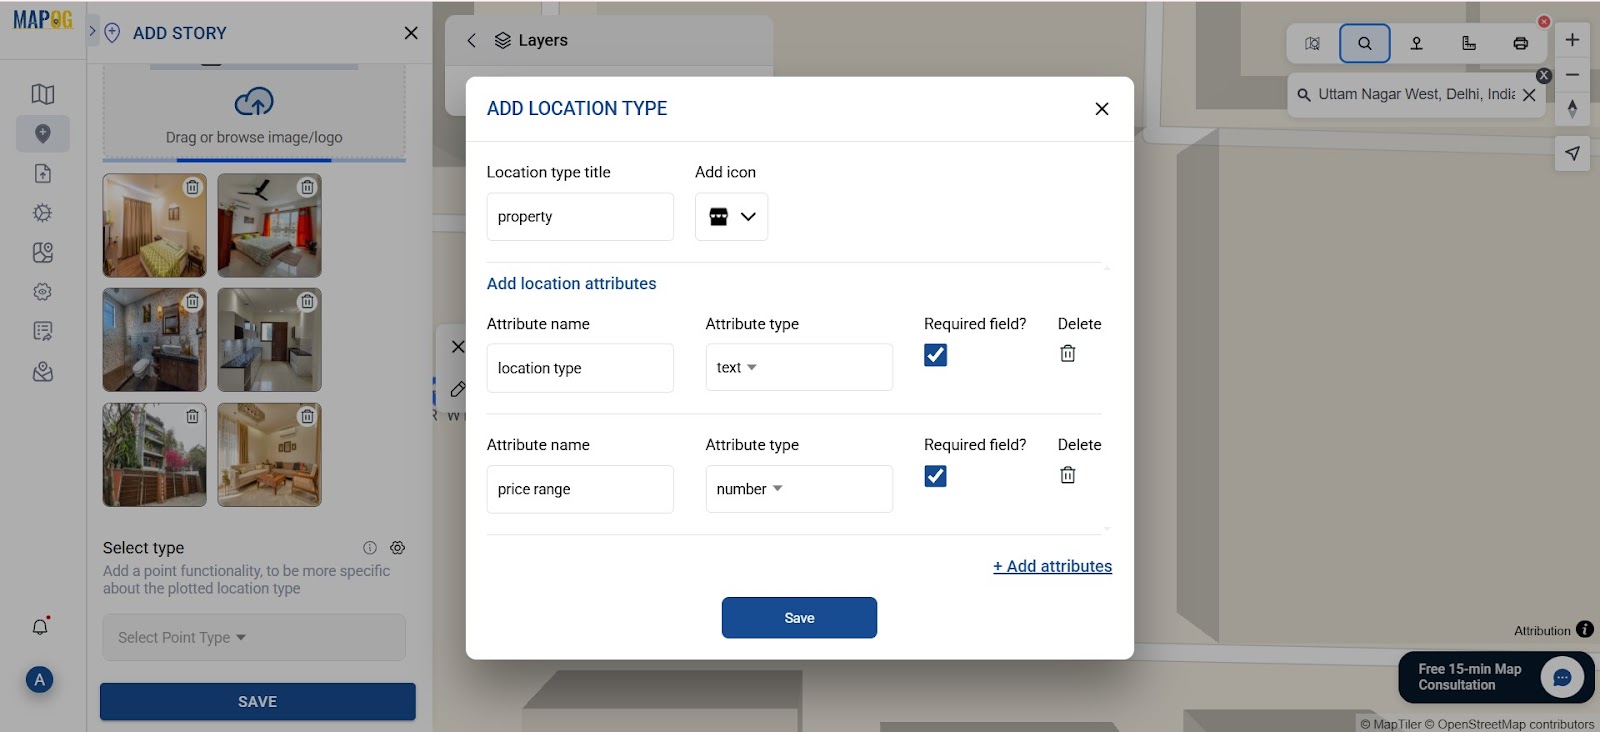
Step 3: Use Location Type Management to Add Attributes
Navigate to Location Type Management to define the data fields for each listing. Create a location type called “Property” and add custom attributes like: Location, Property Type, Price Range, etc Click Save to lock in the structure for future entries.
Step 4: Add and Fill in the Listing Details
First, go back to your map and choose the location type. Then, start adding listings. For each one, assign a category, fill in details like price and area, and also upload images with a short description. Consequently, every listing appears as a clickable point on the map.

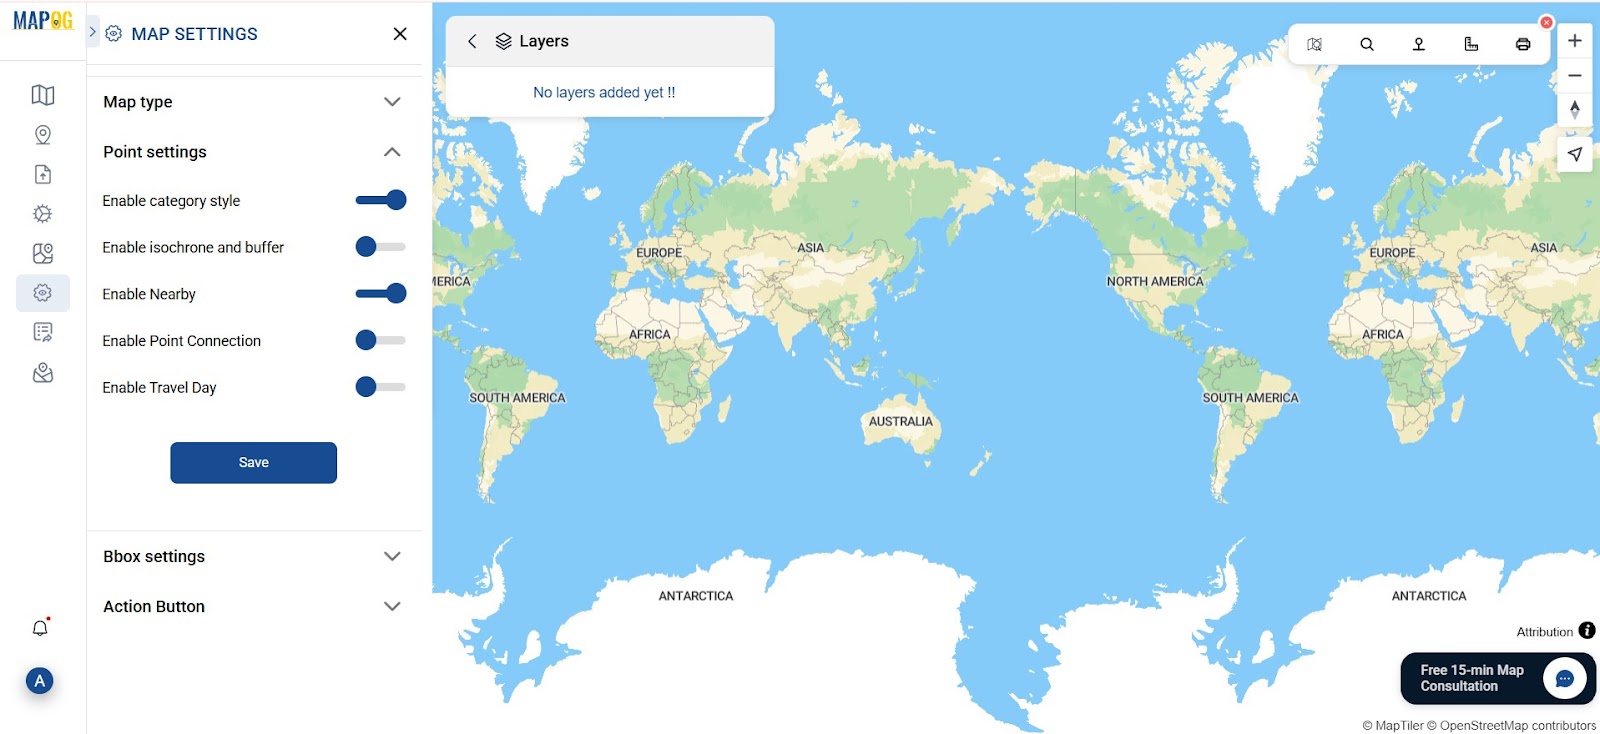
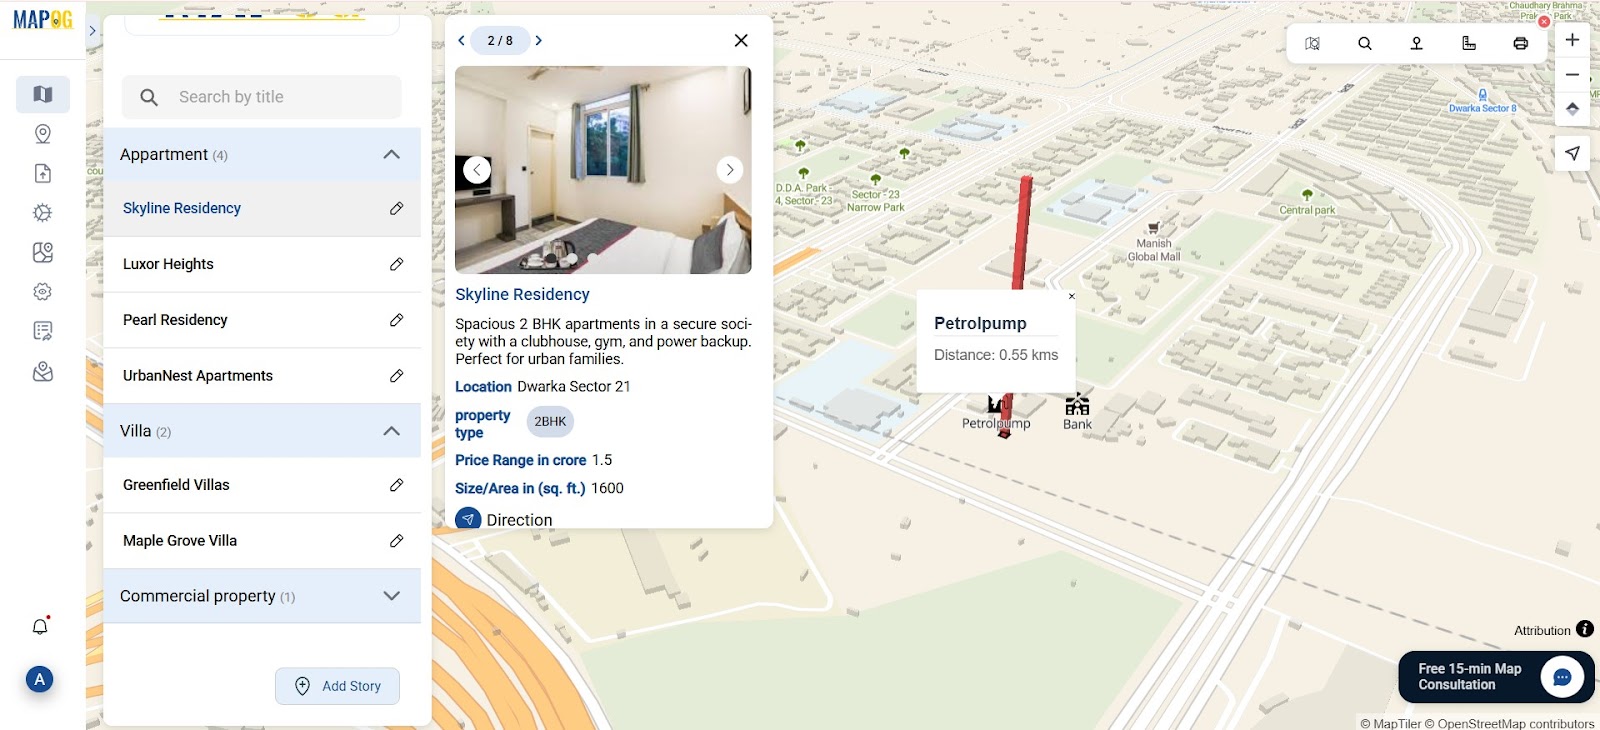
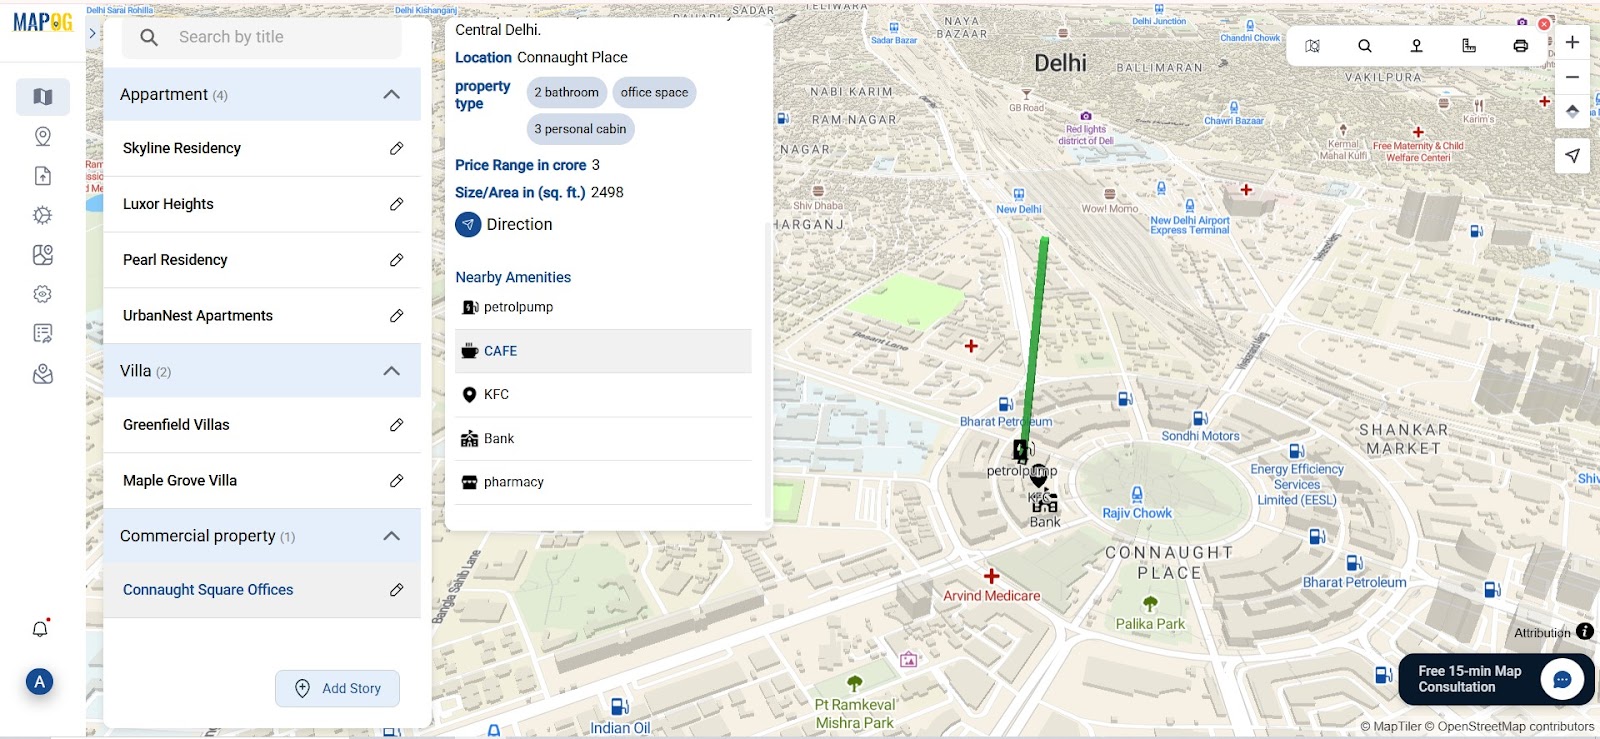
Step 5: Enable Nearby Points in Map Settings
To begin, go to Map Settings > Point Settings and then enable the “Nearby” feature. Next, add markers for key landmarks such as schools, hospitals, and parks to provide neighborhood context.
Next, use the Measure Tool from the toolbox in the upper-right corner. Simply click your property point and drag a line to the selected amenity to display the exact distance.
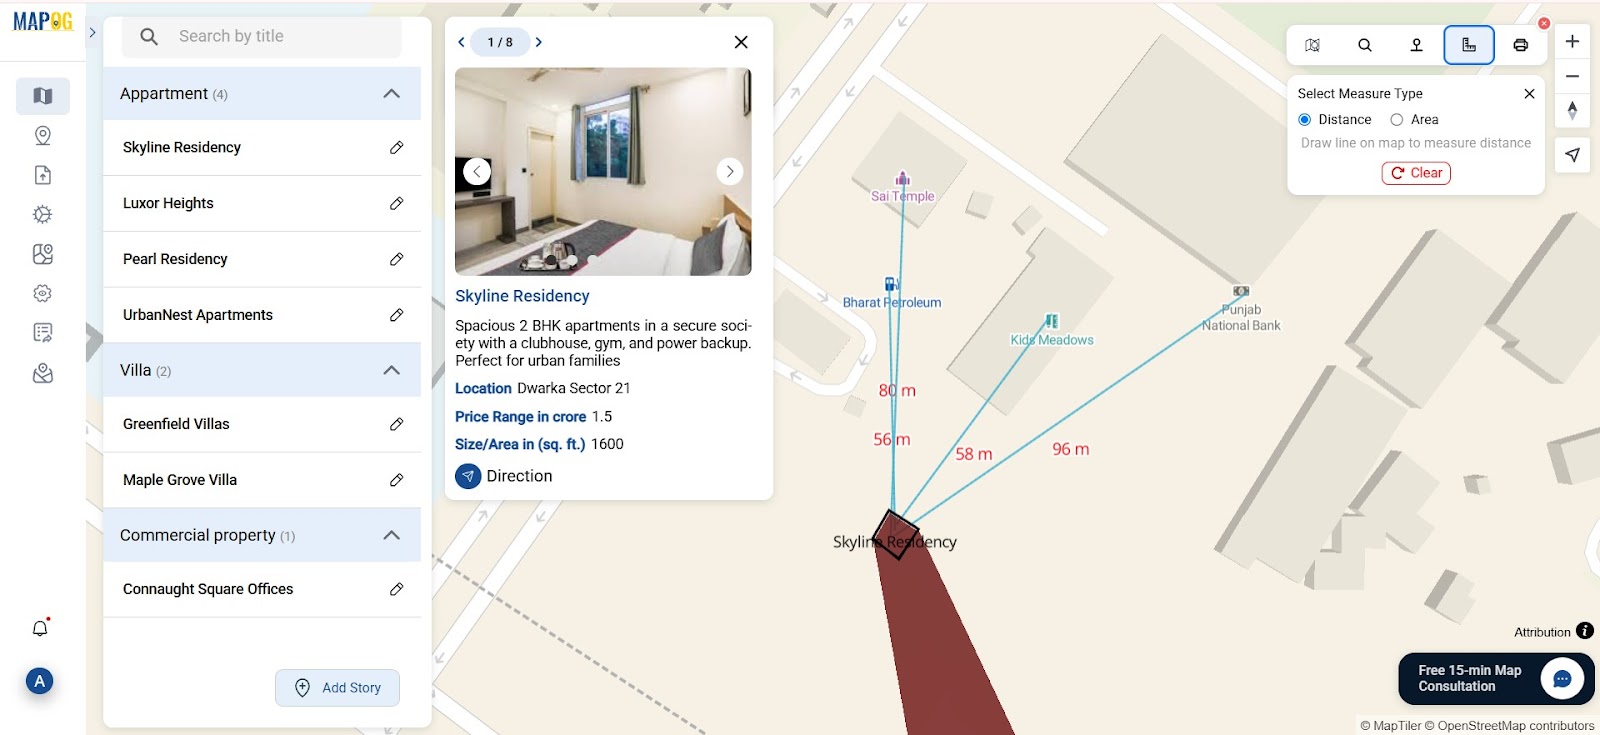
Add markers for hospitals, schools, petrol pumps, parks, and stores using the add nearby points. Use distinct icons (e.g., school symbol, shopping cart) and the distances we took earlier for easy identification. Click Save after adding.
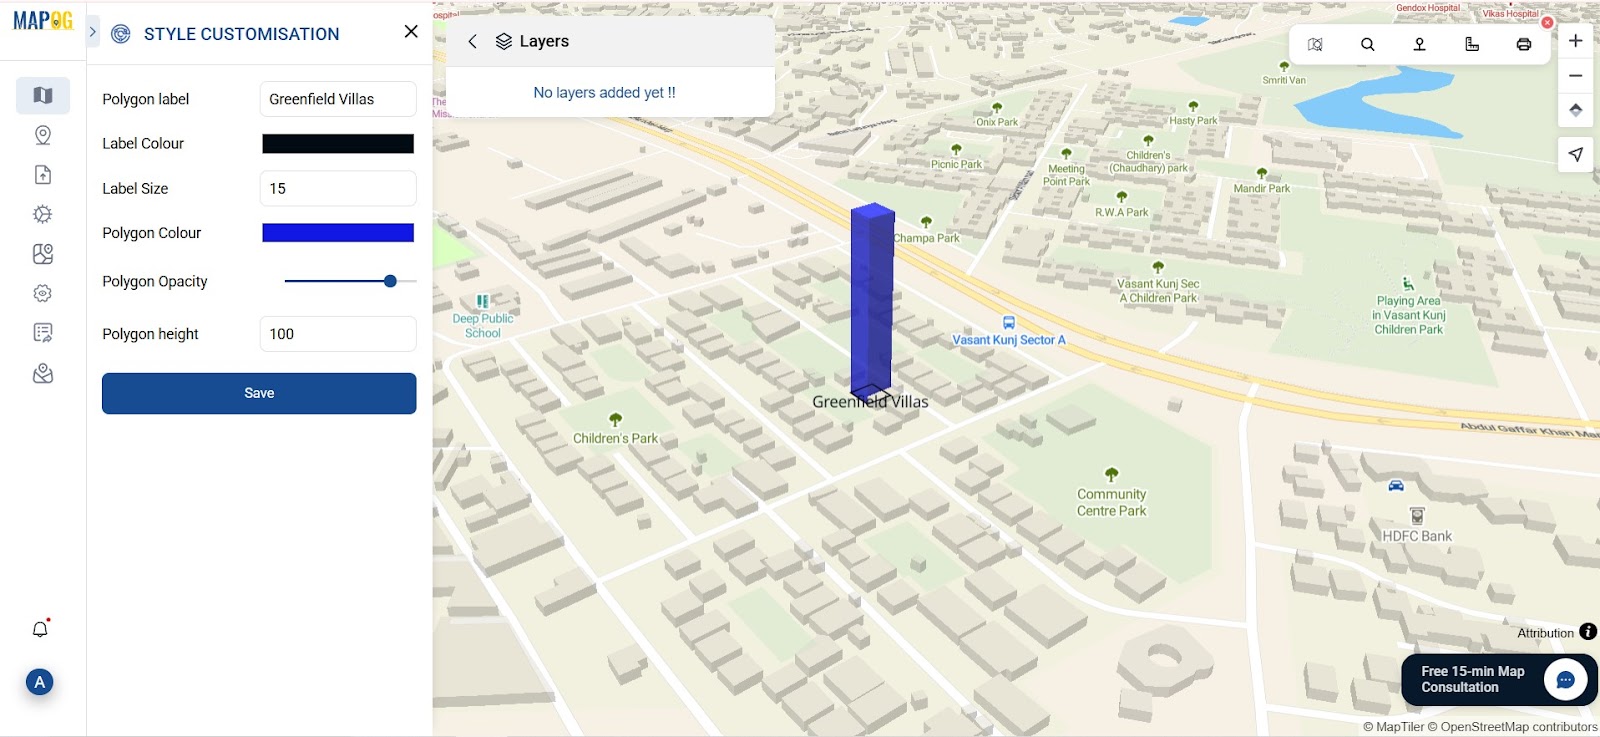
Step 6: Customize Polygon Appearance and Labels
In the Polygon Customization tab, assign different color codes to property categories (e.g., green for villas, blue for apartments). Add labels like property name or price, and adjust the polygon height (100-250) for a subtle 3D effect. Save changes once you’re done.
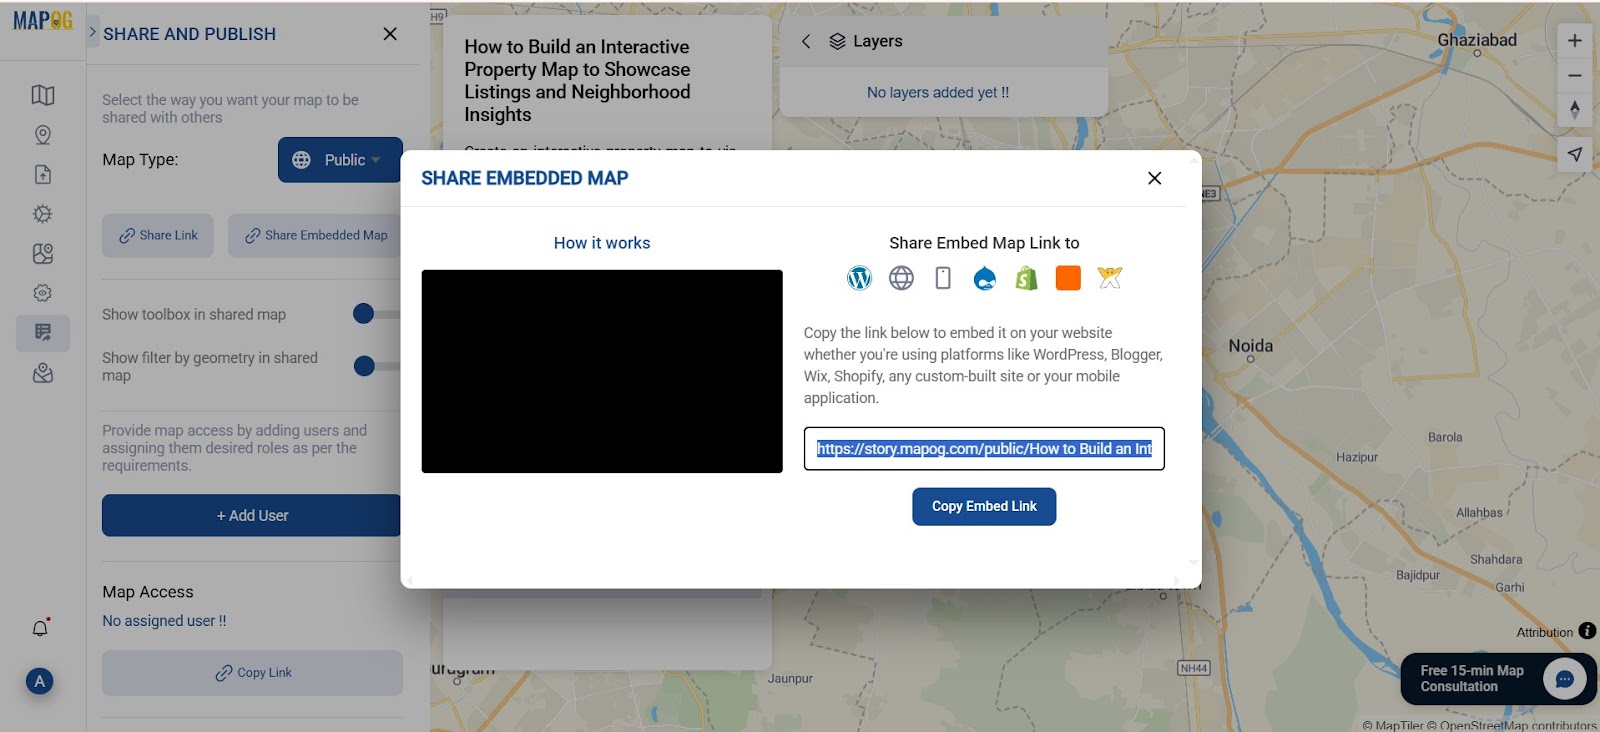
Step 7: Preview, Publish, and Share Your Map
Click Preview and Share to check your final map. Make any last edits, then click Publish. You’ll get a shareable link to embed on your website or promote through emails and social media.
Industry & Benefits: Why Interactive Property Maps Matter in Real Estate
Interactive maps do more than attract attention empower users to make faster, smarter decisions. Buyers can compare listings, view nearby amenities, and assess convenience . These maps improve transparency, boost engagement, and save time by reducing repetitive queries.
Final Thoughts
Today, creating interactive real estate maps no longer requires any coding. With the help of MAPOG, you can easily build intuitive, category-based property maps that include custom icons, photos, and neighborhood insights all without needing technical skills.
Moreover, this approach not only enhances your online presentation but also builds trust and speeds up decision-making.