Managing multiple store locations using standard maps often limits visibility, branding, and customer engagement. Default maps provide only basic location details, while MAPOG enables businesses to build fully customized store maps with branded icons, rich information, and interactive features. Store Map vs Default map improves store discovery, enhances customer experience, and supports better decision-making for retail and franchise operations.
Key Concept: Store Map vs Default
A default map typically shows store locations with simple markers and limited information. It lacks branding, customization, and detailed interaction. A store map transforms location data into an interactive map and business-ready tool. It allows businesses to display each store with custom icons, detailed pop-ups, product availability, contact details, and operational insights.
Why Store Map is Important
A store map improves branding, shows detailed store information, centralizes all locations, supports better decisions, keeps data updated, and enhances customer engagement. It also makes store discovery easier and more interactive for customers.
Methodology: Store Map vs Default
This method explains how to create and manage a custom store map for retail and franchise businesses using MAPOG.
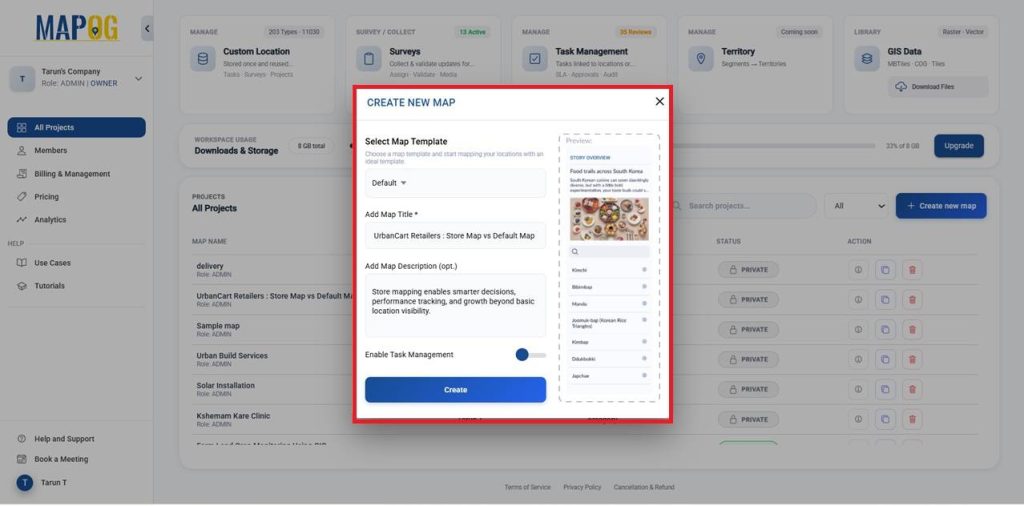
1. Create a New Store Mapping Project
Open MAPOG, click Create New Map, choose the default template, add a title and description, enable required features, and click Create.
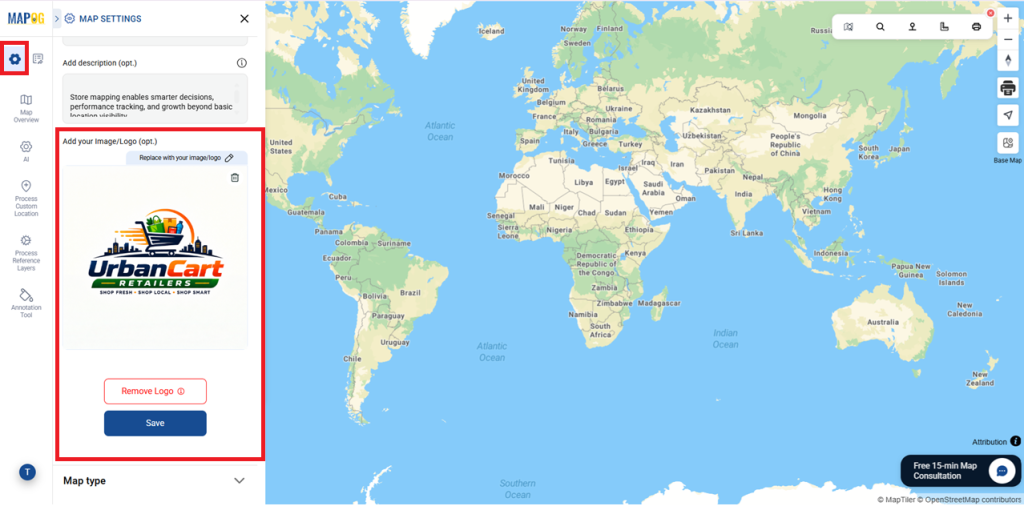
2. Add Your Image/Logo
Click Replace, upload your image or logo, make necessary edits, and save it as your company logo.
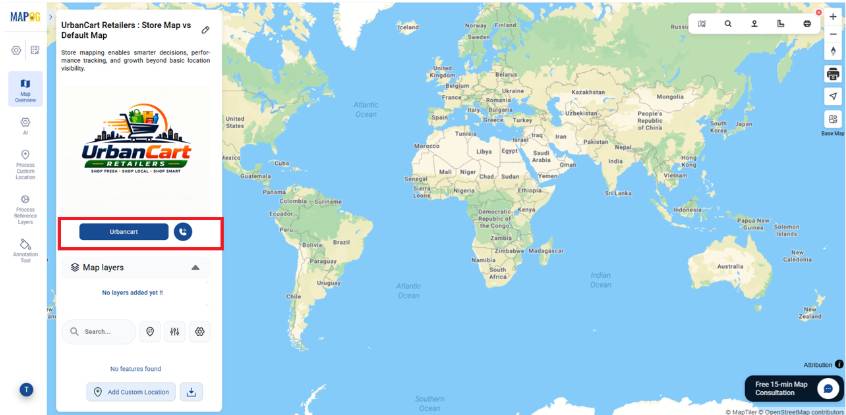
3. Use of Action Button
In Map Settings, select the Action Button and add details like a website link or phone number.
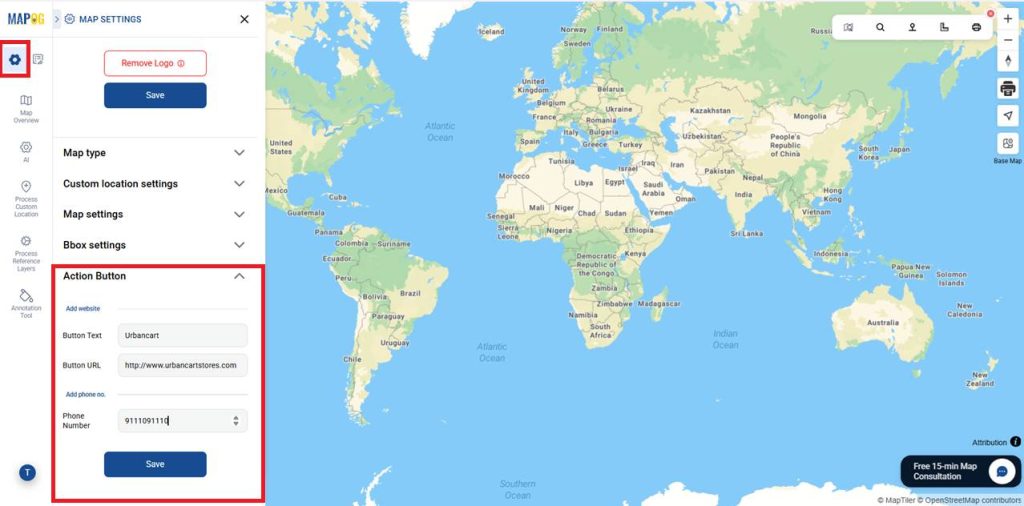
Save the changes, and users can instantly open the website or make a call by clicking the button.
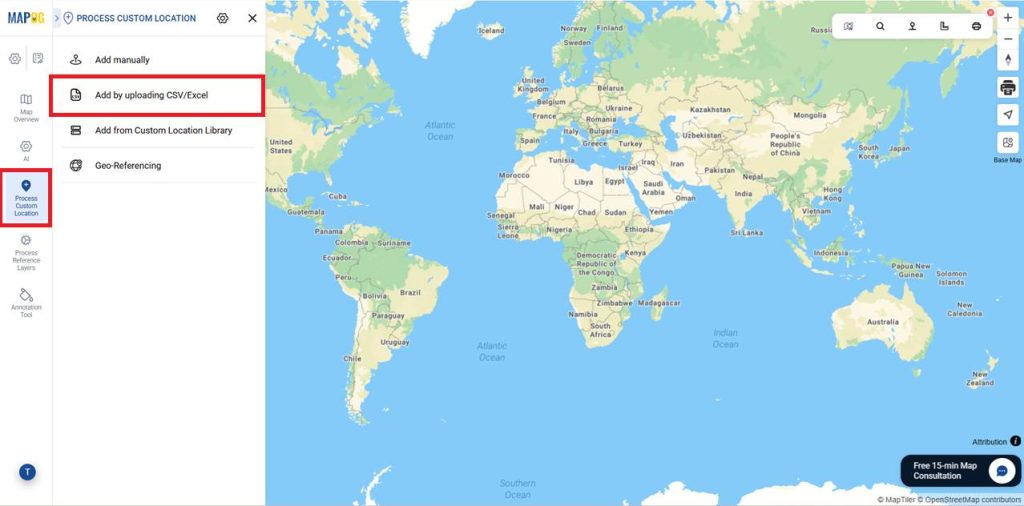
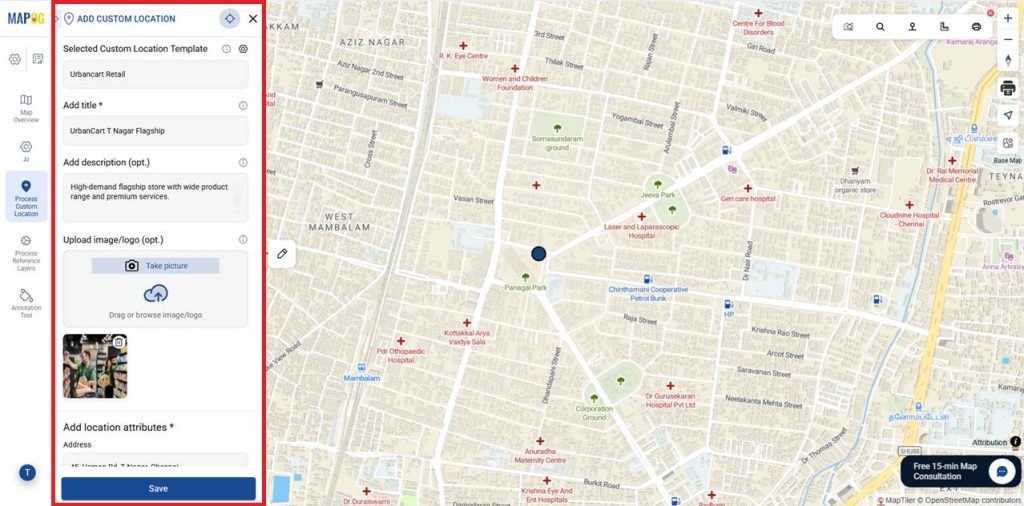
4. Add Store Location Information
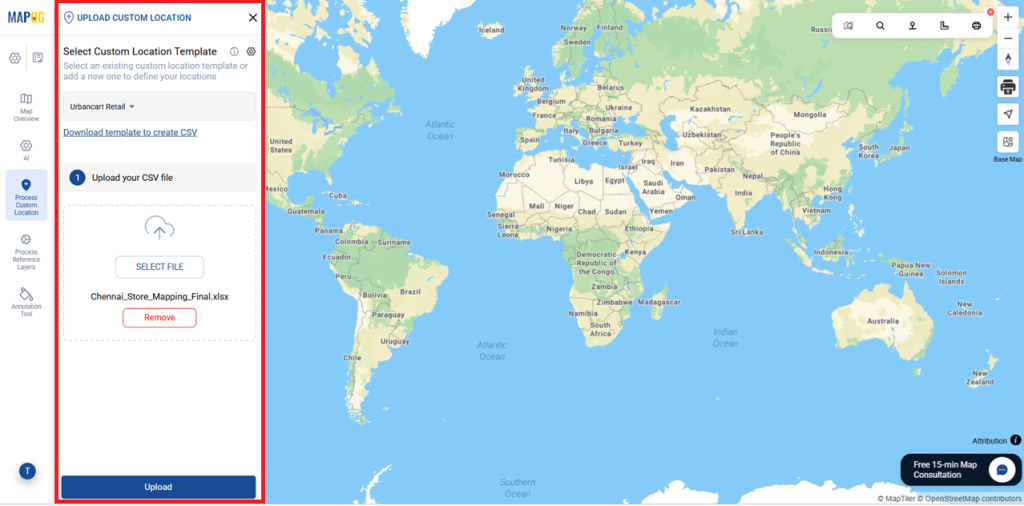
Open Process Custom Locations and select Add by uploading CSV/Excel to import all franchise location details in one step.
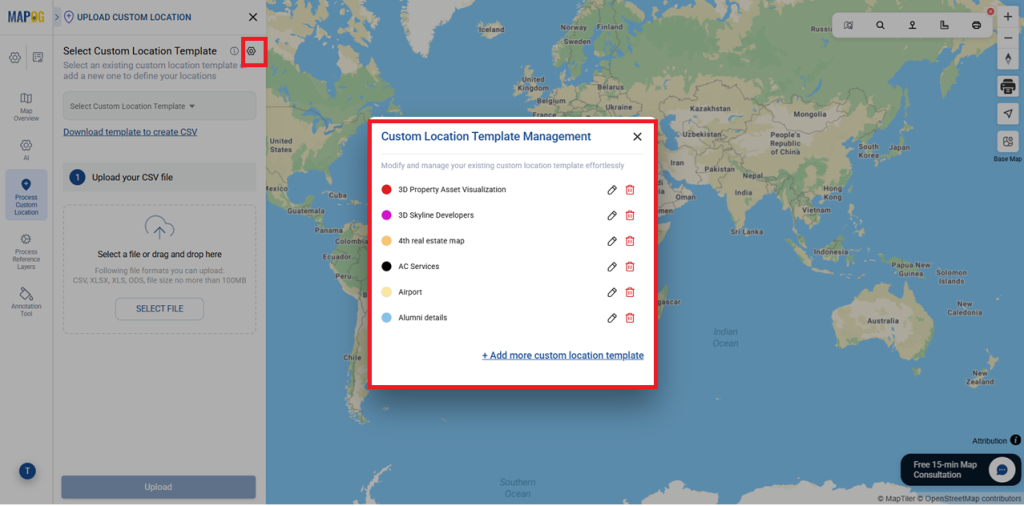
Next, go to Custom Location Template Settings and click +Add more custom location template to create a new franchise template.
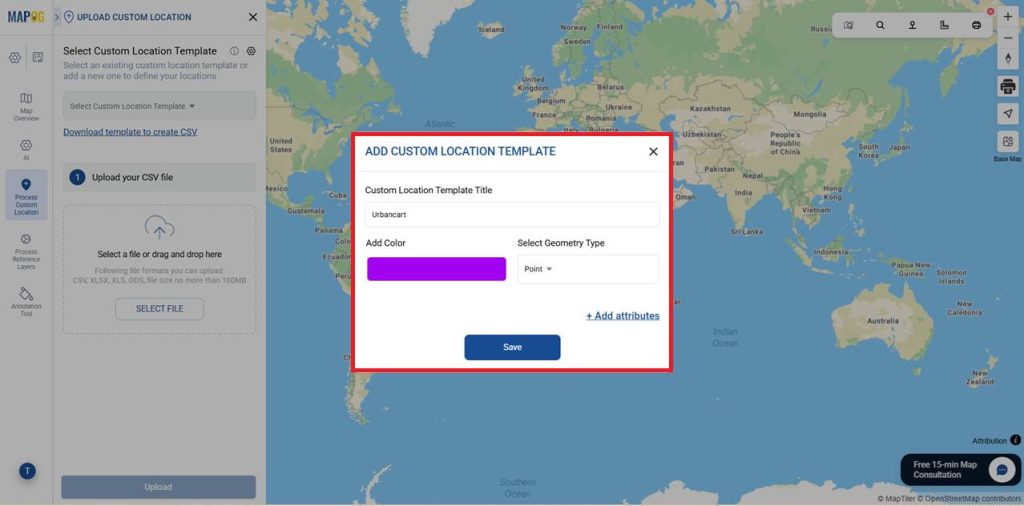
Enter a template name, choose a color, set geometry to Point for franchise locations, and add attributes to store related data.
Include attributes like Store Name, City, Store Type, Services Offered, and stock availability for structured data. Set each field as text, select, or multiselect as needed. For website links, choose the type as Website_url and display it as a button. Mark important fields as required to ensure mandatory data entry. Where you can enable for contributor also when needed.
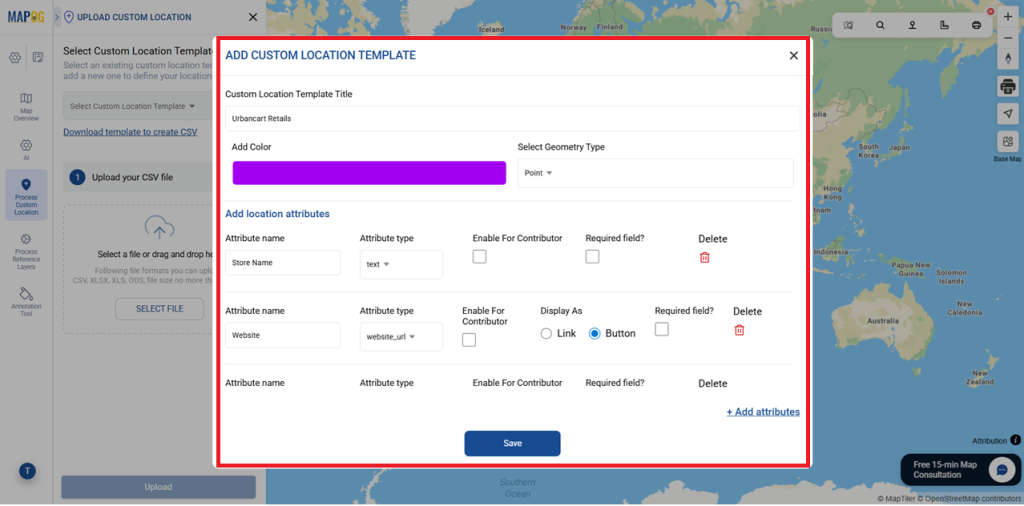
After adding all attributes, click Save. Then select the new template from Custom Location Template, review the fields, and upload your CSV file using Select File.
In Define Location Fields, map each attribute to the corresponding Excel column and select fields to display on the map. Use a unique ID for accurate syncing or choose Auto-Generate ID. You can also select Update Existing or Ignore Duplicate as needed.
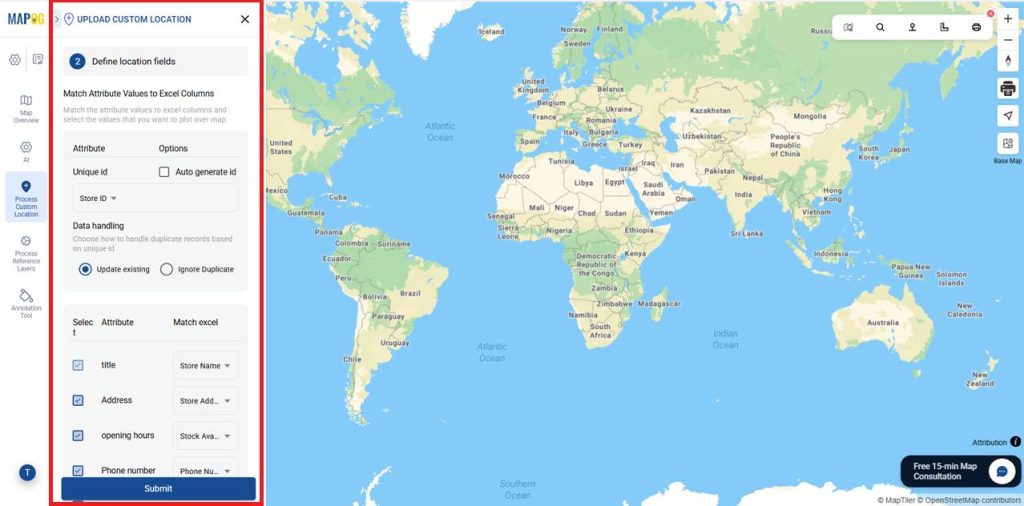
Assign Latitude and Longitude correctly under Select Field Type, then click Submit.
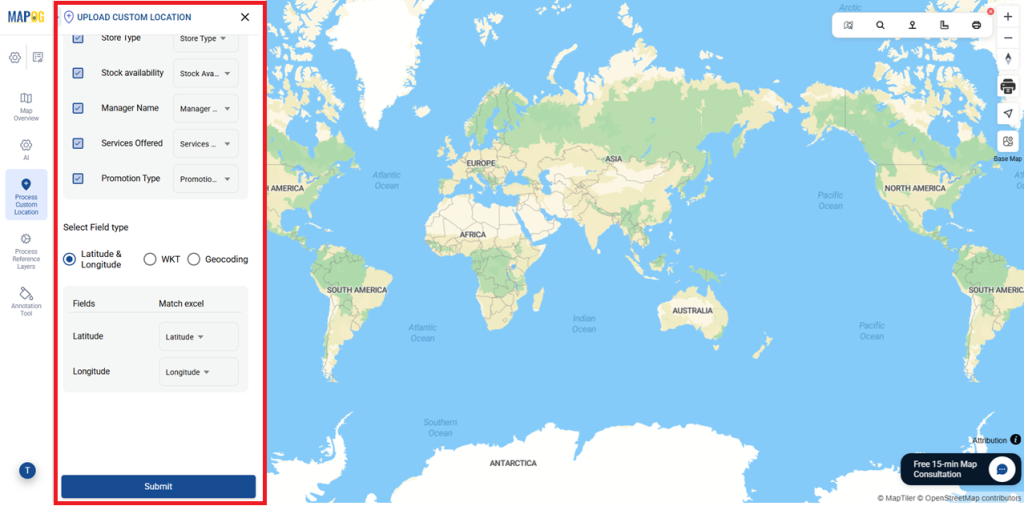
Now, all store locations will automatically appear as points on the map.
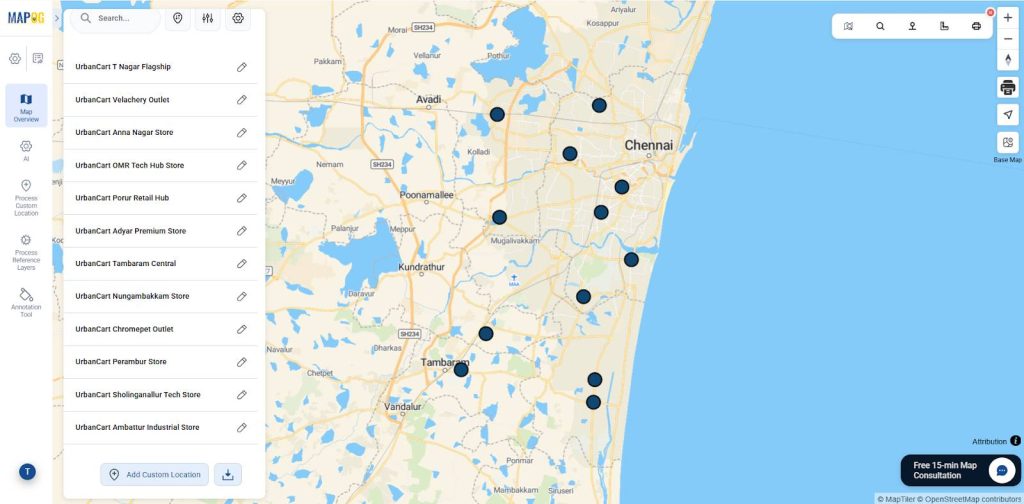
For each store, you can either upload existing images or capture new photos. Use Edit Custom Location Details to add descriptions, and then save your updates.
In the same way, you can upload complete information for each location.
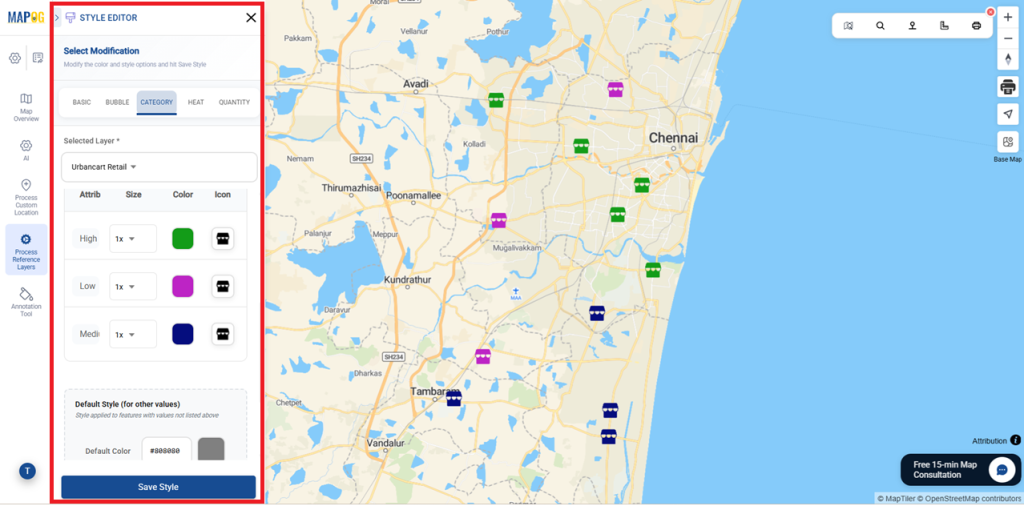
5. To style a layer
Instead, go to Settings under Custom Locations and select Add Layer Style. Set the category to Style and choose the uploaded Excel layer.
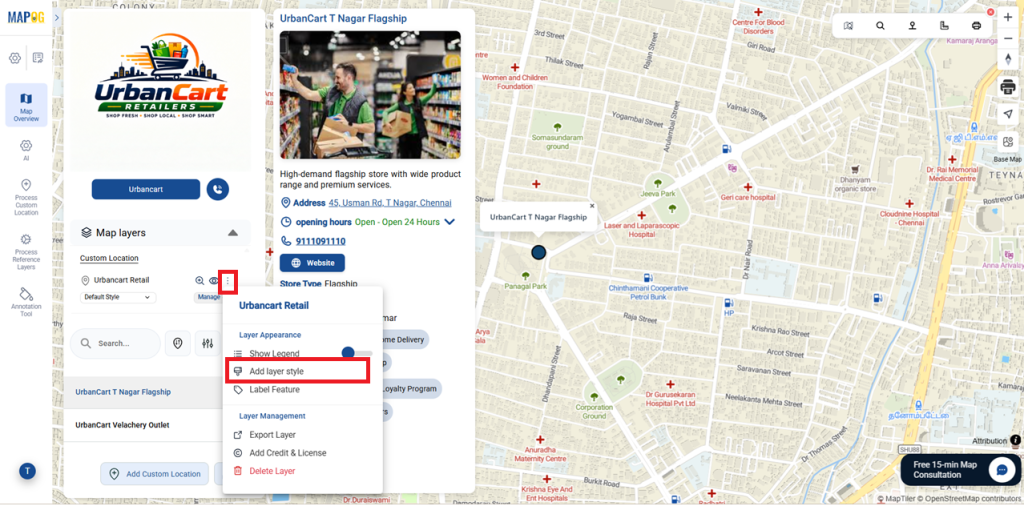
For example, select either Franchise Type or Performance Status, assign icons, adjust marker size and colors, and save to display the styled franchise locations.
6. Default map to Store Mapper
Nevertheless, Change the map type from Default to Store Mapper to enable customization and branding. For this go to the map settings and under map type select Store Mapper.
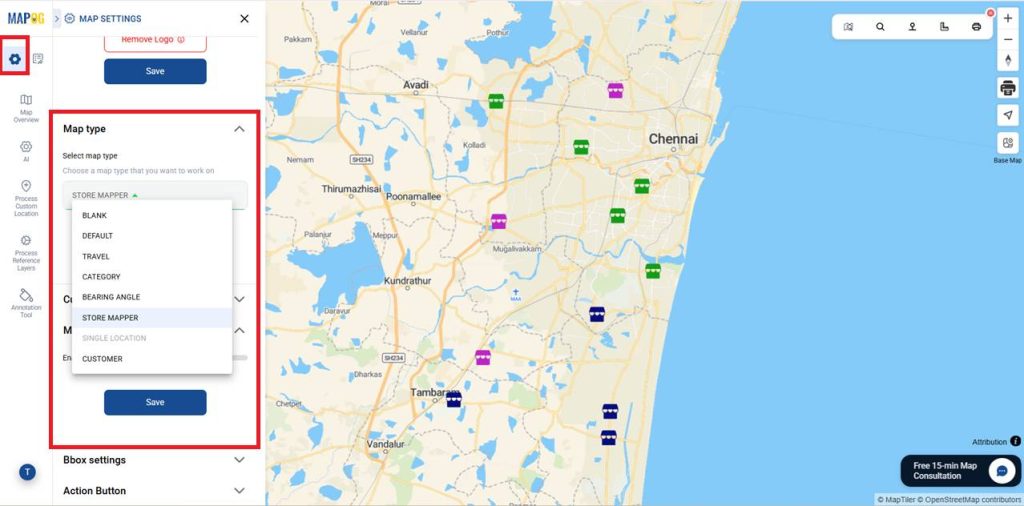
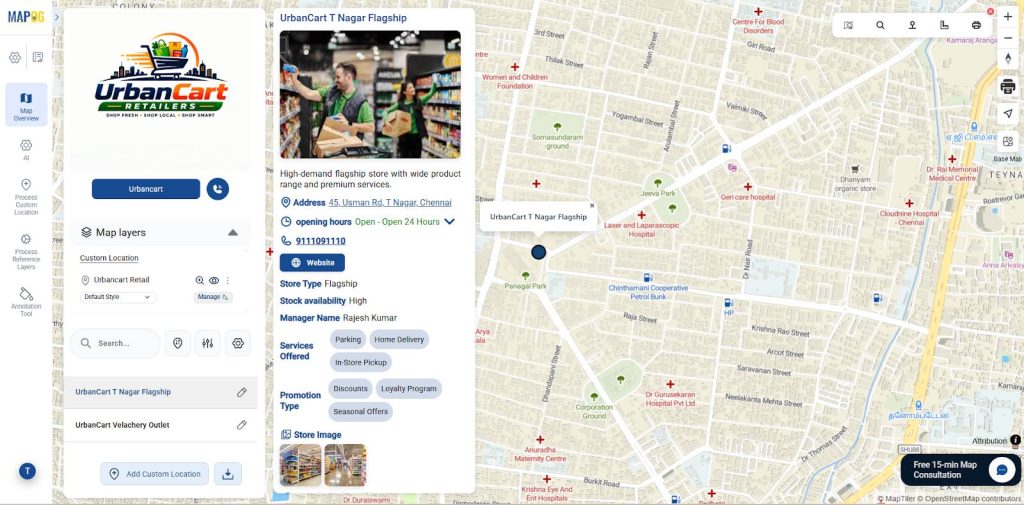
Therefore, compared to default maps, Store Maps provide richer details and better interactivity for locations, improving user experience and engagement.
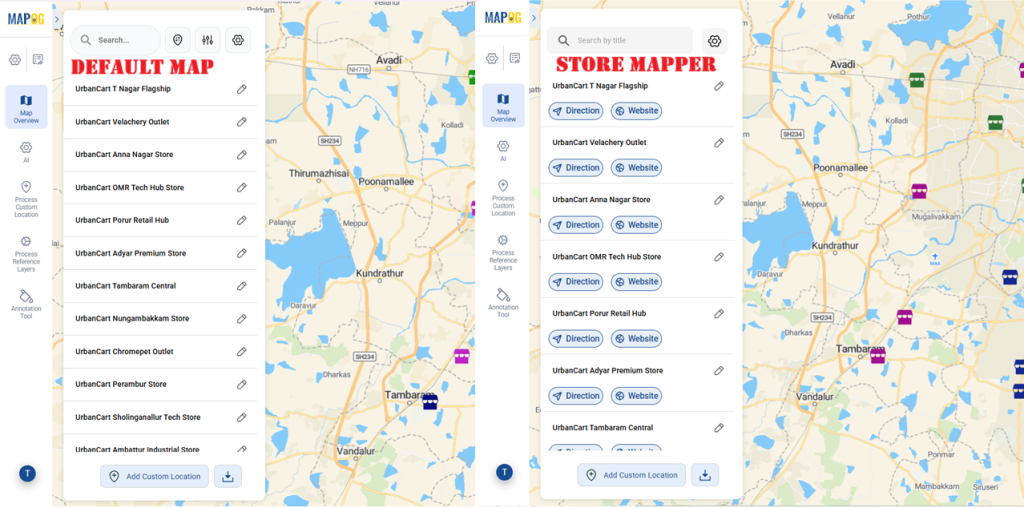
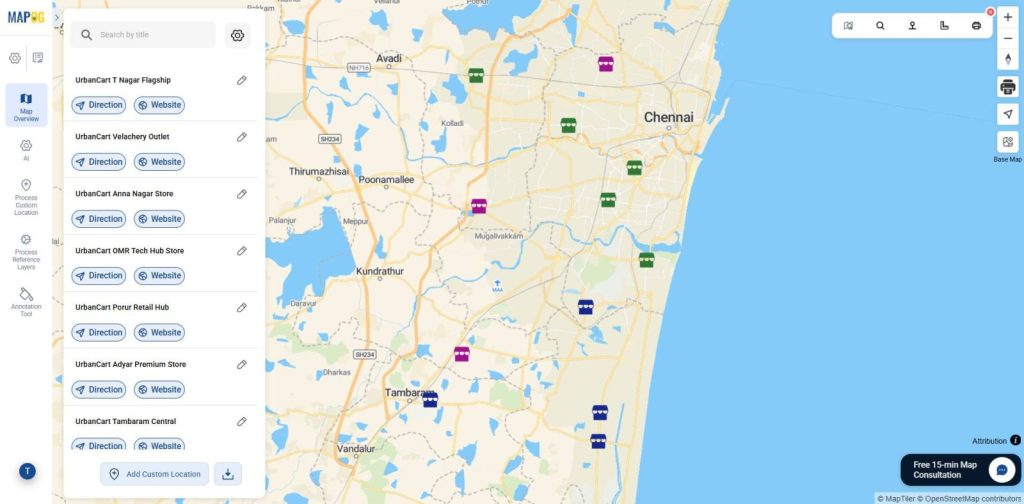
Instead, This will be the final view of the store mapper. If you want to prepare a store mapper while creating the map, select Store Mapper as the type instead of the default option.
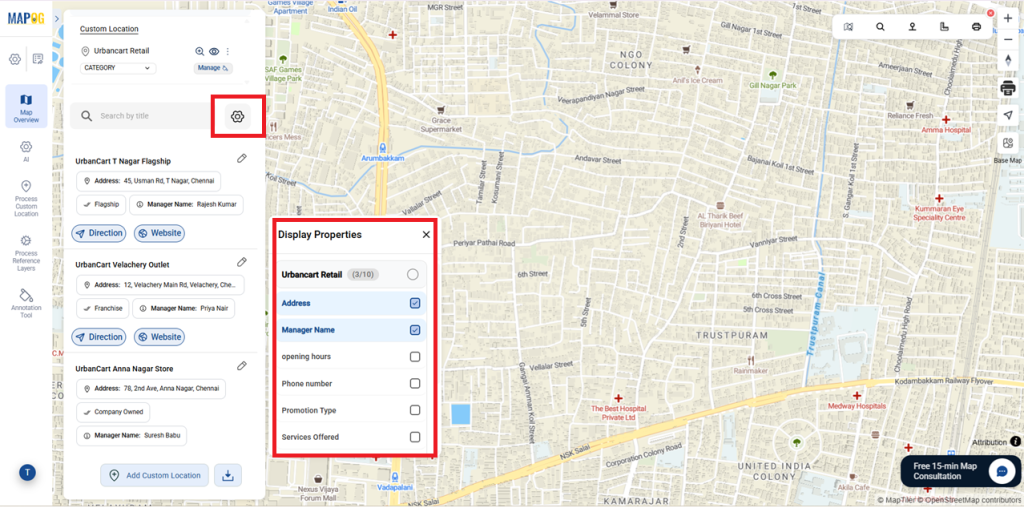
7. Display Properties
Additionally, In the Settings menu, you can adjust display properties and specify the attributes that will be automatically displayed for every location
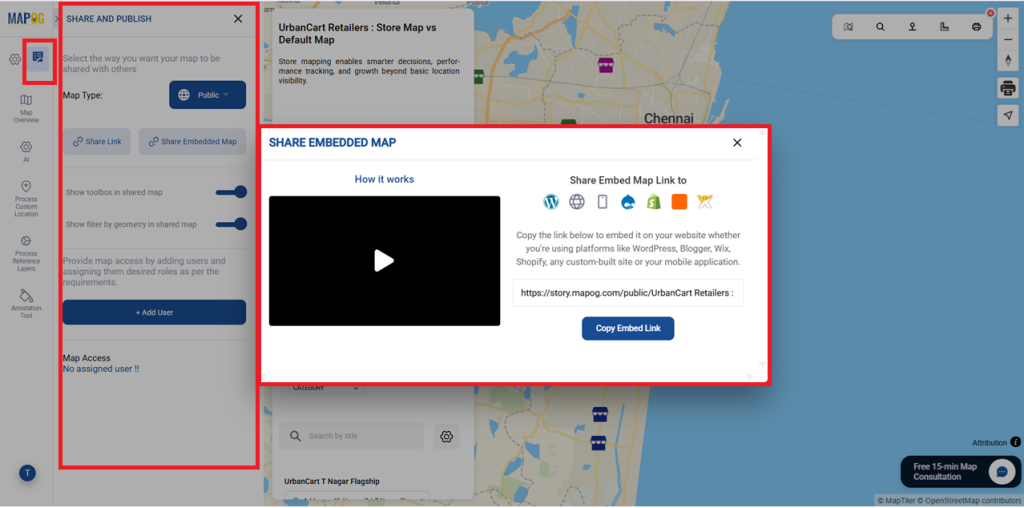
8. Publish and Share Your Map
After setup, use Preview & Share to make the map public and generate a shareable or embeddable link, allowing users to easily access and explore store locations and details.
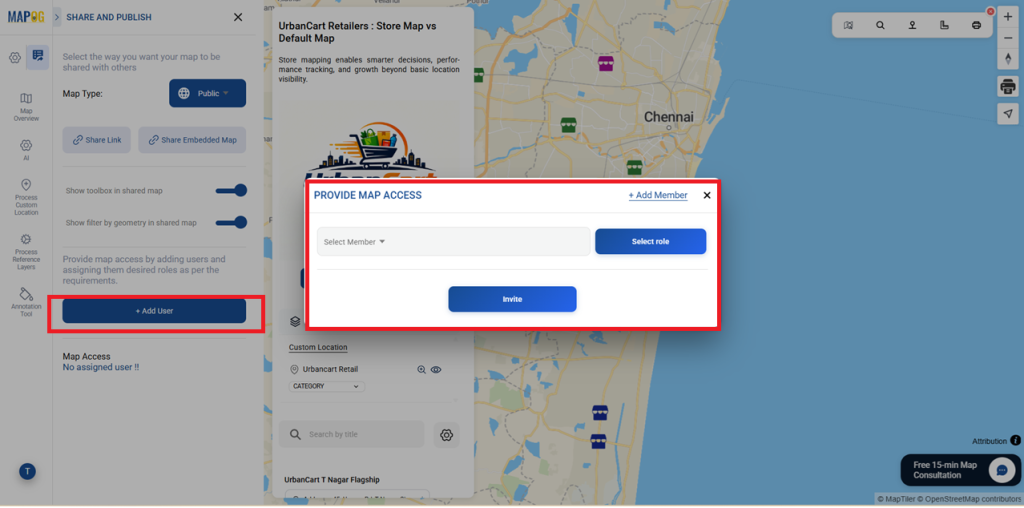
Use +Add Users to add existing users or create new members, then assign permissions to let them view or edit the map as needed.
Industry Use Cases and Benefits
Meanwhile, Store maps bring all locations into one platform, helping retail and franchise businesses manage stores, track performance, and improve customer experience. Although, they enhance coordination, provide real-time updates, and offer better visibility across all store locations.

Conclusion
In conclusion, MAPOG simplifies store management by converting location data into an interactive store map, helping businesses manage locations, improve visibility, and make faster, data-driven decisions.