Field operations across installation industries struggle daily with incomplete service records, missed site details, and zero location accountability. Technicians finish a job, make a phone call, and that becomes the only record. There is no photo proof, no geo-stamp, and no structured data to reference later. MAPOG task management solves this gap by letting supervisors and field teams Record Service Completion Details Location-Wise, directly from the job site, linked to real map coordinates, and captured through structured digital forms.
Key Concept: Record Service Completion Details Location-Wise
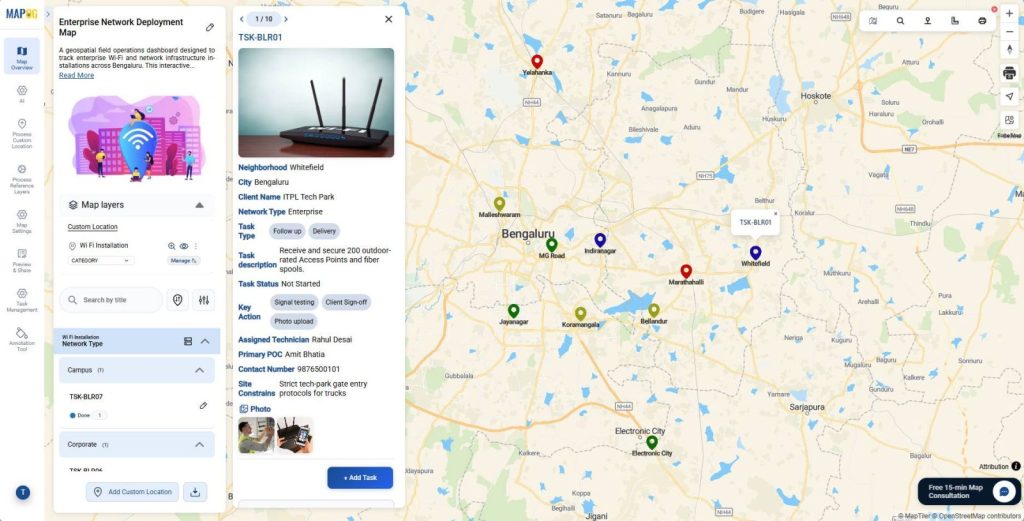
Map-based task management links every task to a geographic point. When staff reach a site, they open an assigned task on the map and fill a structured completion form before closing it. Consequently, managers get verified, location-stamped records instantly.
Key Benefits: Record Service Completion Details Location-Wise
Installation, telecom, and utility sectors assign dozens of field tasks daily across scattered sites. To Record Service Completion Details Location-Wise, supervisors track real-time progress on a live map, cut paperwork, and build a geo-tagged audit trail automatically.
Step- by- Step Process to Record Service Completion Details Location-Wise
1. Create a Custom Location Template
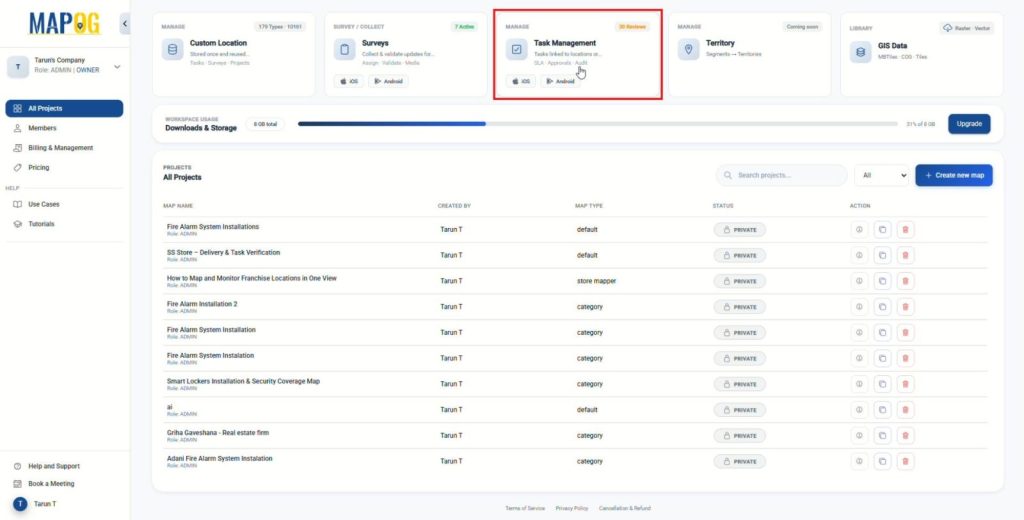
To begin, log on to MAPOG and open the Task Management section from the Dashboard to initialize with the process.
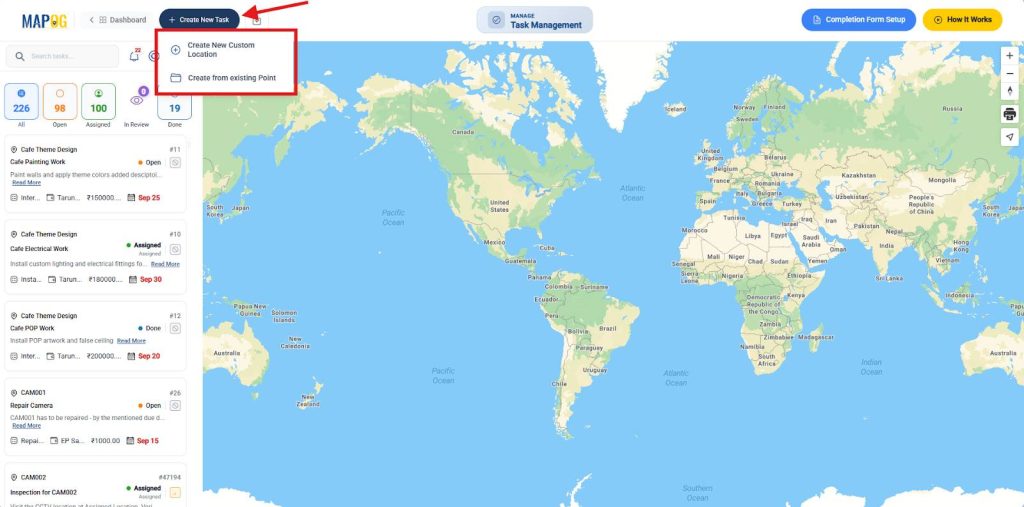
After that, click on Create New Task. Then, choose Create New Custom Location for a new site.
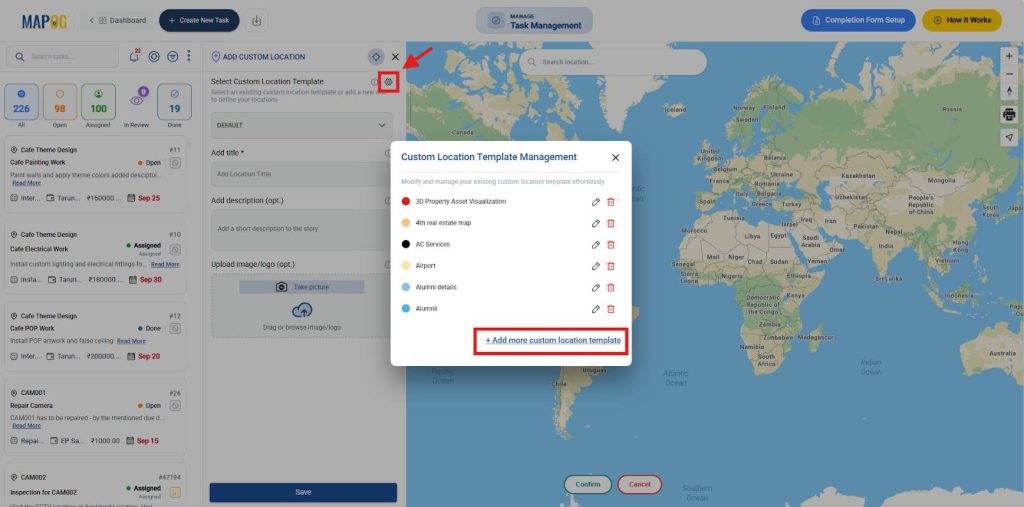
Subsequently, click the settings icon next to Custom Location Template and choose Add More Custom Location Template.
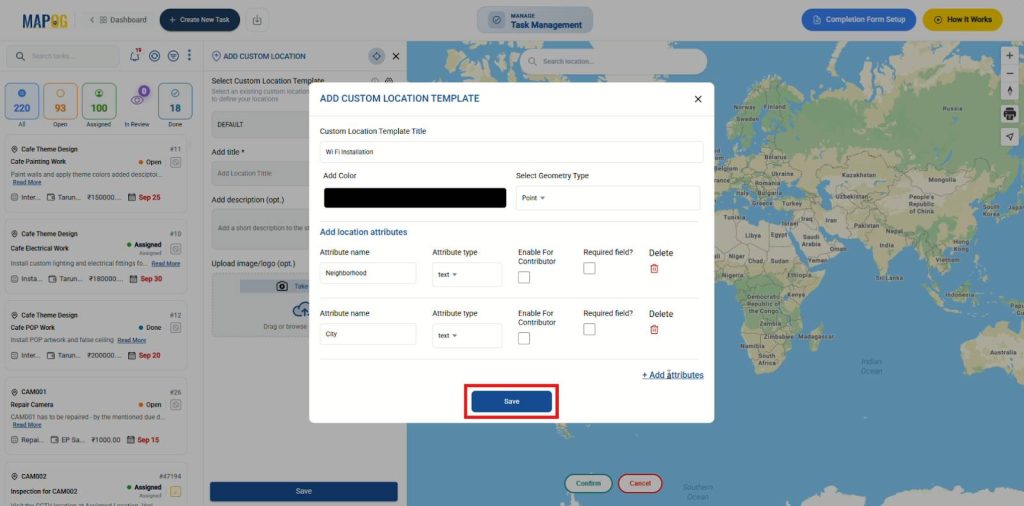
Give it a title, choose color and set the geometry type to Point, then click on add attributes to add relevant attributes with different field types such as select, multiselect, number, images etc.
Finally, save the template, which can be reused across projects, ensuring standardization and consistency.
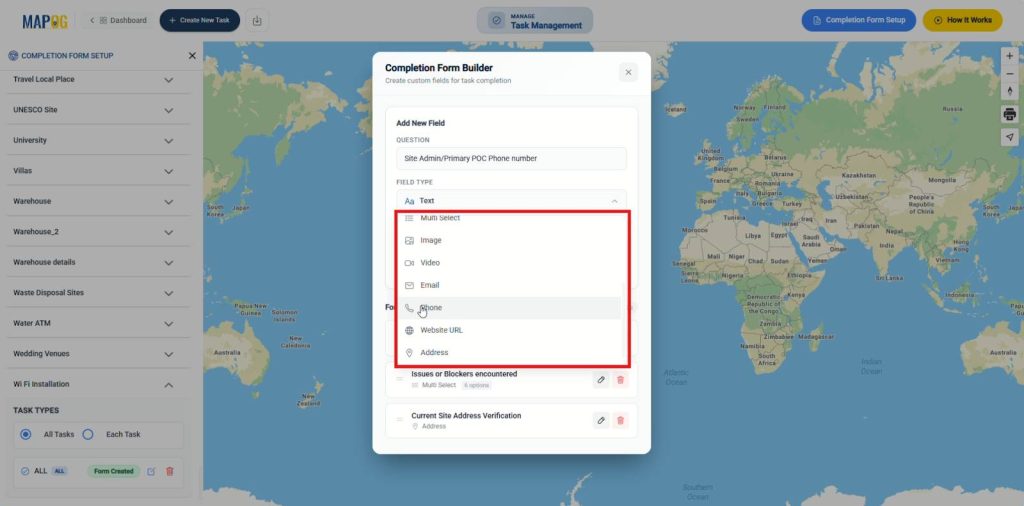
2. Build Completion Forms
After creating the template, go to Completion Form Setup, open your location template, and create a form that staff must complete before they close a task. This step ensures work gets verified, not just marked complete.

Add relevant questions for all tasks or specific task types using field types such as: Single Select for current task status, Multiselect for issues or blockers encountered, Image for visual proof of progress, and more. You can do the same for each task type also.
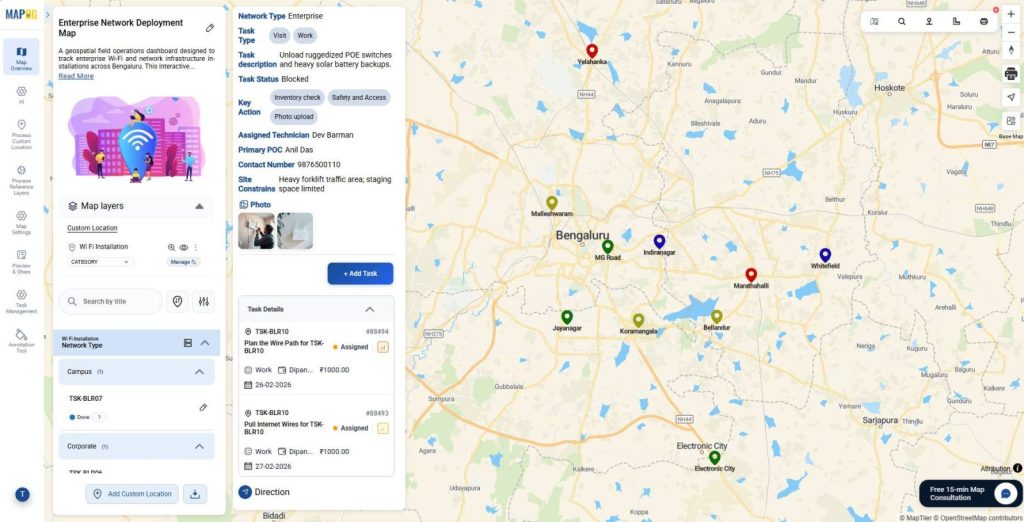
3. Upload Locations and Assign Tasks
After configuring the forms, upload multiple locations in bulk with site details. Then add tasks for each location, link them directly to the project, and assign them to team members with deadlines to ensure structured execution across sites.
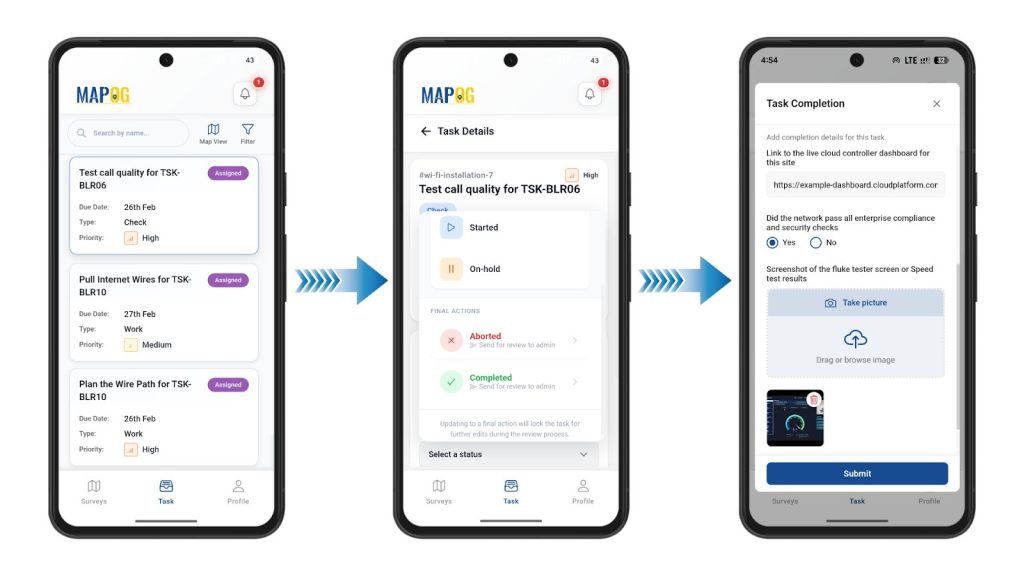
4. The Contributor App
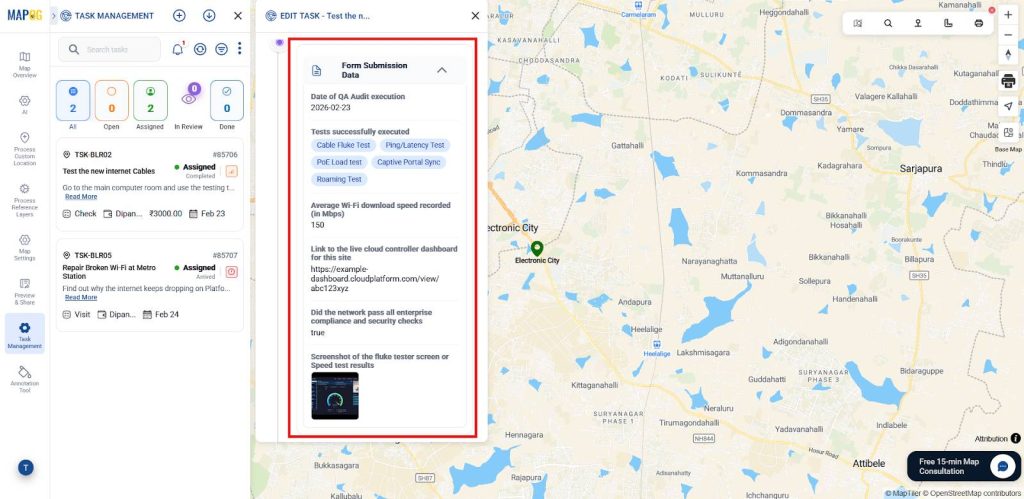
Meanwhile, to eliminate delayed reporting, technicians open the MAPOG Contributor App directly at the installation site. Assignees can view their allocated tasks, filter them by priority level, task status (started, on hold, arrived, in progress), and due date. They can add comments, update task stages, and mark tasks as complete once finished. Once a task status is set as completed, the assignee can fill out the structured completion form with gathered details and upload photo evidence, ensuring accurate, real‑time proof of work.
5. Review and Dashboard Monitoring
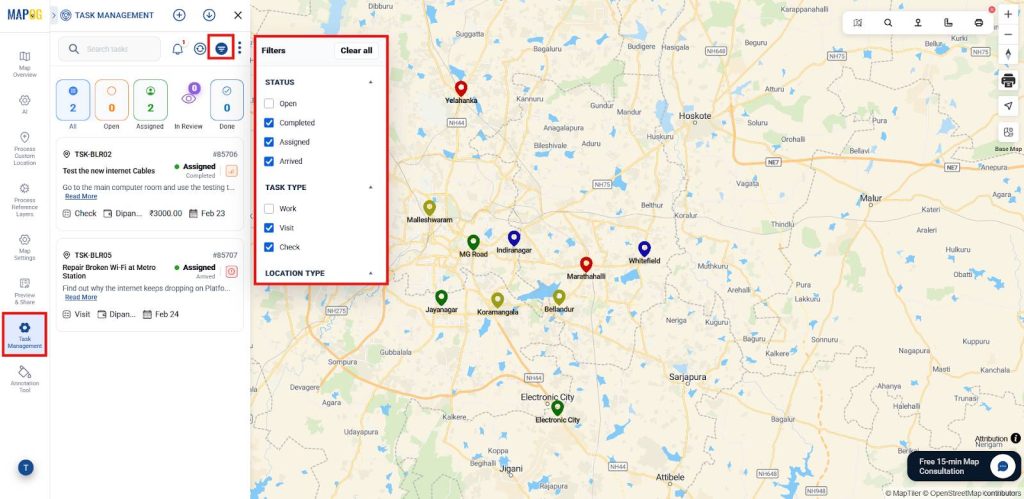
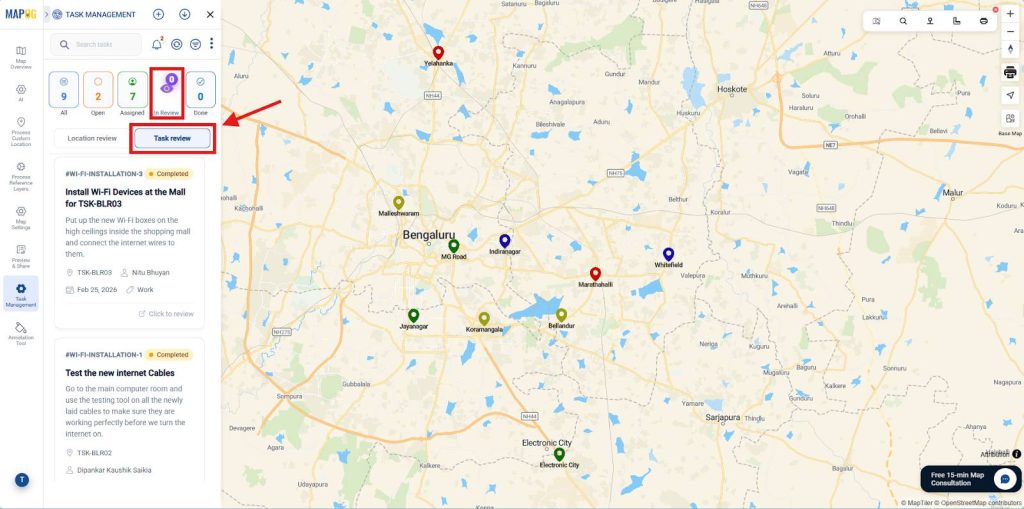
Back in the platform, managers track this incoming real-time progress through the task management dashboard.
To begin, tasks can be filtered by status, type, assignee, or due date, helping admins quickly focus on specific tasks.
Subsequently, admins review photos and completion forms submitted by technicians, providing visual proof and structured data to ensure each job is properly documented.
In addition, admins can open the In Review section on the dashboard to access tasks submitted by field staff. From here, they use Task Review to check task details, completion form responses, and supporting evidence to confirm the work meets required standards before taking further action.
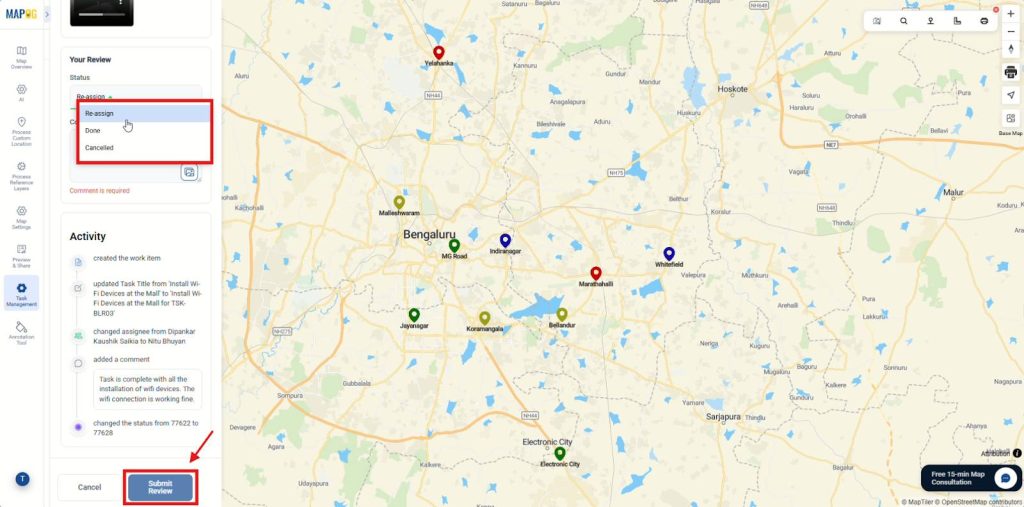
Admins first add comments to request clarification, provide feedback, or record approval. Then, they update the status to Re-assign, Done, or Cancelled based on the review.
Finally, clicking Submit Review updates the workflow and notifies the field team, ensuring visibility, faster decisions, and clear accountability.
Industries and Domains
This approach directly benefits solar panel installation, pipeline maintenance, municipal utilities, broadband rollout teams, and government infrastructure projects; essentially any domain where service delivery happens across multiple geographic locations.
Conclusion
Map-based task management transforms how field teams document their work. Using MAPOG, organizations Record Service Completion Details Location-Wise with custom forms, real-time tracking, and geo-verified proof, building a reliable, site-specific service history with zero manual effort.