Planning efficient electric aerial vehicle routes is, therefore, becoming essential in industries like logistics, disaster response, and surveillance. Not only does a precise route save time, but it also ensures flight safety and energy optimization. Consequently, MAPOG simplifies this process by combining bearing angle & distance calculations with real-world coordinates. In this article, we’ll explore how to use this powerful method with MAPOG to create accurate EAV routes, starting from base coordinates to, eventually, sharing a complete flight plan.
Key Concept: Plan Electric Aerial Vehicle Routes
To plan any aerial route, understanding bearing angle & distance is, first and foremost, critical. While the bearing angle defines the direction between two geographic points, the distance, on the other hand, helps calculate how far your EAV needs to travel. When used together, these two elements, therefore, ensure smoother transitions and route optimization. MAPOG, in turn, makes this process user-friendly through its bearing angle visualization format. This format, as a result, allows planners to instantly measure angle shifts and travel lengths between waypoints.
Step-by-Step Process to Plan Electric Aerial Vehicle Routes
1. Setting up the Map with Bearing Angle Format
Start by visiting MAPOG. After clicking “Create new map,” switch the format to bearing angle. Assign a relevant title and description to your project. You can also optionally upload a relevant image for better visualization. Saving the map locks in your project structure.

2. Adding Story Points using Coordinates
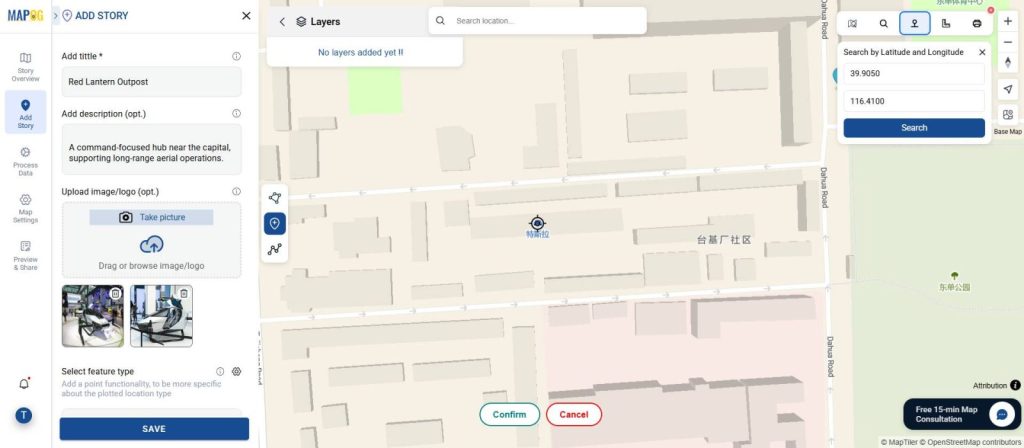
Next, navigate to the “Add Story” tab and choose “Add Manually.” Select the point section and head to the toolbox where you’ll find “Search by Coordinates.” Input your EAV base location using precise latitude and longitude, then confirm it. Add a short title, a description, and if needed, attach images.
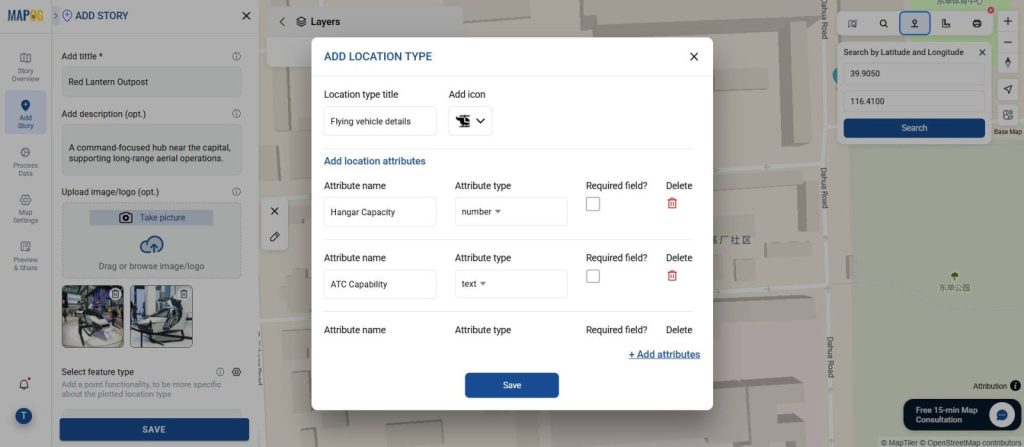
Next, choose settings in the “Select Type,” and then create a new attribute type named “Flying Vehicle Details.” Under this, go on to add necessary attributes like Hangar Capacity, ATC Capability, Runway Length, etc. After that, fill in all the required details and save. In doing so, this structured data, likewise, adds layers of clarity to your story map.
3. Customizing Your Point Location
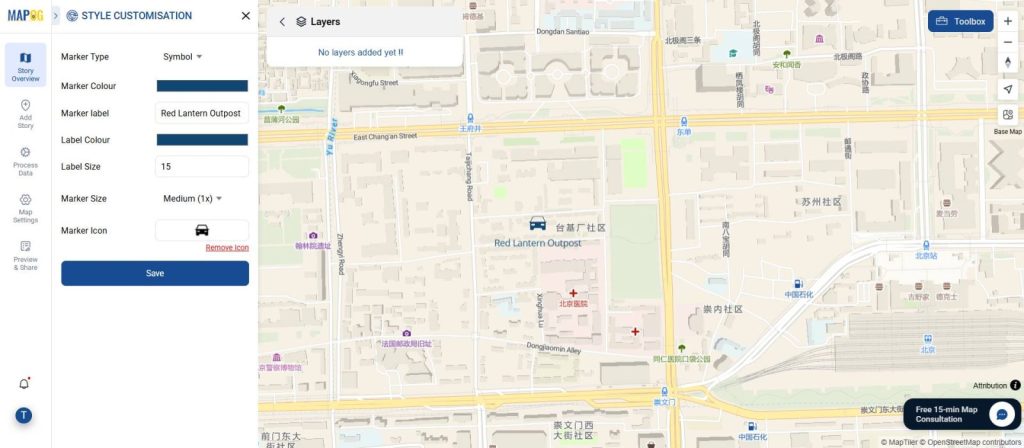
Move to the point customization section. Assign a specific icon, pick a suitable color, and label your base point. Save it to finalize your first waypoint.
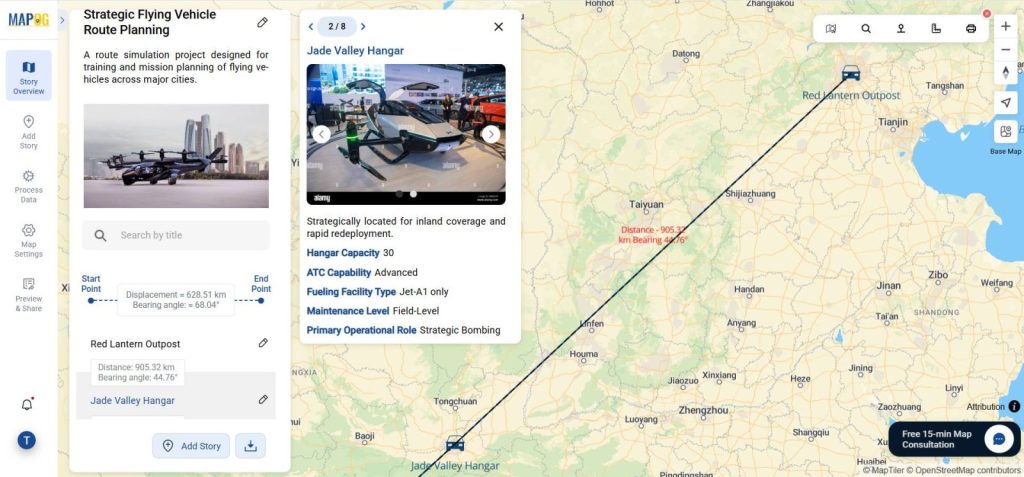
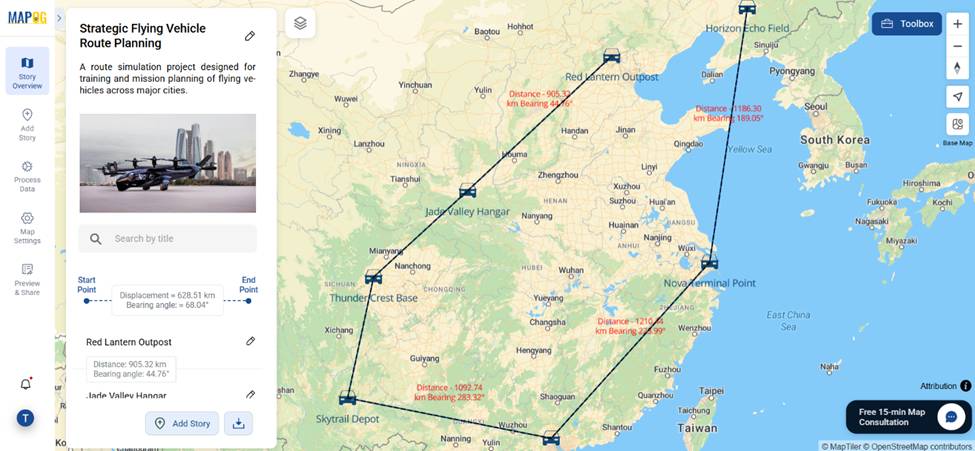
As you continue adding more points using the same method, MAPOG automatically displays the bearing angle & distance between them—making route alignment far more intuitive and visual.
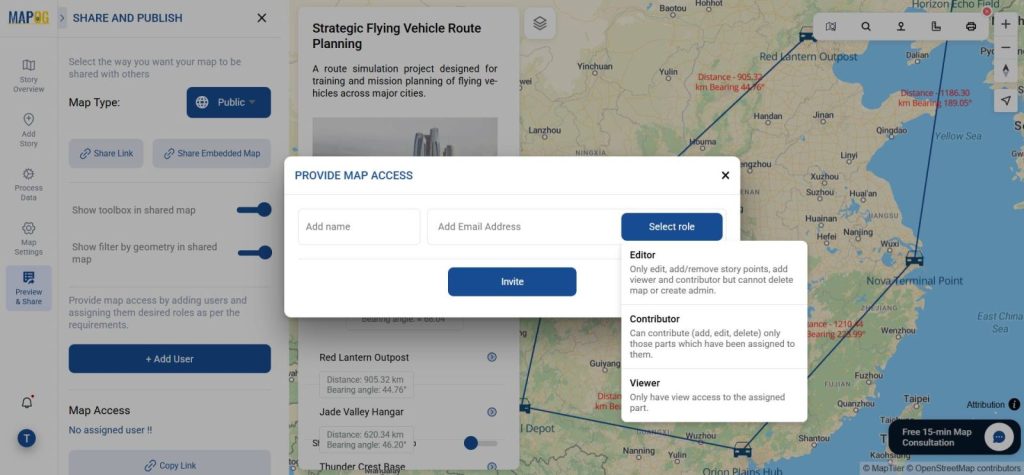
4. Preview and Share
Once all route points are placed and customized, use the “Preview and Share” feature. Toggle the visibility to “Public” to generate a shareable link. This makes it easier for your team, stakeholders, or clients to access the plan directly. The interactive experience adds a storytelling layer to your technical routing data.
Industry Relevance and Benefits
Mapping electric aerial vehicle routes using bearing angle & distance is a game-changer across sectors. In disaster zones, precise angles can help drones reach remote relief points. For surveillance, predictable routes reduce battery usage and improve performance. The bearing angle view in MAPOG supports real-time decision-making, especially for operators relying on dynamic conditions.
Using the “Add Story” feature with detailed attributes in MAPOG adds extra context to each point, such as wind speed, altitude needs, or local airspace rules. These detailed layers support better mission planning and data presentation.
Conclusion
Integrating bearing angle & distance into your electric aerial vehicle routes helps ensure smarter, safer, and more effective flight paths. Platforms like MAPOG not only simplify this process but also allow for customization, storytelling, and real-time sharing. Whether you’re mapping drone deliveries or planning surveillance, it’s time to explore how visual route planning can transform your workflow.
Here are some other blogs you might be interested in
- Route Compass: Strategic Guidance for Military, Air Force, and Forest Conservation
- Mapping Hotel Branches for Better Hospitality Management
- Optimizing Trade Routes with Route Compass: Distance and Bearing Angle Calculation, Easy Share &Embed