Planning your next adventure? Don’t just jot down your stops—Create a Travel Journal on a Map to capture every moment. A Travel Journal Map helps you organize memories by location, add photos and notes, and visually share your journey. With MAPOG, it’s easy to plan your route, add key locations, and share it online with just a few clicks.
Knowing how to create a travel itinerary on a map and share it online is the first step. But once your trip begins, that map becomes something more—a travel journal filled with experiences, photos, and memories.
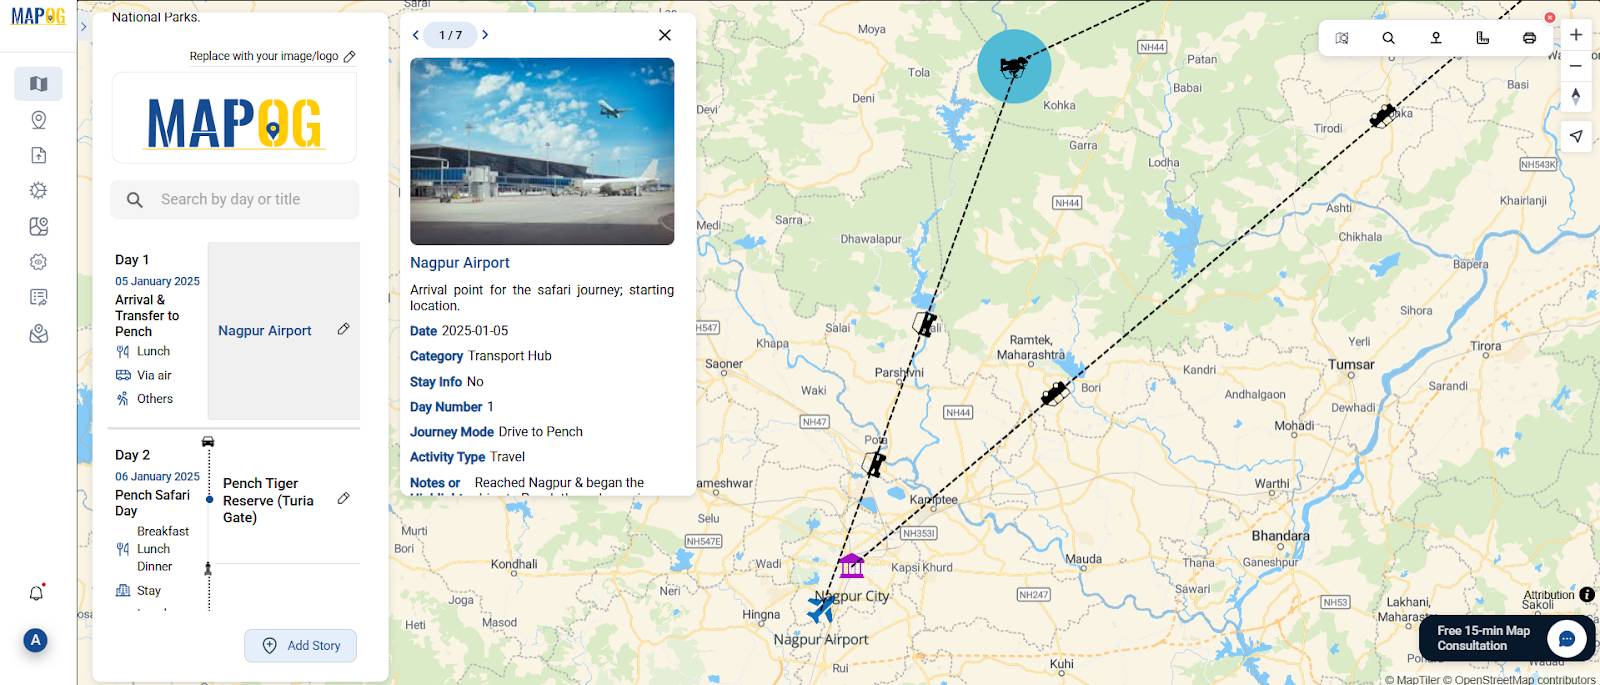
This guide walks you through the process using Wilderness Week: Exploring Pench & Kanha as an example—showing how to go from a mapped plan to a mapped story.
Key Concept: Why Turn a Travel Itinerary into a Journal Map?
A mapped itinerary is more than just navigation—it’s storytelling. Rather than isolated photos or scattered notes, each destination becomes a memory with meaning and flow.
With MAPOG features like Add Story, custom pins, and Preview & Publish, you can create a travel journal that turns your trip into a structured, shareable digital map. Travel route planning also becomes easier with story maps—where each point holds meaning, not just a location.
Create a Travel Journal on a Map – Step-by-Step Guide
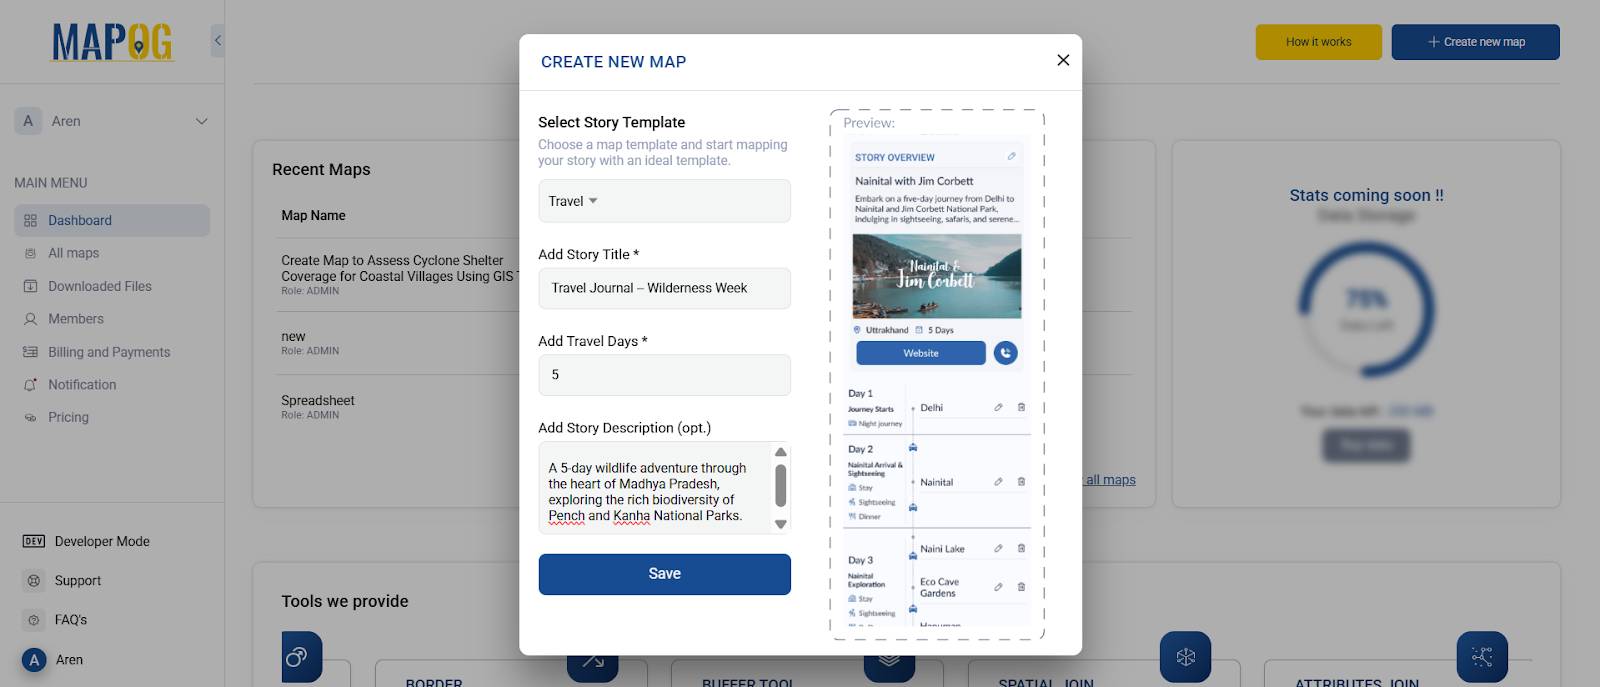
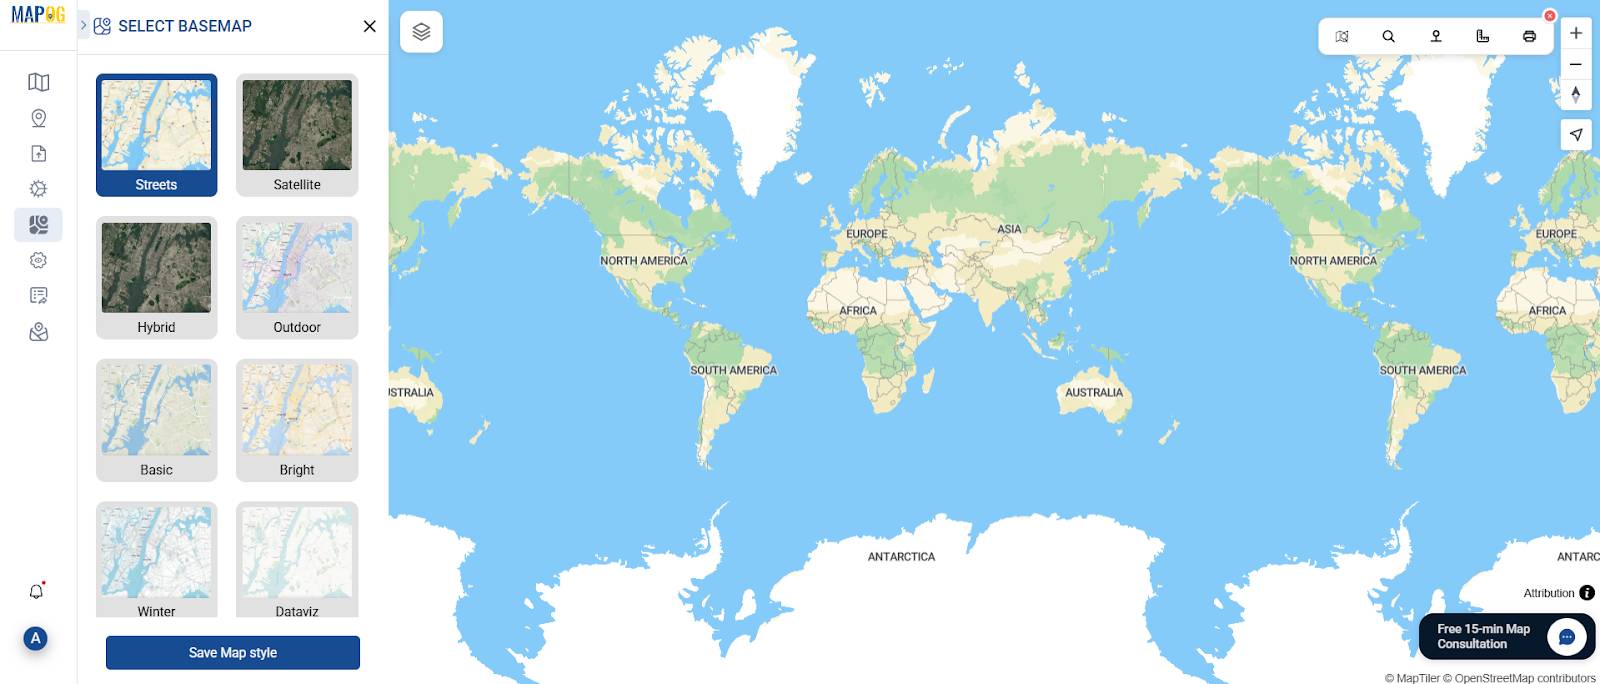
Step 1: Start Your Itinerary Project and Select Base Map
- Go to MAPOG → Create a New Map
- Choose “Travel” as your Story Template
- Add a Title and Short Description
- Click Save to launch the map editor
Once inside, select a suitable Base Map to match the theme of your journey
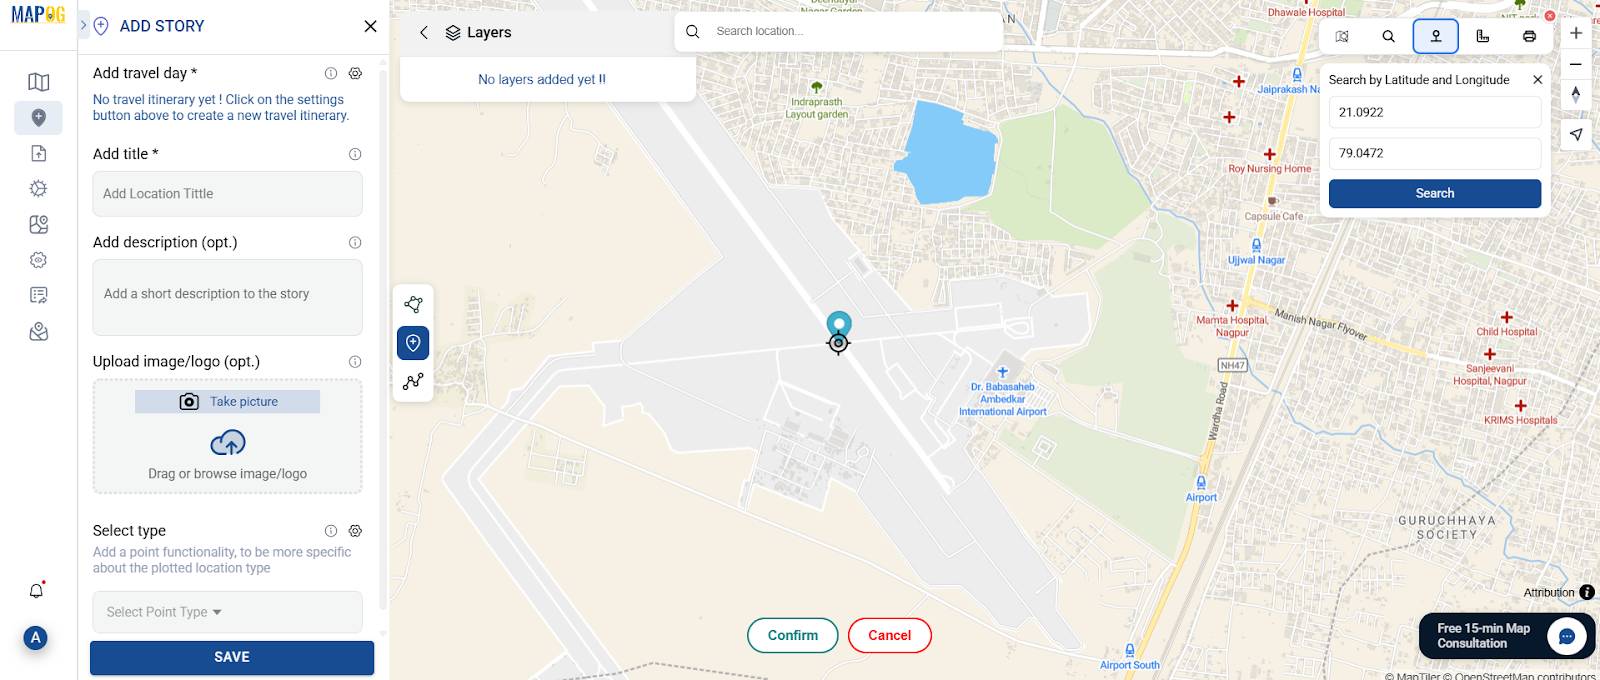
Step 2: Add Story Points Manually
Once your base map is ready, start adding travel locations:
- Go to “Add Story” → “Add Point”
- Use Search by Coordinates and enter the latitude & longitude to mark the location
- Add a Title, Description, and Image
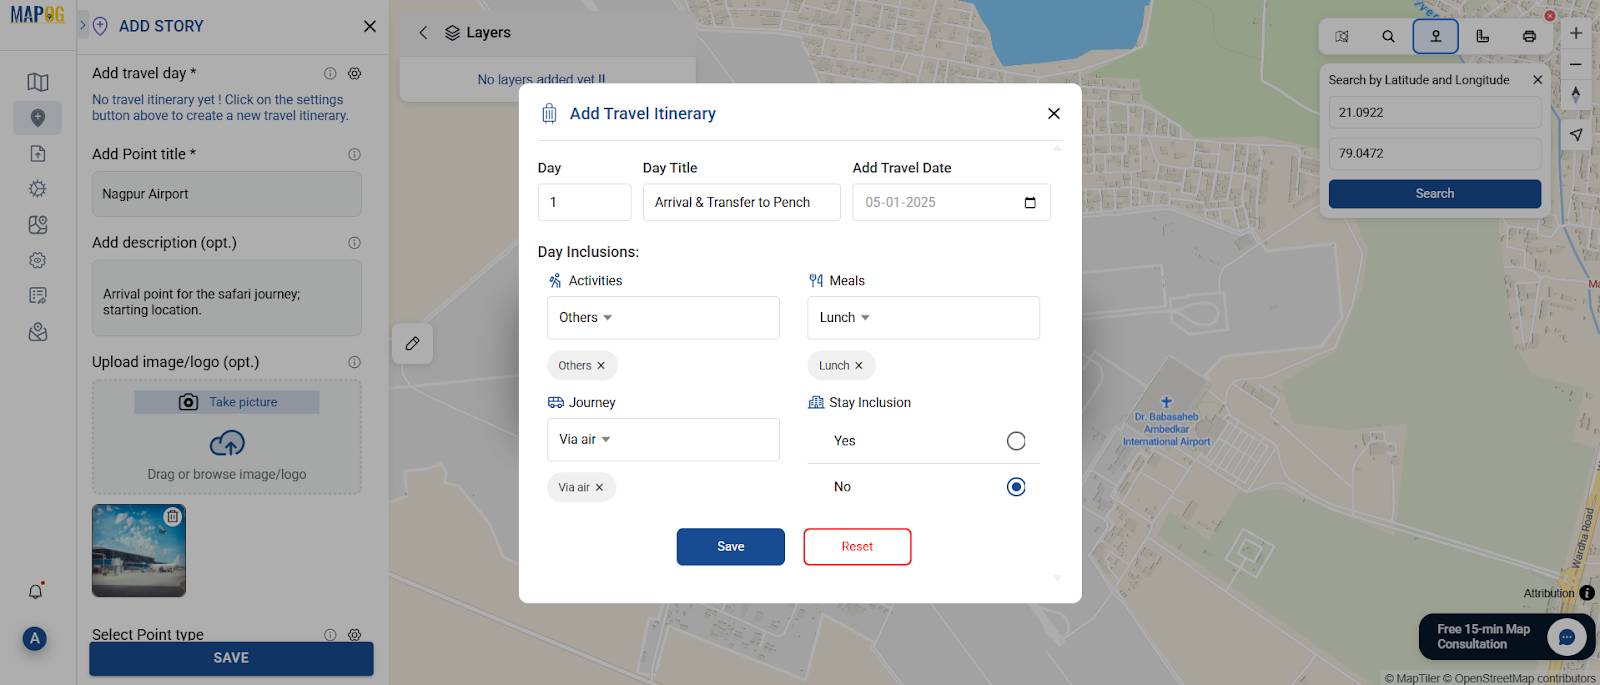
Step 3: Fill in Travel Itinerary Details
As you add each location, use the “Add Travel Itinerary” tab to make your story point journal-ready.
- Fill in the Day number, Title, and Date
- Use the Day Inclusions section to select:
- Activities
- Meals
- Journey Type
Toggle Stay Inclusion if accommodation is included
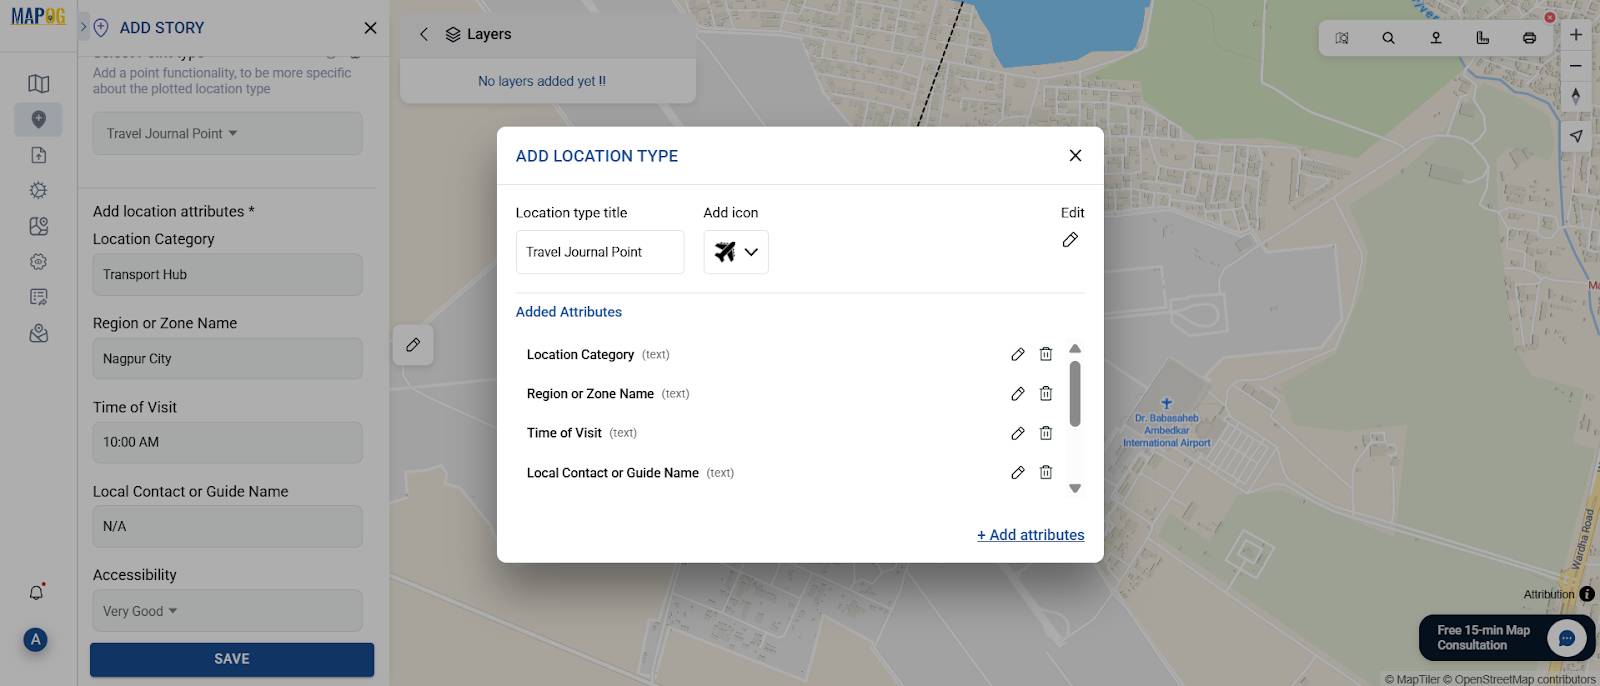
Step 4: Create Custom Location Types
To organize your travel journal better, define your own Location Type using the “Select point Type Setting” tool
- Go to the Location Type Management tab
- Click “Create New Location Type”
- Name it something like Travel Journal Point
- Add relevant attributes, such as:
• Location Category
• Region or Zone Name
• Time of Visit
• Local Contact or Guide Name
• Accessibility
• Notes or Highlights
Save it after filling the information, and repeat the same process for the rest of the locations.
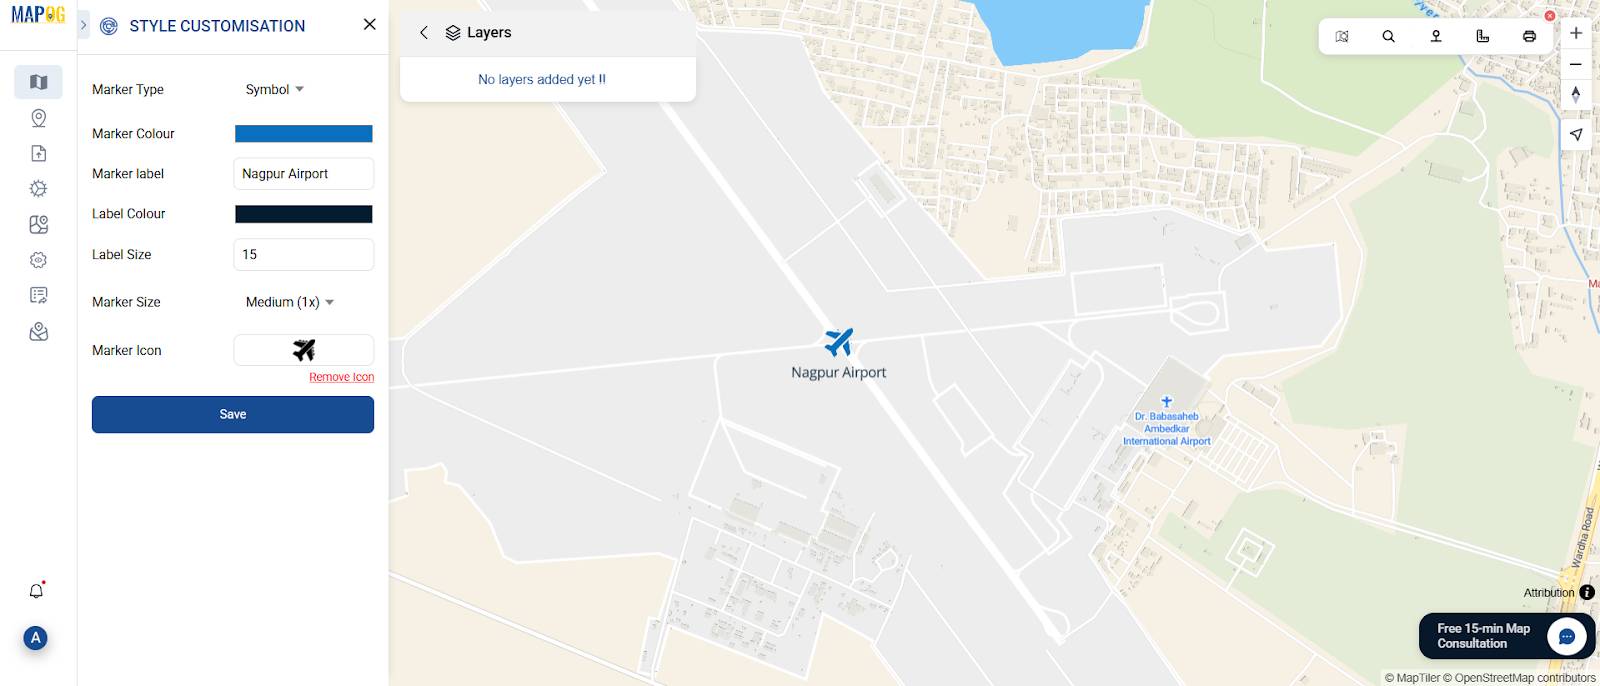
Step 5: Customize Points for Visual Clarity
Open the “Point Customization” tab for each location to:
- Assign meaningful icons
- Set label style, color, and placement
- Reflect category or priority using color codes
- Toggle labels based on zoom level
This makes your map clear, clean, and expressive.
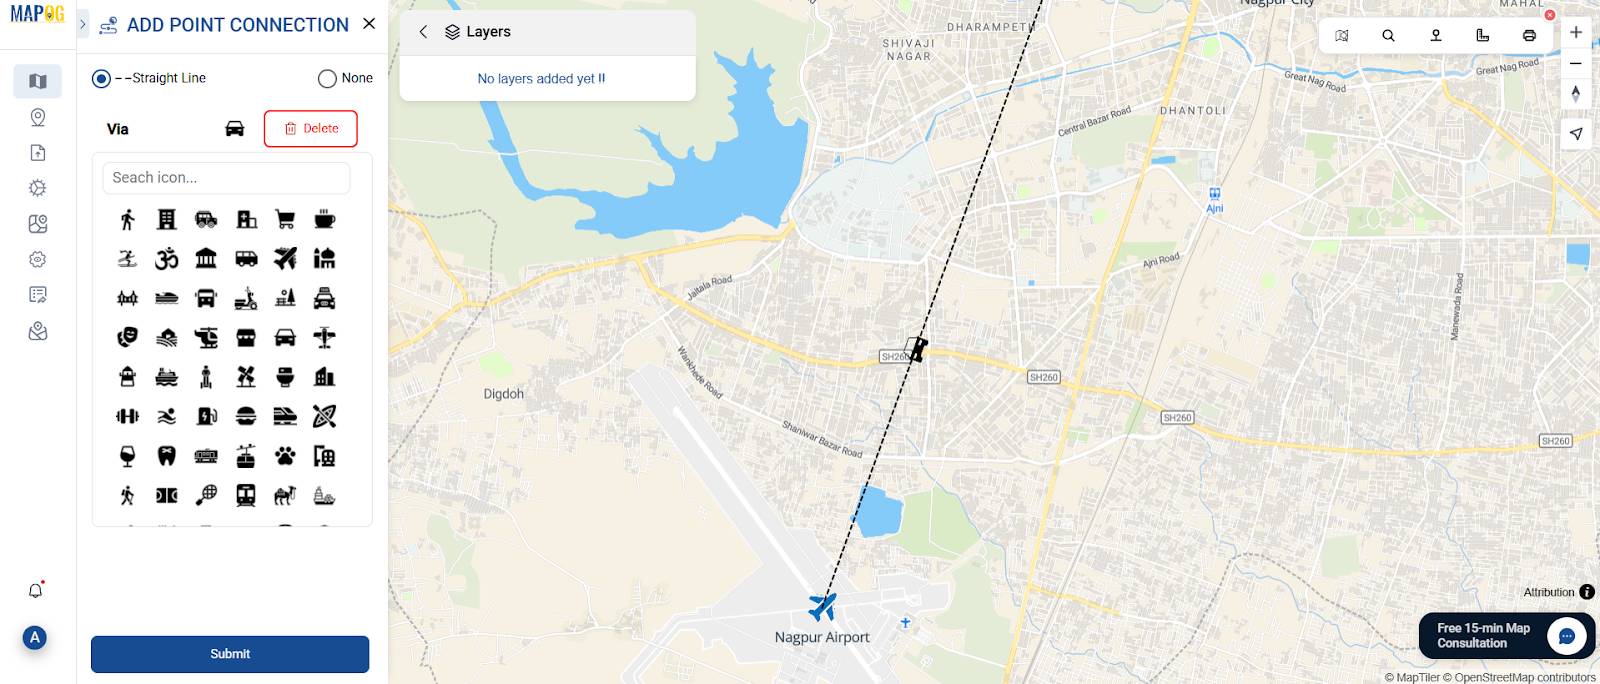
Step 6: Connect Your Route
To show your travel path, use the “Add Point Connection” tool in MAPOG.
- Open the Story Overview panel
- Click and select “Add Point Connection”
- Choose Straight Line to link points in order
- Pick icons under Via to show travel mode
- Click Submit to save the route
Step 7: Share & Publish Your Map
- Go to ”Share & Publish”
- Set visibility to Public, Private, or Restricted
- Share it with others via web or social media

Industry Use & Benefits of Travel Maps
Mapped itineraries are valuable beyond personal use—they serve professionals across the travel sector:
- Travel agencies & tour planners
- Bloggers, influencers, and guides
Whether you’re building organized safari routes or highlighting lesser-known spots, mapped journals help streamline communication and enhance storytelling. For instance, when designing experiences for offbeat travel in India, adding value for both creators and travelers.
Conclusion: Start Your Visual Travel Story
Using MAPOG, you can turn simple travel plans into interactive stories. With features like Add Story, Customization, and Route Connection, every trip becomes more organized, engaging, and shareable.