Effective task management is essential when coordinating multiple trades like electrical, flooring, and painting. They often work in tight timelines and shared spaces, where even a small scheduling error can lead to mishaps. By managing tasks using location-based mapping, tasks can be organized and tracked based on specific areas within a site, ensuring that each activity is performed in the correct sequence and location. MAPOG ensures each activity happens in the right sequence and location, improves visibility, reduces on-site conflicts, and enables supervisors to track progress in real time.
Key Concept
Managing tasks using location-based mapping visually links electrical, flooring, and painting activities to specific areas within the site. By organizing work according to location, the map prevents trade overlaps and enables real-time tracking. This approach improves coordination, reduces delays, and ensures efficient execution across all areas.
Step-By-Step method
Step 1: Create new custom location template
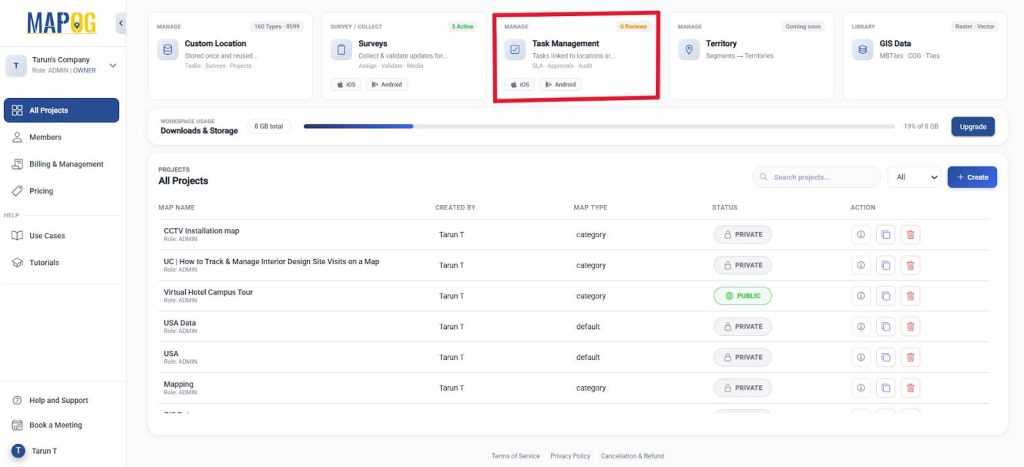
Click on “Task Management” on the MAPOG dashboard.
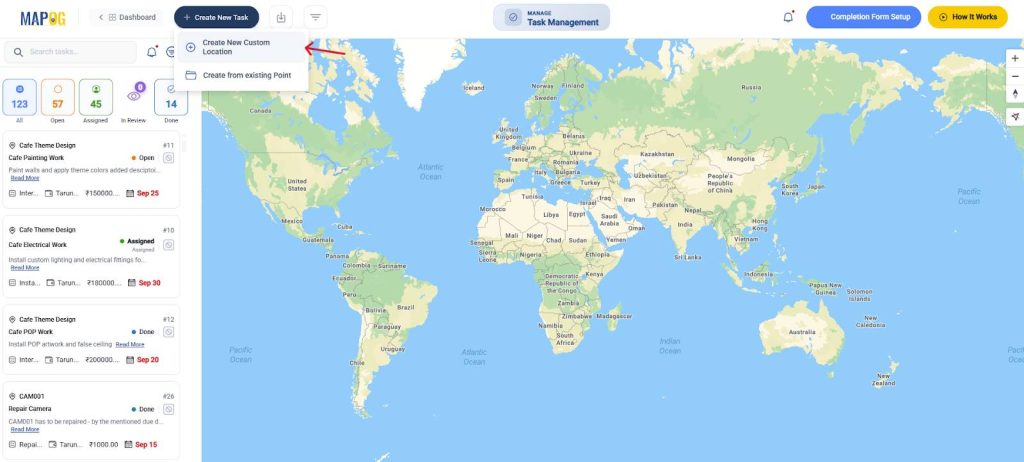
Here, click on ‘Create New Task’ and ‘Create New Custom Location’, you can add your specific related attributes to each location.
Go to custom location settings and click on add new custom location template.
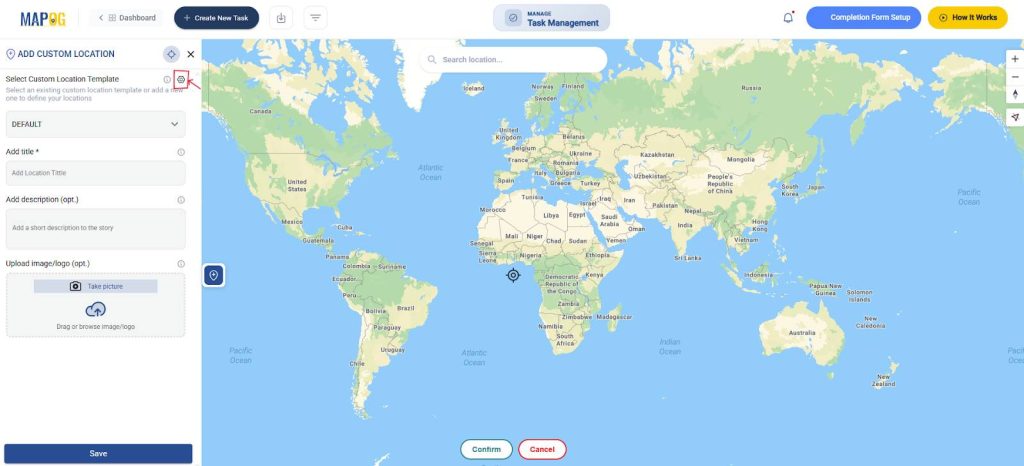
Create a custom location template. Give it a title, colour and select geometry as a point. Further, add attributes such as Location, area type and facilities, with select or multi-select options.

Step 2: Create a task completion form
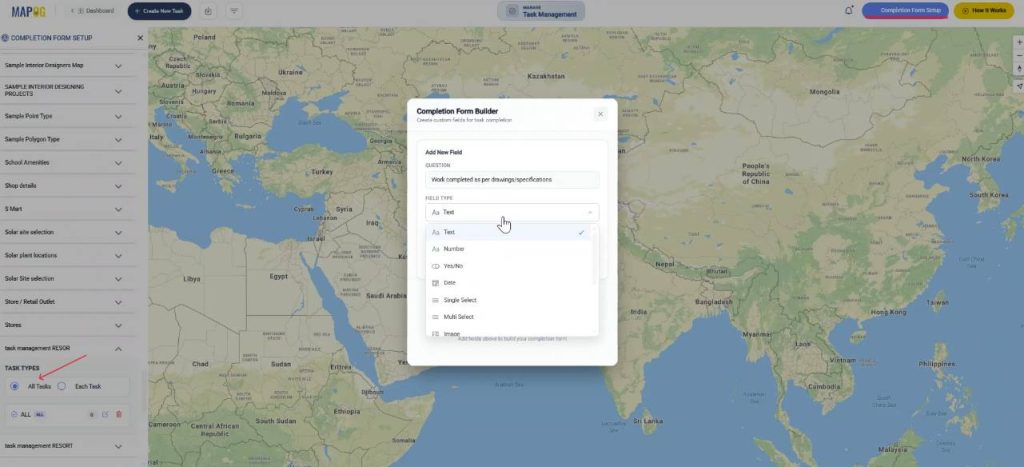
Next, you can create a completion form that is required to check the quality of work and note down other details. Start by navigating to the Completion Form setup in the top-right corner. Next, locate your custom location template on the left. Under Task Types, select All Tasks and build your own completion form. You can add a variety of questions with responses such as text, select, multi-select, yes/no, and even images.
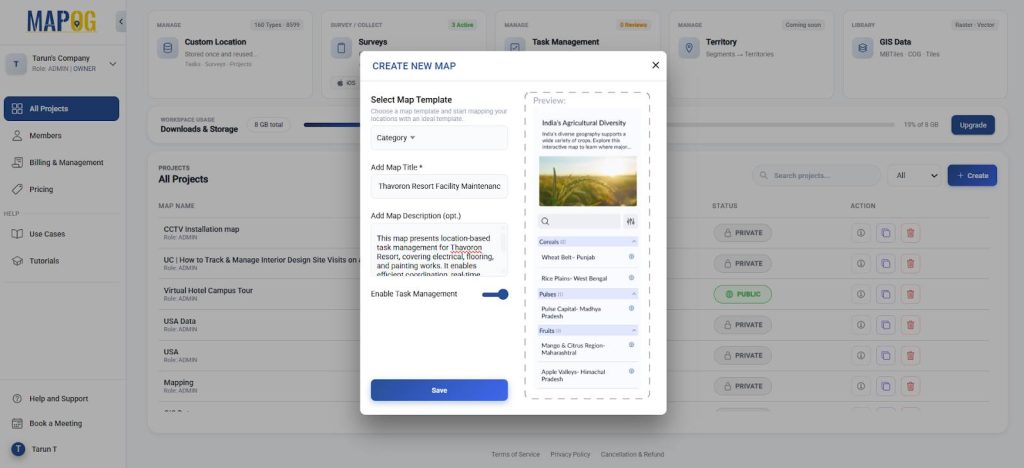
Step 3: Create the map
Go back to the dashboard and click “create” to create a new map. Select ‘Category’ as the map template, add a title and description. Next, click Enable Task Management and save.
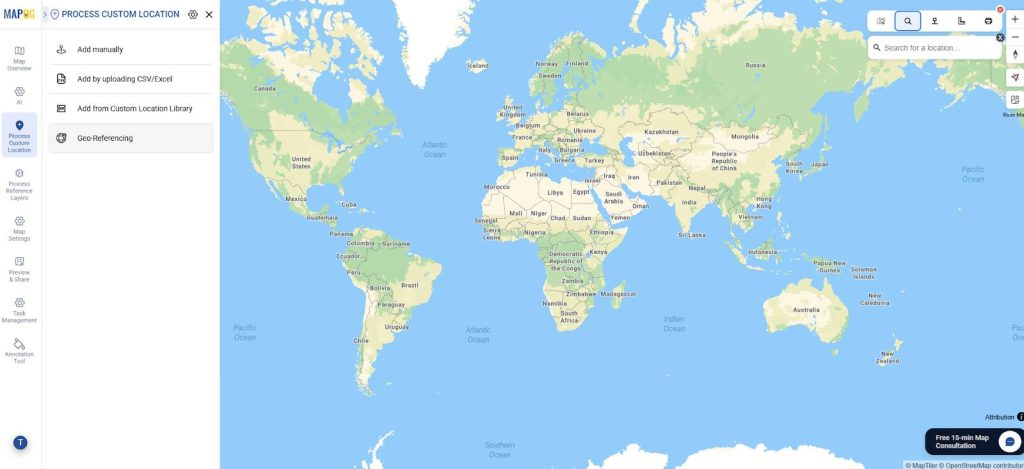
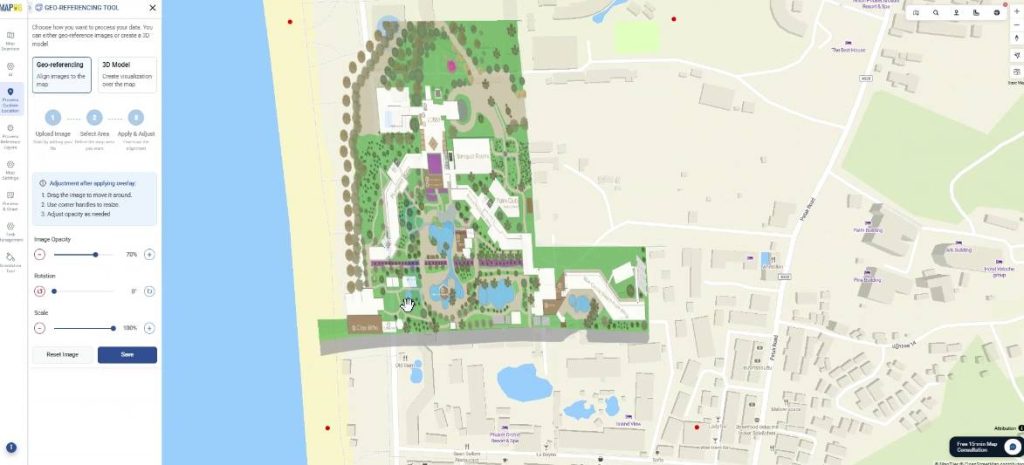
Step 4: Geo-referencing
Now, you can add your area layout to your base-map for advanced clarity. Go to Process custom location and select “Geo-Referencing”.
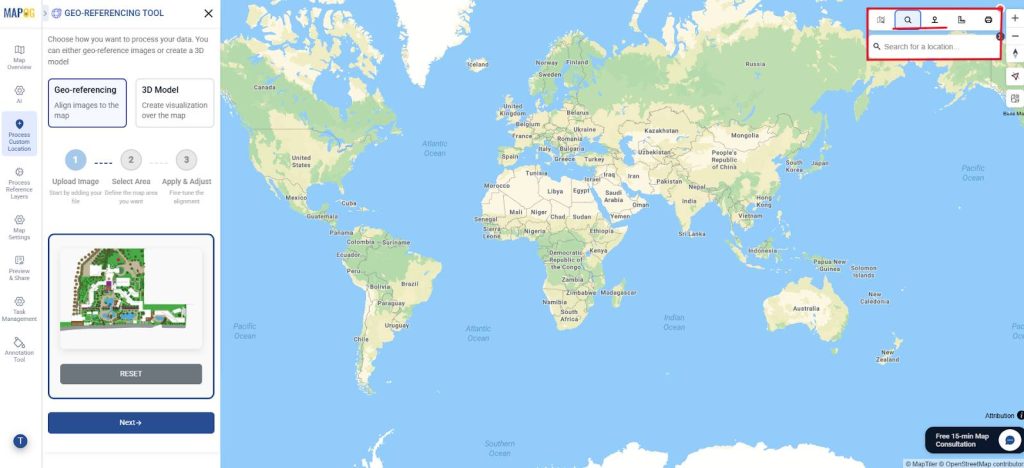
Further, upload the layout of your area in PNG or JPG format and press Next.
Search for your location by either name or coordinates using the toolbar on your right corner. Once you get your location on the basemap, select your area, using the drawing mode, you can select 4 points, square or rectangle. Then click on start drawing.
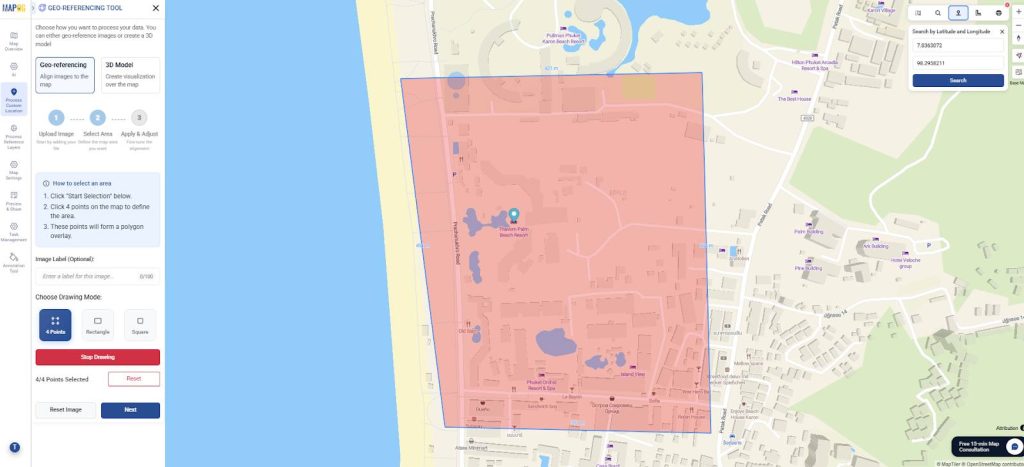
Afterward, click on Next and the layout will be projected onto your basemap. Adjust the projection onto the base map to align by using important buildings, roads as reference. You can use tools like rotation, scale and image opacity to adjust the layout. When satisfied, save it.
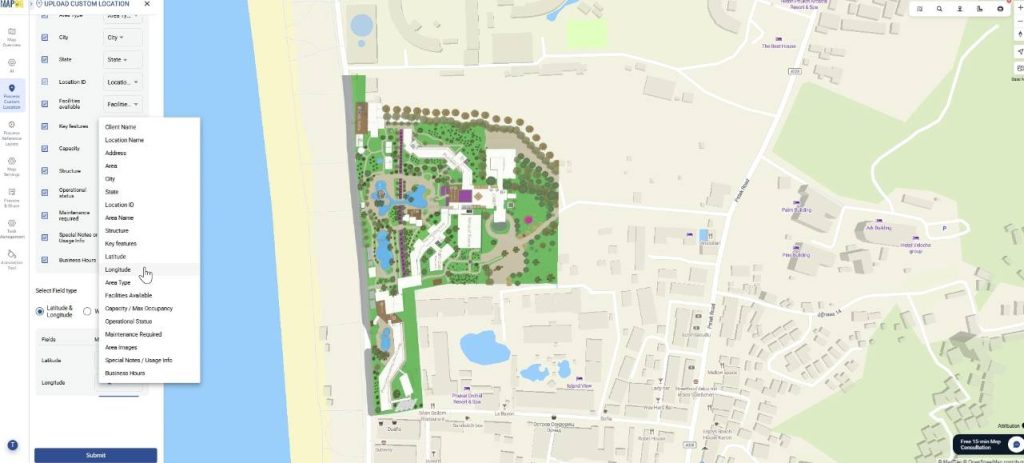
Step 5: Add locations
Now, go to Process Custom location and click on add by uploading csv/excel, as it provides a simple way to upload all attributes associated with each custom location. Next, select the custom location template that you recently created. Further, browse your file and upload.
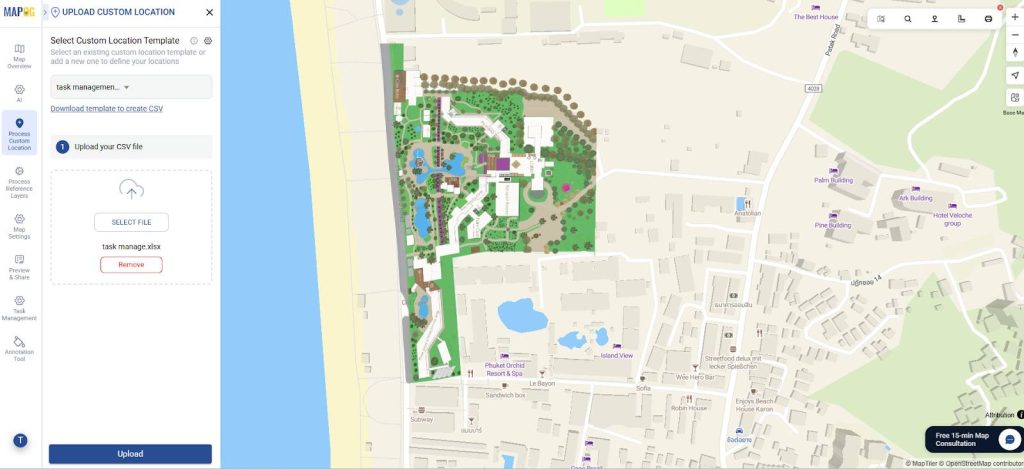
Now, define the location fields. Primarily, add a unique ID to your location by attribute or auto generate them, so that the system can recognize and track the same place reliably, even if its name, shape, or location changes. Then, match attributes to excel columns along with field types like Latitude & Longitude. Finally, your points will get auto-plotted on the map.
Step 6: Edit customer location details
Optionally, edit each location details. Go to edit custom location details as shown below.

Here, you can customize details about each location like business hours, description, upload images or edit the location itself.

Step 7: Assign task to location
Now, click on the location and select Add Task.
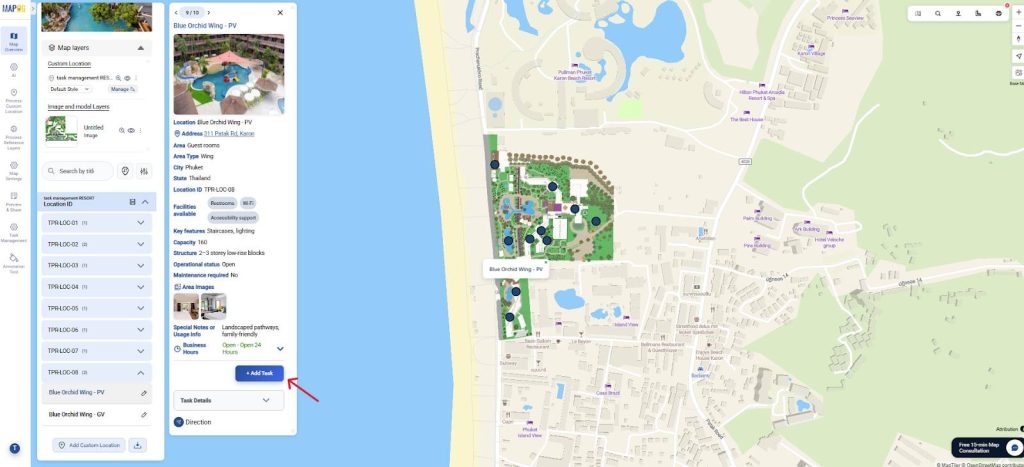
Further, give the task a title, description, due date and value. Also, select task status as open or assigned and set the task priority from urgent to low. Optionally, you can allow users to edit location.
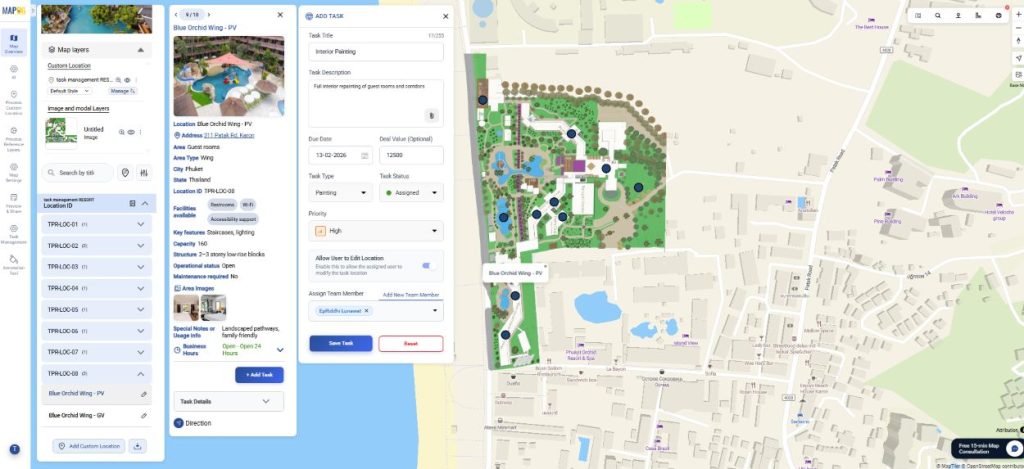
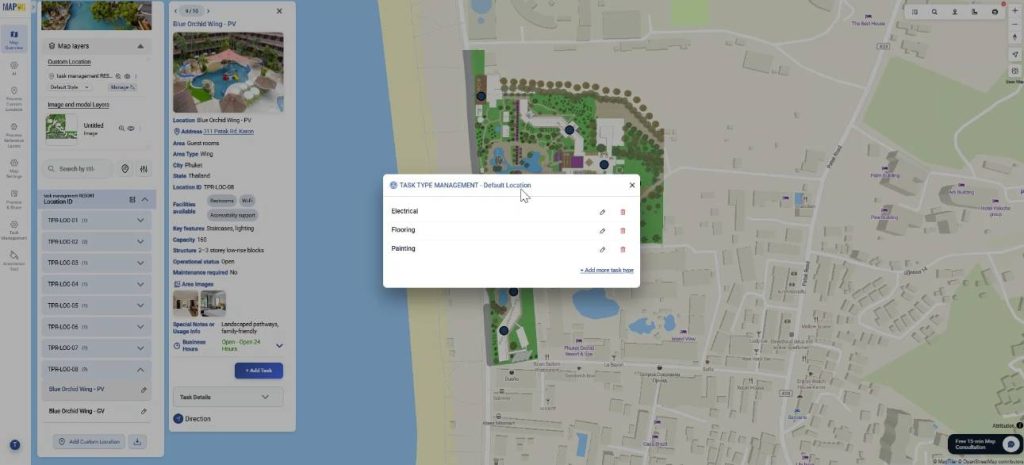
Further, go to Task Type and set up the type of tasks that you will perform like Electrical, Painting or Flooring.
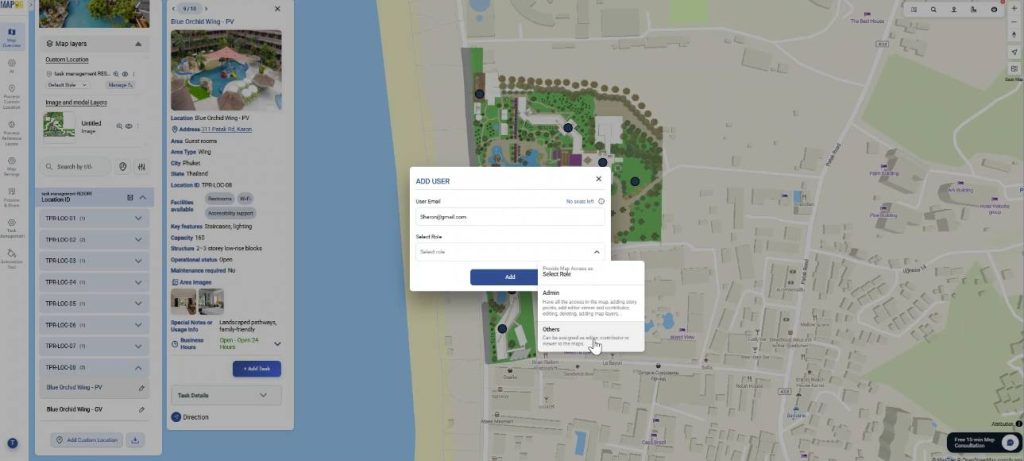
Assign the team members by using the add new member button and select the role such as admin or others. Then, select the team member for the required task. Then save the task.
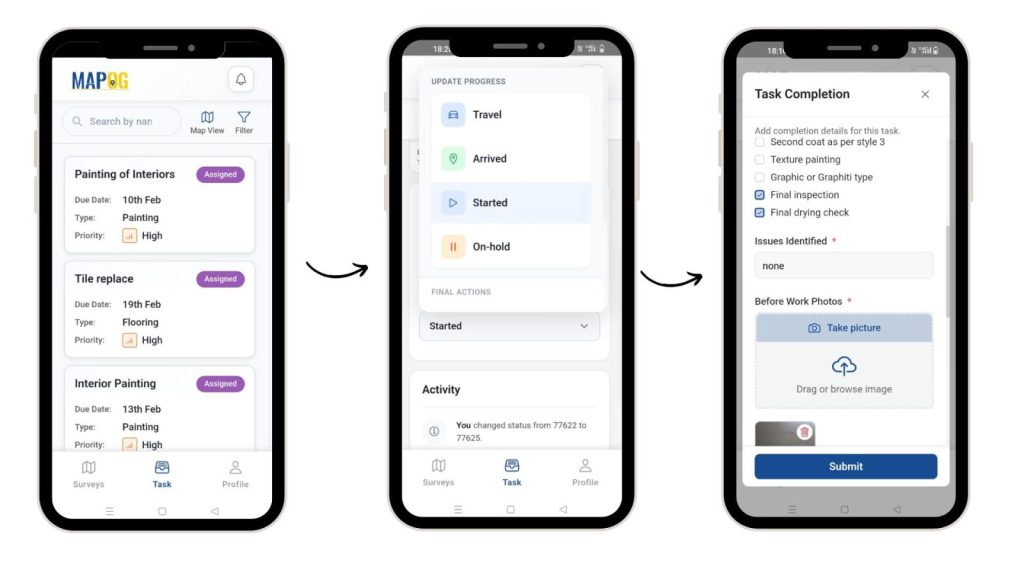
Step 8: The user interface
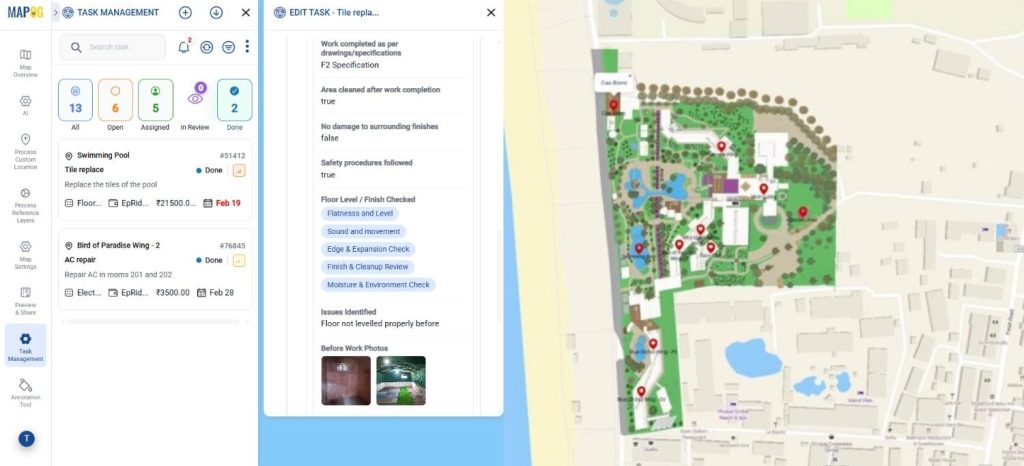
The assigned users can see their tasks in the MAPOG Contributor app. They can view tasks by table or map view and also filter them by priority as well as due date. Afterwards, they can fill the task completion form, along with images of the task before and after completion.
Step 9: Task Overview
Finally, you can view the tasks in the task management section. You can use the filter option and see them by priority, type or assignee and manage tasks skillfully.
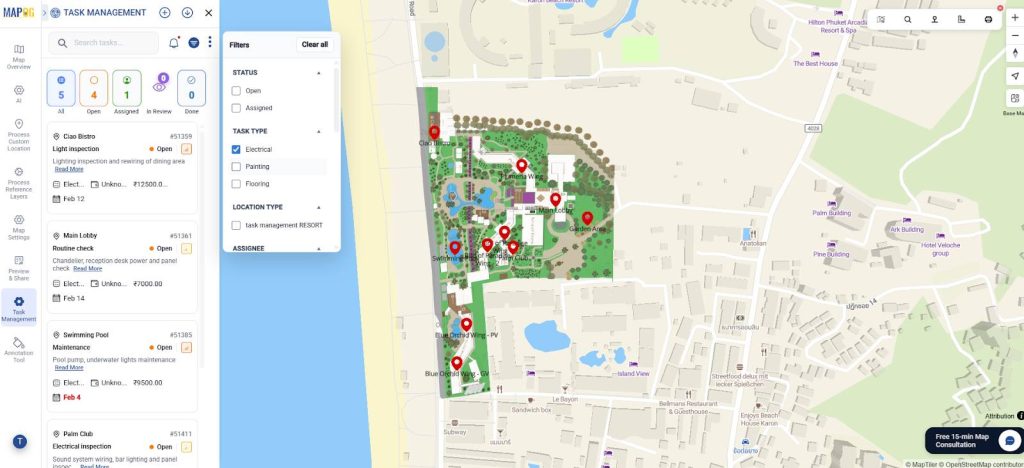

You can even review the submissions from here.
Industrial Benefits of task management
Managing tasks using location-based mapping is ideal for environments like campuses, hospitals, and resorts. It enables precise coordination across trades, reduces conflicts and supports execution without disrupting daily operations. Real-time, location-level visibility enhances resource planning, accountability, progress tracking, and provides reliable documentation for quality control and long-term facility management.

Conclusion
Mapping tasks to physical areas improves control over multi-trade operations by ensuring tasks occur in the right sequence and locations. With MAPOG, you can reduce conflicts, improve visibility, and enable efficient execution in environments like resorts and campuses.
MAPOG Contributor App:
App Store: https://apps.apple.com/us/app/mapog-contributor/id6754868956
Play Store: https://play.google.com/store/apps/details?id=com.mapog.contributor