If you’re planning your next big adventure, there’s one thing you shouldn’t skip—how to create a travel itinerary on a map and share it online. It not only helps you stay organized but also allows your friends or travel buddies to follow along in real-time. With intuitive platforms like MAPOG, it’s now easier than ever to map out your journey, add detailed plans, and share them in just a few clicks. This guide will walk you through a real example of how you can make your travel plans visual, interactive, and accessible from anywhere.
Key Concept: Why Use a Mapped Travel Itinerary
Creating a travel itinerary directly on a map gives your trip structure, clarity, and visual appeal. Instead of juggling spreadsheets or notes, imagine seeing all your stops, meals, activities, and photos marked beautifully on an interactive map.
With MAPOG comes features like Add Story and Preview and Publish, making it easier to tell a visual travel story. Whether you’re road-tripping through Europe or backpacking across Asia, having your plan mapped helps with better navigation, coordination, and storytelling.
Step-by-Step: How to Create a Travel Itinerary on a Map and Share It Online
1. Get Started with the Mapping Platform
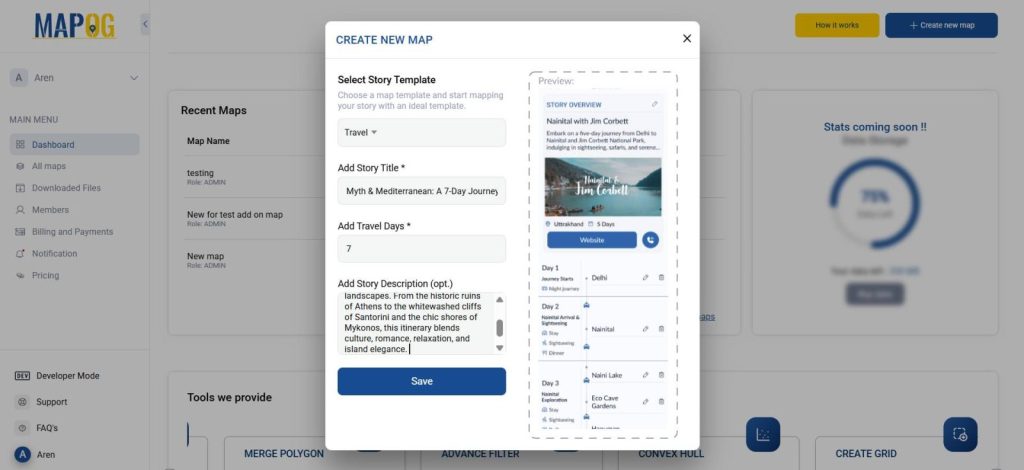
First, go to MAPOG and create a new travel itinerary. Give your itinerary a title and a short description of your journey. Save it to access the main interface.
2. Add Your First Travel Point
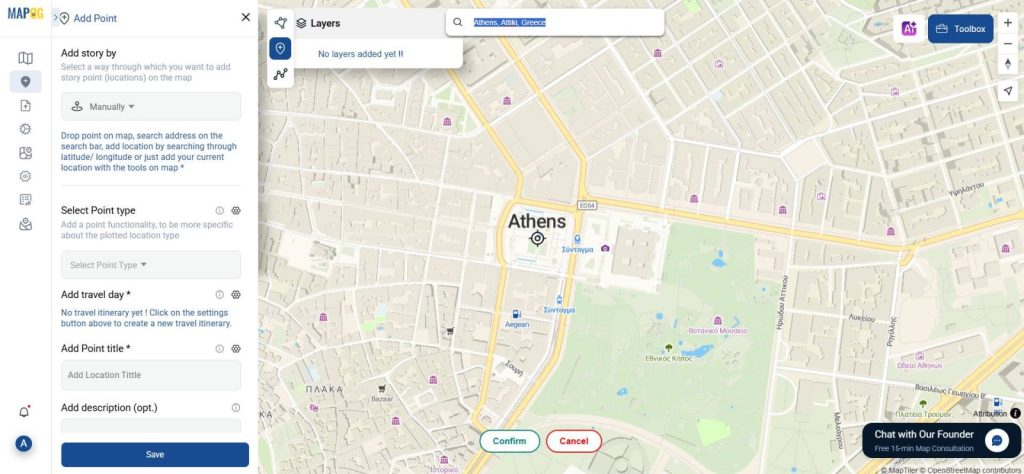
Click on “Add Story”, then choose “Add Point” to start marking your locations. You can manually search or click on the map to pin a place.
3. Customize Your Itinerary Details
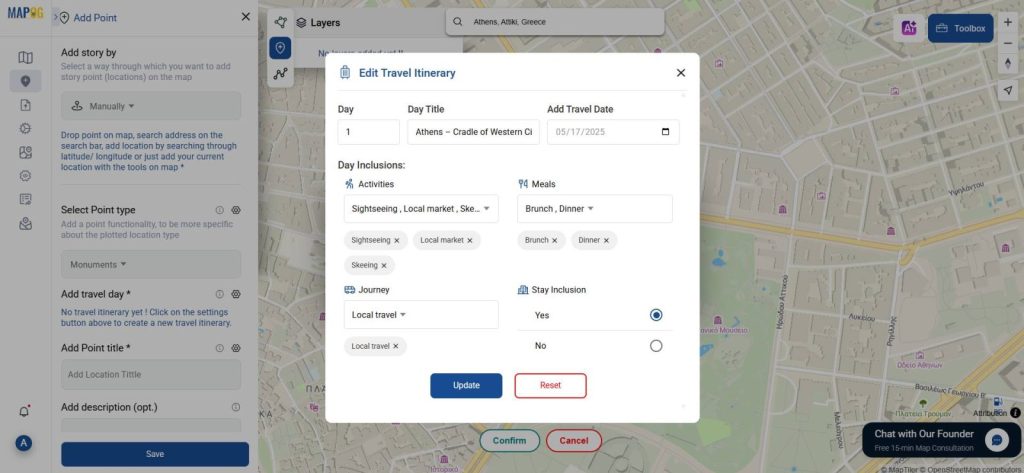
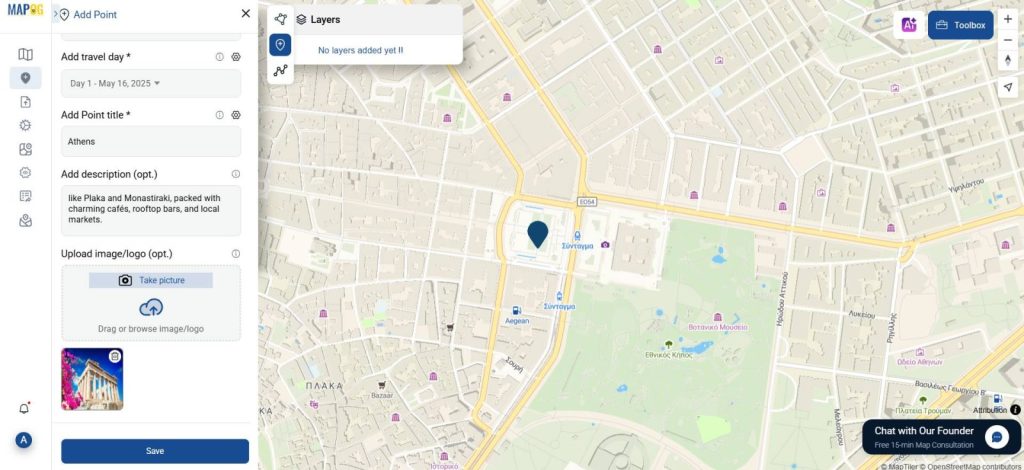
For each point you can add different point set up & itineraries. In those itineraries you can add day number, dates, day title, what kinds of activities you’re looking forward to, from meals to stay details everything in one place. This level of detail turns your map into a complete guide for anyone who views it. Lastly add point details like tittle, description, there you can upload images and other important attribute and save it.
4. Repeat for Each Travel Stop
Continue adding all the points of your journey. For each one, repeat the above steps. You can organize your trip day-wise or location-wise based on how you prefer to visualize your travel.
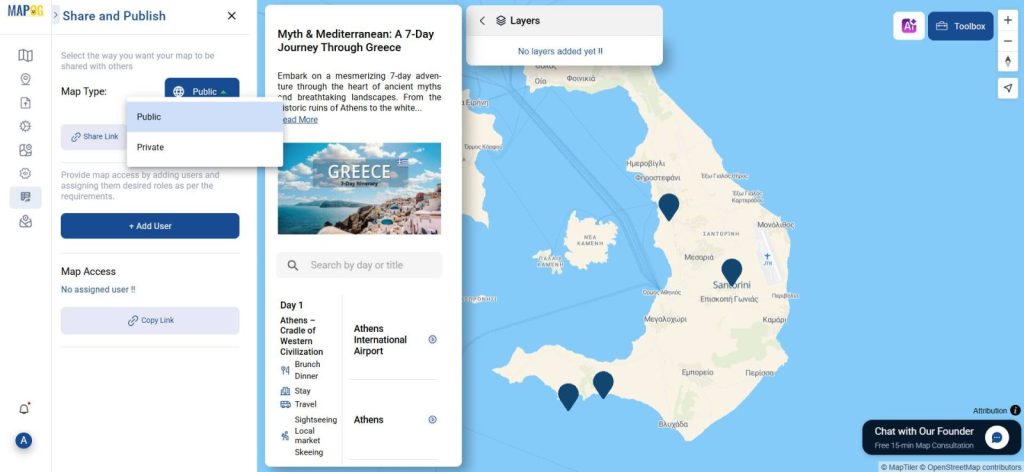
5. Share Your Journey
Once your itinerary is complete, click “Preview and Publish”. This will generate a public link you can send to anyone—whether it’s your travel group, family, or social media followers.
Industry Use & Benefits of Travel Itinerary on a Map
Creating a mapped travel itinerary isn’t just for personal use. Travel agencies, bloggers, and tour planners also benefit from MAPOG. Here’s why:
- Visual Appeal: Mapped itineraries catch attention and are easier to follow.
- Collaboration: Group trips become smoother with shared access.
- Storytelling with Purpose: MAPOG allow you to not just pin places but tell a story with photos, text, and structure.
- No App Needed: Just a web browser, and you’re set!
Conclusion: Start Your Visual Travel Story Today
Learning how to create a travel itinerary on a map and share it online opens up a new way to plan and experience trips. With platforms like MAPOG offering features like Add Story and Preview and Publish, you get more than just a plan—you get a story.
So, whether you’re planning a solo trip or a group getaway, give your itinerary a visual edge.
Have you ever mapped your travel plans? Try it next time and see how seamless and fun it can be.