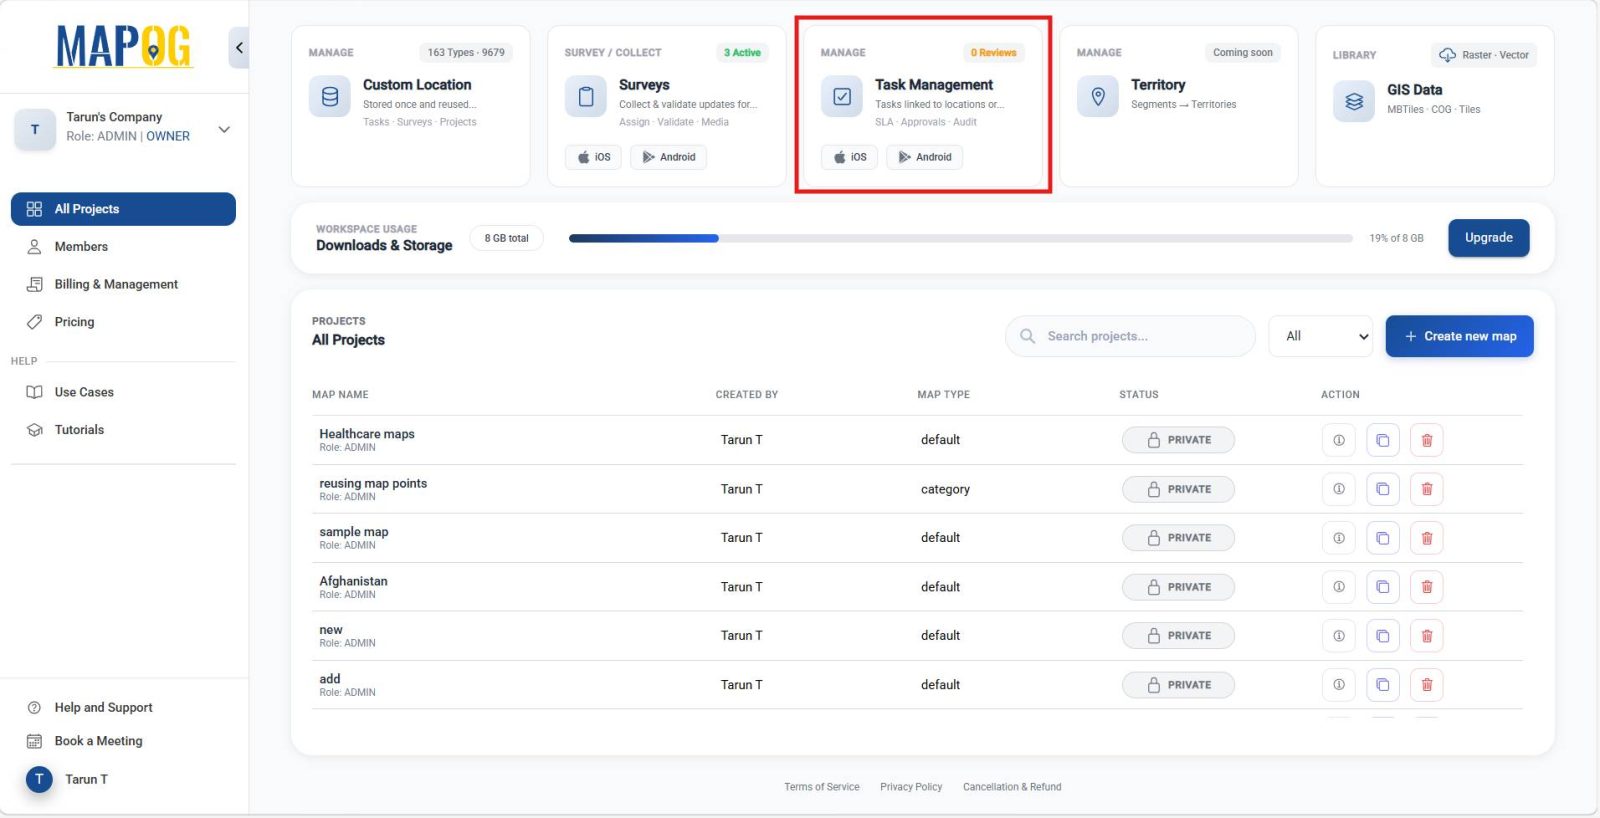
Interior design industries face challenges like unstructured workflows, weak accountability, and inefficiencies across multiple sites. Consequently, tracking inspections, approvals, and progress becomes difficult, while clients demand transparency. MAPOG helps teams manage interior design projects with structured task management, organizing categories, adding verification steps, and ensuring consistency across all mapped locations.
Key Concept: Why Manage Interior Design Projects
To manage projects effectively, teams need structured coordination across spaces, budgets, and client expectations. Therefore, a clear framework strengthens collaboration, accountability, and financial alignment. By linking tasks to mapped locations and validating progress with completion forms, teams maintain visibility, optimize resources, and build client trust across sites.
Step to Manage Interior Design Projects
1. Create a Custom Location Template
To begin, open MAPOG and navigate to the Task Management Dashboard to structure your workflow.
Click Create New Task. Then, choose Create New Custom Location for a new site or Create from Existing Point for ongoing work.

Next, click the settings icon beside Custom Location Template and choose Add More Custom Location Template.

Enter a title, set the geometry type to Point, and configure attributes like Select (Property Type), Multiselect (Design Areas), Number (Estimated Budget), and Image (Site Images). Finally, save the template for reuse across projects, ensuring standardization and consistency.

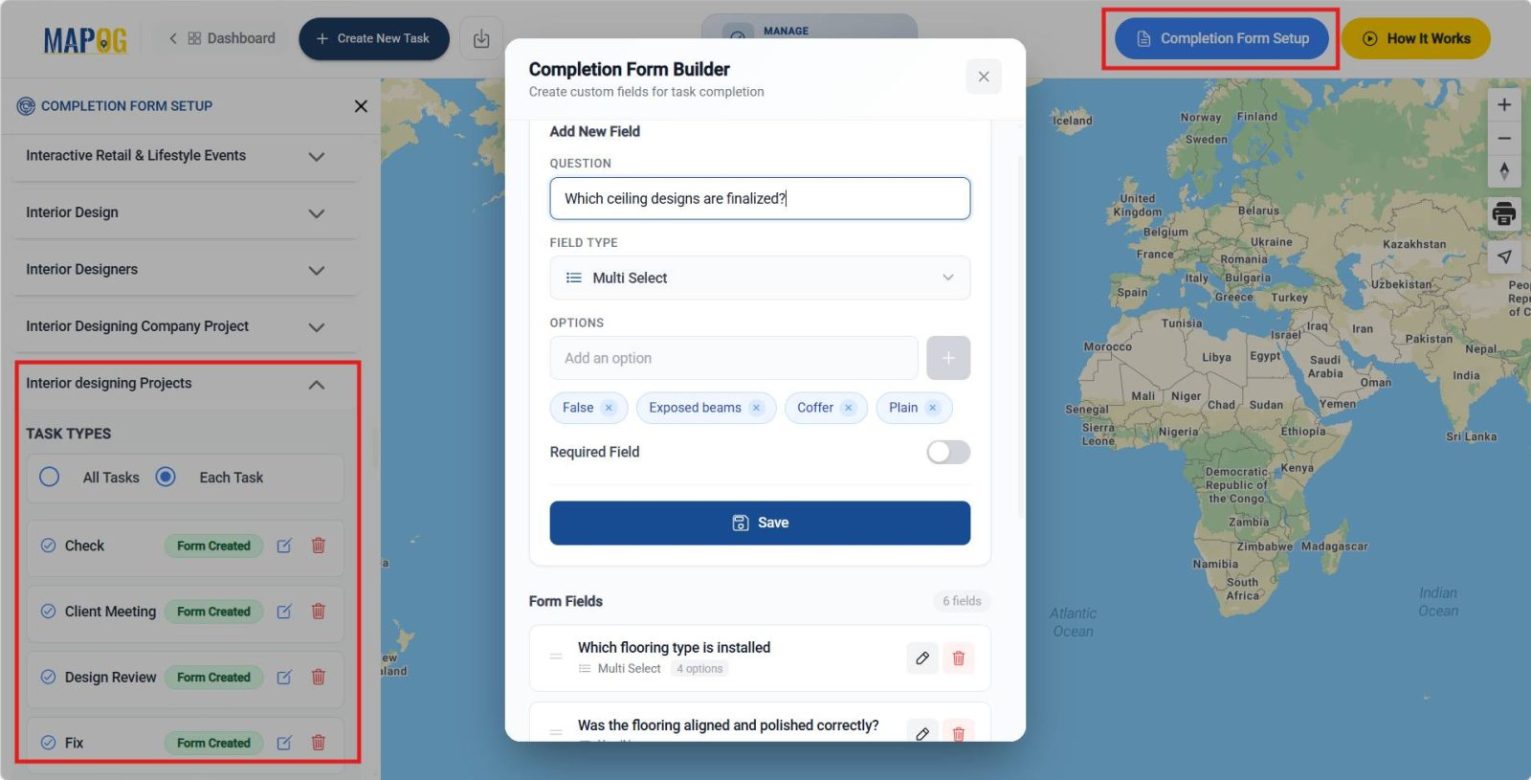
2. Build Completion Forms
Once the template is ready, proceed to Completion Form Setup to create a validation form before tasks are closed. Select the location template and add questions either for All tasks or customize them per task.

For example, add fields like: Was the wall paint applied evenly? (Yes/No), Upload a photo of the finished flooring (Image), Enter installation date (Date), and Select material type (Multi-select). Save to ensure proper verification.

3. Start a New Project and Import Location Data
Back in the Dashboard, click Create New Map, choose Category as the project type, add title and description, enable Task Management, and save.

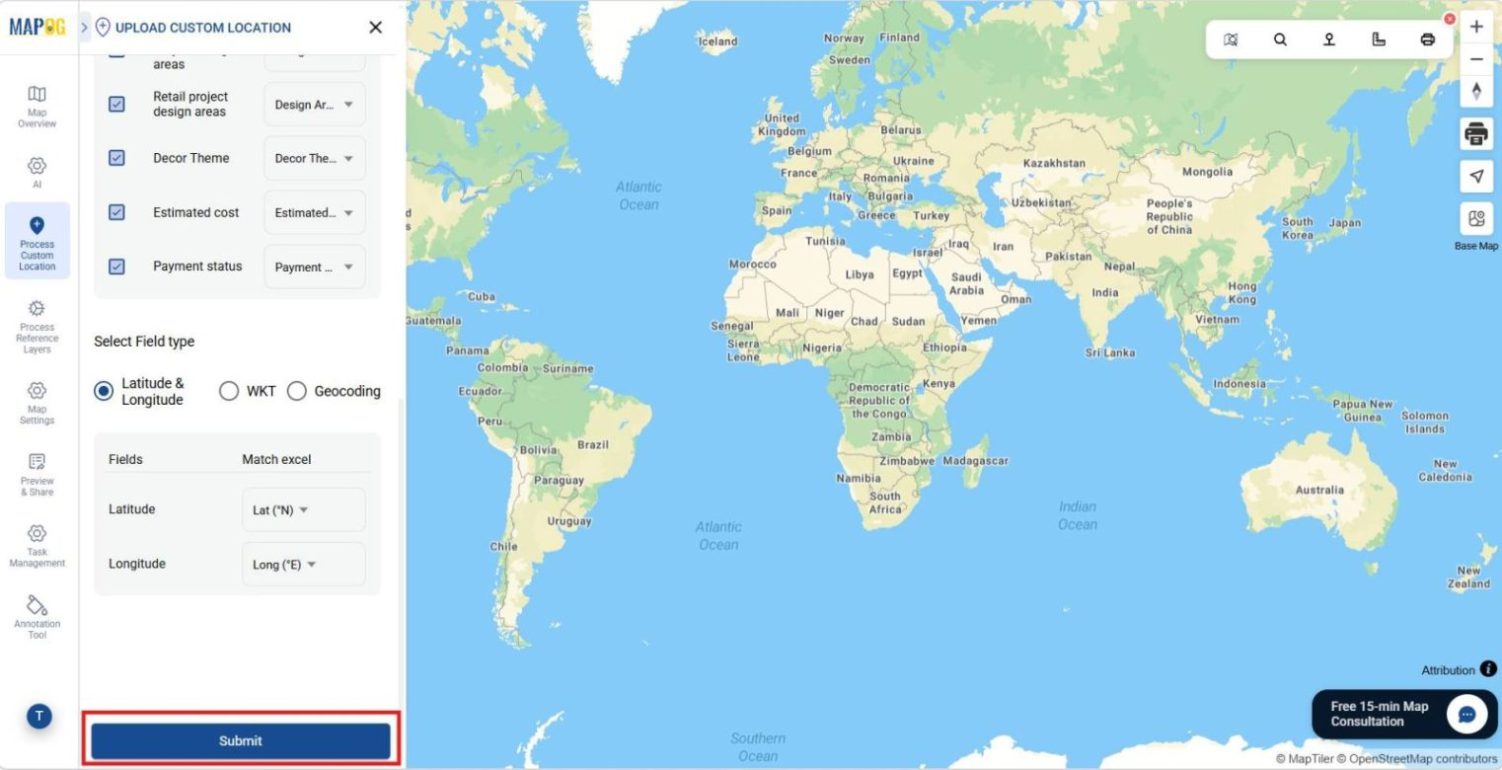
Next, navigate to Process Custom Location and select Add by Uploading CSV/Excel to import sites in bulk.

Choose your location template and upload the file,

If a unique ID already exists, use it for accurate tracking; otherwise, select Auto-Generate ID. Then match attributes with Excel columns,

choose placement type as Latitude & Longitude or WKT, and submit. As a result, the points automatically appear on the map.
4. Add and Assign Tasks
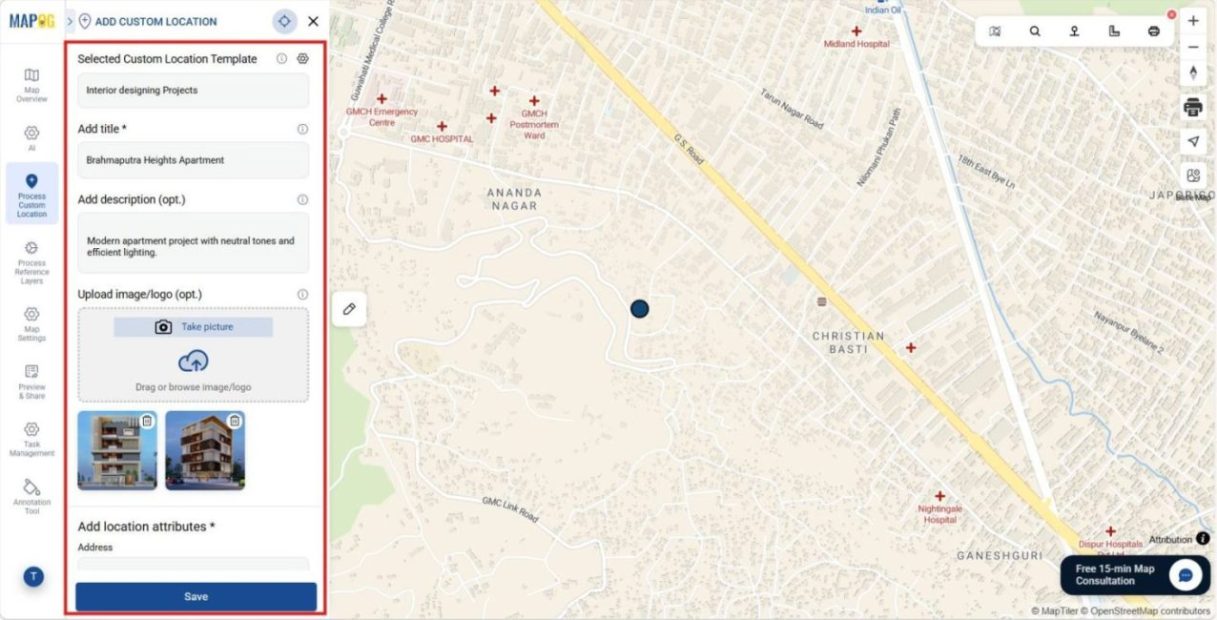
Then, click the pencil icon on a point to Edit Custom Location Details,
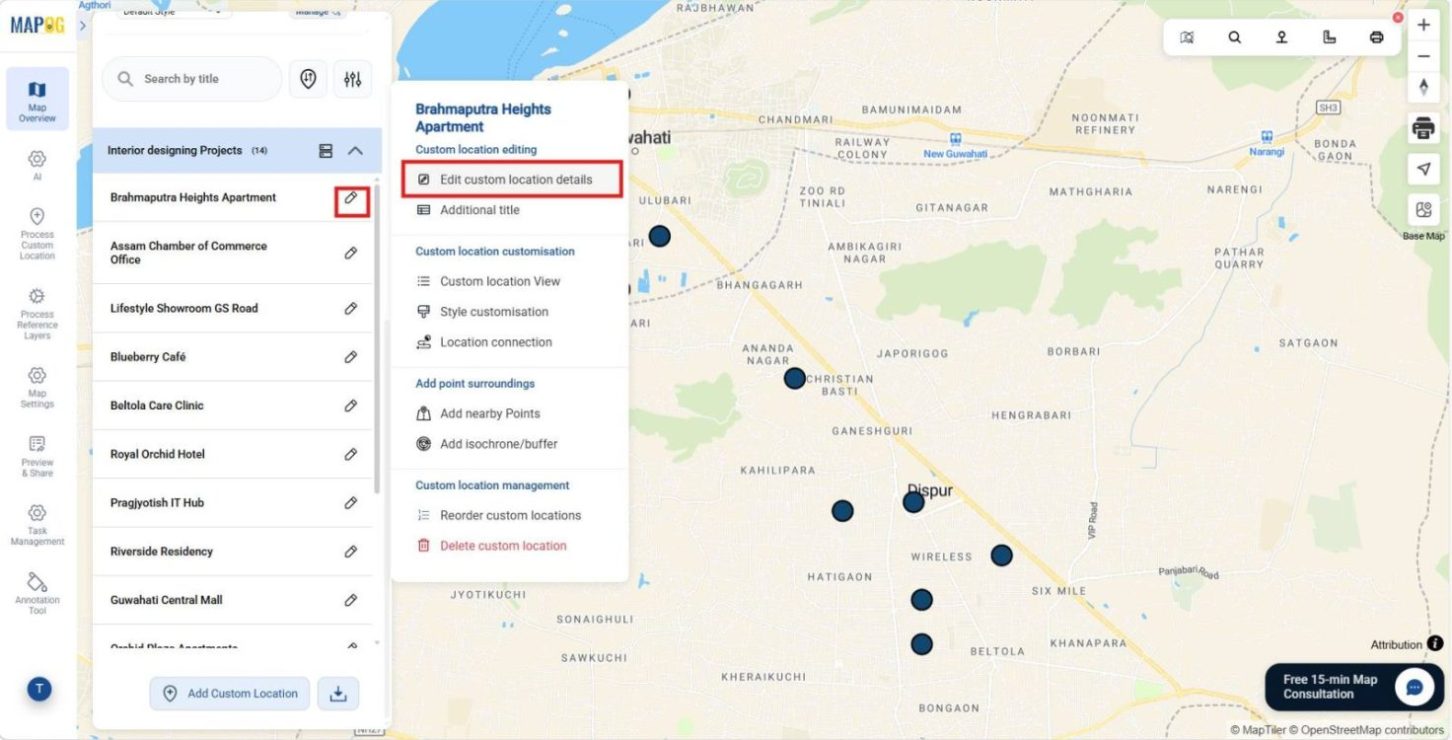
add images or descriptions, and save.
To create a task, select the site and click Add Task. Enter the task title, description, due date, and deal value.
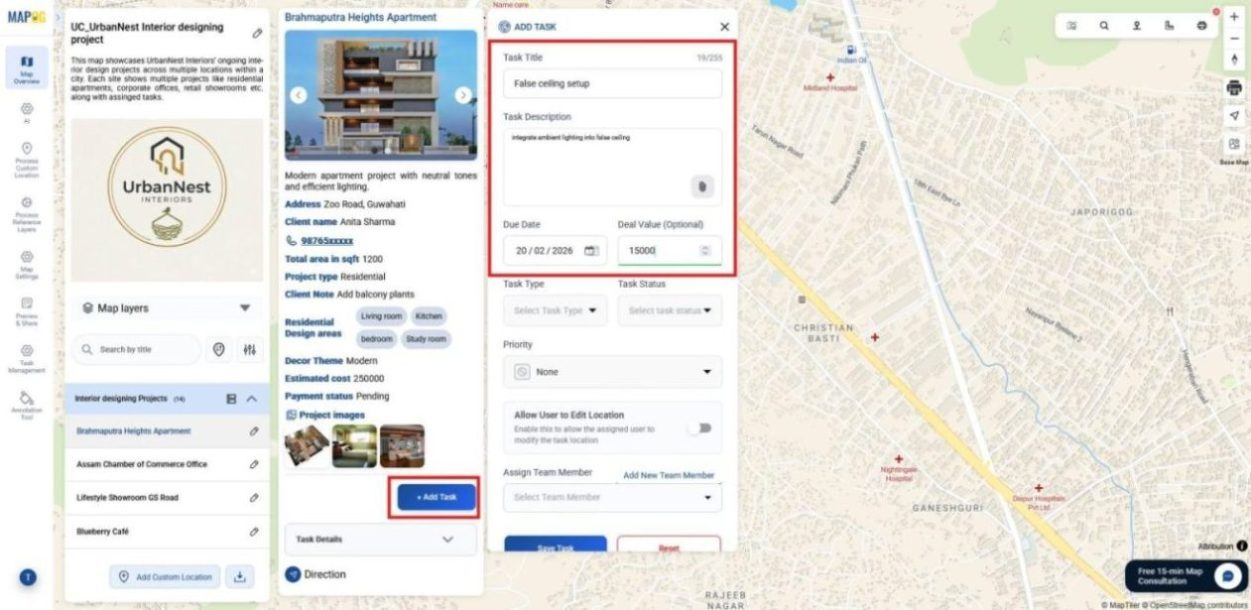
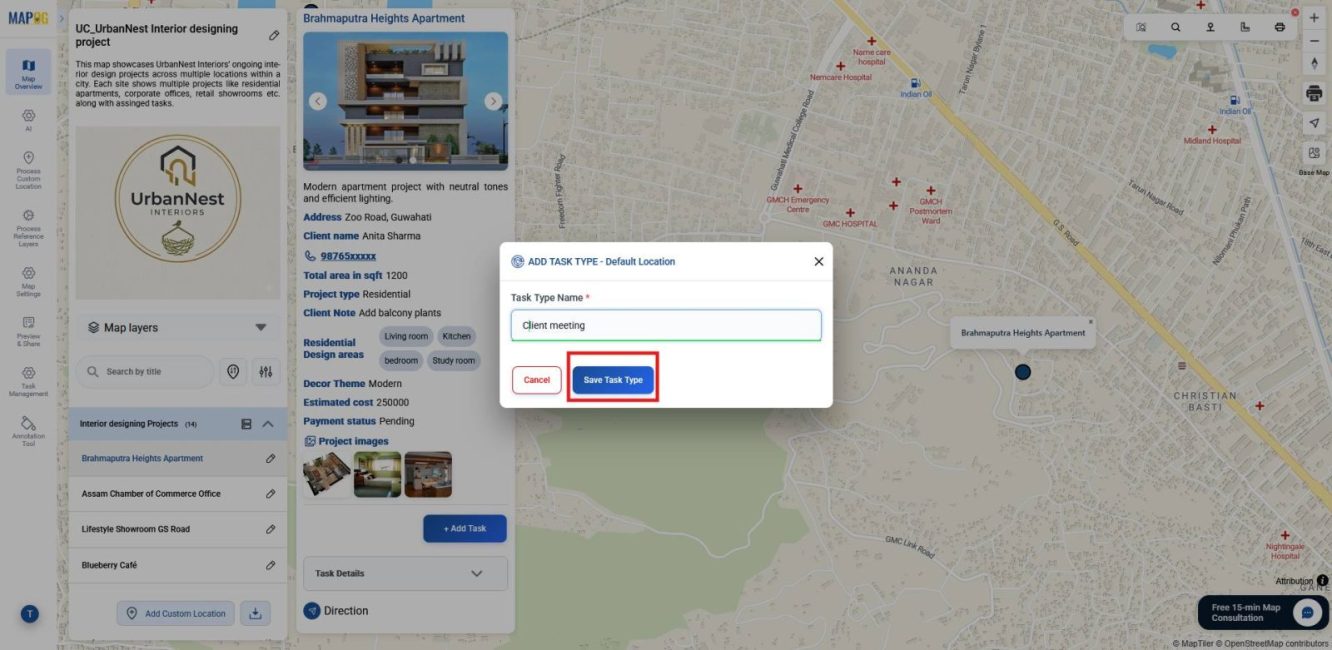
Then choose a task type such as Fix, Change, or Others. If required, customize new types through Manage,
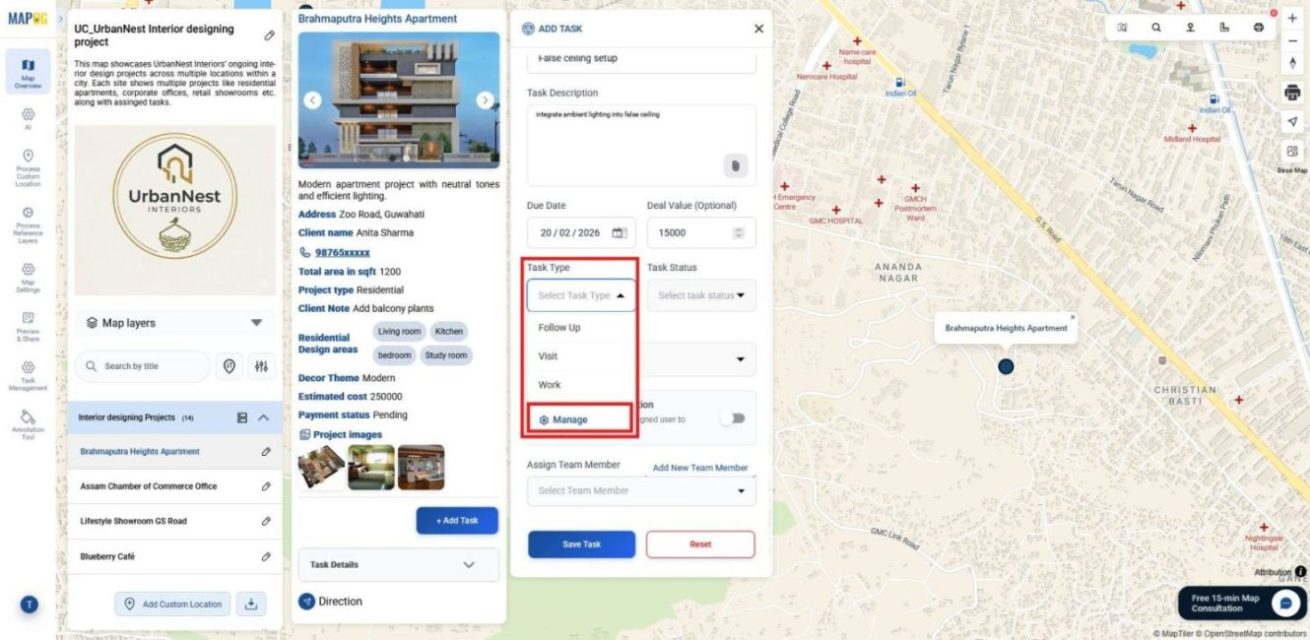
click Add More Task Type, define it, finalize, and save.
You can also create task‑specific completion forms in Completion Form Setup to add checkpoints for accurate reporting.
Next, define the status as Open or Assigned, and set priority levels such as Urgent, High, Medium, or Low.
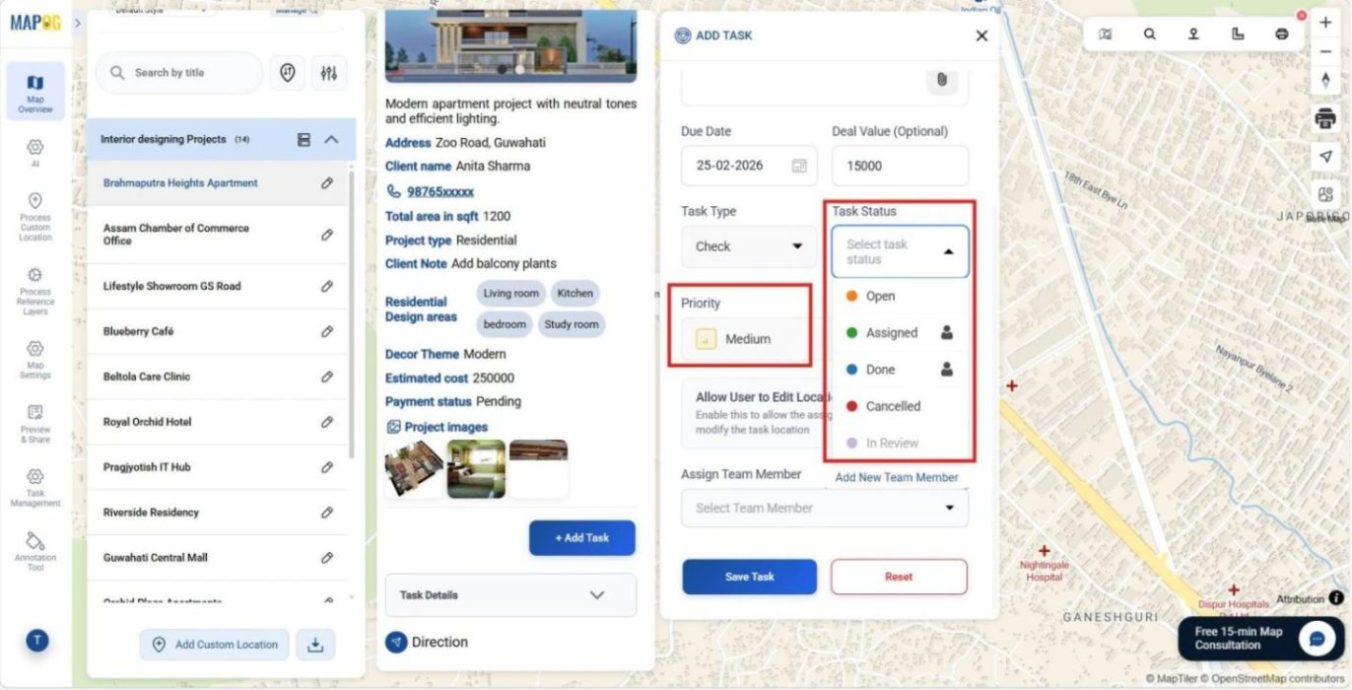
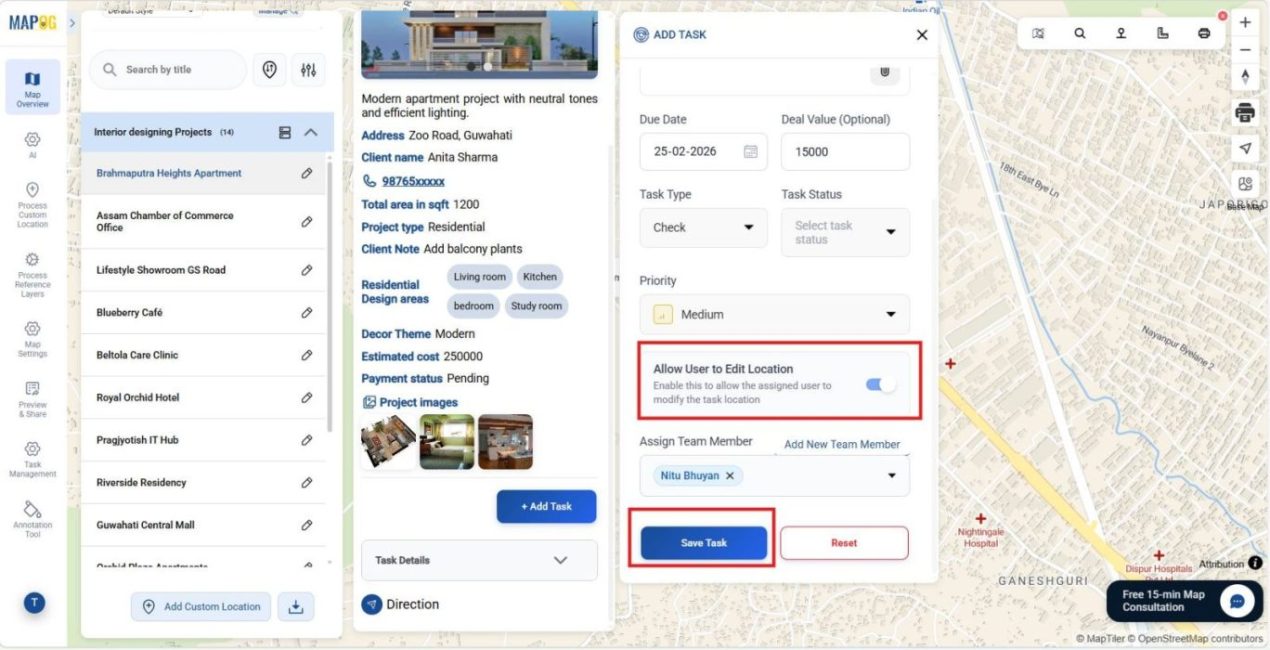
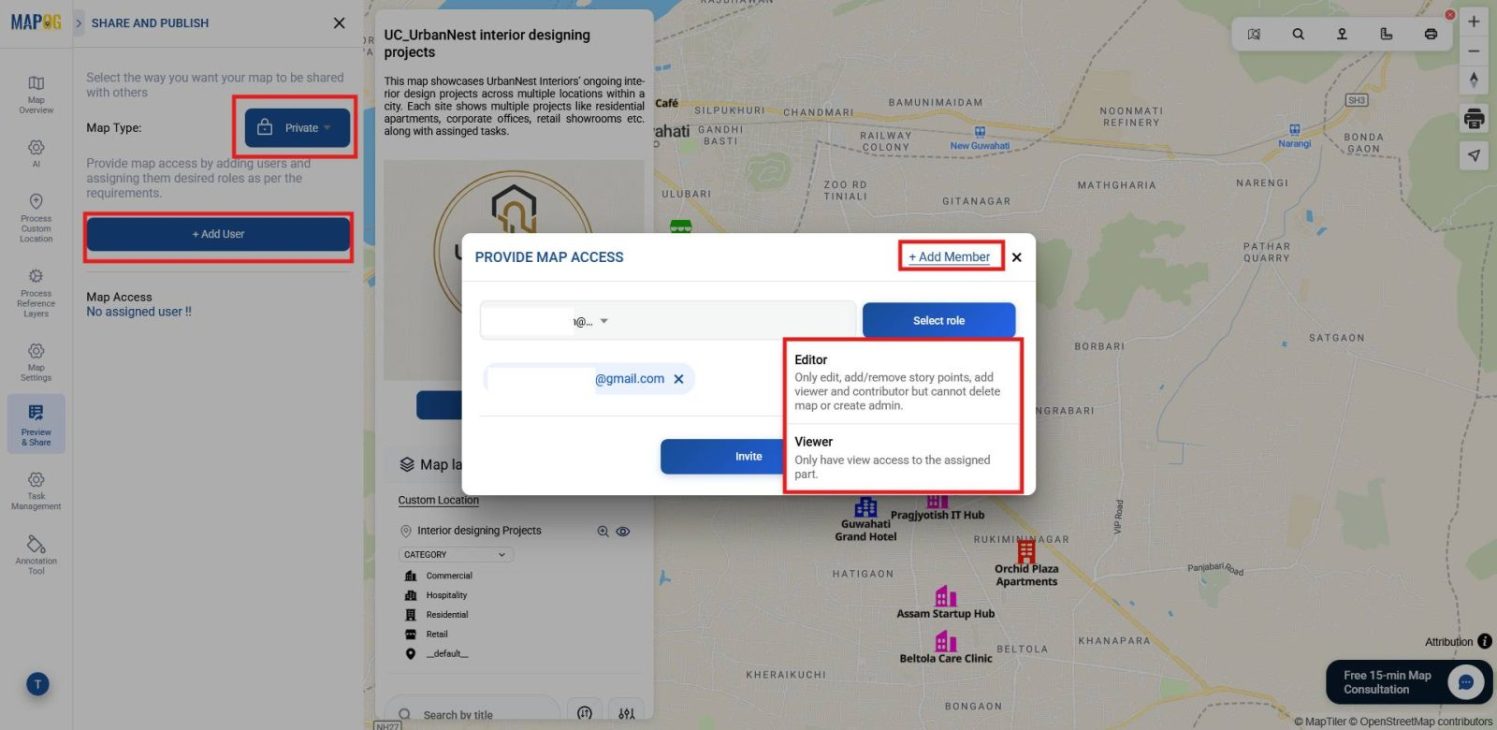
Click Add New Team Member, enter email IDs, and assign roles: Admins (full control over tasks and site details) or Others (limited to assigned tasks) and click Add.

Even allow users to edit task locations. Finally, select members from the Assign Team Member dropdown and save. Multiple tasks can be linked to one location with different assignees.
5. Style, Organize, and Configure the Map
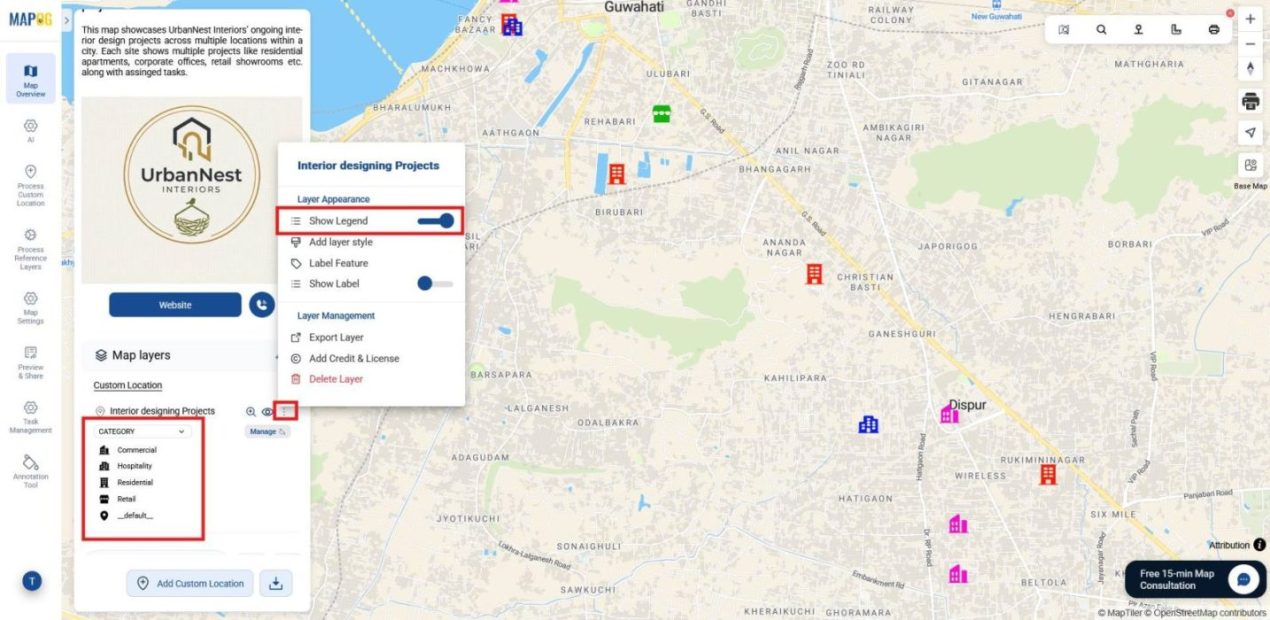
After assigning tasks, go to Map Layers and click Add Layer Style for map clarity.
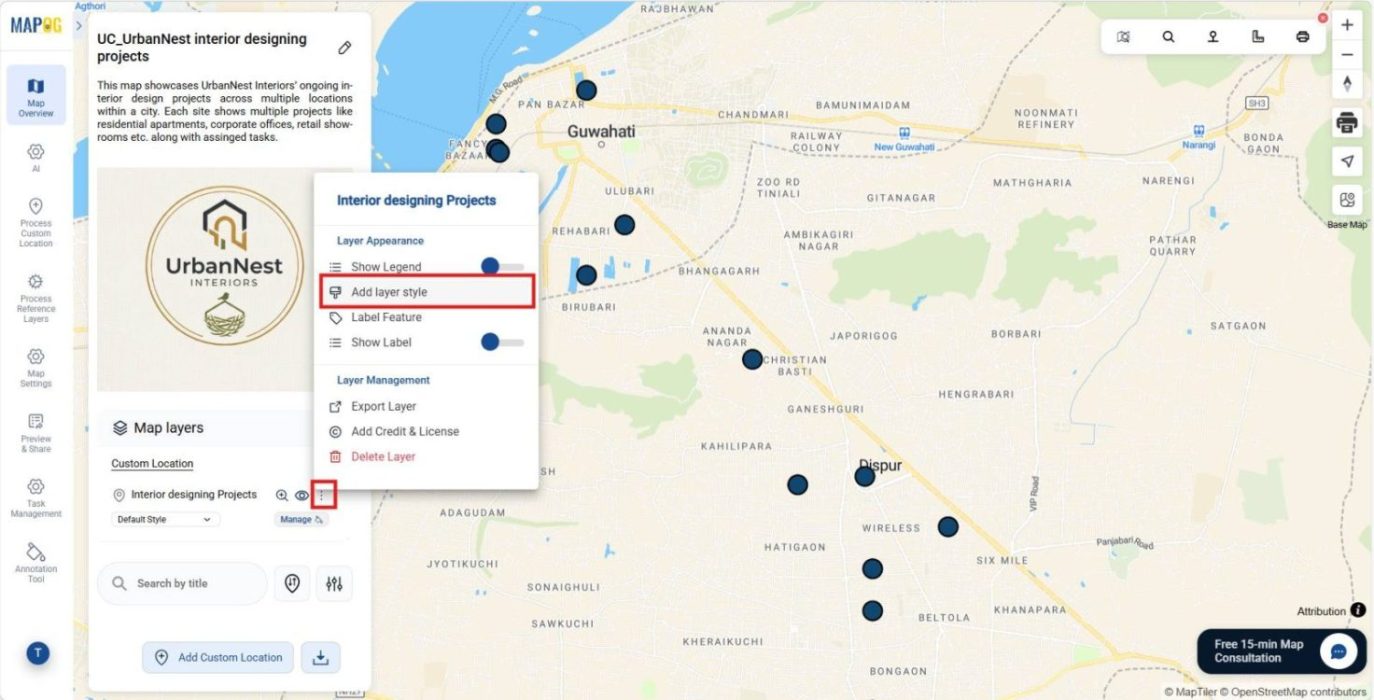
In the Category section, select an attribute, apply color coding, choose icons in the Category Icon section, and then save the style.
and enable the Legend for interpretation.
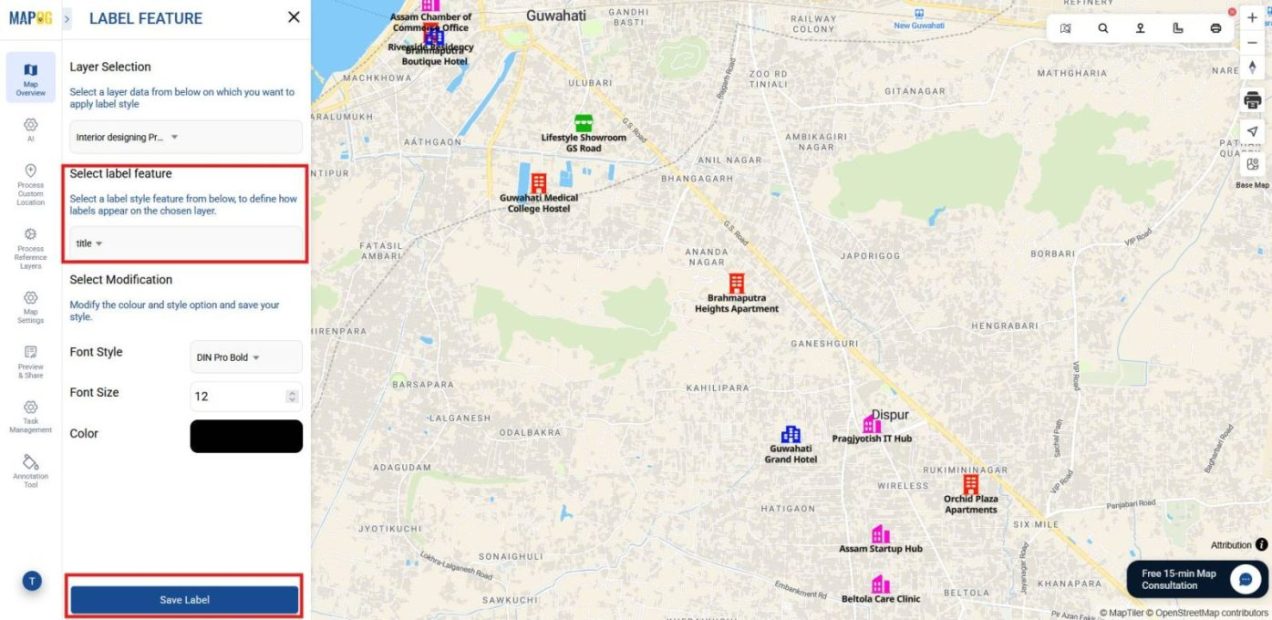
For additional clarity, click on Label Feature, choose the attribute to display, and save labels so they appear on the map.
6. Group By, Filter and Sort Attributes Tool
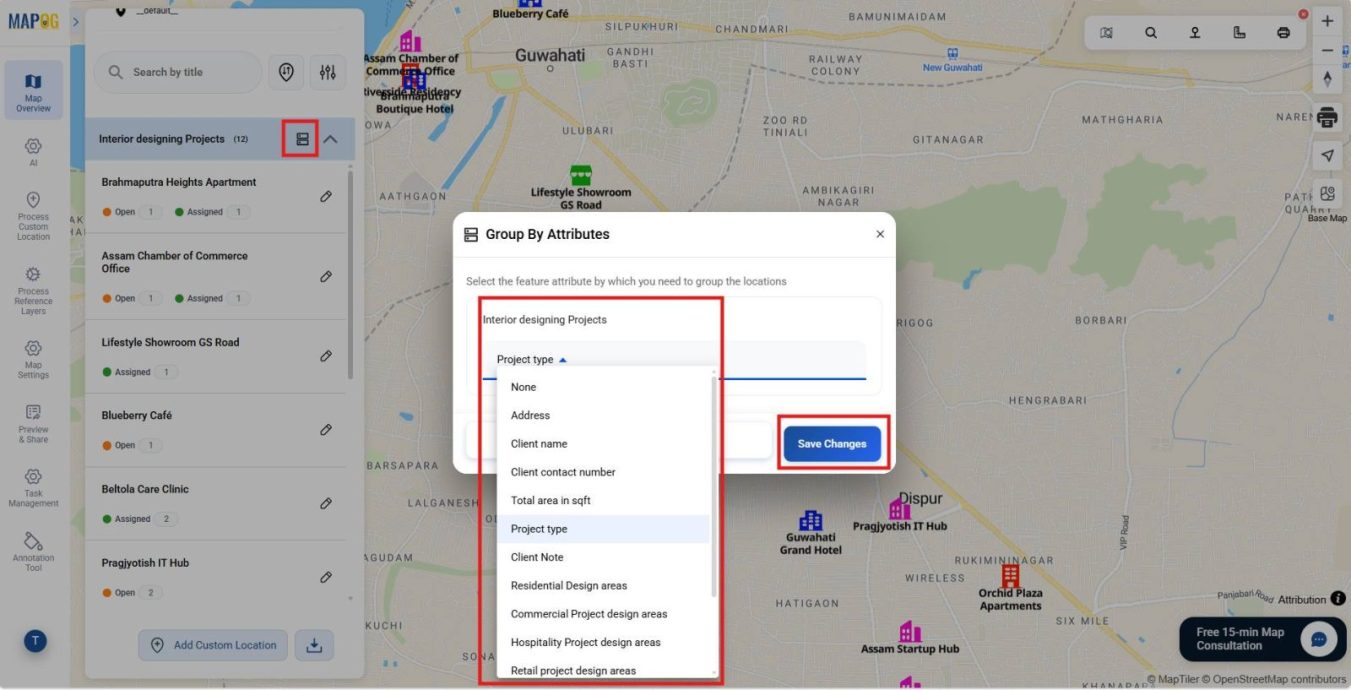
For better organization, use Group by Attributes to arrange location by region, type, or status.
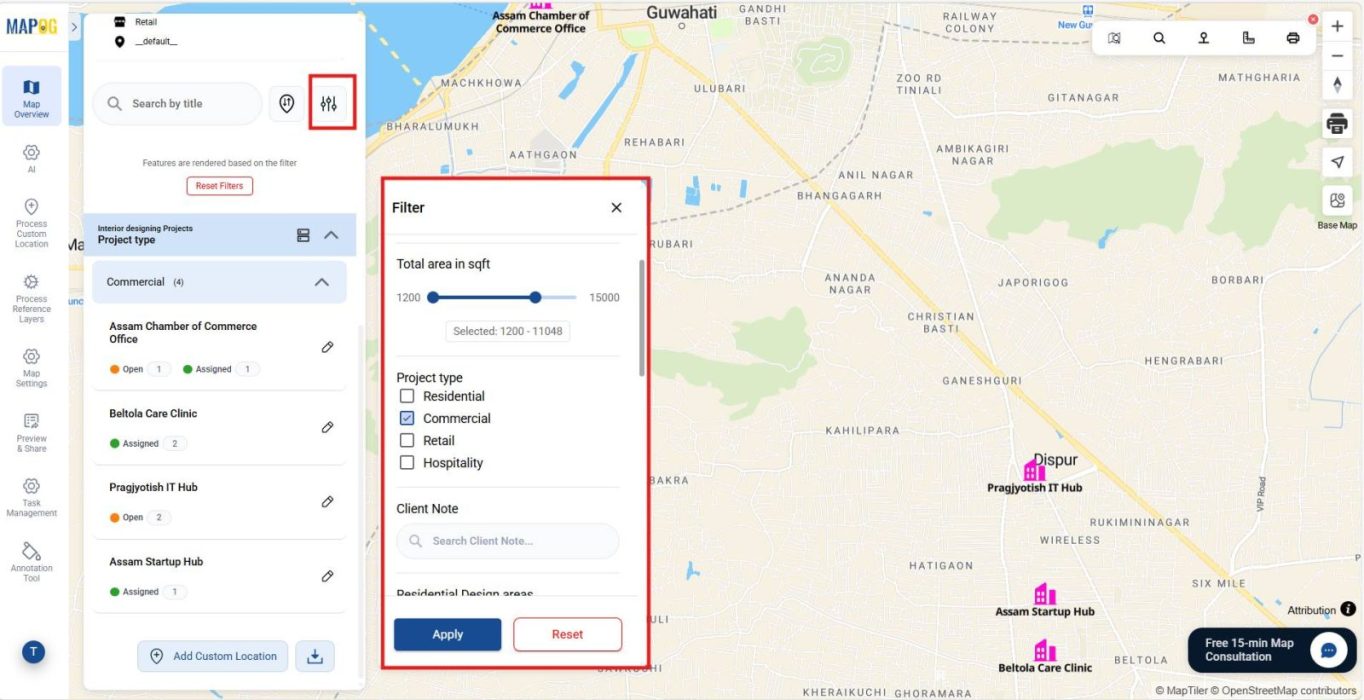
Apply the Filter tool to display attributes such as project type, budget, or client name,
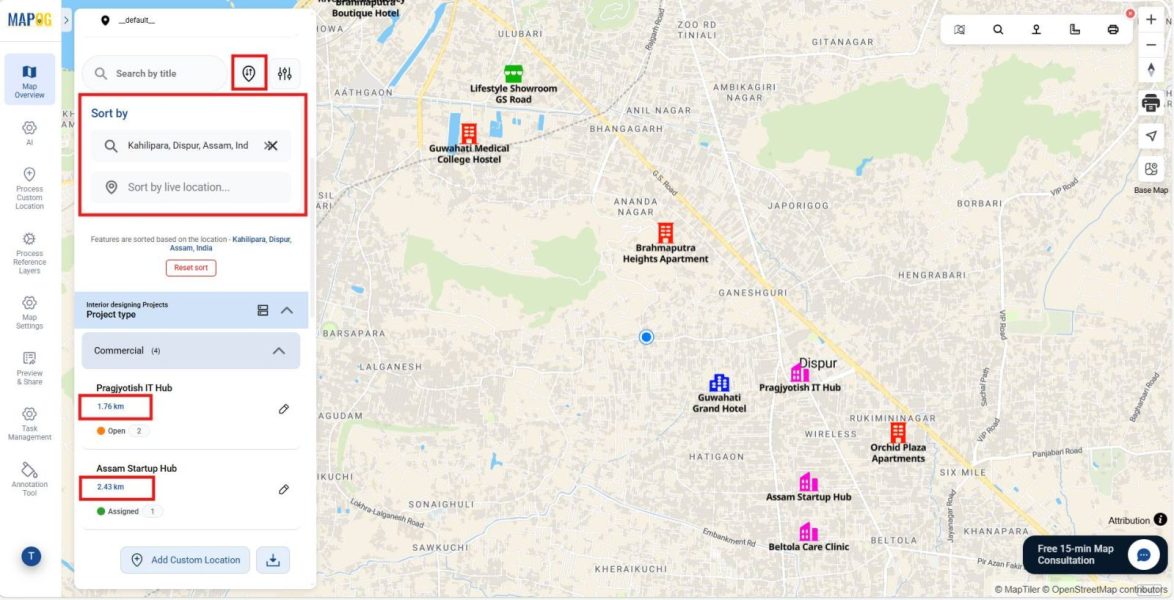
Use sorting to organize sites by name or live distance, helping prioritize urgent visits.
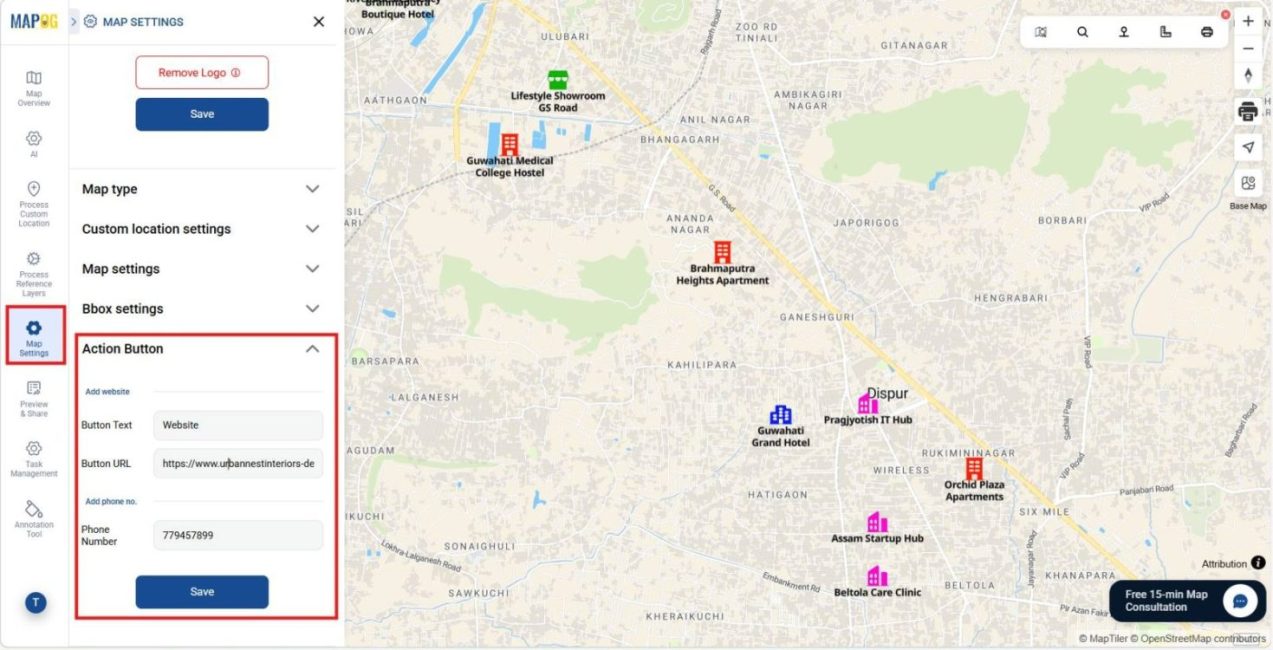
Next, open Map Settings and use the Action Button to add website links or contact numbers for direct accessibility.
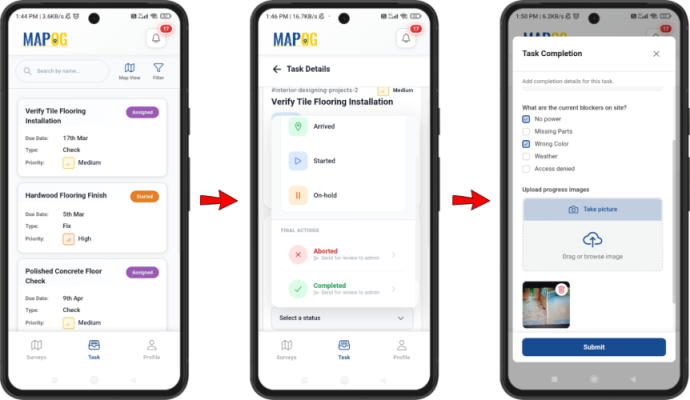
7. Contributor App and Dashboard Monitoring
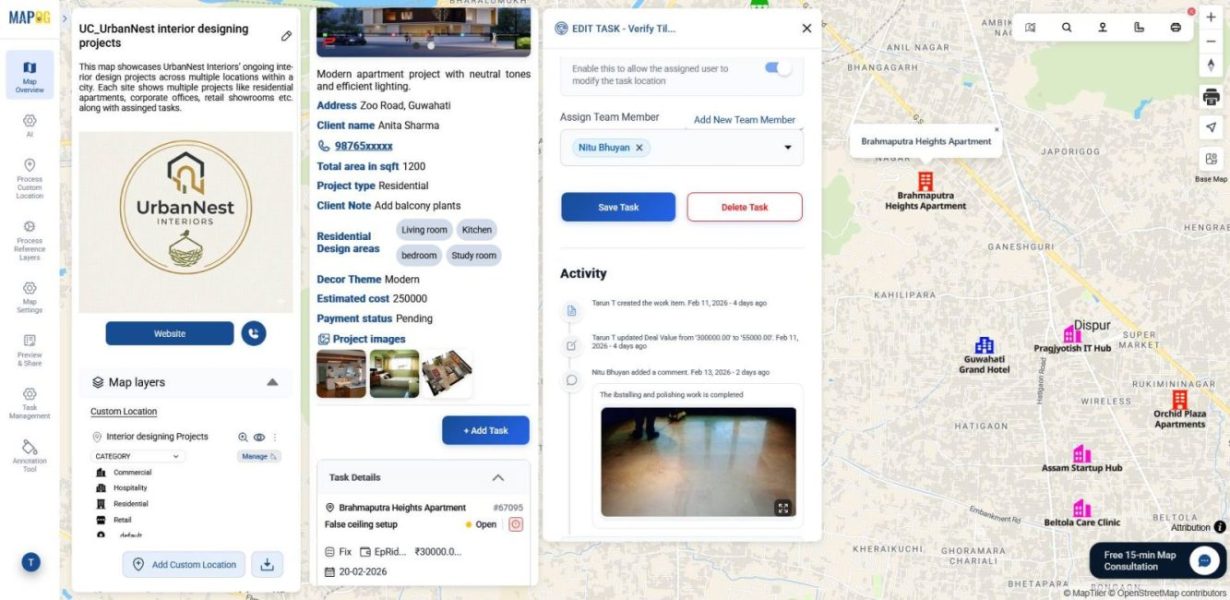
Meanwhile, through the MAPOG Contributor App, assignees can update task stages, fill details directly from the site & upload comments & images.
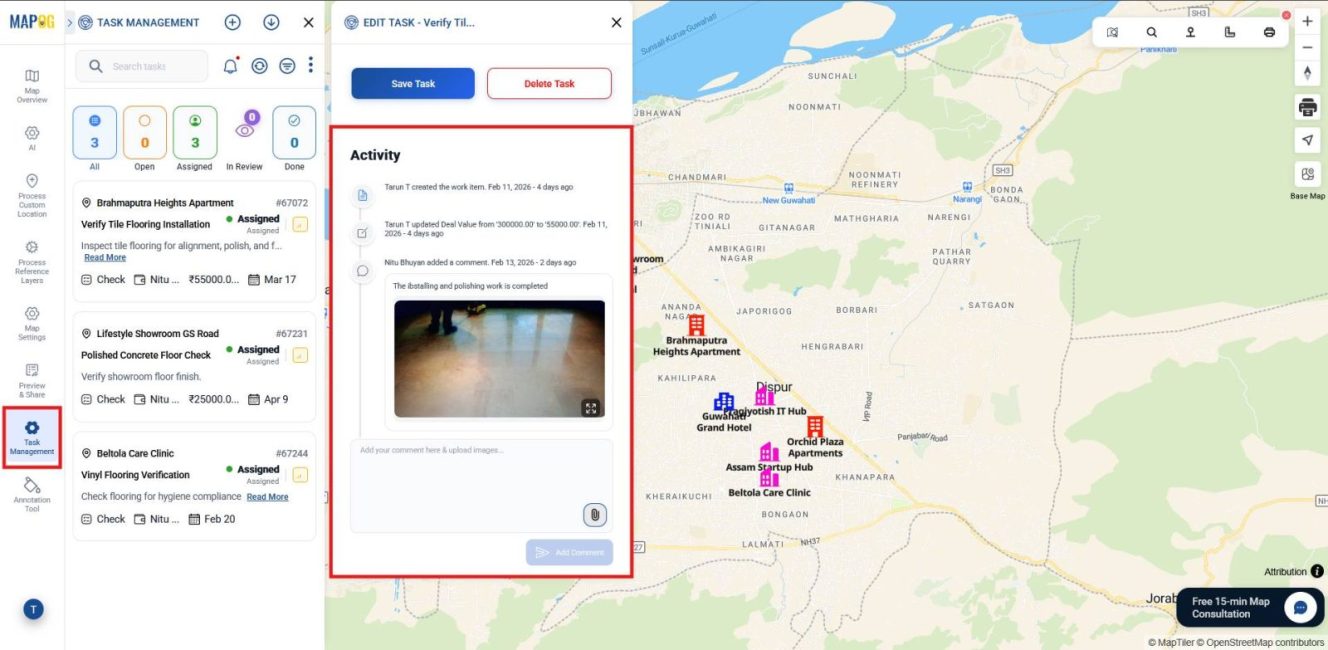
Simultaneously, admins can monitor progress in the Dashboard under Task Management by filtering tasks as per status or type,
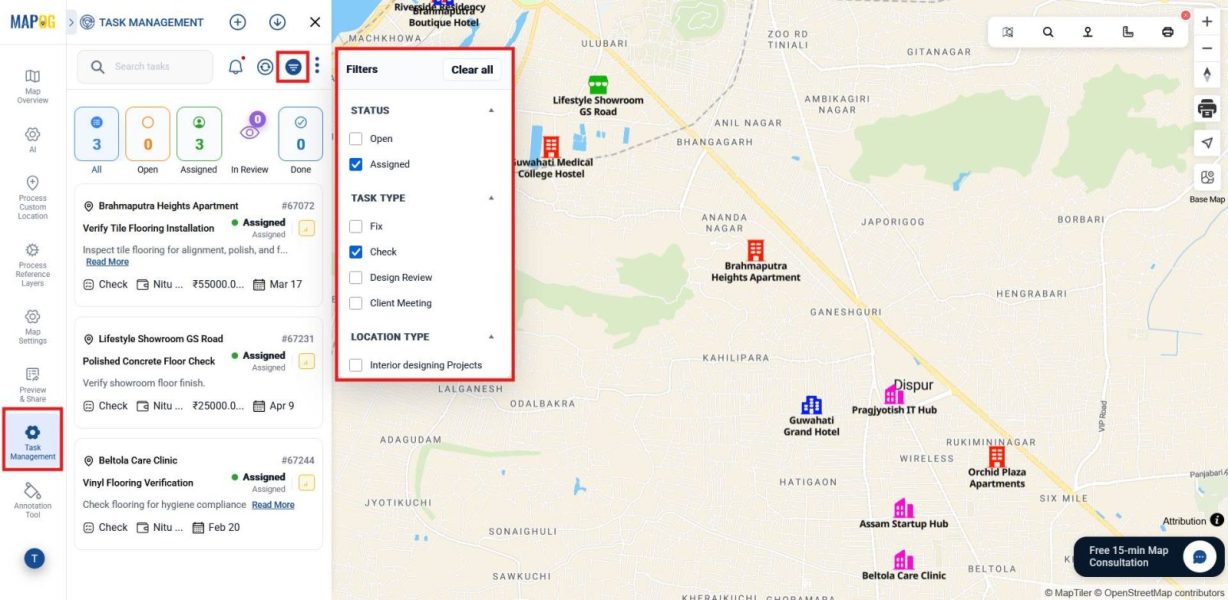
And then reviewing statuses, comments, and completion forms to maintain accountability.
8. Preview and Share
Finally, in the Preview and Share section, invite users via Add User and assign roles: Editors can edit, add story points, and invite users but cannot delete maps or assign admins; Viewers have read‑only access.
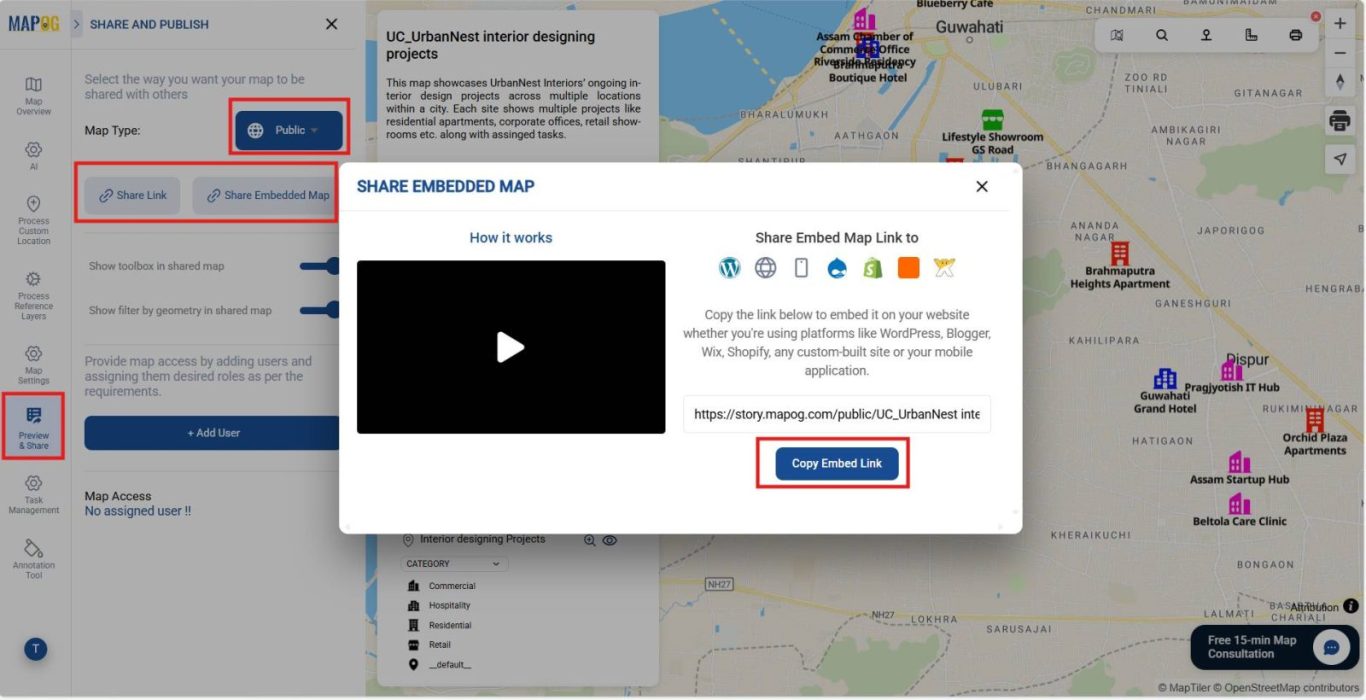
You can also share publicly via a link or embedded map option.
Industrial Use and benefits
Location‑based task management benefits industries beyond interior design. For instance, construction tracks inspections, retail ensures rollouts, and events coordinate venues. Consequently, transparency, accountability, and efficiency improve across multiple sites.
Conclusion
In summary, interior design projects succeed when coordination is structured and transparent. MAPOG supports this through organized task management, mapped accountability, and verification processes. Therefore, every stage remains timely, consistent, and aligned with quality standards.